Table of Contents
Advertisement
Advertisement
Table of Contents

Related Manuals for Atid AT380


Summary of Contents for Atid AT380
- Page 1 Product User’s Guide Ver. 1.0 Model : AT380 ATID Co., Ltd...
- Page 2 Disclaimer ATID is registered trade mark of ATID Co., Ltd. Si303, Si203, AT880, AT280, AT980 and AT380 is registered trade mark of ATID Co., Ltd. All other trademarks and trade names referred to herein are property of their respective owners.
-
Page 3: Table Of Contents
Table of Contents Table of Contents ............................. 3 Chapter1. Caution when using ATID PDA Product ................. 6 1. How to use the battery correctly ....................6 2. Caution when using ATID PDA Product ..................6 Chapter2. Products compositions ......................... 7 1. - Page 4 3.2 Bluetooth Pairing ........................39 3.3 Bixolon SPP-R200 Printer Demo ..................42 Chaptor5. Appendix ............................44 Specification with AT380 ........................44 User’s Guide...
-
Page 5: Copyright And Agreement
This manual is written for the person who is responsible for installing, configuring, and maint aining the AT380 PDA. Read and follow all warnings and cautions in this document before y ou handle and operate ATID equipment... -
Page 6: Chapter1. Caution When Using Atid Pda Product
Chapter1. Caution when using ATID PDA Product Before you handle and operate your AT280 and other ATID PDA Products, Please read throu gh and familiar with the contents of this manual. 1. How to use the battery correctly When you dropped the main body or battery in water, please do not put it on the stov e or heater for drying. -
Page 7: Chapter2. Products Compositions
Its various function applied to Industry, Enterprise, Logistics and so on, can be used extensively in many fields. 1. Package components After opening the product packaging box, check the items listed as below: MODEL : AT380 2. Adaptor and AC Cable 3. Main Battery 1. AT380 Body 4. -
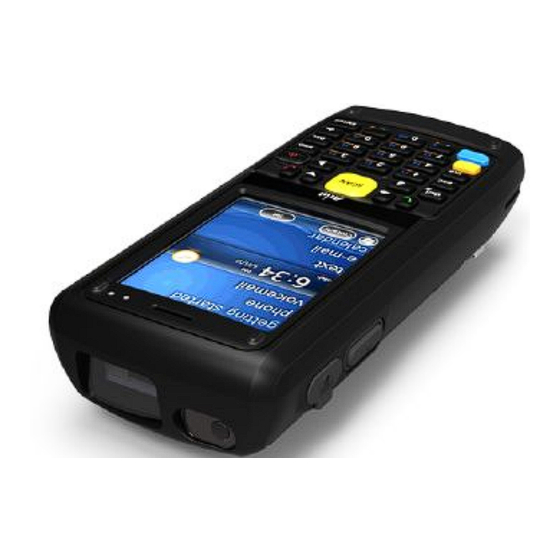
Page 8: Each Part Name & Function
2. Each Part Name & Function MODEL : AT380 1D/2D Scanner Window Charge LED(RED) & WLAN/BlueTooth LED Camera & Flash Hand Strap Hol Function Button UHF Module Port Touch Screen Ear Jack Main Battery Speaker SIM Slot SD card Slo... - Page 9 Part Descriptions Laser beam emitted through this window. Please be careful the foreign substances 1D/2D Scanner Window and preventing from the damage. Warning! Do not look at the laser beam direc (Option) tly. UHF Module Port Enable you to install a UHF 900Mhz tag reader module. Enable you to perform a Warm Reset, Press <Power>button simultaneously, enable you to Reset Button perform a Hard Reset.
-
Page 10: Chapter3. Basic Functions
1. Power and Battery AT380 battery is composed of main battery and backup battery. A main battery supplies the power to the system and RAM which could keep save the data. A backup battery could keep save the data of RAM when the main battery discharged completely. - Page 11 Power off automatically The device has been powered but has not been used for a period of time, then the system will enter low-power mode (sleep mode) automatically. You could set the sleep mode time at the power management so that could save power and prolog the battery life. [Start Button] ->...
-
Page 12: Checking Battery Gauge
1.2 Checking Battery Gauge Note: Battery life is largely affected from the user using method and surrounding environments. A 5,200mA battery is usually needs 8 ~ 12 hours to get charged completely. Checking Battery Gauge [Start Button] -> [Setting] -> [Control Panel] -> [Power Management] -> [Battery] ... -
Page 13: Backup Battery
1.3 Backup Battery A backup battery could safely keep the RAM data, even the main battery discharged complet ely. Caution: If the main battery and the backup battery are both discharged, the RAM date will disapp ear. Among the running programs, the RAM data will disappear in which are using, and the sy stem 1.4 Dispose of Battery You need to purchase a new one if the battery damaged or reached its end of life. -
Page 14: System Reset
Hard Reset, which is also called Cold Reset, enables to initialize hardware completely. User’ s installed programs, copied files and registry values will keep remained even AT380 perform ed Hard Reset, but the real time and date will be initialized. So you need to reset the time and date after performed Hard Reset. -
Page 15: Initializing System
Desktop will appear in about ten seconds. Time and date window will be popped up and need to reset it. 2.3 Initializing System Enter [Boot Menu] and do what you want, when in the situations as below: 1. When you need to restore the original registry information, which has been changed. 2. -
Page 16: Using Micro Sd Card
3. Using Micro SD Card The image as below is battery compartment of AT380, and there are 1EA SIM Card Slot an d 1EA Micro SD Card Slot. 1 Micro SD Card Slot You can find the Micro SD Memory Card icon when executing the file explorer, after the Micro... -
Page 17: System Settings
4. System Settings 4.1 Setting Brightness Brightness is already set 80% at the factory, and brightness is the biggest consume part of the power, so you might need to adjust it to your actual need. [Setting Brightness] 1. [Start Button] -> [Setting] -> [Control Panel] -> [Brightn ess] 2. -
Page 18: Setting Volume And Sounds
it moves around the screen. The screen counts 30 seconds after calibrating, and you ca n finish the recalibration to touch screen wherever you want, if you do not any action, t he screen will automatically finish the recalibration of itself. 4.3 Setting Volume and Sounds Volumes is already set 80% at the factory, and you can readjust you need volume at control panel ->”Volume and Sounds”... - Page 19 Setting Month: Setting Day: Double Click the Month or Click the day directly to s Click L/R arrow button to et day. set Month. Setting Time: Setting Time Zone: Click AM/PM, Time area dir Click up and down arrow d ectly, using up and down irection to select time zon arrow button to set Time.
-
Page 20: Using Keypad
5. Using keypad Keypad enables you to input numbers, alphabets and special symbols. And can also execute other set function with <Blue> and <Orange>buttons. 5.1 Using keypad If you’d like to change the current input language, can press <Orange> button as below ste [Numeric] ->... -
Page 21: Using Stylus
6. Using stylus You can tie the stylus to the hand strap hole, so that enable you to use the stylus as like a mouse on a PC Use Stylus to: Select a letter on the soft keypad. Select a program on the desktop or taskbar. -
Page 22: Using Activesync Program
7. Using ActiveSync Program ActiveSync program could synchronize between the PC and PDA device, so that enable you to perform program installing, copy, transition, delete and so on operations. 7.1 Installing Microsoft ActiveSync Program Download the latest version of ActiveSync program from Microsoft Windows CE. Website, and install it to your PC. -
Page 23: Connecting Pc To Pda
7.2 Connecting PC to PDA Setting PC [Start button] -> [Programs] -> [Microsoft ActiveSync] Executing Microsoft ActiveSync program Click [File], Click [Get Connected]. Select <Allow USB connection with ActiveSync connected to PDA this desktop computer>, press OK button. User’s Guide... -
Page 24: Transmitting Data
Setting AT280 PDA [Start Button] -> [Setting] -> [Control Panel] -> [PC Connection] Double click PC Connection ico To check if set to connected t o USB Sync cable 7.3 Transmitting Data Connect USB cable to PC or Device. Connecting state Disconnecting state You can check the ActiveSync connecting state on the taskbar. - Page 25 After ActiveSync connected, click Ex Designate transmitting file path. plore button. Transmit files. User’s Guide...
-
Page 26: Firmware Upgrade
8. Firmware Upgrade [Start Button] -> [Setting] -> [Control Panel] -> [Firmware Upgrade] User’s Guide... -
Page 27: Chapter4. Optional Module
Chapter4. Optional Module AT380 provided variety of optional modules and in this chapter will provide you the informatio n of each module. Optional modules as below: Barcode Scanner -. 1D Laser Barcode Scanner -. 2D Imager Barcode Scanner Wireless LAN – 802.11 a/b/g Bluetooth User’s Guide... -
Page 28: D Or 2D Barcode Scanner
1. 1D or 2D Barcode Scanner AT280 enable to equip with a compact image engine, which could recognize all the 1D and 2D barcodes. 1.1 Scanning Barcode Press Scan Buttons to Rea Start Button/Programs/Demo d Barcode. Apps/Scanner/BarcodeDemo 1.2 Setting Barcode Emulator Barcode Emulator program enables you to set the barcode value input type, scan button, sc an sound on and off so on, and could input the scan values to any program(such Web prog ram, WordPad program so on) where located the cursor. - Page 29 Executing Barcode Emulator [Start Button] -> [Program] -> [Demo Apps] -> [Scanner] -> [BarcodeEmulator] Run Barcode Emulator Program Barcode Emulator Icon will b e showed on the taskbar. Run WordPad Program, then Result Type click the Emulator Icon Keyboard Event: Barcode inputted one by one.
- Page 30 Terminator Key Setup None:Not input terminal barc F1-F8 Key: Hardware Keypad ode value. Gun1, Gun2: Gun Trigger CRLF: Barcode value will inc lude an “Enter” Space: Barcode value will in clude a “Space” Tab: Inputting type as same as Tab Key Function. Sound: Set sound ON/OFF aft er scanned barcode...
-
Page 31: Setting Barcode Symbology
1.3 Setting Barcode Symbology AT280 enables you to set the various barcode by using barcode symbologies program. [Start Button] -> [Program] -> [Demo Apps] -> [Scanner] -> [BarcodeSetup] BarcodeSetup Progra Set Barcode Type in detail. Click Set Enable Status butt Make a check mark on the barcode which you want to use, and then click <SET>... -
Page 32: Barcode Scanning Beam Position
2D Symbology Selection: 1D Symbology selection: 1. Initialize all the symbologies t 1. Initialize all the symbologies to o factory default value. factory default value. 2. Unable to read all the symbol 2. Unable to read all the symbolo ogies. gies. - Page 33 [Correct Scanning Beam Position] 1. The more small size of barcode, AT280 needs the more close to barcode. The effective scanning rang of Si303 is from 40 ~ 300mm. if failed to scan barcode, please try to adjust scan angle and distance. 2.
-
Page 34: Using Wireless Lan
2. Using Wireless Lan AT280 enable to equip an internal 802.11 radio module to transfer data and do wireless communication. AT280 supports TCP/IP network protocol, and communicate with a host computer directly. Connecting to Wlan [Start Button] -> [Program] -> [Demo Apps] -> [Wireless Lan] Run the Wireless LAN program. -
Page 35: Checking Wlan Information
Checking WLAN Information Double click WLAN icon on the task Start Button/Programs/ATID App/Wireless Lan, and then to check Wlan information. select <WLAN OFF> to stop Wlan communication. Note: The Wlan LED will changed to green and the Wlan icon on the taskbar will be lig... -
Page 36: Using Bluetooth
3. Using Bluetooth This User Guide is only applied to the AT280 which installed "MD6RF" module. AT280 not only supports to the SPP printer device like as AT870/AT570, but also supports Bl uetooth Stack Service of Windows CE. This Chapter described how to Pairing and Disconnec ting between and Bluetooth devices, and also described basic testing method of Mobile... - Page 37 Select “Bluetooth ON” item, then press OK button. C. After Bluetooth executed, the Bluetooth BTPAN1 icon will be appeared on the b ottom of Windows Taskbar, and the red cross mark on it shows that you access is available and prepared to be accessed. User’s Guide...
- Page 38 2. Bluetooth Function Closing Executing “Bluetooth” demo App from Windows CE Menu. Select “Bluetooth OFF”, then to press OK button to off the Bluetooth power. User’s Guide...
-
Page 39: Bluetooth Pairing
3.2 Bluetooth Pairing After connecting each other through pairing way, Bluetooth devices could do its function properly. 1. Executing Bluetooth program as below path. Start->Settings->Control Panel->Bluetooth Device Properties -> 2. Press “Scan Device” button to searching devices which could pairing. User’s Guide... - Page 40 3. Depending on the situation, maybe need to input password for some devices, then c ould search devices continually. According to the devices need, some devices have to input Pin Code (password) f irstly. SPP-R200 printer factory setting Pin Code is “0000”. 4.
- Page 41 our device again. 5. Double click your device name, click “Trusted” Tab to add the device to the pairing it ems, then click “Yes” button to ending the Bluetooth Manager. -> -> You can set the Password (Authentication code) according to the each device. The Red Cross mark(X) on the Key icon will disappear if finished to registration.
-
Page 42: Bixolon Spp-R200 Printer Demo
6. Click “Active” button to active the paired device. 7. Then, you can perform the data communication through COM2 Port. 8. After pairing and active the Bluetooth device, you can use the Device driver, S/W, a nd SDK, which provided from the Bluetooth device manufacturer, to perform the relev ant Bluetooth function. - Page 43 11. Change the COM8 to COM2, then press “Open” button to testing printer. User’s Guide...
-
Page 44: Chaptor5. Appendix
Chaptor5. Appendix Specification with AT380 Physical and Environmental Characteristics Dimension 146mm(L) X 74mm(W) X 26mm(H) Weight 250g(PDA only, without battery) Operation Temperature -20℃ ~ 60℃ Storage Temperature -30℃ ~ 70℃ Humidity 95% RH Non-condensing Drop 1.5m drop to concrete Performance Characteristics Processor Marvell™... - Page 45 Frequency 850MHz- 960Mhz(Adjustable) Reading Range 0m ~ 7m (Differs from each tag) Writing Range 0m ~ 3m Antenna Gain 2 dbi (Standard) Speed 62.5 kbps RF Output 1W EIRP Protocol EPC Gen2 ISO 18000 6C , ISO 18000 6B(Option) Multi-Reading Anti-collision User’s Guide...
Need help?
Do you have a question about the AT380 and is the answer not in the manual?
Questions and answers