Table of Contents
Advertisement
Quick Links
Advertisement
Table of Contents

Related Manuals for Atid AB700


Summary of Contents for Atid AB700
- Page 1 AB700 User guide For Windows CE 5.0...
- Page 2 Copyright©2006 ATID Co., Ltd. An Unpublished Work – All right reserved. No part of the contents of this documentation or the procedures described there in may be reproduced or transmitted in any form or by any means without prior written permission of ATID Co., Ltd. or its wholly owned subsidiaries ("ATID ").
-
Page 3: Table Of Contents
Transmitting Data ........................27 8. Firmware Upgrade ............................ 29 Chapter4. Optional Module .......................... 30 1. Using 1D or 2D Barcode Scanner ...................... 31 1.1 Scanning Barcode .......................... 31 1.2 Setting Barcode Emulator ......................32 1.3 Setting Barcode Symbology ......................34 AB700 User Guide... - Page 4 6.3 ISO15693 Tag Window ......................... 50 7. Using 900MHz RFID Tag Reader ......................51 7.1Executing RF900Demo Program ....................51 8. Using Modem ............................52 8.1 Modem ON/OFF ..........................52 8.2 Modem Resetting ..........................53 Chapter5. Appendix ............................55 Configuration ..............................55 AB700 User Guide...
-
Page 5: Copyright And Agreement
ATID Co., Ltd. or its wholly owned subsidiaries. ATID reserves the right to change any contents of this manual at anytime without prior notice. -
Page 6: Chapter1. Caution When Using
If smell odors, occurs smoke or noise during use product, immediately disconnect the charger and off the power, then Please contact with customer service center If you have any other questions during use, please contact the customer service c enter AB700 User Guide... -
Page 7: Chapter2. Products Compositions
Industry, Enterprise, Logistics and so on, can be used extensively in many fields. 1. Package components After opening the product packaging box, check the items listed as below: 2. Adaptor and AC Cable 3. Main Battery 1. AB700 Body 5. USB Sync Cable 6. Protective Fil Leather Case 7. Stylus 8. -
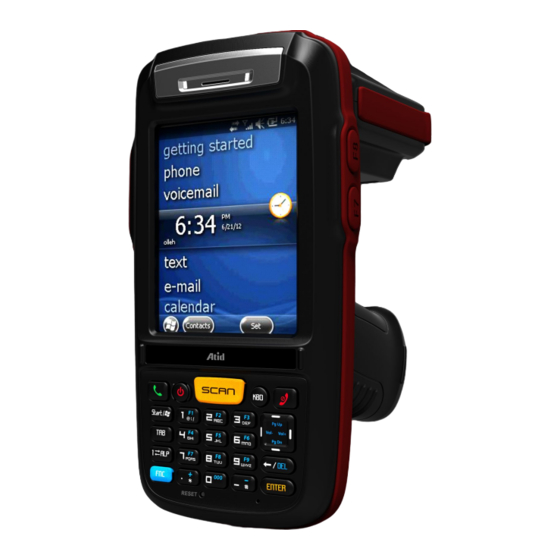
Page 8: Name Of Each Part
Scan & Function WLAN LED buttons Phone receiver refdare rece Hand strap hole Charge LED Speaker Volume/cursor UHF Connecting por buttons pport Main Battery Touch screen Scan button Battery Latch Keypad Microphone Reset button Cradle, Sync, Power Adaptor AB700 User Guide... -
Page 9: Function Of Each Part
Display running programs, and could execute, use, and exit programs via using stylus to Touch Screen touch the screen. Enable you to attach a hand strap or a stylus for the convenience of using, while need to Hand strap hole use the device for a long period time. AB700 User Guide... -
Page 10: Chapter3. Basic Functions
Green. Note: If the window wallpaper has shown on the screen, press the <power> button for a couple of seconds, so that could shorten the charging times. AB700 User Guide... -
Page 11: Detaching And Attaching Main Battery
Put the top part of battery into the upward groove, and then press down the bottom of battery into the battery compartment, slide battery latch to the left (LOCK side) to attach battery firmly. R/L Battery Attachin g Groove AB700 User Guide... -
Page 12: Charging
Press <Power> button one time, the device will enter low-Power mode (Sleep Mode) und er the system is started and the following window is displayed on the desktop or other p rograms is running in the system. Press <Power> button once again could activate the s ystem. Start button Taskbar AB700 User Guide... - Page 13 Power Icon You can also double click <Power> Icon to enter this interface. You can also press the <Power> button to activate the system, when the device turned off cause get into the sleep mode. AB700 User Guide...
-
Page 14: Checking Battery Gauge
In this case, you need to press the <Power> button to turn off the power, and to charge the battery as soon as possible. AB700 User Guide... -
Page 15: Backup Battery
Among the running programs, the RAM data will disappear in which are using, and the sy stem 1.7 Dispose of Battery You need to purchase a new one if the battery damaged or reached its end of life. Warning! Please dispose the used batteries in a designated place. AB700 User Guide... -
Page 16: System Reset
System will be restarting. Operating System (Windows CE) will be loading and restarting. Desktop will appear in about ten seconds. Time and date window will be popped up and need to reset it. AB700 User Guide... -
Page 17: Initializing System
2 . C l e a n ( W i t h F l a s h ) Clean(With Flash) 3 . E x i t My Device, Registry and Flash Disk area recover as shipped Exit Finish the Boot Menu Menu Select : Enter No. [Boot Menu] Start-up Screen AB700 User Guide... - Page 18 AB700 User Guide...
-
Page 19: Using Micro Sd, Sim, Sam Card
Put Micro SD card into Slo Push the cover up as arro t and press down the cove w direction to lock it, and r as arrow direction. attach the main battery an d turn on the power. AB700 User Guide... -
Page 20: Installing Sim Card And Sam Card
You can find the Micro SD Memory Card icon when executing the file explorer, after inserted the Micro SD card. 3.2 Installing SIM Card and SAM Card SIM Card and SAM Card can easily insert and pull out along arrow direction. AB700 User Guide... -
Page 21: System Settings
Touch screen calibration [Start Button] -> [Setting] -> [Control Panel] -> [Stylus] -> [Calibration] -> [Recalibratio Press and hold stylus pen briefly on the center of cross symbol, and repeat 5 times as AB700 User Guide... -
Page 22: Setting Volume And Sounds
Volumes is already set 80% at the factory, and you can readjust you need volume at control panel ->”Volume and Sounds” Setting Volume and Sounds [Start Button] –> [Setting] -> [Control Panel] -> [Volume and Sounds] 4.4 Setting Data and Time [Start Button] -> [Setting] -> [Control Panel] -> [Date and Time] AB700 User Guide... - Page 23 Month. Setting Time: Setting Time Zone: Click AM/PM, Time area dir Click up and down arrow d ectly, using up and down irection to select time zon arrow button to set Time. e and click apply button. AB700 User Guide...
-
Page 24: Using Keypad
Each button has 2 ~ 3 letters or symbols. Press the button once, the first letter or symbol will be inputted, press twice continuously, then the second letter or symbol will be inputted, and the third letter or symbol need to press button three times continuously. AB700 User Guide... -
Page 25: Using
Select button, zone or tab bar in a window box or program. Caution: Please do not use sharp objects on the touch screen. Use only supplied stylus, otherwise would bring seriously damage to the touch screen. AB700 User Guide...Button -
Page 26: Using Activesync Program
Designate installation folder, then click < Click [Next] Button. Next> button. The installation was finished, and then us es the USB cable to connect to the USB port on the computer; ActiveSync will aut omatically detect the device connection. AB700 User Guide... -
Page 27: Connecting Pc To Pda
Setting PC [Start button] -> [Programs] -> [Microsoft ActiveSync] < Windows XP > Executing Microsoft ActiveSync program Click [File], Click [Get Connected]. ActiveSync connected to PDA Select <Allow USB connection with this desktop computer>, press OK button. AB700 User Guide... -
Page 28: Transmitting Data
USB Sync cable 7.3 Transmitting Data Using the USB cable to connect PC and the device. Connecting state Disconnecting state You can check the ActiveSync connecting state on the taskbar. < Windows XP > Start button/Programs/Microsoft ActiveSyn AB700 User Guide... - Page 29 After ActiveSync connected, click Ex Designate transmitting file path. plore button. Transmitting files. AB700 User Guide...
-
Page 30: Firmware Upgrade
8. Firmware Upgrade [Start Button] -> [Setting] -> [Control Panel] -> [Firmware Upgrade] AB700 User Guide... -
Page 31: Chapter4. Optional Module
Optional modules as below: Barcode Scanner -. 1D Laser Barcode Scanner -. 2D Imager Barcode Scanner Wireless LAN – 802.11 a/ b/g Bluetooth Camera HF13.56 Reader UHF 900MHz Tag Reader – EPC Gen 2, ISO/IEC 18000 6B Modem AB700 User Guide... -
Page 32: Using 1D Or 2D Barcode Scanner
1. Using 1D or 2D Barcode Scanner Enable to equip with a compact image engine, which could recognize all the 1D and 2D bar codes. 1.1 Scanning Barcode Start Button/Programs/Demo Press Scan Buttons to Rea Apps/Scanner/BarcodeDemo d Barcode. AB700 User Guide... -
Page 33: Setting Barcode Emulator
Run WordPad Program, then Result Type click the Emulator Icon Keyboard Event: Barcode inputted o ne by one. Copy Paste: Barcode will be stored be stored in clipboard and shown at paste way. AB700 User Guide... - Page 34 Gun1, Gun2: Gun Trigger Space: Barcode value will include a “Space” Tab: Inputting type as same as Tab Key Function. Sound: Set sound ON/OFF aft er scanned barcode Vibrator: Set vibrator ON/OFF after scanned barcode Close: Exit Emulator Program AB700 User Guide...
-
Page 35: Setting Barcode Symbology
[Start Button] -> [Program] -> [Scanner] -> [BarcodeSetup] BarcodeSetup Progra Set Barcode Type in detail. Make a check mark on the Click Set Enable Status butt barcode which you want to use, and then click <SET> button. AB700 User Guide... - Page 36 4. Set a level that enable to read more than two symbologies si multaneously. Warning! Please do not look directly into the laser beam of barcode, or it may do harm to your vision. AB700 User Guide...
-
Page 37: Barcode Scanning Beam Position
2. The laser beam is a red thick line, when scanning a barcode. [Incorrect Scanning Beam Position] 1. The laser beam must across the barcode. 2. It will couldn’t scan barcode if the laser beam across only a fraction of barcode. AB700 User Guide... -
Page 38: Using Wireless Lan
[Start Button] -> [Programs] -> [Demo Apps] -> [Wireless Lan] Run the Wireless LAN progr Select <WLAN ON>, and the n click Ok button. Setting Wlan Manually Double click a suitable device Input Key Password, and the from the list of AP. n click OK button. AB700 User Guide... -
Page 39: Checking Wlan Information
<WLAN OFF> to stop Wlan communication. Note: The Wlan LED will changed to green and the Wlan icon on the taskbar will be lig hted on if failed the Wlan icon will be light off AB700 User Guide... -
Page 40: Using Bluetooth
** AB700x could pairing with maximum 6ea devices, but assign COM Port only to COM2 an d COM4. 3.1 Bluetooth Beginning and Closing AB700x is using Stack of Windows basically, only could control the power of Bluetooth Modul e’s ON/OFF. 1. Bluetooth Function Beginning Executing the “Bluetooth” demo program. WinCE Start->Programs->Demo Apps->Bluetooth. AB700 User Guide... - Page 41 Select “Bluetooth ON” item, then press OK button. C. After Bluetooth executed, the Bluetooth BTPAN1 icon will be appeared on the b ottom of Windows Taskbar, and the red cross mark on it shows that you access is available and prepared to be accessed. AB700 User Guide...
- Page 42 2. Bluetooth Function Closing Executing “Bluetooth” demo App from Windows CE Menu. Select “Bluetooth OFF”, then to press OK button to off the Bluetooth power. AB700 User Guide...
-
Page 43: Bluetooth Pairing
After connecting each other through pairing way, Bluetooth devices could do its function properly. 1. Executing Bluetooth program as below path. Start->Settings->Control Panel->Bluetooth Device Properties -> 2. Press “Scan Device” button to searching devices which could pairing. AB700 User Guide... - Page 44 According to the devices need, some devices have to input Pin Code (password) f irstly. SPP-R200 printer factory setting Pin Code is “0000”. 4. The devices which can connect will be listed, after finished searching. If cannot find your need device, please press “Scan Device” button to searching y AB700 User Guide...
- Page 45 “Yes” button to ending the Bluetooth Manager. -> -> You can set the Password (Authentication code) according to the each device. The Red Cross mark(X) on the Key icon will disappear if finished to registration. AB700 User Guide...
-
Page 46: Bixolon Spp-R200 Printer Demo
9. Copy and paste the DLL and executable file, which located at bin₩ce5₩MobileComp ia_M3Plus₩ within the printer SDK, to AB700x Flash Disk. 10. Executing the Sample.exe program in the AB700X Flash Disk. AB700 User Guide... - Page 47 11. Change the COM8 to COM2, then press “Open” button to testing printer. AB700 User Guide...
-
Page 48: Using Gps
4. Using GPS GPS Module designed to be installed on the back top of the AB700. COM: 6 Baud rate: 9600 Executing GPS Demo Program [Start Button] -> [Program] -> [DEMO Apps] ->[GPS-Demo] Execute GPSDemo Program. Confirmation of GPS receiving data: Finding an open place to check your GPS signals. -
Page 49: Using Camera
5. Using Camera AB700 can equip with a 3.0 megapixel camera which could fixes screen brightness, adjust th e video resolution, screen capture, etc. Using Camera [Start Button] -> [Program] -> [DEMO Apps] -> [CameraDemo] Execute Camera Program. Camera’s Main Screen. -
Page 50: Using Hf13.56Mhz Reader
6. Using HF13.56MHz Reader AB700 PDA enable to equip a HF13.56Mhz module as a option, and the recognition distanc e is 3-8.5cm according to the standard of ISO, in the case of Mifare Tag, it’s will be 1~3.5c 6.1 Executing HF13.56 Demo Program [Start Button] ->... -
Page 51: Iso15693 Tag Window
6.3 ISO15693 Tag Window ISO15693: UID: Read ISO15693 Tag ID. Read Blk: Read ISO15693 Block dat Write Blk: Write ISO15693 Block dat Click button to read ISO 15693 AB700 User Guide... -
Page 52: Using 900Mhz Rfid Tag Reader
[Start button] -> [Program] -> [DEMO Apps] -> [RF900Demo] INVENTORY Mode: RF900Demo Program Single Read: Read one Tag each ti Multi Read: Read multi Tag each tim e (Anti Collision). INVENTORY: Press <Inventory> butto n to read tags. AB700 User Guide... -
Page 53: Using Modem
If there is the SIM card, then setti Press <RAS Connect> button, if th ng each item on the Operator Se ere is no SIM card, the prompt tting interface, and press <Save> messege window will pop up. button AB700 User Guide... -
Page 54: Modem Resetting
Then, RAS Connecting success 8.2 Modem Resetting Double click Mydevice icon Double click <Flash Disk> AB700 User Guide... - Page 55 Delete <Gprs.ini> file Double click <Phone UI> Press <Yes> button, then to resetti AB700 User Guide...
-
Page 56: Chapter5. Appendix
1D Laser Scanner, 2D Image Scanner Camera 3.0Mega Pixel with Auto Focus UHF 900MHz Tag Reader Frequency 850MHz- 960Mhz (Adjustable) Reading Range 0m ~ 7m (Differs from each tag) Writing Range 0m ~ 3m (Differs from each tag) Antenna Gain 2dbi (Standard) AB700 User Guide... - Page 57 Anti-collision Technical support and Sale Contact ATID Co., Ltd. #1210 Byuksan/Gyungin Digitial Valley II, #481-10 Gasan-Dong Gumchon-Gu, Seoul, Korea TEL: +82-2-544-1436 FAX: +82-2-2113-0040 Homepage: http://www.atid1.com E-mail: atid@atid1.com, webmaster@atid1.com English: +82-70-8677-8589, +82-70-8677-8591 Chinese: +82-70-8677-8591 Japanese: +82-70-8677-8594 Korean: +82-70-8677-8594 AB700 User Guide...
Need help?
Do you have a question about the AB700 and is the answer not in the manual?
Questions and answers