Table of Contents
Advertisement
Quick Links
Advertisement
Table of Contents

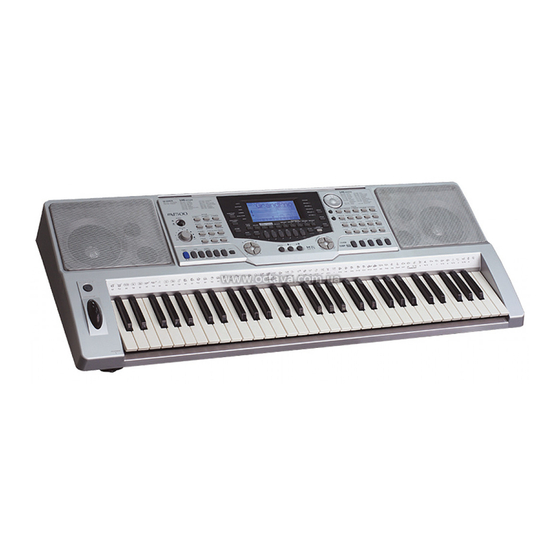
Related Manuals for Medeli MD500


Summary of Contents for Medeli MD500
-
Page 2: Power Supply
Congratulations! Congratulations on your purchase of this keyboard. It is an easy-to-use keyboard with advanced functions especially in self-learning. The major customers are the children or adults who are the beginners of learning keyboard, and they will be more interested in keyboard performance. -
Page 3: Intro/Ending
Main Features Keyboard Assistant Learning Function This keyboard has the FFW, REW and PAUSE 61-key touch keyboard function with guide beat in the song and make it convenient to the customers. Operation LCD Indication Use DIAL to select desired voice, style and song It indicates the note you play on the staff and the keyboard. -
Page 4: Table Of Contents
Contents General Guide 11.Chorus type 12.Chorus level Power supply 13.MIDI setting -Use the AC adaptor Mixer menu -Use batteries Metronome The Connectors -The headphones jack Memory -The damper jack 1.Bank -The Aux.Out jack 2.Store and load -The volume jack 3.Data store memory -The MIDI IN/OUT jacks O.T.S. -
Page 5: General Guide
General Guide Front panel POWER SWITCH [+/YES] [-/NO]BUTTON SUSTAIN MASTER VOLUME TOUCH LOWER VOICE TEMPO / OCTAVE - DUAL ACCOMP VOLUME / OCTAVE + TRANSPOSE MIXER METRONOME MODULATION FUNCTION + /NEXT DEMO PITCHBEND FUNCTION - /BACK O.T.S. START / STOP SYNC STOP A.B.C. -
Page 6: Power Supply
Power Supply This electronic keyboard can be powered by current from a standard household wall outlet (using the specified AC adaptor) or by batteries. Use the AC adaptor Make sure that only the AC adaptor specified for this electronic keyboard is used. The adaptor shall be 12V DC output, and center positive type. -
Page 7: The Connectors
Cautions£¡ Improper handling of the batteries can cause them to burst or leak, creating the danger of personal injury or damage of the keyboard. Be sure to take the following important precautions when using batteries: Never use batteries of different types. Never mix old batteries with new ones. -
Page 8: Voice Selecting
Voice Selecting Voice number The keyboard has 146 voices in all, including 128 GM voice, 12 Chinese voice, A.B.C. ACCOMP and 6 percussion voice. SUSTAIN MELODY 1 DUAL MELODY 2 Voice setting LOWER MELODY 3 SYNC STOP MELODY 4 EDIT MELODY 5 The default VOICE R1 is No.001. -
Page 9: Lower Voice
Other voice functions Lower voice You can split the keyboard to right and left area to create two different voices. In this function, you can assign a desired A.B.C. ACCOMP voice in the left-hand area of keyboard. SUSTAIN MELODY 1 DUAL MELODY 2 Press [LOWER ] button to turn on the... -
Page 10: Style Control
Style Control Play the style(only drum) A.B.C. ACCOMP There are 100 styles , from 001 to 100. SUSTAIN MELODY 1 The default style is 001. DUAL MELODY 2 LOWER MELODY 3 Press [STYLE] button to enter the style SYNC STOP MELODY 4 mode. -
Page 11: The Accompaniment Section
Style Control The accompaniment section Accompaniment consists of Intro, normal, variation, fill (a-a, a-b, b-a, b-b), ending. Using different sections based on the structure of styles enables you to enhance musical performance. INTRO Press the [INTRO/ENDING] button to insert an intro section before you start to play . -
Page 12: Fill In A/Fill In B
Style Control Play the Main(A/B) section Flashing Choose the disired style and press the [START/STOP] button. A.B.C. ACCOMP SUSTAIN MELODY 1 Stop playing the style DUAL MELODY 2 The accompaniment can be stopped at LOWER MELODY 3 any time by pressing the [START/STOP] SYNC STOP MELODY 4 button. -
Page 13: Stop Playing A Stayle
Style Control Stop playing a style Stop immediately The accompaniment can be stopped at any A.B.C. ACCOMP time by pressing the [START/STOP] button. SUSTAIN MELODY 1 DUAL MELODY 2 Stop with ending LOWER MELODY 3 Press the [INTRO/ENDING] button if you SYNC STOP MELODY 4 want to go to the ending section and then... -
Page 14: A.b.c
Style Control A.B.C.(auto bass chord) The default mode is A.B.C OFF. Press A.B.C. ACCOMP [A.B.C.] button to turn on the auto bass SUSTAIN MELODY 1 chord, A.B.C flag on LCD is lightened. DUAL MELODY 2 The left area of keyboard are known as LOWER MELODY 3 the chord area. -
Page 15: Tempo
Style Control Tempo ACC VOLUME A.B.C. ACCOMP Press the [TEMPO ] or [TEMPO SUSTAIN MELODY 1 button to change the tempo, the DIAL can DUAL MELODY 2 also be used to change the tempo . LOWER MELODY 3 SYNC STOP MELODY 4 Press the [TEMPO ] and [TEMPO... -
Page 16: Function Menu
Function Menu Press [FUNCTION+/NEXT] + / YES [FUNCTION-/BACK] button to enter or escape the menu of function. The default option of the menu is TRANSPOSE . - /NO Press [FUNCTION+/NEXT] or [FUNCTION-/BACK] button, select your desired option. Use [+/YES]/[-/NO] or the DIAL to set the parameter. -
Page 17: Octave
Function Menu Ocatve The LCD displays the octave value. Use [+/YES]/[-/NO] or DIAL to change the octave value. Its range is from 2 to 2 octaves only by the right area of keyboard. Press [+/YES] and [-/NO] together will set the OCTAVE value to its default one. -
Page 18: Touch
Function Menu Touch This function allows you to adjust the dynamic level when playing the keyboard. The LCD displays the touch value. Use [+/YES]/[-/NO] or DIAL to change the touch response level. There are 4 levels touch response including a off parameter. -
Page 19: Chorus Level
Function Menu Chorus level The LCD displays the chorus level. Use [+/YES]/[-/NO] or DIAL to change the chorus level. The level ranges from 0 to 127. The default level is 0 MIDI setting Reverb Type You can set the channel of MIDI IN by RECEIVE. -
Page 20: Mixer Menu
Mixer Menu Press [MIXER] button to enter the menu of MIXER. The default option of the menu is Oc1 Vol , When you enter this menu next time, you will find the option is the same as last time. Press [MIXER] button, select the option you want to set. -
Page 21: Memory
Memory Bank There are 8 banks at all; each bank has 6 memories (M1~M6). Press [BANK] button. The LCD displays 00x Mem Bank . Use [+/YES]/[-/NO] button or DIAL to select the bank. Store and load Press and hold [STORE]. Press M1(or M2~M6) meanwhile. -
Page 22: O.t.s
O.T.S. In this function, it can load 4 types of parameters (M1~M4) that is suitable for the current style. Press [O.T.S.] button to turn on this mode and lighten the O.T.S flag on LCD. Press [M1] - [M4] button, it will load corresponding A.B.C. -
Page 23: Record
Record 6 tracks (1 ACCOMP track, 5 MELODY tracks). You can choose either RECORD or STEPRECORD to record the user song. Note: 1.The recorded data will not be lost when you turn off the power. 2.Press [RECORD] and [PLAY/STOP] simultaneously when turn on the keyboard, it will clear all the recorded data. -
Page 24: Step Record
Record Step record If you are not familiar with playing song , you can choose STEP RECORD to record the song. Note: In STEP RECORD, the new data will not cover the old one unless you delete it. You can continue to record the song till the capacity of the track is full. -
Page 25: Accomp
Record ACCOMP TRACK: After you choose accomp track. The flag of accomp is lightening on LCD. Press the style button to chosse style and press [FUNCTION+/ NEXT] to enter next step. LCD will show " Ent chord". Then, please follow the steps below to continue the recording. -
Page 26: Melody
Record ¡ö Example Dotted note Play the keyboard to input the note value. For example, to get dotted semibreve, press [ ] and [ ] key together to input the time value. Tercet note Play the keyboard to input the note value. For example, to get the first note of the tercet quarter note, press [ ] and [ ] together. -
Page 27: Record Play
Record Record play Press [PLAY/STOP] to playback the user song. You can use[ACCOMP], [MELODY1] and [MELODY 5] button to turn on or off the relative track. Note: If there is no user song when you press [PLAY/STOP], LCD will display NULL temporarily. -
Page 28: User Song Lesson
Record User song lesson The user song has the LESSON function. Press [LESSON] button to enter the LESSON mode. You can choose the track to learn the user song. In the left hand mode you can study the ACCOMP track. In the right hand mode you can study the MELODY track. -
Page 29: Song
Song The keyboard has 50 songs at all, in which there are 35 classical songs, and 15 piano songs. Each song can be practised in LESSON mode. START/STOP the song: Press [SONG] button to enter the song mode. The song flag on LCD is lightened. It will play all songs circularly. -
Page 30: Demo
Demo Press [DEMO] button to enter the DEMO mode. There are 2 classic demo songs at all. The keyboard plays the demo song by turns from 1st song. To exit demo mode, press [ DEMO] button again. Lesson In song mode, press LESSON button to enter the lesson mode. -
Page 31: Chord Dictionary
Chord Dictionary Chord dictionary is a function to help you to check the chord notes. DICT 1 (CHORD LEARNING MODE) A.B.C. ACCOMP SUSTAIN MELODY 1 Press [CHORD DICTIONARY] button to DUAL MELODY 2 enter DICT 1 mode. The chord dictionary LOWER MELODY 3 flag on LCD is lightened. -
Page 32: Modulation
Modulation Press and hold the [MODULATION] button when you play the keyboard. The keyboard will have a vibration effect. Release the [MODULATION] button to back to normal status. Pedal Foot switch The keyboard can assign the pedal in function menu. See FUNCTION. PEDAL SUSTAIN If pedal assign is set as pedal sustain ,... -
Page 33: Midi
MIDI What is MIDI? MIDI Musical Instrument Digital Interface. The standard interface between PC and Electronic instrument. The keyboard is equipped with standard MIDI interface, including 1 MIDI IN and 1 MIDI OUT. Connection The keyboard can connected with PC or other MIDI equipment. -
Page 34: Specifications
Specifications Keys: 61 keys with Touch Response Voices: 146 voices Polyphony: 64-note (max.) Styles: 100 styles Styles Control: Start/stop,Sync, Intro/Ending, FILL-IN A, FILL-IN B,A.B.C Song: 50 songs Song Control PAUSE REPEAT REW FF Song Lesson DEMO Song: 2 demo songs Overall Control: Transpose, Tune, Octave, Beat, Split Point, Pedal select, Brilliance, Touch,Reverb type,Reverb level,Chorus type,... -
Page 35: Midi Implementation Chart
MIDI Implementation Chart Function Transmitted Recognized Remarks Basic Default Channel Changed 1-16ch 1-16ch Default Mode Messages Altered *********** Note 0 127 0 127 Number : True voice *********** 0 127 Velocity : Note on 9nH,V=1-127 9nH,V=1-127 Note off 9nH,V=0 (9nH,V=0; 8nH,V=0-127) After key's Touch... -
Page 36: Appendix 1-Voice List
Appendix 1 - Voice List BRASS PERCUSSIVE PIANO 57 Trumpet 113 Tinkle Bell 01 Acoustic Grand Piano 02 Bright Acoustic Piano 58 Trombone 114 Agogo 59 Tuba 115 Steel Drums 03 Electric Grand Piano 60 Muted Trumpet 116 Wood Block 04 Honky-Tonk Piano 61 French Horn 117 T aiko Drum... -
Page 37: Appendix 2-Style List
Appendix 2 - Style List... -
Page 38: Appendix 4-Demo List
Appendix 3 - Song List CLASSICAL PIANIST Annen polk Music Box Dancer Alise Allergro In BBK003 Military March Aida Wedding March Chant Sans Paroles Op.40 No.6 Turkish March Blue Danube Waltz Four Little Swans Violin Sonata In F Minuet In G Menuett Minuet German Dance No.6... -
Page 39: Appendix 5-Chord List
Appendix 5- Chord list Chord Name [Abbreviation] Normal Voicing Chord(C) Display Major[M] 1-3-5 Major sixth [6] 1-(3)-5-6 Major seventh [M7] 1-3-(5)-7 Major seventh add sharp eleventh [M7(#11)] 1-(2)-3-#4-(5)-7 CM7(#11) CM7(#11) Major add ninth [M9] 1-2-3-5 CM(9) CM(9) Major seventh ninth [M7(9)] 1-2-3-(5)-7 CM7(9) CM7(9)
Need help?
Do you have a question about the MD500 and is the answer not in the manual?
Questions and answers