BolyGuard MG982K-10M User Manual
Bolyguard mg982k-10m infrared mobile digital scouting camera
Hide thumbs
Also See for MG982K-10M:
- User manual (32 pages) ,
- User manual (33 pages) ,
- User manual (35 pages)
Table of Contents
Advertisement
Advertisement
Table of Contents

Related Manuals for BolyGuard MG982K-10M

Summary of Contents for BolyGuard MG982K-10M
- Page 1 Infrared Mobile Digital Scouting Camera User’s Manual MG982K-10M...
-
Page 2: Table Of Contents
Content 1 Instruction....................1 1.1 General Description................1 1.2 Application..................1 1.3 Camera Overview................2 1.4 Shooting Information Display............4 1.5 Two Way Communication..............4 2 Cautions....................5 3 Quick Start Guide...................6 3.1 Power Supply..................6 3.2 Insert SD card and SIM card............6 3.3 Do the Camera Settings..............6 3.4 Manually Send a MMS or GPRS Photo...........8 3.5 Enter Work Mode................8 3.6 SMS Control..................8... -
Page 3: Instruction
MG982K-10M 1 Instruction Instruction 1.1 General Description This camera, a digital scouting camera with MMS function, is a digital infrared surveillance camera, triggered by any movement of human or animal monitored by a high sensitive Passive Infrared (PIR) motion sensor, and then automatically captures high quality pictures (up to 10M pixels) or records video clips (720P HD). -
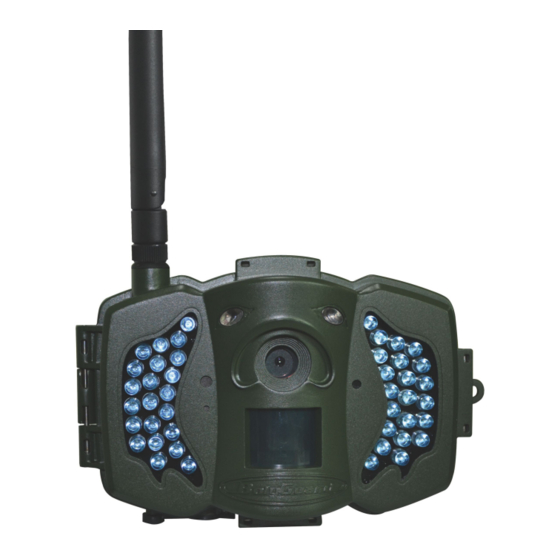
Page 4: Camera Overview
MG982K-10M 1 Instruction 1.3 Camera Overview Take a few moments to familiarize with the camera controls and displays. It is helpful to bookmark this section and refer to it when reading through the rest of the manual. Figure 1 Diagram of camera functional indicators... - Page 5 MG982K-10M 1 Instruction Figure 2 Inner panel view Figure 3 Diagram of camera interfaces Page 3...
-
Page 6: Shooting Information Display
MG982K-10M 1 Instruction Shooting Information Display When the camera is turned on (the power switch is slid to TEST position), the current settings will be displayed on screen. Figure 4 Shooting information display is the correct SIM card status and the available space of SD card should be a none zero value. -
Page 7: Cautions
MG982K-10M 2 Cautions Cautions The working voltage of the camera is 6V. The camera is supplied by the power adapter or 8 AA batteries. Please install batteries according to shown polarity. Please insert the SD card before power on camera. -
Page 8: Quick Start Guide
MG982K-10M 3 Quick Introductions Quick Start Guide 3.1 Power Supply Hunting mode or outdoor use: use 8 or 4 AA batteries. High-density and high-performance alkaline or lithium batteries are recommended. Security mode or indoor use: use 6V/2A high quality power adapter. The battery can be just a backup for emergency use. - Page 9 MG982K-10M 3 Quick Introductions For first time use, we suggest you to use default settings (step1). Then select your country and carriers (step2) according to your SIM card and input your receive phone number in “administrator number” and receive e-mail address in ”Receive Email 1”...
-
Page 10: Manually Send A Mms Or Gprs Photo
MG982K-10M 3 Quick Introductions 3.4 Manually Send a MMS or GPRS Photo After you generate a setting file in your SD card, please slip the power switch to SETUP position. After the camera acquires the signal and the SIM card icon appears, target an object and press “SHOT”... -
Page 11: Advanced Operations
MG982K-10M 4 Advanced Operations Advanced Operations This chapter explains the advanced operations for customizing the camera settings. 4.1 Work Mode Setup mode: to program camera or to playback the photos or video clips. Hunting mode: when animal or human intrudes into the monitoring... -
Page 12: Setting Items
MG982K-10M 4 Advanced Operations select the different options, use “◄” to change different item page. Press “OK” to save the settings. 4.2.1 Setting Items Setting Description Items There are three camera modes: Photo,Video or Camera Pic+Video. You can enter the main menu to set the Mode camera mode. - Page 13 MG982K-10M 4 Advanced Operations Please note that if the PIR Trigger is set to Off, then the Time Lapse can’t be set to Off. Choose sensitivity of the PIR. The higher sensitivity indicates that the camera is more easily triggered by motion and takes more pictures or records more videos.
- Page 14 MG982K-10M 4 Advanced Operations mode. “OFF” means to close the communicate Send function. Mode 1. “Manual”: Choose “Manual” in SETUP mode. Please ensure a SIM card is inserted properly; please note only photos can be sent in SETUP mode. Video information can’t be sent in SETUP mode.
- Page 15 MG982K-10M 4 Advanced Operations 4. “Off”: to disable MMS function. Control enable communication function. It means if you choose SMS Ctrl as ON, this camera can receive and SMS Ctrl respond your SMS command. Also you can retrieve live pictures any time. But the power consumption will be a little bigger than normal hunting status.
-
Page 16: Default Set
MG982K-10M 4 Advanced Operations 4.2.2 Default Set Setting Default Options Description Items Video, Pic+Video Camera Mode Photo Security Mode Two way communication Photo Size 10MP Video Size 1280x720 640x480 Photo Burst 1 Photo 2-6 Photos Video Length 10 Sec. -
Page 17: Use The Remote Control
MG982K-10M 4 Advanced Operations Zone7 Language English Beep Sound Camera Posit A to Z Position Format SD Enter Yes, No Default Set Save Version Enter 4.3 Use the Remote Control When it’s in Security Mode, you can use the remote control to easily arm (button A) or disarm (button D). -
Page 18: Load Or Remove A Wireless Sensor
MG982K-10M 4 Advanced Operations Method to add remote control(s) to the camera: Enter the Setup status, press Menu and enter the Study Code submenu. Choose “RCH,” press OK button, then press button A of the remote control. When it's successful, there will be a "√”... - Page 19 MG982K-10M 4 Advanced Operations 2. Power on or trigger the wireless sensor to study code. Page 17...
- Page 20 MG982K-10M 4 Advanced Operations Page 18...
-
Page 21: Change The Settings Via Android App Or Sms
MG982K-10M 4 Advanced Operations 3. When you want to remove the wireless sensor, please enter the study code menu, press “ ” or “ ” button to cancel the ◄ ► “√.” Please note that the wireless sensors just can be used in Security Mode. -
Page 22: User Level
MG982K-10M 4 Advanced Operations specified website is written in the last page of the manual. 4.5.1 User Level There are two user levels: administrator and normal users. Each user has a different authorization level: Functions User Level Set administrator Only phone number administrator’s password... -
Page 23: Get On Spot Photo
MG982K-10M 4 Advanced Operations Here the “0000” is the original administrator’s password. Please change the password ASAP. Note:there is a “#”at the end of the commend. If successful, reply SMS: Dear administrator, your number is 13800138000. If failed, reply SMS: Please check the password. -
Page 24: Sms Command List
MG982K-10M 4 Advanced Operations 4.5.5 SMS Command List If you can’t use the Android APP for easy operation, the list below shows all the SMS commands for you. You can control your camera via SMS. A. Set GSM Parameter Function... - Page 25 MG982K-10M 4 Advanced Operations Get On Spot Photo Disarm Check Camera Settings Format TF Card #P#0000# (It’s suggested that the Administrator’s administrators password be changed at the Password beginning) Help C. Set Menu Parameter No Function SMS Command Change Camera...
- Page 26 MG982K-10M 4 Advanced Operations Call Change SMS Ctrl #e#zon# or #e#zoff# Change Camera #e#oa# (a~z) to set the camera position Position function #e#ooff# to off the camera position function Page 24...
-
Page 27: Trouble Shooting
MG982K-10M 5 Trouble shooting Trouble Shooting There is something in front of the camera lens. Is the camera broken? Figure 5 IR-cut filter A: The camera is not broken. It’s an IR-cut filter. When the camera is powered on, the IR-cut will be reset and cover the lens. -
Page 28: Appendix I: Pir Detection Zone
Appendix I: PIR Detection Zone MG982K-10M Appendix I: PIR Detection Zone Figure 6 shows the detection range in different detection angle. When the detection angle is 35°, the detection range is 50ft (15m). When the detection angle is 52°, the detection range is 30ft (9m). - Page 29 Appendix I: PIR Detection Zone MG982K-10M Figure 7 Detection angle vs. FOV angle This camera has a new design of PIR and the new PIR is patented. The new patented PIR’s detection range is ultra-long. Figure 8 shows the compared detection zone between normal PIR and the new patented PIR.
-
Page 30: Appendix Ii: Error Code
MG982K-10M Appendix : Error Code Appendix II: Error Code Code Meaning Description Possible cause: 1. The user forgets to input the receiving cellphone number. Non-existent 2. The user forgets to input the receiving E- 3915 address mail address. Suggestion: 1. Check the MMS settings, input all the necessary parameters. - Page 31 MG982K-10M Appendix : Error Code Possible cause: 1. The GSM network is not good or not well covered with the GPRS network. 2. The instability in signal transmission leads to some MMS setting parameters missing when the GSM base station do the data analysis.
-
Page 32: Appendix : Technical Specifications
MG982K-10M Appendix : Technical Specifications Ⅲ Appendix Ⅲ Ⅲ Ⅲ Ⅲ : Technical Specifications 5MP Color CMOS, 10MP Image Sensor Interpolation Lens F/NO=3.0 FOV (Field of View)=52° PIR Detection Range 30M/100F Display Screen 3’’ LCD Memory Card From 8 MB to 32 GB 10MP = 3648×2736... -
Page 33: Appendix : Parts List
MG982K-10M Appendix : Parts List Ⅳ Appendix Ⅳ Ⅳ Ⅳ Ⅳ : Parts List Part Name Quantity Digital Camera Wireless Remote Control USB Cable Belt User’s Manual Antenna Website Information: Down load the camera easy set up software from here: (version 1.3)
Need help?
Do you have a question about the MG982K-10M and is the answer not in the manual?
Questions and answers