Table of Contents
Advertisement
Available languages
Available languages
ELLIPTICAL OWNER'S MANUAL
MANUEL DU PROPRIÉTAIRE DE L'EXERCISEUR ELLIPTIQUE
MANUAL DEL PROPIETARIO DE LA MÁQUINA ELÍPTICA
Read the ELLIPTICAL GUIDE before using this OWNER'S MANUAL.
Lire le GUIDE D'UTILISATION DE L'EXERCISEUR ELLIPTIQUE avant de se servir du présent MANUEL DU PROPRIÉTAIRE.
Lea la GUÍA DE LA MÁQUINA ELÍPTICA antes de usar este MANUAL DEL PROPIETARIO.
10.0
LS
E
LS
LS
13.0
E
15.0
E
Advertisement
Table of Contents

Subscribe to Our Youtube Channel
Related Manuals for Livestrong LS10.0E


Summary of Contents for Livestrong LS10.0E
- Page 1 10.0 13.0 15.0 ELLIPTICAL OWNER’S MANUAL MANUEL DU PROPRIÉTAIRE DE L’EXERCISEUR ELLIPTIQUE MANUAL DEL PROPIETARIO DE LA MÁQUINA ELÍPTICA Read the ELLIPTICAL GUIDE before using this OWNER’S MANUAL. Lire le GUIDE D’UTILISATION DE L’EXERCISEUR ELLIPTIQUE avant de se servir du présent MANUEL DU PROPRIÉTAIRE. Lea la GUÍA DE LA MÁQUINA ELÍPTICA antes de usar este MANUAL DEL PROPIETARIO.
- Page 2 They connect people and communities to drive social change, and call for state, national and world leaders to help fight this disease. Anyone, anywhere can join the fight against cancer. Join them at LIVESTRONG.org.
- Page 3 IMPORTANT PRECAUTIONS SAVE THESE INSTRUCTIONS Read the ELLIPTICAL GUIDE before using this OWNER’S MANUAL. When using an electrical product, basic precautions should always be followed, including the following: Read all instructions before using this elliptical. It is the responsibility of the owner to ensure that all users of this elliptical are adequately informed of all warnings and precautions.
- Page 4 DANGER TO REDUCE THE RISK OF ELECTRICAL SHOCK: Always unplug the elliptical from the electrical outlet immediately after using, before cleaning, performing maintenance and putting on or taking off parts. WARNING • To reduce the risk of burns, fire, electrical shock or injury to persons: •...
- Page 5 WARNING TO REDUCE THE RISK OF BURNS, FIRE, ELECTRICAL SHOCK OR INJURY TO PERSONS: • Keep power cord away from heated surfaces. Do not carry this unit by its supply cord or use the cord as a handle. • Do not use other attachments that are not recommended by the manufacturer. Attachments may cause injury. •...
-
Page 6: Grounding Instructions
GROUNDING INSTRUCTIONS If your elliptical has power incline with a 3-prong plug, you must follow these grounding instructions. This product must be grounded. If a elliptical should malfunction or breakdown, grounding provides a path of least resistance for electrical current to reduce the risk of electrical shock. This product is equipped with a cord having an equipment-grounding conductor and a grounding plug. - Page 7 ENTER YOUR SERIAL NUMBER AND MODEL NAME IN THE BOXES BELOW: SERIAL NUMBER: ® LIVESTRONG ELLIPTICAL MODEL NAME: » Refer to the SERIAL NUMBER and MODEL NAME when calling for service.
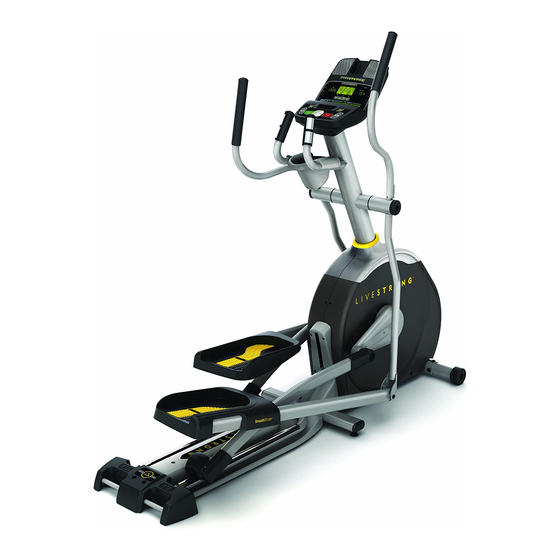
- Page 8 CONSOLE FAN SPEAKERS LS10.0E UPPER HANDLEBAR PULSE GRIPS WARNING CONSULT A PHYSICIAN PRIOR TO USING ANY EXERCISE EQUIPMENT. POSSIBILITY OF SERIOUS INJURY IF EQUIPMENT IS USED IMPROPERLY. READ INSTRUCTION MANUAL BEFORE USING. KEEP CHILDREN OFF AND AWAY FROM THIS EQUIPMENT. FOR CONSUMER USE ONLY.
- Page 9 CONSOLE FAN SPEAKERS LS13.0E UPPER HANDLEBAR LS15.0E WARNING PULSE GRIPS CONSULT A PHYSICIAN PRIOR TO USING ANY EXERCISE EQUIPMENT. POSSIBILITY OF SERIOUS INJURY IF EQUIPMENT IS USED IMPROPERLY. READ INSTRUCTION MANUAL BEFORE USING. KEEP CHILDREN OFF AND AWAY FROM THIS EQUIPMENT. FOR CONSUMER USE ONLY.
-
Page 10: Tools Required
TOOLS REQUIRED: PRE ASSEMBLY 8 mm L-Wrench 13/15 mm Flat Wrench UNPACKING 5 mm L-Wrench/Screwdriver Screwdriver (not included) Unpack the product where you will be using it. Place the elliptical carton on a level flat surface. It is recommended that you place a protective covering on your floor. PARTS INCLUDED: Never open box when it is on its side. -
Page 11: Assembly
ASSEMBLY STEP 1 HARDWARE FOR STEP 1: BOLT (A) SPRING WASHER (B) ARC WASHER (C) 30 mm 15 mm 17 mm Qty: 4 Qty: 4 Qty: 4 STABILIZER TUBE Open HARDWARE FOR STEP 1. Attach the STABILIZER TUBE to the MAIN FRAME using 2 BOLTS (A), 2 SPRING WASHERS (B) and 2 ARC WASHERS (C) on each side. - Page 12 ASSEMBLY STEP 2 HARDWARE FOR STEP 2: Open HARDWARE FOR STEP 2. FLAT SPRING BOLT (F) BOLT (G) WASHER (D) WASHER (E) Attach the GUIDE RAIL SET to the 20 mm 35 mm 20 mm 18 mm Qty: 4 Qty: 4 Qty: 4 Qty: 4 MAIN FRAME using 4 BOLTS (F),...
- Page 13 ASSEMBLY STEP 3 HARDWARE FOR STEP 3: NOTE: Be careful not WAVY SPRING FLAT BOLT (K) WASHER (J) WASHER (B) WASHER (D) 20 mm to pinch any 22.5 mm 15 mm 20 mm Qty: 2 Qty: 2 Qty: 2 Qty: 2 wires while attaching the CONSOLE MAST...
- Page 14 ASSEMBLY STEP 4 HARDWARE FOR STEP 4: FLAT WAVY BOLT (N) WASHER (L) WASHER (M) 20 mm 27 mm 29 mm Qty: 2 Qty: 4 Qty: 2 SPRING FLAT WASHER (O) WASHER (P) 15.4 mm 20 mm Qty: 2 Qty: 2 PEDAL ARM BRACKET Open HARDWARE FOR STEP 4.
- Page 15 ASSEMBLY STEP 5 HARDWARE FOR STEP 5: RUBBER FLAT FLAT WASHER (Q) WASHER (R) WASHER (D) CONSOLE MAST 26 mm 25 mm 26 mm Qty: 2 Qty: 4 Qty: 4 RUBBER WASHER (Q) FLAT WASHER (R) SPRING BOLT (S) WASHER (B) 20 mm 15 mm Qty: 2...
- Page 16 ASSEMBLY STEP 6 HARDWARE FOR STEP 6 : TEFLON FLAT SPRING WASHER (T) WASHER (U) WASHER (B) 28.4 mm 20 mm 15 mm Qty: 4 Qty: 2 Qty: 2 BOLT (V) NUT (W) 70 mm Qty: 2 NUT (W) Qty: 2 LOWER HANDLEBAR Open HARDWARE FOR STEP 6.
- Page 17 ASSEMBLY STEP 7 HARDWARE FOR STEP 7: SCREW (X) SCREW (Y) 12 mm 15 mm CONSOLE MAST Qty: 2 Qty: 2 TOP CAP REAR COVER TOP CAP FRONT COVER Open HARDWARE FOR STEP 7. SCREWS (X) Slide TOP CAP REAR COVER over REAR CAP CONSOLE MAST and attach using SCREWS (Y)
- Page 18 CONSOLE MAST HANDLEBAR. PRE-INSTALLED BOLTS E Slide UPPER HANDLEBAR onto LOWER LOWER HANDLEBAR HANDLEBAR making sure handlebars are joined LS10.0E UPPER together completely. Secure UPPER HANDLEBAR to HANDLEBAR AND LOWER HANDLEBAR using PRE-INSTALLED SET HANDLEBAR COVER SCREWS. F Slide HANDLEBAR COVER down to cover hardware.
- Page 19 ASSEMBLY STEP 9 If you would like to use the elliptical without the UPPER HANDLEBARS, you can install the HANDLEBAR CAPS instead of the UPPER HANDLEBARS. NOTE: All hardware for this step is included in the plastic bag with the HANDLEBAR CAPS. A If the UPPER HANDLEBARS are already installed, SCREW remove the PRE-INSTALLED SCREWS and slide...
- Page 21 ELLIPTICAL OPERATION This section explains how to use your elliptical’s console and programming. The BASIC OPERATION section in the ELLIPTICAL GUIDE has instructions for the following: • LOCATION OF THE ELLIPTICAL • POWER/GROUNDING INSTRUCTIONS • FOOT POSITIONING • MOVING THE ELLIPTICAL •...
- Page 22 L S 1 0 .0 E LS10.0E F I T N E S S J O U R N A L S Y S T E M PERSONAL LAST 5 WORKOUT WORKOUT Energy BEST WORKOUTS TOTALS STATS Saver HOLD TO RESET...
- Page 23 LS10.0E CONSOLE OPERATION Note: There is a thin protective sheet of clear plastic on the overlay of the console that should be removed before use. A) LCD DISPLAY WINDOW: time, distance, speed, calories, incline, laps, and heart rate. B) LIVETRACK FITNESS JOURNAL SYSTEM: see page 31 for more information.
- Page 24 L S 13 .0 E LS13.0E F I T N E S S J O U R N A L S Y S T E M PERSONAL LAST 5 WORKOUT WORKOUT Energy BEST WORKOUTS TOTALS STATS Saver HOLD TO RESET MELLOW WEIGHT MUSCLE...
- Page 25 LS13.0E CONSOLE OPERATION Note: There is a thin protective sheet of clear plastic on the overlay of the console that should be removed before use. A) LCD DISPLAY WINDOW: time, distance, speed, calories, incline, laps, and heart rate. B) LIVETRACK FITNESS JOURNAL SYSTEM: see page 31 for more information. C) ENERGY SAVER LIGHT: indicates if machine is in Energy Saver mode.
- Page 26 LS10.0E & LS13.0E DISPLAY WINDOWS LS10.0E DISPLAY • TIME: Shown as minutes : seconds. View the time remaining or the time elapsed in your workout. • DISTANCE: Shown as miles. Indicates distance traveled or distance remaining during your workout. LS10.0E LS13.0E...
-
Page 27: Finishing Your Workout
LS10.0E & LS13.0E GETTING STARTED TO RESET THE CONSOLE Hold STOP key for 3 seconds. 1) Check to make sure no objects are nearby that will hinder the movement of the elliptical. TO CLEAR CURRENT SELECTION 2) Plug in the power cord and turn the elliptical ON. (Switch is located at the bottom-front of the elliptical.) - Page 28 LS10.0E & LS13.0E PROGRAM INFORMATION MANUAL: Adjust your level and incline manually during your workout WEIGHT LOSS: Promotes weight loss by increasing and decreasing the resistance and incline, while keeping you in your fat burning zone. Resistance changes, LS10.0E segments repeat every 60 seconds.
- Page 29 MELLOW JOHNNY’S TRAIL: Simulates the ascent and descent of trail walking. Helps tone muscles and build cardiovascular fitness. Time based goal with 10 difficulty levels to choose from. LS10.0E LS13.0E Program Segments LANCE’S CLIMB: Experience changing incline levels simulating an outdoor biking experience.
- Page 30 1) Press the CUSTOM program button and press ENTER. 2) Set the workout time using the and press ENTER. LS10.0E LS13.0E 3) Use to set the resistance level for each segment. Press ENTER to confirm the resistance setting for each segment of the workout.
- Page 31 , you can easily compare your current workout to your last, average or lifetime workout totals. With quick access to feedback like duration of workout or calories burned during previous workouts, you’ll be able to see the progress you’ve made. SETUP RESET LS10.0E To activate LIVETRACK ™ fitness journal system a user MUST be Reset all recorded information for User 1 or User 2 by LS13.0E...
- Page 32 L S 1 5 . 0 E Energy Saver T O U C H S C R E E N D I S P L A Y W I T H F I T O U C H ™ T E C H N O L O G Y LS15.0E W O R K O U T S MANUAL...
- Page 33 LS15.0E CONSOLE OPERATION Note: There is a thin protective sheet of clear plastic on the overlay of the console that should be removed before use. A) TOUCHSCREEN: see page 34 for more information. B) ENERGY SAVER LIGHT: indicates if machine is in Energy Saver mode. C) GO: used to start workout.
- Page 34 LS15.0E HOMESCREEN LS15.0E SIMPLE RUNSCREEN LS15.0E LS15.0E SETUP SCREEN LS15.0E PROFILE RUNSCREEN...
- Page 35 LS15.0E DISPLAY OPERATION The LS15.0E has a fully integrated touchscreen display on which all information required for various workouts is explained. On-screen prompts will guide you through program set-up, but you should first identify what each button/icon means (below). Exploration of the interface is highly recommended because, as with all touchscreen interfaces, the best way to learn how our touchscreen works is to use it (before using the elliptical).
- Page 36 LS15.0E GETTING STARTED DATE AND CLOCK SETUP 1) Check to make sure no objects are nearby that will hinder the 1) Enter engineering mode: Press and hold movement of the elliptical. the resistance (up/down) buttons for 3-5 2) Plug in the power cord and turn the elliptical ON. (Switch is located seconds.
- Page 37 LS15.0E PROGRAM INFORMATION 1) MANUAL: A workout that allows you to manually adjust the resistance level and incline values at any time. 2) ROLLING HILLS: A level-based workout that automatically adjusts the resistance value to simulate walking or running up hills.
- Page 38 LS15.0E PROGRAM INFORMATION 6) TARGET HEART RATE The first step in knowing the right intensity for your training is to find out your maximum heart rate (max HR = 220 – your age). The age-based method provides an average statistical prediction of your max HR and is a good method for the majority of people, especially those new to heart rate training.
- Page 39 3) Remove the AUDIO ADAPTOR CABLE when not in use. MODELS ENERGY SAVER (STANDBY MODE) (LS10.0E/LS13.0E) This machine has a special feature called Energy Saver™ mode. This mode is NOT automatically activated. When Energy Saver mode is activated, the display will automatically enter standby mode (Energy Saver mode) after 15 minutes of inactivity.
- Page 41 LIMITED HOME-USE WARRANTY...
- Page 42 • Normal wear and tear, improper assembly or maintenance, or installation of parts or accessories not originally intended or compatible with the ELECTRONICS & PARTS • LS10.0E: 3 YEARS LS13.0E, LS15.0E: 5 YEARS equipment as sold. Manufacturer warrants the electronic components, finish and all •...
- Page 43 SERVICE/RETURNS does not provide monetary or other compensation for any such • In-home service is available within 150 miles of repairs or replacement parts costs, including but not limited to gym the nearest authorized Service Provider (Mileage membership fees, work time lost, diagnostic visits, maintenance beyond 150 miles from an authorized service visits or transportation.
- Page 44 Ils branchent les gens avec les communautés pour contribuer au changement social et font appel aux leaders des provinces, nationaux et autour du monde pour lutter contre cette maladie. Tout le monde peut se joindre à la lutte contre le cancer. Joignez-vous à eux à LIVESTRONG.org.
- Page 45 PRÉCAUTIONS IMPORTANTES CONSERVEZ CES DIRECTIVES Lisez ce GUIDE DE L’EXERCISEUR ELLIPTIQUE avant de vous référer au MANUEL DU PROPRIÉTAIRE. Lorsque vous utilisez un produit électrique, des précautions de base doivent toujours être respectées, y compris les suivantes : Lisez toutes les directives avant d’utiliser cet exerciseur elliptique.
- Page 46 DANGER POUR RÉDUIRE LE RISQUE DE CHOC ÉLECTRIQUE : Débranchez toujours l’exerciseur elliptique de la prise de courant immédiatement après l’avoir utilisé, avant de le nettoyer et d’effectuer un entretien ainsi qu’avant d’ajouter ou d’enlever des pièces. AVERTISSEMENT • Pour réduire le risque de brûlures, d’incendie, de choc électrique ou de blessures : •...
- Page 47 AVERTISSEMENT POUR RÉDUIRE LE RISQUE DE BRÛLURES, D’INCENDIE, DE CHOC ÉLECTRIQUE OU DE BLESSURES : • Tenez le cordon d’alimentation loin des surfaces chauffées. Ne transportez pas cet appareil par son cordon d’alimentation et n’utilisez pas le cordon comme poignée. •...
- Page 48 INSTRUCTIONS DE MISE À LA TERRE Si votre exerciseur elliptique comporte un dispositif mécanique de réglage de l’inclinaison avec fiche à 3 broches, suivez ces instructions de mise à la terre. Cet appareil doit être mis à la terre. Si l’exerciseur elliptique fait défaut ou tombe en panne, la mise à la terre fournit une voie de moindre résistance pour le courant électrique, et ce, afin de réduire le risque de choc électrique.
- Page 49 INSCRIVEZ LE NUMÉRO DE SÉRIE ET LE NOM DU MODÈLE DANS L’ESPACE CI-DESSOUS : NUMÉRO DE SÉRIE : EXERCISEUR LIVESTRONG NOM DU MODÈLE : ELLIPTIQUE Référez-vous au NUMÉRO DE SÉRIE et au NOM DU MODÈLE lorsque vous appelez pour le service.
- Page 50 VENTILATEUR DE CONSOLE HAUT- PARLEURS LS10,0E GUIDON SUPÉRIEUR POIGNÉES DU CARDIO- FRÉQUENCEMÈTRE WARNING CONSULT A PHYSICIAN PRIOR TO USING ANY EXERCISE EQUIPMENT. POSSIBILITY OF SERIOUS INJURY IF EQUIPMENT IS USED IMPROPERLY. READ INSTRUCTION MANUAL BEFORE USING. KEEP CHILDREN OFF AND AWAY FROM THIS EQUIPMENT.
- Page 51 VENTILATEUR DE CONSOLE HAUT-PARLEURS LS13.0E GUIDON SUPÉRIEUR LS15,0E WARNING POIGNÉES CONSULT A PHYSICIAN PRIOR TO USING ANY DU CARDIO- EXERCISE EQUIPMENT. POSSIBILITY OF SERIOUS INJURY IF EQUIPMENT IS USED FRÉQUENCEMÈTRE IMPROPERLY. READ INSTRUCTION MANUAL BEFORE USING. KEEP CHILDREN OFF AND AWAY FROM THIS EQUIPMENT.
- Page 52 OUTILS REQUIS : PRÉ ASSEMBLAGE Clé à manche en L, de 8 mm Clé hexagonale 13/15 mm DÉBALLAGE Clé à manche en L de 5 mm/tournevis Tournevis (non inclus) Déballez l’appareil là ou il sera utilisé. Placez l’emballage de l’exerciseur elliptique sur une surface plane.
- Page 53 ASSEMBLAGE ÉTAPE 1 QUINCAILLERIE POUR ÉTAPE 1 : BOULON (A) RONDELLE RONDELLES 30 mm À RESSORT (B) EN ARC (C) Qté : 4 15 mm 17 mm Qté : 4 Qté : 4 TUBE DE STABILISATION Ouvrez la TROUSSE DE QUINCAILLERIE POUR L’ÉTAPE 1.
- Page 54 ASSEMBLAGE ÉTAPE 2 QUINCAILLERIE POUR ÉTAPE 2 : Ouvrez la TROUSSE DE QUINCAILLERIE POUR L’ÉTAPE 2. RONDELLE RONDELLE À BOULON (F) BOULON (G) PLATE (D) RESSORT (E) 20 mm 35 mm 20 mm 18 mm Qté : 4 Qté : 4 Qté...
- Page 55 ASSEMBLAGE ÉTAPE 3 QUINCAILLERIE POUR ÉTAPE 3 : REMARQUE : Prenez garde RONDELLE RONDELLE RONDELLE BOULON (K) de ne pas ONDULÉE (J) À RESSORT (B) PLATE (D) 20 mm 22.5 mm 15 mm 20 mm Qté : 2 pincer les Qté...
- Page 56 ASSEMBLAGE ÉTAPE 4 QUINCAILLERIE POUR ÉTAPE 4 : RONDELLE RONDELLE BOULON (N) PLATE (L) ONDULÉE (M) 20 mm 27 mm 29 mm Qté : 2 Qté : 4 Qté : 2 RONDELLE RONDELLE PLATE (P) À RESSORT (O) 20 mm 15.4 mm Qté...
- Page 57 ÉTAPE D’ASSEMBLAGE 5 QUINCAILLERIE POUR ÉTAPE 5 : RONDELLE EN RONDELLE RONDELLE CAOUTCHOUC (Q) PLATE (R) PLATE (D) MÂT DE LA CONSOLE 26 mm 25 mm 26 mm Qté : 2 Qté : 4 Qté : 4 RONDELLE EN RONDELLE PLATE (R) CAOUTCHOUC (Q) RONDELLE BOULON (S)
- Page 58 ASSEMBLAGE ÉTAPE 6 QUINCAILLERIE POUR ÉTAPE 6 : RONDELLE RONDELLE RONDELLE EN TÉFLON (T) PLATE (U) À RESSORT (B) 28.4 mm 20 mm 15 mm Qté : 4 Qté : 2 Qté : 2 BOULON (V) ÉCROU (W) 70 mm Qté...
- Page 59 ASSEMBLAGE ÉTAPE 7 QUINCAILLERIE POUR ÉTAPE 7 : VIS (X) VIS (Y) 12 mm 15 mm MÂT DE LA CONSOLE Qté : 2 Qté : 2 COUVERCLE ARRIÈRE COUVERCLE AVANT DU DU CAPUCHON SUPÉRIEUR CAPUCHON SUPÉRIEUR Ouvrez la TROUSSE DE QUINCAILLERIE VIS (X) POUR L’ÉTAPE 7.
- Page 60 Fixez le GUIDON SUPÉRIEUR ET COUVERCLE DU GUIDON DU MODÈLE au GUIDON INFÉRIEUR à l’aide desBOULONS LS10.0E PRÉ-INSTALLÉS. F Glissez le COUVERCLE DU GUIDON vers le bas pour couvrir la quincaillerie. G Répéter les étapes D et E de l’autre côté.
- Page 61 ASSEMBLAGE ÉTAPE 9 Si vous désirez utiliser l’exerciseur elliptique sans les GUIDONS SUPÉRIEURS, vous pouvez installer les CAPUCHONS DES GUIDONS au lieu des GUIDONS SUPÉRIEURS. Remarque : Toute la quincaillerie pour cette étape se trouve dans le sac de plastique avec les CAPUCHONS DES GUIDONS.
- Page 63 FONCTIONNEMENT DE L’EXERCISEUR ELLIPTIQUE Cette section explique comment utiliser la console de votre exerciseur elliptique et comment la programmer. La section des FONCTIONNEMENTS DE BASE dans le GUIDE DE L’EXERCISEUR ELLIPTIQUE comprend des directives sur les points suivants : • EMPLACEMENT DE L’EXERCISEUR ELLIPTIQUE •...
- Page 64 L S 1 0 .0 E LS10,0E F I T N E S S J O U R N A L S Y S T E M PERSONAL LAST 5 WORKOUT WORKOUT Energy BEST WORKOUTS TOTALS STATS Saver HOLD TO RESET MELLOW WEIGHT MUSCLE...
- Page 65 FONCTIONNEMENT DE LA CONSOLE LS10.0E Remarque : Il y a une fine pellicule protectrice en plastique transparent sur la console que vous devez enlever avant d’utiliser la machine. FENÊTRE D’AFFICHAGE ACL : Durée, distance, vitesse, calories, pente, tours et fréquence cardiaque.
- Page 66 L S 13 .0 E LS13.0E F I T N E S S J O U R N A L S Y S T E M PERSONAL LAST 5 WORKOUT WORKOUT Energy BEST WORKOUTS TOTALS STATS Saver HOLD TO RESET MELLOW WEIGHT MUSCLE...
- Page 67 FONCTIONNEMENT DE LA CONSOLE LS13.0E Remarque : Il y a une fine pellicule protectrice en plastique transparent sur la console que vous devez enlever avant d’utiliser la machine. FENÊTRE D’AFFICHAGE ACL : Durée, distance, vitesse, calories, pente, tours et fréquence cardiaque. SYSTÈME DE JOURNAL DE CONDITIONNEMENT PHYSIQUE LIVETRACK : Consultez la page 73 pour plus d’informations.
- Page 68 LS10.0E & LS13.0E FENÊTRES LS10.0E AFFICHAGE D’AFFICHAGE • DURÉE : Indiquée en minutes : secondes. Visualisez le temps restant ou le temps écoulé dans votre entraînement. • DISTANCE : Shown as miles. Indique la distance parcourue ou LS10,0E la distance restante de votre entraînement.
- Page 69 LS10.0E & LS13.0E POUR COMMENCER POUR RÉINITIALISER LA CONSOLE Tenez LA TOUCHE stop (arrêt) pendant 3 secondes. 1) Assurez-vous qu’il n’y aucun objet près de l’exerciseur elliptique qui pourrait nuire aux déplacements. 2) Branchez le cordon d’alimentation et mettez l’exerciseur elliptique POUR EFFACER LA SÉLECTION ACTUELLE...
- Page 70 LS10.0E ET LS13.0E RENSEIGNEMENTS SUR LE PROGRAMME MANUEL : Vous pouvez ajuster le niveau et l’inclinaison manuellement pendant votre entraînement. PERTE DE POIDS : Favorise la perte de poids en augmentant et en diminuant la résistance et LS10,0E la pente, tout en vous tenant dans la zone pour brûler de la graisse. Les résistances changent et LS13.0E...
- Page 71 LA ROUTE DE MELLOW JOHNNY : Simule les mouvements de montée et de descente sur un sentier de randonnées. Aide à tonifier les muscles et bâtir le conditionnement cardiovasculaire. Objectif de durée avec un choix de 10 niveaux de difficulté. LS10,0E LS13.0E Segments de programmes...
- Page 72 RENSEIGNEMENTS SUR LE PROGRAMME PERSONNALISÉ Vous permet de créer et de refaire une séance d’entraînement parfaite pour vous avec une vitesse, une pente et une combinaison de durées spécifiques. L’ultime programme personnel. Objectif de durée 1) Appuyez sur la touche de programme CUSTOM (Personnaliser) et appuyez sur ENTER (Entrer). 2) Réglez la durée de la séance d’entraînement en utilisant et appuyez sur ENTER (Entrer).
- Page 73 SYSTÈME DE JOURNAL DE CONDITIONNEMENT PHYSIQUE LIVETRACK Le logiciel LIVETRACK intégré vous permet de suivre votre progrès en conditionnement physique sans le besoin de journaux papiers. À l’aide de LIVETRACK , vous pourrez facilement comparer votre entraînement actuel avec les données totales de votre dernière séance, la moyenne de vos séances et la totalité...
- Page 74 L S 1 5 . 0 E Energy Saver T O U C H S C R E E N D I S P L A Y W I T H F I T O U C H ™ T E C H N O L O G Y LS15,0E W O R K O U T S MANUAL...
- Page 75 FONCTIONNEMENT DE LA CONSOLE LS15.0E Remarque : Il y a une fine pellicule protectrice en plastique transparent sur la console que vous devez enlever avant d’utiliser la machine. ÉCRAN TACTILE : consultez la page 76 pour plus d’informations LUMIÈRE ÉCONOMISEURE D’ÉNERGIE : Indique si la machine est en mode économiseur d’énergie. GO (Aller) : Utilisé...
- Page 76 ÉCRAN D’ACCUEILLS10.0E ÉCRAN DE COURSE SIMPLELS10.0E LS15,0E ÉCRAN DE RÉGLAGELS10.0E ÉCRAN DE COURSE DU PROFILLS10.0E...
- Page 77 FONCTIONNEMENT DE L’AFFICHAGE LS15.0E L’appareil LS15.0E possède un écran tactile entièrement intégré sur lequel tous les renseignements requis pour les séances d’entraînement diverses sont expliqués. Des messages guides à l’écran vous guideront au cours du réglage d’un programme mais avant vous devez identifier la signification de chaque touche/icône (ci- dessous).
- Page 78 LS15.0E POUR COMMENCER COMMENT PROGRAMMER LA DATE ET L’HORLOGE 1) Assurez-vous qu’il n’y aucun objet près de l’exerciseur elliptique qui pourrait nuire aux déplacements. 1) Entrer dans le mode ingénieur : appuyer 2) Branchez le cordon d’alimentation et mettez l’exerciseur elliptique sous tension. sur résistance plus et moins et les tenir (L’interrupteur est situé...
- Page 79 RENSEIGNEMENTS SUR LE PROGRAMME LS15.0E 1) MANUEL : Une séance d’entraînement qui vous permet d’ajuster les niveaux de résistance et de la pente manuellement en tout temps. 2) COLLINES : Un entraînement basé sur des niveaux qui ajuste automatiquement les valeurs de la résistance pour simuler la marche ou la course en montant des collines.
- Page 80 RENSEIGNEMENTS SUR LE PROGRAMME LS15.0E 6) FRÉQUENCE CARDIAQUE CIBLE La première étape pour connaître la bonne intensité pour votre entraînement est de trouver votre fréquence cardiaque maximale (FC max = 220 – votre âge). La méthode basée sur l’âge offre une prévision statistique moyenne de votre FC max et est une bonne méthode pour la majorité des gens, spécialement ceux nouvellement initiés à...
- Page 81 3) Débranchez le CORDON D’ADAPTATEUR AUDIO si non utilisé. MODÈLES ÉCONOMISEUR D’ÉNERGIE (MODE DE VEILLE) (LS10.0E/LS13.0E) Cette machine a une fonction appelée Energy Saver™ (Mode de Veille) qui n’est pas activée automatiquement. Quand on l’active, l’affichage passera au mode de sommeil (Mode Economique d’Energie) après 15 minutes de non-activité. Cette fonction épargne d’énergie électrique en désactivant toute électricité...
- Page 83 GARANTIE LIMITÉE D’USAGE RÉSIDENTIEL...
- Page 84 Ce qui n’est PAS couvert : • L’usure normale, l’assemblage ou l’entretien incorrects ou l’installation de pièces ou d’accessoires incompatibles ou COMPOSANTS ÉLECTRONIQUES ET PIÈCES • LS10.0E : 3 ANS LS13.0E, LS15.0E : non destinés à l’équipement tel qu’il est vendu.
- Page 85 SERVICE/RETOURS compensation monétaire ou autre pour de telles réparations ou le coût des • Le service à domicile est disponible à l’intérieur de pièces de rechange, y compris notamment les cotisations d’organismes 240 km (150 milles) du Détaillant de service autorisé sportifs, pertes de temps de travail, visites de diagnostic, visites d’entretien le plus près (pour une distance de plus de 240 km ou frais de transport.
- Page 86 Todos, en todas partes, podemos unirnos a la lucha contra el cáncer. Únase a ellos en LIVESTRONG.org.
- Page 87 PRECAUCIONES IMPORTANTES CONSERVE ESTAS INSTRUCCIONES Lea la GUÍA DE LA MÁQUINA ELÍPTICA antes de utilizar este MANUAL DEL PROPIETARIO. Cuando se usa un producto eléctrico, se deben tener precauciones básicas, incluidas las siguientes: lea las instrucciones antes de utilizar esta máquina elíptica. Es responsabilidad del propietario asegurarse de que todos los usuarios de esta máquina elíptica están informados adecuadamente de todas las advertencias y las precauciones.
- Page 88 PELIGRO PARA REDUCIR EL RIESGO DE DESCARGA ELÉCTRICA: Desconecte siempre la máquina elíptica del tomacorriente inmediatamente después de su uso, antes de limpiarla, al realizar trabajos de mantenimiento y al añadirle o quitarle piezas. ADVERTENCIA • Para reducir el riesgo de quemaduras, incendios, descarga eléctrica o lesiones: •...
- Page 89 ADVERTENCIA PARA REDUCIR EL RIESGO DE QUEMADURAS, INCENDIOS, DESCARGA ELÉCTRICA O LESIONES: • Mantenga el cable de corriente alejado de superficies calientes. No jale la unidad con el cable de suministro eléctrico ni utilice el cable como agarradera. • No utilice otros accesorios que no estén recomendados por el fabricante. Los accesorios podrían generar lesiones. •...
- Page 90 INSTRUCCIONES DE CONEXIÓN A TIERRA Si su máquina elíptica tiene una inclinación electrónica con un enchufe de 3 clavijas, debe seguir las siguientes instrucciones para la conexión a tierra. Este producto debe conectarse a tierra. En el caso de que una máquina elíptica se averíe o funcione incorrectamente, la conexión a tierra proporciona un camino de menor resistencia para la corriente eléctrica a fin de reducir el riesgo de descarga eléctrica.
- Page 91 INTRODUZCA SU NÚMERO DE SERIE Y NOMBRE DE MODELO EN EL ESPACIO ABAJO: NÚMERO DE SERIE: MÁQUINA ELÍPTICA LIVESTRONG ® NOMBRE DE MODELO: » Cuando llame para solicitar servicio técnico, haga referencia al NÚMERO DE SERIE y al NOMBRE DE MODELO.
- Page 92 VENTILADOR DE LA CONSOLA ALTAVOCES LS10.0E BARRA DE SUJECIÓN SUPERIOR EMPUÑADURAS CON SENSOR DE PULSO WARNING CONSULT A PHYSICIAN PRIOR TO USING ANY EXERCISE EQUIPMENT. POSSIBILITY OF SERIOUS INJURY IF EQUIPMENT IS USED IMPROPERLY. READ INSTRUCTION MANUAL BEFORE USING. KEEP CHILDREN OFF AND AWAY FROM THIS EQUIPMENT.
- Page 93 VENTILADOR DE LA CONSOLA ALTAVOCES LS13.0E BARRA DE SUJECIÓN LS15.0E SUPERIOR WARNING EMPUÑADURAS CONSULT A PHYSICIAN PRIOR TO USING ANY CON SENSOR DE PULSO EXERCISE EQUIPMENT. POSSIBILITY OF SERIOUS INJURY IF EQUIPMENT IS USED IMPROPERLY. READ INSTRUCTION MANUAL BEFORE USING. KEEP CHILDREN OFF AND AWAY FROM THIS EQUIPMENT.
- Page 94 HERRAMIENTAS PREENSAMBLAJE REQUERIDAS: Llave en L de 8 mm DESEMPAQUE Llave plana de 13/15 mm Destornillador/Llave en L de 5 mm Extraiga el producto del paquete en el lugar donde lo utilizará. Coloque la caja de la Destornillador (no incluido) máquina elíptica sobre una superficie plana y nivelada.
- Page 95 ENSAMBLAJE PASO 1 TORNILLERÍA PARA EL PASO 1: PERNO (A) ARANDELA ARANDELA 30 mm ELÁSTICA (B) DE ARCO (C) Cant.: 4 15 mm 17 mm Cant.: 4 Cant.: 4 TUBO ESTABILIZADOR Abra la BOLSA DE TORNILLERÍA PARA EL PASO 1. Una el TUBO ESTABILIZADOR al BASTIDOR PRINCIPAL usando 2 PERNOS (A), 2 ARANDELAS ELÁSTICAS (B) y 2 ARANDELAS DE ARCO (C) de...
- Page 96 ENSAMBLAJE PASO 2 TORNILLERÍA PARA EL PASO 2: Abra la BOLSA DE TORNILLERÍA PARA EL PASO 2. ARANDELA ARANDELA PERNO (F) PERNO (G) PLANA (D) ELÁSTICA (E) 20 mm 35 mm 20 mm 18 mm Cant.: 4 Cant.: 4 Cant.: 4 Cant.: 4 Una el CONJUNTO DE RIELES GUÍA al BASTIDOR PRINCIPAL usando 4 PERNOS...
- Page 97 ENSAMBLAJE PASO 3 TORNILLERÍA PARA EL PASO 3: NOTA: Tenga cuidado de no ARANDELA ARANDELA ARANDELA PERNO (K) ONDULADA (J) ELÁSTICA (B) PLANA (D) 20 mm pellizcar ningún 22,5 mm 15 mm 20 mm Cant.: 2 Cant.: 2 Cant.: 2 Cant.: 2 cable mientras conecta el...
- Page 98 ENSAMBLAJE PASO 4 TORNILLERÍA PARA EL PASO 4: ARANDELA ARANDELA PERNO (N) PLANA (L) ONDULADA (M) 20 mm 27 mm 29 mm Cant.: 2 Cant.: 4 Cant.: 2 ARANDELA ARANDELA ELÁSTICA (O) PLANA (P) 15,4 mm 20 mm Cant.: 2 Cant.: 2 SOPORTE DEL BRAZO DEL PEDAL...
- Page 99 ENSAMBLAJE PASO 5 TORNILLERÍA PARA EL PASO 5: ARANDELA ARANDELA ARANDELA POSTE DE LA CONSOLA DE GOMA (Q) PLANA (R) PLANA (D) 26 mm 25 mm 26 mm Cant.: 2 Cant.: 4 Cant.: 4 ARANDELA DE GOMA (Q) ARANDELA PLANA (R) ARANDELA PERNO (S) ELÁSTICA (B)
- Page 100 ENSAMBLAJE PASO 6 TORNILLERÍA PARA EL PASO 6: ARANDELA ARANDELA ARANDELA DE TEFLÓN (T) PLANA (U) ELÁSTICA (B) 28,4 mm 20 mm 15 mm Cant.: 4 Cant.: 2 Cant.: 2 TUERCA (W) PERNO (V) Cant.: 2 70 mm TUERCA (W) Cant.: 2 BARRA DE SUJECIÓN INFERIOR...
- Page 101 ENSAMBLAJE PASO 7 TORNILLERÍA PARA EL PASO 7: TORNILLO (X) TORNILLO (Y) 12 mm 15 mm POSTE DE LA Cant.: 2 Cant.: 2 CONSOLA CUBIERTA TRASERA CUBIERTA DELANTERA DE LA TAPA SUPERIOR DE LA TAPA SUPERIOR Abra la BOLSA DE LA TORNILLERÍA PARA EL TORNILLOS (X) PASO 7.
- Page 102 BARRA DE SUJECIÓN INFERIOR haciendo que SUPERIOR Y CUBIERTA las barras de sujeción se unan por completo. Asegure DE LA BARRA DE SUJECIÓN DE LS10.0E la BARRA DE SUJECIÓN SUPERIOR a la BARRA DE SUJECIÓN INFERIOR usando los TORNILLOS DE FIJACIÓN PREINSTALADOS.
- Page 103 ENSAMBLAJE PASO 9 Si desea utilizar la máquina elíptica sin las BARRAS DE SUJECIÓN SUPERIORES, puede instalar los CAPUCHONES DE LAS BARRAS DE SUJECIÓN en lugar de las BARRAS DE SUJECIÓN SUPERIORES. NOTA: Toda la tornillería para este paso está incluida en la bolsa de plástico con los CAPUCHONES DE LAS BARRAS DE SUJECIÓN.
- Page 105 FUNCIONAMIENTO DE LA MÁQUINA ELÍPTICA Esta sección explica cómo utilizar la consola y la programación de la máquina elíptica. La sección FUNCIONAMIENTO BÁSICO en la GUÍA DE LA MÁQUINA ELÍPTICA tiene instrucciones para lo siguiente: • UBICACIÓN DE LA MÁQUINA ELÍPTICA •...
- Page 106 L S 1 0 .0 E LS10.0E F I T N E S S J O U R N A L S Y S T E M PERSONAL LAST 5 WORKOUT WORKOUT Energy BEST WORKOUTS TOTALS STATS Saver HOLD TO RESET...
- Page 107 FUNCIONAMIENTO DE LA CONSOLA LS10.0E Nota: Hay una lámina protectora delgada de plástico transparente en el revestimiento de la consola que debe quitarse antes de usarla. VENTANA DE INDICADORES DE LCD: tiempo, distancia, velocidad, calorías, inclinación, vueltas y ritmo cardíaco.
- Page 108 L S 13 . 0 E LS13.0E F I T N E S S J O U R N A L S Y S T E M PERSONAL LAST 5 WORKOUT WORKOUT Energy BEST WORKOUTS TOTALS STATS Saver HOLD TO RESET MELLOW WEIGHT MUSCLE...
- Page 109 FUNCIONAMIENTO DE LA CONSOLA LS13.0E Nota: Hay una lámina protectora delgada de plástico transparente en el revestimiento de la consola que debe quitarse antes de usarla. VENTANA DE INDICADORES DE LCD: tiempo, distancia, velocidad, calorías, inclinación, vueltas y ritmo cardíaco. SISTEMA DE REGISTRO DE ACONDICIONAMIENTO FÍSICO LIVETRACK: consulte la página 115 para obtener más información.
- Page 110 VENTANAS DE INDICADORES EN PANTALLA DE LS10.0E PANTALLA DE LS10.0E Y LS13.0E • TIME (Tiempo): Aparece en minutos : segundos. Indica el tiempo restante o el que ha pasado en su sesión de ejercicio. • DISTANCE (Distancia): Aparece en millas. Indica la distancia LS10.0E...
- Page 111 LS10.0E Y LS13.0E PRIMEROS PASOS PARA PONER EN CERO LA CONSOLA Mantenga oprimida la tecla STOP (Parar) por 3 segundos. 1) Verifique que no haya ningún objeto cercano que dificulte el movimiento de la máquina elíptica. PARA BORRAR LA SELECCIÓN ACTUAL 2) Enchufe el cable de corriente y ENCIENDA la máquina elíptica.
- Page 112 LS10.0E Y LS13.0EINFORMACIÓN DE LOS PROGRAMAS MANUAL: Ajuste su nivel y la inclinación de forma manual durante su sesión de ejercicio. WEIGHT LOSS (Control de peso): Promueve el control de peso al aumentar y reducir la resistencia y la inclinación, al tiempo que lo mantiene dentro de su zona óptima para quemar LS10.0E...
- Page 113 MELLOW JOHNNY’S TRAIL (La senda de Mellow Johnny): Simula el ascenso y el descenso del senderismo. Ayuda a tonificar los músculos y a desarrollar el acondicionamiento cardiovascular. Objetivo basado en el tiempo con 10 niveles de dificultad para escoger. LS10.0E LS13.0E Segmentos del programa Program Segments LANCE’S CLIMB (La escalada de Lance): Experimente los cambios de nivel de la inclinación...
- Page 114 1) Oprima el botón de programa CUSTOM (Personal) y oprima ENTER (Aceptar). 2) Indique el tiempo de la sesión de ejercicios usando y oprima ENTER (Aceptar). LS10.0E LS13.0E 3) Use para indicar el nivel de resistencia para cada segmento. Oprima ENTER (Aceptar) para confirmar la configuración de la resistencia para cada segmento de la sesión de ejercicio.
- Page 115 CONFIGURACIÓN RESTABLECER LS10.0E Para activar el sistema de registro de acondicionamiento físico Restablezca toda la información registrada para el usuario 1 o 2 al LS13.0E LIVETRACK ™...
- Page 116 L S 1 5 . 0 E Energy Saver T O U C H S C R E E N D I S P L A Y W I T H F I T O U C H ™ T E C H N O L O G Y LS15.0E W O R K O U T S MANUAL...
- Page 117 FUNCIONAMIENTO DE LA CONSOLA LS15.0E Nota: Hay una lámina protectora delgada de plástico transparente en el revestimiento de la consola que debe quitarse antes de usarla. PANTALLA TÁCTIL: consulte la página 118 para obtener más información. LUZ DE AHORRO DE ENERGÍA: indica si la máquina está en el modo de ahorro de energía. GO (Ir): se utiliza para iniciar la sesión de ejercicio.
- Page 118 PANTALLA DE INICIO DE LS15.0E PANTALLA DE EJECUCIÓN SIMPLE S15.0E LS15.0E PANTALLA DE CONFIGURACIÓN DE LS15.0E PANTALLA DE EJECUCIÓN DE PERFIL DE LS15.0E...
- Page 119 FUNCIONAMIENTO DE LA PANTALLA DE LS15.0E El modelo LS15.0E tiene una pantalla táctil completamente integrada en la cual se explica toda la información necesaria para diferentes sesiones de ejercicio. Las indicaciones en la pantalla lo orientarán en la configuración del programa, pero primero usted debe identificar lo que significa cada botón/ícono (a continuación).
- Page 120 LS15.0E PRIMEROS PASOS COMMENT PROGRAMMER LA DATE ET L’HORLOGE 1) Verifique que no haya ningún objeto cercano que dificulte el movimiento de la máquina elíptica. 1) Entre en el menú de Ingeniero: oprima 2) Enchufe el cable de corriente y ENCIENDA la máquina elíptica. (El interruptor por 3 - 5 minutos la tecla para aumentar la se encuentra en la parte inferior frontal de la máquina elíptica).
- Page 121 INFORMACIÓN DE LOS PROGRAMAS LS15.0E 1) MANUAL: una sesión de ejercicio que le permite ajustar manualmente el valor de la resistencia y los valores de la inclinación en cualquier momento. 2) ROLLING HILLS (Colinas ondulantes): una sesión de ejercicio basada en el nivel que ajusta automáticamente el valor de resistencia para simular el ascenso de colinas caminado o corriendo.
- Page 122 INFORMACIÓN DE LOS PROGRAMAS LS15.0E 6) META DE RITMO CARDÍACO El primer paso para determinar la intensidad adecuada para su acondicionamiento físico es determinar su ritmo cardíaco máximo (RC máx.= 220 – su edad). El método basado en la edad es una predicción estadística promedio de su ritmo cardíaco máximo y es un buen método para la mayoría de las personas, especialmente para los novatos en el acondicionamiento basado en el ritmo cardíaco.
- Page 123 3) Quite el CABLE ADAPTADOR DE AUDIO cuando no lo utilice. MODELOS AHORRO DE ENERGÍA (MODO EN ESPERA) (LS10.0E/LS13.0E) Esta maquina tiene una función especial llamada Energey Saver™ (Modo en Espera) que no se activa automáticamente. Cuando Energy Saver es activada, la pantalla entrara en un modo de guardia “stand by” (Modo Económico de Energía) después de 15 minutos de no-actividad.
- Page 125 GARANTÍA LIMITADA DE USO EN EL HOGAR...
- Page 126 Qué NO está cubierto: que pueda extraerse). • El desgaste normal por el uso, el ensamblaje o el PARTES ELECTRÓNICAS Y PIEZAS • LS10.0E: 3 AÑOS mantenimiento inadecuado, la instalación de piezas LS13.0E, LS15.0E: 5 AÑOS o accesorios no destinados originalmente al equipo o que no El fabricante ofrece garantía de los componentes electrónicos, el acabado...
- Page 127 SERVICIO/DEVOLUCIONES de otro tipo para tales reparaciones o costos de piezas de sustitución, • Hay servicio técnico a domicilio dentro de los primeras incluidos, a título enunciativo y no limitativo, tarifas de membresía de 150 millas (240 km) del centro de reparaciones gimnasio, tiempo de trabajo perdido, visitas de diagnóstico, visitas de autorizado más cercano (las distancias mayores de mantenimiento o transporte.
- Page 128 Cottage Grove WI, 53527 LS10.0E-2012, LS13.0E-2012, LS15.0E-2012 Rev. 1.4 | © 2012 Johnson Health Tech Designed & Engineered in the U.S.A. • Made in China | Conçu et développé aux États-Unis. • Fabriqué en Chine | Diseño y tecnología de los EE.UU. • Hecho en China...
Need help?
Do you have a question about the LS10.0E and is the answer not in the manual?
Questions and answers
Where is the manual incline lever located on the Livestrong LS10.0E?
The manual incline lever on the Livestrong LS10.0E is located on the side of the elliptical. To adjust the incline, place one hand firmly on the top of the shroud and use the other hand to pull back and guide the manual incline lift lever up or down. Ensure the pin is engaged in the slot at the preferred incline level.
This answer is automatically generated
My incline is stuck and won’t go down. How do I fix this?
To fix a stuck incline on a Livestrong LS10.0E elliptical, follow these steps:
1. Stand on the Side – Position yourself on the side of the elliptical for stability.
2. Firmly Hold the Shroud – Place one hand on top of the shroud to steady the machine.
3. Use the Manual Incline Lever – With your other hand, pull back the *Manual Incline Lift Lever* while guiding it up or down.
4. Ensure Proper Engagement – Make sure the incline pin locks into the slot at the desired incline level.
If the incline is still stuck, check for any obstructions or loose parts and ensure the incline mechanism moves freely.
This answer is automatically generated
Hi, my program buttons are not working, is there software I need to update? All the other buttons work, but I cannot select the pre-programs like weight loss, muscle toner, strength builder, etc. For a Livestrong elliptical LS10.0E
I hear a regular clicking sound coming from the center of the main wheel. How can I fix this?