Table of Contents
Advertisement
Quick Links
Bea-fon SL651A
User Manual
Dear users,
Thank you for choosing Bea-fon SL651A
Please read this manual carefully before using the phone.
The Manufacturer reserves the ultimate right for the interpretation of this manual.
The Manufacturer reserves the right for the changes in the technical specification without advanced
notice.
1
Advertisement
Table of Contents

Related Manuals for Bea-fon SL651A


Summary of Contents for Bea-fon SL651A
- Page 1 Bea-fon SL651A User Manual Dear users, Thank you for choosing Bea-fon SL651A Please read this manual carefully before using the phone. The Manufacturer reserves the ultimate right for the interpretation of this manual. The Manufacturer reserves the right for the changes in the technical specification without advanced...
-
Page 2: Table Of Contents
Table of Contents 1. Security ............5 2. Phone Layout ............ 8 2.1. Key and Parts ........... 8 3. Getting Started ..........11 3.1. Batteries ............11 3.1.1. Installing and uninstalling the battery11 3.1.2. Charging the battery ....... 11 3.1.3. Using the battery ...... - Page 3 6. Messages ............17 6.1. Write message ..........17 6.1.1. SMS ..........17 6.1.2. MMS ..........17 6.2. Inbox ............. 18 6.3. Drafts ............. 18 6.4. Outbox ............18 6.5. Sent messages ..........19 6.6. Broadcast messages ........19 6.7. Message settings ..........19 7.
- Page 4 10.5.M1, M2, M3 ........... 25 10.6.Security settings ..........25 10.6.1. SIM security ........26 10.6.2. Phone security ....... 26 10.7.Connectivity ..........26 10.7.1. Bluetooth ........26 10.7.2. Data account settings ..... 27 10.8.Call settings ..........27 10.8.1. SIM call settings ......27 10.9.Restore factory settings .........
-
Page 5: Security
Thank you for selecting our mobile phone. This user guide will provide you with the general information and Bea-fon SL651A operation instructions. This color screen phone is designed for the 2G GSM network environment. Enjoy good call connecting quality and high speed data access over the network. - Page 6 You phone will emit radio frequency even in the standby mode. Turn off you phone when so instructed. Always obey all the local laws and regulations. Do not use your phone while driving. Use Hands-free operation, if available, and give full attention to driving and to the road.
- Page 7 Notice for batteries use Do not disassemble or modify your batteries, otherwise it can cause leakage, over heat, fire or explosion. Disposing battery in a fire can cause fire or explosion. Old batteries should be returned to your dealer or be disposed according to local regulations.
-
Page 8: Phone Layout
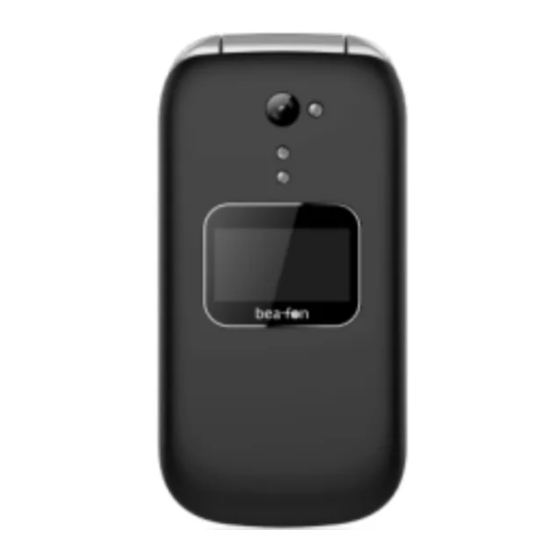
2. Phone Layout 2.1. Key and Parts... - Page 9 Receiver Camera Menu Key left Left Soft Key Menu Key right Right Soft Key Dialing Power/End Key Arrow key (up), On the idle screen this button takes you to the Messages menu. Arrow key (down), On the idle screen this button takes you to the Photo contacts Direct dialing numbers (M1,M2,M3) * Key, Press this button on the starting screen to enter the following symbols : * /+ /P / W.
-
Page 10: Display Symbols
2.2. Display symbols Signal Strength The vertical bars show the network connection strength. SIM card has signals. New messages This icon shows when you receive a new message. SIM Card has an unread message The inbox is full. This icon flickers when the inbox is full and you need to delete messages to receive new messages. Earphone This icon shows when you plug the earphone in. -
Page 11: Getting Started
3. Getting Started 3.1. Batteries The battery is included in the package. It is not fully charged out of factory but it may still be able to power on your phone. Please completely use up the power of the battery and then charge it for at least 12 hours with your phone turned off. You battery will reach its optimal state after three cycles of charge and discharge. -
Page 12: Battery Level Indicator
Please comply with the local regulations of disposing the battery (such as recycling). Do not dispose it as household waste. 3.1.5. Battery level indicator When the phone is on, the battery level indicator is located at the upper right corner of the screen. 3.2. -
Page 13: Unlock The Sim Card
3.2.3. Unlock the SIM card PIN code Your Personal Identification Number (PIN) code protects the SIM card against unauthorized use. Your PIN code is usually supplied with the SIM card. If this security function is enabled, you need to enter the PIN code every time you turn on the phone. You can also disable this function. -
Page 14: Dial
Power off In Standby mode, press to turn off the phone. 4.2. Dial When the network carrier is shown on the screen, your phone has entered the Standby mode and you may make or receive calls. If you have installed SIM cards, the network carriers will both appear on the screen. 4.2.1. -
Page 15: During A Phone Call
If call waiting is on, (You need to apply for this service to your network carrier.) when you are on the phone and there is another incoming call, your phone will notify you with a short tone. You may answer or reject that second call. If you choose to answer the second call, the current call will be on hold. -
Page 16: Main Menu
settings of camera. Set photo contact 4.6.1. 1. Press the arrow key down on the starting screen to go to the photo contact menu. 2. Switch with helping the arrow keys to the preferred contact number (1-8). 3. Press the Left Soft Key to edit the photo contact. 4. -
Page 17: Messages
Delete: Delete the current contact. Copy: Copy the current contact. Add to Blacklist: Add the number to black list and block the same number to call you. Phonebook settings:You can manage the phonebook with this function. Preferred storage: You can select preferred storage in SIM, phone or Both. -
Page 18: Inbox
message, you have the follow options: Send To: Send the message. Insert Symbol: Enter punctuation interface, select the symbol that you want. Input Method: Change the input method. Input method options: You can choose writing language. ... -
Page 19: Sent Messages
You can choose the following options while reading you’re sent SMS: Resend, Edit, Delete, Delete all and Details. 6.5. Sent messages Here you can see the messages which you have sent. 6.6. Broadcast messages Look up the broadcast messages. Your options include: Receive mode: Turn on or turn off cell broadcasting. -
Page 20: Organizer
Delete call logs: You can choose to delete Missed calls/Dialed calls/Received calls and All calls. Call Timers: You can view the last call, dialed calls, received calls Call time records. Can also reset the record. Last call: view the last call duration. ... -
Page 21: Tasks
Location, Repeat, Start date, Start time, End date, end time, alarm, description. The display and reminder will be executed according to your setting. Delete Event: Delete the selected affair. Jump To Date: Return to the calendar window after inputting the designated date with the cursor stopping on the inputting date. ... -
Page 22: Multimedia
9. Multimedia 9.1. Camera With this function, you can snap. Press Camera Key to snap under the view-finding window. Enter Camera Option, Your options include: Photos: Enter in the album folder. Camera settings: Set up the camera. Image settings: Set up the photo parameters. ... -
Page 23: Fm Radio
Browse style: You can select list style or matrix style. Send: Send the selected image to MMS or Bluetooth. Use as: Send the selected image file to the wallpaper. Rename: Change the name of the image. ... -
Page 24: File Manager
9.4. File manager The File Manager lists the all the files stored in your phone or memory card. 10. Settings You can set up various functions for the phone with this function. 10.1. Profiles Enter in the function; display the profile mode list including General, Silent, Meeting, Outdoor. Select one mode and enter the option menu: ... -
Page 25: Network Settings
112 or another emergency number on the numerical keypad. By pressing the SOS button, the SL651A will send an SOS SMS person (in case mobile number or telephones with SMS function is available for emergency contact) to the emergency numbers you have previously saved and will be automatically dialled in the given sequence. -
Page 26: Sim Security
password of the phone when leaving the factory is 1122. The password and PIN2 and SIM card are provided by the network operator. When the PIN/PIN2 is input wrongly in successively three times, the SIM card will be locked. The PUK /PUK2 are required to input if you want to unlock the SIM card. The PUK/PUK2 is provided by the network operator. If the PUK is input wrongly in successively 10 times, the SIM card will be locked and discarded permanently. -
Page 27: Call Settings
10.7.2. Data account settings This is MMS data account. You can select an entry of data account and press <Option> under the list window to perform: Edit : Edit data account Add PS account: Add new data account Delete: Delete the selected the data account;... -
Page 28: Restore Factory Settings
Check if call divert is set. If it is set, your incoming calls may be diverted to other numbers or devices. How can I use the memory card If you want to use a memory card please note that the SL651A supports SD micro cards up to 8GB. To use the installed memory card, please make following steps: Press the camera key on the starting screen then press the left menu key"Options"... -
Page 29: Error Message
Select the "Memory Card" and press the left menu key "OK". From now all images will be saved to the memory card into the folder "Photos". How to edit the SMS Centre number? Got to menu point: Messages - Message settings - SMS – SIM –- Profile settings - Profil 1 – Edit – SMSC address 11.2. -
Page 30: Certification Information (Sar)
Keep the phone and all its parts and accessories out of the reach of children. Keep the phone dry, all kinds of liquid will erode the electronic circuit. Do not use or store the phone in a dusty place to avoid damaging the removable parts. ... -
Page 31: Basic Specifications
<240 minutes* Liability Disclaimer: Bea-fon Mobile GmbH shall not bear any liability for any relevant, indirect, special, incidental, or inevitable injuries caused by using of this product, including injuries which have been considered, or unconsidered, likely to happen. For any losses caused by natural disasters (such as earthquake, flood, etc.) or any acts or accidents (including deliberate or accidental misuses by the user under these accidents or other unusual circumstances) which are beyond our liability scope, non-responsibility should be accounted on us.
Need help?
Do you have a question about the SL651A and is the answer not in the manual?
Questions and answers