Table of Contents
Advertisement
Quick Links
Advertisement
Table of Contents

Related Manuals for Bea-fon SILVER LINE SL860


Summary of Contents for Bea-fon SILVER LINE SL860
- Page 1 User Guide...
-
Page 2: General Information
The content of this User Manual is presented as it is. Bea-fon does not assume any responsibility for the accuracy and completeness of the content of this user manual. - Page 3 Please check the supplied accessories to ensure that the accessories are all there. Should one of the components be missing or defective, please contact the dealer where you purchased the telephone. The Bea-fon SL860 package contains: 1 Telephone • 1 Charging station •...
-
Page 4: For Your Safety
For your safety Read these simple guidelines. Failure to observe these rules can have harmful consequences or contravene regulations. Do not turn on the phone if the use of mobile phones is prohibited, or may cause interferences or danger. Traffic safety Do not use your phone when driving a vehicle. -
Page 5: Table Of Contents
Table of contents General Information ..............2 For your safety ................. 4 My phone (front face) ..............8 My phone (back face) ............... 11 Symbol description ..............12 New Messages ................. 12 Headset .................. 13 Insert the SIM card/Micro SD card ..........15 Charging the Battery .............. - Page 6 Camera .................. 35 Gallery ................... 37 Alarm ..................39 Calendar ................. 40 E-mail ..................41 Internet .................. 42 Extras ..................43 Multimedia ................44 Photo contacts ................. 45 Remove photo contact .............. 46 SOS emergency number ............49 Safety zone ................55 Settings ..................
- Page 7 Troubleshooting ............... 76 Intended operation/use ............. 80 Recycling ................84 Information ................89 More information ..............91...
-
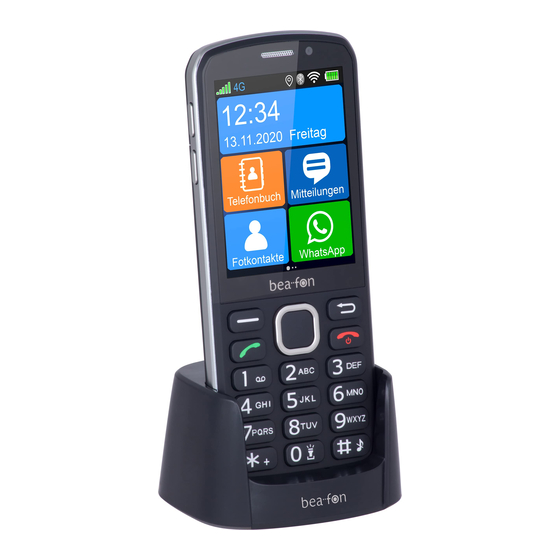
Page 8: My Phone (Front Face)
My phone (front face) - Page 9 Touch screen Use the touch screen of your phone to quickly and easily select options and perform functions The home screen is also called Desktop and provides access to all functions Menu button, left Disables the screen key lock. Calls the settings in an app. Navigation key (4-way) Use these 4 keys to navigate.
- Page 10 OK key Use the key to select the selected menu or confirm an entry in the menu. (e.g., PIN code entry) Red button Turn the phone on and off (press and hold) and end a call. Enables and disables the key lock Exit app or return to the main menu 10 * Key From the home screen, long press this key to toggle between...
-
Page 11: My Phone (Back Face)
My phone (back face) -
Page 12: Symbol Description
Camera Camera with 5.0MP resolution Emergency call key Press the emergency call button to initiate an SOS alarm Light support for photo shooting and torch function Symbol description Symbol Description Reception strength The vertical bars show the strength of the reception of your network operator. -
Page 13: Headset
This symbol is displayed when you receive a new message. Headset This symbol is displayed when headphones are plugged in. Missed calls This symbol is displayed when you did not answer a call. Ringer Silent mode & Press and hold down the hash key on the home screen. Call forwarding This symbol is displayed when all calls are being forwarded. - Page 14 Wi-Fi connection lost - there may be many reasons: No IP address assigned due to poor connection or the DHCP server is configured incorrectly. DNS server cannot resolve the Internet address or is not responding "no Internet connection": Server is not responding Location detector The app detects and/or queries the current location.
-
Page 15: Insert The Sim Card/Micro Sd Card
Insert the SIM card/Micro SD card The telephone must be switched off and disconnected from the charger. Remove the battery cover at the back of the phone by sliding the battery cover down. Should the battery be in the device, please remove it. - Page 16 There are 2 card slots: on the top right for a Micro SD card and on the left for the Micro SIM card. (Up to 128 GB, not included). With the gold contacts facing downwards, slide the cards carefully into the card slot.
-
Page 17: Charging The Battery
Charging the Battery There are two options for charging the SL860 battery: Charging station Charger Connect the charger to the charging port on the bottom side of • the phone. Then plug the charger into a socket. • When the phone is charged while turned on, the flash icon •... -
Page 18: Switching The Telephone On/Off
Switching the telephone on/off: Press and hold the red key for 1-2 seconds in order to switch on • the telephone. If the PIN code is active, the phone will now ask for your PIN • code, please enter it and confirm by pressing the Press and hold the red key for 1-2 seconds in order to switch off •... - Page 19 To answer a call with the keypad locked, press the green dial key. When you end or decline a call, the keypad and the touch screen are automatically locked again. Additional functions: See the menu item: Settings - Android Settings - Display Sleep.
-
Page 20: Screen Touch Function
Screen touch function The touch screen allows you to manage all operations. Drag your finger left or right to change the page. Tap an icon (tile) to open the relevant menu or run a programme. Press the red key to return to the home screen (Desktop). - Page 21 Swipe the app you want to close to the left; when the app disappears, it is closed. Or press the X icon in the corner of the respective window. If you want to close all apps at once, press the “CLOSE ALL” button. Important: As soon as you remove the app, it will be closed and the application will be disabled...
-
Page 22: Menu Navigation
Menu navigation Menu navigation consists selectable user interfaces: Silver Line • Use the "Silver Line" user interface to display all elements clearly and in a very large size. Classic Line • Use the Classic user interface to display all elements in a classic and modern way. -
Page 23: Make A Call
Make a call Enter the telephone number including the area code and press • the green key. International Calls: Enter a + sign (by pressing the star key twice) of the country before the area code. (If necessary, omit 0 before the area code). Press the "Back"... -
Page 24: Making Calls Using The Photo Contacts
Making calls using the Photo Contacts With a pre-installed contact page, you can create up to 6 contacts with images of your choice. Create photo contact Please swipe to the right on the home screen to access Photo contacts. Tap a photo contact to call the contact and then press the number or the green dial key. -
Page 25: Making A Call Using The Phonebook
Making a call using the phonebook If contacts are stored in the phonebook, you can make a call using the phonebook. ^ Tap the “Phonebook” button • Using the navigation key scroll (up/down) to the desired • contact. Press the green key to call the number. -
Page 26: Phonebook
Phonebook Create new contact Open the Phonebook and press Options or the left menu key. Select the menu item Add contact You can make the following settings: Options - Location: Select the desired location: Phone or SIM • card Name: Enter the name •... - Page 27 Use this function to transfer existing contacts from the SIM card to the phone, or vice versa. In the phone directory, press the left menu key or tap Options • on the display. Select the menu item Copy There are two options to select from: Copy from phone to SIM: •...
- Page 28 Delete contact In the phone directory, tap the contact you want to delete. Select the menu item Delete and confirm with Yes. • Delete multiple contacts If you want to delete multiple contacts, tap Delete multiple • select the contacts you want to delete Then press Options •...
- Page 29 In the phone directory, tap the contact you want to edit. Select the menu item Edit to change information in the contact • fields. Additional functions: In the phone directory, tap the desired contact and press/tap Options Black list: Used to block unwanted calls from certain phone numbers. Speed dial: Here you can assign any contacts to keys 2-9, which you can then dial by pressing and holding down the desired key on the home screen.
-
Page 30: Send Messages
Send messages You can receive and send Messages (SMS/MMS) depending on the network provider. For more information, please contact your carrier. Type messages: Press the Messages button • Select the desired contact from the existing messages. When sending a message to a contact for the first time, please proceed as follows: Press the Options... - Page 31 Text input The following functions are available: Press the # hash key to toggle between lowercase, uppercase • and word recognition [R9]: and note the icon in the upper right corner of the display which shows the current input method. 123, En, EN, en ...
- Page 32 Press the Back key (Delete) to delete a letter; press and • hold the Back key (Delete) to delete the whole text. Delete messages In Messages, press the left menu key (Options) to access the • Delete menu Here you can delete all messages or messages for specific contacts If you want to delete a single message, long press on this message to call up the Delete menu SMS and MMS settings...
-
Page 33: Call List
Call list Your telephone stores logs for Missed calls, Dialed calls, and Received calls • Press the green dial key or the Call list tile The newest entries are at the top of the list. You can save phone numbers directly from the Call list to the Phonebook by tapping the contact to open the settings and selecting contact. -
Page 34: Whatsapp
WhatsApp WhatsApp is a "messenger". However, you can also telephone and video telephone with WhatsApp, depending on the Internet connection quality. To be able to use WhatsApp, you need a valid phone number and an Internet connection. Please ensure that both are available before you run WhatsApp. Note: WhatsApp may need to be updated, please follow the instructions on the display as soon as you have started WhatsApp. -
Page 35: Camera
Camera Press the camera key or click on the camera icon to enable this function Taking photographs Point the camera lens at a position or an object and press the Camera key or the key to take a photo. After shooting, the photo will be saved automatically. - Page 36 Keypad shortcuts Switch between a front-facing camera and a back camera Switch to gallery Settings for the respective active camera and function. Return to the desktop In camera mode you can toggle between camera and video function in the upper left of the display.
-
Page 37: Gallery
Gallery In the gallery, all images are sorted by the dates they were taken. You can manage images, videos, graphics, recordings, and received files. These files are stored in the phone memory or on an inserted memory card and are managed in folders. View images Click on the desired folder and then click on the image to view it in full screen mode, click on the left/right arrows... - Page 38 Share image To share an image, press the left menu key; in the menu that opens, press “Share” - the phone will list the available options for sharing the image. Delete image To delete an image, press the left menu key; in the menu that opens, press “Delete”...
-
Page 39: Alarm
Alarm Press the Alarm tile. To set a new alarm, press Options – New alarm. In Alarm menu, you can create multiple alarms and enable and disable them separately by tapping the respective alarm and selecting “On” or “Off”. This icon appears in the status bar when an alarm is enabled When the alarm sounds, swipe the alarm icon to the right to stop it or swipe it to the left to snooze. -
Page 40: Calendar
Calendar The calendar shows you the month overview, the current date and the calendar week. To go to a past or future date, tap the left/right arrows or use the navigation key. < September 2017 > Add reminder: Tap the desired date. 35 28 29 30 31 1 Press the left menu key 36 4... -
Page 41: E-Mail
E-mail The phone also allows you to receive and send emails. To do so, you need an email account and the corresponding data. This email client supports the following protocols: POP3, IMAP, and Exchange. Please follow the app instructions to set up an email account. Important: As this email app is not an in-house development of Beafon, we can not guarantee the serviceability of this app! Please note that this app... -
Page 42: Internet
Internet This app allows you to access the Internet. The browser contains the Google page as a default home page, so that you can search easily and conveniently on the Internet. -
Page 43: Extras
Extras The Extras menu item includes multiple apps Flashlight to switch flashlight off/on. Calculator pocket calculator simple computational tasks Note - suitable for simple brief notes Reminder voice memos - suitable for voice recording with a time reminder SIM toolkit - service that must be supported by the network provider. -
Page 44: Multimedia
Multimedia The Multimedia menu item includes multiple apps FM radio to listen to the radio at any time. Music to play your favourite songs. Video player to play your videos on the phone. Audio recorder for making voice memos Note on FM radio: You need a headset (not included) to listen to the radio. -
Page 45: Photo Contacts
Photo contacts With the Photo Contact app, you can create up to 6 contacts with images of your choice. Create photo contact From the home screen, press the photo contact tile and then swipe to the right to scroll through the individual photo contacts. Options or the left menu key to select... -
Page 46: Remove Photo Contact
Remove photo contact To remove a photo contact, open the Photo Contact app and tap the desired photo contact. Press the left menu key or tap Options on the display. In the menu, select “Delete”. Note: The contact is removed from the photo contact list, but not deleted from the phone directory. - Page 47 The SL860 phone includes additional pre-installed apps which are not located on the desktop. Tap “Apps” to locate a list of the pre-installed apps which you can run. Every other app you install on this phone will appear in this list Below you will find a list of available apps: Safety zone SOS settings...
- Page 48 1. Safety zone To use this app, see page 55 2. SOS settings To use this app, see page xx Direct access to the Download folder Uptodown App Store The App Store allows you to download additional apps. If there are certain functions missing from the phone, you have the option to search for a suitable app for you with this App Store.
-
Page 49: Sos Emergency Number
SOS emergency number General The SOS app is a simple function that can save lives at a crucial moment. You can save any number of contacts and an SMS notification. These SOS numbers, which can be initially saved in sequence, will be dialled automatically in an emergency as soon as you press and hold the emergency call button at the back of the mobile phone for approx. - Page 50 As a next step, if the first SOS number is dialled; if this is not available, the next number will be dialled automatically, etc. The phone tries to reach the SOS contact for approx. 19 seconds (based on the connection set-up). If it is not reached, the phone will terminate it automatically and select the next SOS number.
- Page 51 Note: If you want to stop or cancel the emergency call, press the red key or click on the SOS button. You can also click on the red circle on the screen. When using a Prepaid card: Always ensure for sufficient funds on your prepaid card, since private emergency call numbers cannot be dialed without sufficient funds.
- Page 52 Important: During an emergency call, the hands-free function is activated automatically. Do not hold the phone to your ear! SOS app settings The following menu items are available in the main menu: General SOS support (On/Off) Enables or disables the SOS button or the SOS function. Alarm signal (On/Off) Disables the alarm or enables the silent alarm (vibration only) Euro emergency call...
- Page 53 attempts. Send message (On/Off) As an option, you can also choose whether to send an SOS SMS to all SOS contacts in addition to the SOS emergency call. Please note that the SOS receiver uses an SMS compatible device. (Mobile device). Title &...
- Page 54 To delete contacts, click on the red beside the contact name Attention: To detect the location, the following menu item must be enabled: Settings – Android Settings – Safety & Location: Mode ON with "High Accuracy"! Beafon assumes no liability for the accuracy or reliability of the location detection!
-
Page 55: Safety Zone
Safety zone The security zone is a location-dependent function, which requires a starting point in order to create a security zone. If the security zone is left, the saved SOS contacts will receive the location information via SMS. The following settings are available: Starting point The starting point marks the centre point of the radius from where the security zone starts. - Page 56 If no location or very inaccurate location is detected, try changing your location; ideally, a GPS signal would be the most accurate way to detect your location. Then please click on the icon again to set the starting point. Coverage Specify the radius of the security zone.
- Page 57 Zone Here you can enable or disable the security zone. If the security zone is left, an SMS with the location details and the time will be sent along with an address, if any. If the security zone is left, a location detection can be requested from one of the SOS contacts by means of a simple call or SMS.
-
Page 58: Settings
Settings Menu Settings. Here you can make your phone's settings! The following icons and/or menu items can be found in the Settings: Airplane mode Menu Settings - Airplane Mode. When Airplane Mode is enabled, the mobile communication units (GSM, UMTS, LTE) and other communication units, if any, such as Bluetooth and Wi-Fi are switched off. - Page 59 The phone shows you the available WLAN networks. Please select the desired WLAN and enter the WLAN password, if required. You can enable or disable mobile data to restrict Internet connection for apps and services via the mobile phone network. When mobile data are enabled, apps and services use your mobile connection when there is no Wi-Fi connection.
- Page 60 Bluetooth Menu Settings - Bluetooth Here you can enter the Bluetooth settings. With Bluetooth, you can connect your telephone with a compatible Bluetooth device. To enable Bluetooth, tap the button in the upper right hand corner of the screen. The phone immediately starts to scan and list the area for Bluetooth devices.
- Page 61 Set visibility • View received files • Low battery notification Menu Settings - Low battery notification. Here you can select contacts to be notified by SMS as soon as the SL860 battery is very low. You can change the preset SMS text as desired...
- Page 62 Key tones Menu Settings - Key tones. Turn on the key tones function if you want to hear a sound every time you press a key. Ringtone and volume Menu Settings - Ringtone and Volume. Here you can manage the following settings: Media volume •...
- Page 63 Common settings Menu Settings - Common Settings. Here you can manage the following settings: Call settings: Here you can manage all call settings such as call • barring, call forwarding or mailbox Display settings: Here you can set display brightness, •...
- Page 64 Common settings In the Settings - Theme menu, you can access the user interfaces. There are three user interfaces. Individual menus Silver Line Classic Line Here each menu is All elements are very Here all elements are displayed separately large and clearly presented in a classic on a page and can displayed.
- Page 65 Android settings Here you can access the system settings for the operating system. Here is a list of settings available: Networks & Internet Wi-Fi Mobile cellular Data use Hotspot and Airplane network tethering mode Connected devices Bluetooth Apps & notifications Battery Tones Media...
- Page 66 Languages & input Date & time Reset options About the phone...
-
Page 67: Uninstall App
Uninstall app In the Settings – Android – Apps & Notifications, menu, you will find a list of all installed apps. Select the app to be removed from the app list In the app details, press the Uninstall button and confirm with OK. Important: Please note that the apps removed from the list will be permanently deleted from the system. -
Page 68: Storage
Storage If you use a memory card, you can manage it in the following menu: Settings – Android– Memory. Choose between Phone memory card. Change silent mode From the home screen, long press the # hash key to switch the phone between silent and normal mode. -
Page 69: Shortcut (Speed) Dialling
Shortcut (speed) dialling Assign a phone number to a number key (2 to 9). Proceed as follows: Open the Phonebook and press the left menu key or tap Options on the display. In the speed dial list, tap the desired number you want to assign •... -
Page 70: Headset/Bluetooth Mode
Headset/Bluetooth mode If a headset is connected to the 3.5 mm jack (or a Bluetooth headset), you can answer the call using the button on the headset (not included). Volume control You can adjust the call volume during the phone call by pressing the side keys (up and down). -
Page 71: Data Connection And Roaming
Data connection and roaming To be able to use a data connection on the go, make sure that roaming is enabled. This means the phone and/or the SIM card also uses the infrastructure of other carriers. Roaming can be enabled in the following menu items: Settings –... -
Page 72: Connect The Telephone To The Computer
Connect the telephone to the computer To copy the images you have taken with the SL160 camera onto your PC, please proceed as follows: Connect the phone to the computer using a Micro USB cable. • (included) The computer will recognize the telephone as removable media. •... -
Page 73: Menu Structure
Menu structure This menu structure is available in the default setting and cannot be changed. Home screen 1. App page 2. App page... -
Page 74: Specifications
Specifications: GSM band 850/900/1800/1900 UMTS band 2100/1900/900/850 LTE band 2100/1800/2600/900/800 (1,3,7,8,20) Wi-Fi 802.11: /b/g/n (2.5 GHz + 5.0 GHz) Storage RAM: 512 ROM: 4 GB Battery: Li-ion 3.7V - 1400mAh Dimensions: 134 x 57 x 11.6 mm Standby Up to 200 hours* time: Talk time: Up to 220 minutes*... - Page 75 Max. transmission power GSM900 2.818 W GSM1800 0.696 W WCDMA 900 0.158 W WCDMA 2100 0.192 W LTE B1 0.169 W LTE B3 0.164 W LTE B7 0.153 W LTE B8 0.208 W LTE B20 0.218 W Wi-Fi 0.039 W Bluetooth 0.004 W...
-
Page 76: Troubleshooting
Head 0.428 W/kg Body 1.427 W/kg Troubleshooting The phone cannot be turned on: Check whether the battery is correctly inserted into the telephone. Check the battery status, charge the battery for 24hrs, and if necessary, replace it (6 months warranty). No location detection is possible: Please check if the location detection has been enabled! Go to the menu item:... - Page 77 SIM card error: Dirt on the contact areas of the SIM card? Clean the contact areas of the SIM card. SIM card is not inserted properly, insert the SIM card correctly. SIM card does not function or is damaged? Get your SIM card checked by your network operator.
- Page 78 Check whether the SIM card is registered on the network. Check whether enough credit is on your SIM card. You do not receive incoming calls: Check whether the SIM card is registered on the network. Check whether the phone is turned on. Check the signal strength Have you activated call barring? If so, please disable all call barring.
- Page 79 Briefly remove the battery and restart the device I cannot receive or send MMS. You are out of range of the mobile network. For information about coverage, please contact your network operator. SIM card is invalid. Contact your service provider Note: If a specific problem cannot be solved by means of the information above,...
-
Page 80: Intended Operation/Use
Intended operation/use Phone If you follow the recommendations below, you will prevent the warranty from early becoming null and void, and you will continue to enjoy your product for years to come. Please use original accessories only or accessories approved by your •... - Page 81 Never leave the mobile phone exposed to sunlight or in an • environment with strong radiation as high temperatures will significantly shorten the life of the electronic components. Always keep the mobile phone dry as liquids could damage the • integrated circuit.
- Page 82 All notes apply likewise to the phone, battery, charger, and all the accessories. Should one of these parts malfunction, send it to your dealer. The staff will assist you and repair the device, if necessary. Battery Your phone is supplied by means of a rechargeable battery. •...
- Page 83 Extreme temperatures have an adverse effect on the performance of • your battery. Use the battery only for its intended purpose. Do not use damaged • chargers or batteries. Do not short-circuit the battery. An unintentional short-circuit may occur when the plus and minus poles of the battery are connected directly by means of a metallic object.
-
Page 84: Recycling
Recycling Always return your used electronic products, batteries, accumulators, and packaging materials to dedicated collection points. In this way you help prevent the uncontrolled waste disposal and promote the reuse of material resources. The crossed out wheeled bin symbol found on the product, battery, packaging material, and in the documentation means that electrical and electronic products, batteries, and rechargeable batteries should be disposed of separately from your household... - Page 85 Always observe special regulations applicable in a particular area, and always turn off the phone when the use of mobile phones is prohibited, or if interferences are caused by the phone, or if dangerous situations may arise. Always keep the device in its normal operating position. Parts of the phone are magnetic.
- Page 86 Pacemakers: Pacemaker manufacturers recommend that a minimum distance of 20 cm between a mobile phone and a pacemaker be maintained in order avoid potential interferences with pacemaker. These recommendations are consistent with the independent research and recommendations of Wireless Technology Research. For people with a pacemaker: You should always keep a minimum distance of 20 cm between the •...
- Page 87 Other medical equipment: Operation of a radio, including a mobile phone, may interfere with the function of insufficiently shielded medical equipment in certain cases. If you need information to adequately shield a medical device from external RF energy, or have questions about other subjects, please contact a physician or a medical device manufacturer.
- Page 88 clearly marked. These e.g. include below deck on boats; vicinity to transfer pipes and storage facilities of chemicals; vehicles using liquefied petroleum gas (such as propane or butane); areas, where the air contains chemicals or particles such as flour, dust or metal powder; any other areas, where you are normally advised to switch off the vehicle engine.
-
Page 89: Information
Information Certification information (SAR): This phone model meets the requirements for electromagnetic fields. The SAR (specific absorption rate) regulates a standard value of 2.0 W/kg as the mean value per 10 grams of body tissue, and this mobile phone type has a test value of: 1.427 W/kg, which complies with the EU Radio Equipment Directive (RED) 2014/53/EU. - Page 90 Disclaimer: Bea-fon Mobile GmbH shall not bear any liability for any relevant, • indirect, special, incidental, or inevitable injuries caused by using this product, including injuries which can be predictable or not. For any losses caused by natural disasters (such as earthquakes, •...
-
Page 91: More Information
More information Should you have questions or want to get more information about any of our products, you can visit our websitewww.beafon.com. or even contact us. E-mail : service@beafon.com Address BEAFON MOBILE GmbH 4722 Peuerbach Enzing 4 Austria We reserve the right to make technical changes without prior notice. v.
Need help?
Do you have a question about the SILVER LINE SL860 and is the answer not in the manual?
Questions and answers