Table of Contents
Advertisement
Quick Links
Download this manual
See also:
User Manual
Advertisement
Table of Contents

Subscribe to Our Youtube Channel
Related Manuals for QTek 8500

Summary of Contents for QTek 8500
- Page 1 Quick Start Guide...
-
Page 2: What's In The Box
1. What’s in the Box? Battery AC Adapter Getting Started CD USB Cable User Manual and Quick Start Guide Phone Headset... -
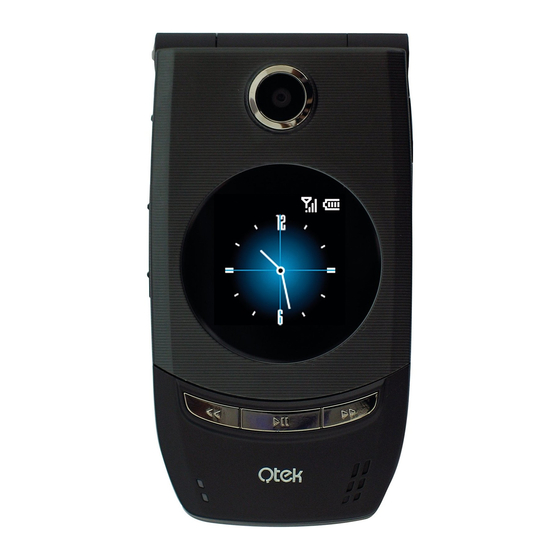
Page 3: Your Phone At A Glance
2. Your Phone at a Glance 1. Camera Lens 1.3 Mega-pixel CMOS lens on the flip cover. It supports the self-capturing feature from the external screen when the flip cover is closed. When your phone is powered on and the flip 2. - Page 4 8. Voice Notes/ Long press to launch Voice Notes recorder. Short press to launch Voice Tag Voice Tag feature. Please note the button does not work when the flip cover is closed. 9. Volume Press to increase or decrease the earpiece volume during a call. 10.
- Page 5 14. Earpiece Listen to a phone call. 15. Display Screen 16. Left Soft Key Press to perform the command shown in the label above the button. 17. TALK Press to dial a phone number, answer a call, switch to another call, or put a call on hold. Hold to activate/deactivate loudspeaker mode.
-
Page 6: Led Indicator Lights
LED indicator lights Various colors that might display in the two LED Indicators are summarized here. Upper LED Status Solid green Battery is fully charged. Blank Device is powered off, device in flight mode or no network coverage. Solid amber Battery is charging or the phone is using ActiveSync to synchronize with a PC. -
Page 7: Install The Sim Card
3. Set Up Your Phone in 6 Steps Install the SIM card Your SIM (Subscriber Identity Module) card is given to you by your wireless service provider and contains your basic subscriber information, such as your phone number and your address book. Before you begin, ensure that the phone is turned off. -
Page 8: Install The Micro Sd Card
Install the Micro SD card Use a Mini-SD (Secure Digital) card in your phone to store images, video clips, music, and other data you may have obtained. 1. Open the battery cover. Insert the Micro 2. Remove the SIM card if you have installed. SD card. -
Page 9: Turn On Your Phone
Turn on your phone Open your phone and locate the POWER/END button. Press and hold the button to turn on the phone. POWER/END button Install ActiveSync ActiveSync synchronizes information between your phone and your PC, keeping information up to date in both devices. Before you connect your phone to your PC, you must install ActiveSync on the PC. - Page 10 4. Set Up an E-mail Account and Send a Message Your phone can be set up to retrieve e-mails from Outlook e-mail, Hotmail, POP3 and IMAP4 accounts. However, you need to set up your e-mail account with an Internet service provider (ISP) or an account that you access using a VPN server connection (typically a work account) before you can send and receive mail.
-
Page 11: Browse The Web
5. Browse the Web Your phone comes with Internet Explorer Mobile installed. Internet Explorer Mobile is a fullfeatured Internet browser, optimized for use on your phone. You can also use ActiveSync to synchronize the Internet Explorer favorites on your PC with your phone so you can use them with Internet Explorer Mobile as well. - Page 12 6. Take a Picture and Send It Taking photos and shooting video clips with audio is easy with your phone’s built-in camera. To open Camera or Video Recorder, do any of the following: • On the Home screen, click Start > Camera. •...
- Page 13 To use the Pictures & Videos program • Click Start > Pictures & Videos. • After capturing image, click the View icon ( ) on the Review screen to switch to Pictures & Videos. The Pictures & Videos program allows you to view pictures and play video clips on your phone, and even view the pictures as a slide show, beam them, send them via a messaging program, edit them, or set them as the background on the Home Screen.
-
Page 14: Personalizing Your Phone
7. Personalizing Your Phone To set up the Answer Mode You can answer an incoming call by pressing TALK ( ) or any numeric key on the keypad, or simply by opening the flip cover. 1. On the Home screen, click Start > Settings > Phone. 2. -
Page 15: To Set The Date And Time
To set the date and time Your phone should already be set up with the regional settings that are appropriate for your locale. However, you can specify the language, locale, date and time style, as well as number and currency formatting options by doing the following: 1. -
Page 16: Secure Your Phone
8. Secure Your Phone There are several levels of security on your phone. You can protect your phone from unauthorized use by requiring a type of password called a PIN (personal identification number) in order to make calls. Your first PIN will be given to you by your wireless service provider. - Page 17 To enable/disable Device Lock Device Lock is an additional security feature that prevents unauthorized use of your phone. To enable the function: 1. On the Home screen, click Start > Settings > Security. 2. Click Device Lock. 3. Select the Prompt if device unused for item, then select the amount of time for the phone to be inactive before automatically locking.
-
Page 18: Learn More
9. Learn More For more in-depth instructions refer to the User Manual, or look for information on Microsoft® Windows Mobile™ Web site (http://www.microsoft.com/windowsmobile/smartphone/).
Need help?
Do you have a question about the 8500 and is the answer not in the manual?
Questions and answers