Table of Contents
Advertisement
Advertisement
Table of Contents
Troubleshooting

Related Manuals for Lenovo IdeaPad Y430


Summary of Contents for Lenovo IdeaPad Y430
- Page 1 Lenovo IdeaPad Y430 User Guide User Guide V1.0 V1.0...
- Page 2 RESTRICTED RIGHTS. Use, duplication or disclosure by the Government is subject to the GSA ADP Schedule contract with Lenovo, if any, or the standard terms of this commercial license, or if the agency is unable to accept this Program under these terms, then we provide this Program under the provisions set forth in Commercial Computer Software–Restricted Rights at FAR 52.227-19, when applicable, or under Rights in Data-General, FAR...
-
Page 3: Energy Star Model Information
Lenovo is proud to offer our customers products with an ENERGY STAR compliant designation. Lenovo computers of the following machine types, if the ENERGY STAR mark is affixed, have been designed and tested to conform to the ENERGY STAR 4.0 program requirements for computers. - Page 4 For more information about ENERGY STAR, visit http://www.energystar.gov. Lenovo encourages you to make efficient use of energy an integral part of your day-to-day operations. To help in this endeavor, Lenovo has preset the following power-management features to take effect when your computer has been inactive for a specified duration: Table 1.
-
Page 5: Explanation Of Hard Disk Capacity
Explanation of Hard Disk Capacity Dear user, While using your computer, you may discover that the nominal hard disk capacity indicated is somewhat different from the disk capacity displayed by the operating system. For example, a nominal 40GB hard disk will appear as less than 40GB in the operating system. This discrepancy is not an error in hard disk installation nor any other problem, but a normal phenomenon of computers. - Page 6 X × 0.931 G. II. A portion of the hard disk space is used for specific purposes Lenovo computers come with preinstalled OneKey Rescue System, so the hard disk has a special portion partitioned before delivery, which is used to store hard disk mirror and OneKey Rescue System program files.
-
Page 7: Table Of Contents
Using the Touch Pad...13 Using the Keyboard ...14 Special keys and buttons ...17 Using the optical drive ...20 Using memory cards...21 Using Lenovo Remote (Specific models only)...22 Using the Integrated Camera...22 Using the Internet...23 Securing your computer...26 Installing Device Drivers...35 Using battery and AC adapter ...35... - Page 8 Important Safety Information .. 68 Caring Your Computer ... 85 Accessibility and Comfort ... 93 Maintenance... 96 Appendix A. Lenovo Limited Warranty ... 100 Warranty Information ... 108 Lenovo Warranty Service Telephone Numbers ... 111 Appendix B. Customer Replaceable Units (CRUs) ... 113 Appendix C.
- Page 9 Contents...
-
Page 10: Chapter 1. Getting To Know Your Computer
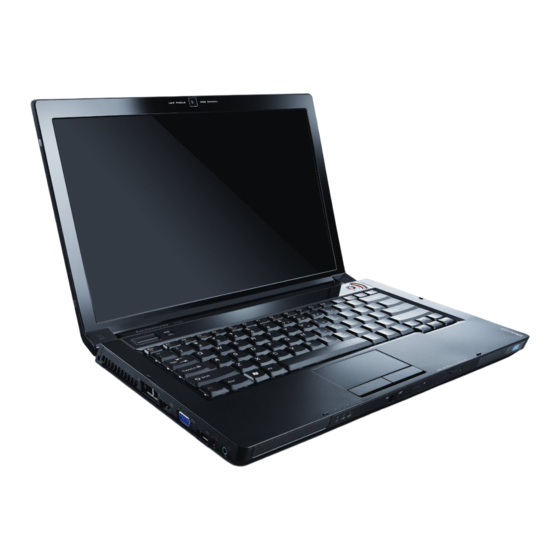
Chapter 1. Getting to Know Your Computer Top View - - - - - - - - - - - - - - - - - - - - - - - - - - - - - - - - - - - - - - - - - - - - - - - - - - - - - - - - - - - - - - - - - - - - - - - - - - - - - - - - - - - - - - - - - - * The illustrations in this manual may differ from the actual product. - Page 11 Chapter 1. Getting to Know Your Computer Wireless LAN antennas An isotropic antenna system is built into the display for optimal reception, enabling wireless communication wherever you are. Computer display The color display with TFT technology provides clear and brilliant text and graphics.
-
Page 12: Left-Side View
Chapter 1. Getting to Know Your Computer Left-side View Security keyhole Your computer comes with a security keyhole. You can purchase a security cable and lock to fit this keyhole. Note: Before purchasing any security product, verify that it is compatible with this type of security keyhole. - Page 13 Chapter 1. Getting to Know Your Computer Fan louvers The fan louvers allow warm air to exit the computer. Important: Make sure that paper, books, clothing, cables or other objects do not block any of the fan louvers or else overheating of the computer may occur.
-
Page 14: Right-Side View
Chapter 1. Getting to Know Your Computer Right-side View - - - - - - - - - - - - - - - - - - - - - - - - - - - - - - - - - - - - - - - - - - - - - - - - - - - - - - - - - - - - - - - - - - - - - - - - -... - Page 15 Chapter 1. Getting to Know Your Computer IEEE 1394 connector ... 42 USB 2.0 port ... 40 Optical drive ... 20 AC power adapter jack Connect the power adapter here to supply power to the computer and charge the internal battery. Note: To prevent damage to the computer and battery pack, use the supplied AC adapter only.
-
Page 16: Front View
Chapter 1. Getting to Know Your Computer Front View - - - - - - - - - - - - - - - - - - - - - - - - - - - - - - - - - - - - - - - - - - - - - - - - - - - - - - - - - - - - - - - - - - - - - - - - - - - - - - - - - - - - - -... - Page 17 Chapter 1. Getting to Know Your Computer System status indicators The system status indicators show the current status of your computer. Wireless device switch Use this switch to simultaneously turn on or turn off Wireless LAN and Bluetooth devices. CIR port... 22 Multi-media reader slot...
-
Page 18: Bottom View
Chapter 1. Getting to Know Your Computer Bottom View - - - - - - - - - - - - - - - - - - - - - - - - - - - - - - - - - - - - - - - - - - - - - - - - - - - - - - - - - - - - - - - - - - - - - - - - - - - - - - - - -... - Page 19 The Lenovo wireless network card is secured in a compartment. Important: Do not disassemble or replace the wireless LAN card by yourself! If you do need to, ask a Lenovo authorized service center or dealer to disassemble or replace it. Subwoofer The multimedia subwoofer features a super bass effect while you are watching movies or enjoying music.
- Page 20 Hard Disk Drive The hard disk drive is secured in a compartment. Important: Do not disassemble or replace the hard disk drive by yourself! If you do need to, ask a Lenovo authorized service center or dealer to disassemble or replace it.
-
Page 21: Chapter 2. Using Your Computer
Chapter 2. Using Your Computer Putting your computer to Sleep or Shutting It Down When you finish working with your computer, you can put it to sleep or shut it down. Putting your computer to Sleep If you will be away from your computer for only a short time, put the computer to sleep. When the computer is in sleep, you can quickly wake it and bypass the startup process. -
Page 22: Using The Touch Pad
Chapter 2. Using Your Computer Using the Touch Pad The touch pad consists of a pad the keyboard. To move the cursor over the pad in the direction in which you want the cursor to move. The functions of the left the left and right mouse buttons on a conventional mouse. -
Page 23: Using The Keyboard
Chapter 2. Using Your Computer Note: You can also attach and use a USB mouse through the USB connector. see “Connecting a Universal Serial Bus (USB) device” on For details, page 40 Using the Keyboard - - - - - - - - - - - - - - - - - - - - - - - - - - - - - - - - - - - - - - - - - - - - - - - - - - - - - - - - - - - - - - - - - - - - Your computer has a numeric keypad and function keys incorporated in the standard keyboard. -
Page 24: Function Key Combinations
Chapter 2. Using Your Computer Function Key Combinations Through the use of the function keys, you can change operational features instantly. To use this function, press and hold the Fn key of the function keys ; then press one... - Page 25 Chapter 2. Using Your Computer The following describes the features of each function key. Fn + Esc: Turn on/off the integrated camera. Fn + F1: Put your computer in sleep mode. Fn + F2: Turn off the LCD screen (any subsequent operation will turn the LCD screen back on).
-
Page 26: Special Keys And Buttons
Chapter 2. Using Your Computer Special keys and buttons Your computer has several special keys and buttons. Touch inductive panel and multi-media buttons - - - - - - - - - - - - - - - - - - - - - - - - - - - - - - - - - - - - - - - - - - - - - - - - - - - - - - - -... - Page 27 Touch inductive panel ( Mute/unmute the sound. Switch between Performance mode and Silence mode. Open Dolby function setup screen. Multi-media control buttons* Play / Pause Stop Previous track Next track Equalizer buttons* Jazz Dance Classical Normal Multi-media buttons ( Switch between Multi-media control buttons and Equalizer buttons.
- Page 28 Chapter 2. Using Your Computer OneKey Rescue System button Press the OneKey Rescue System button to enter the main interface of OneKey Rescue System while the power is off. Attention: When you press OneKey Rescue System button to turn on the computer, please ensure that your computer is not connected with other peripherals (such as USB storage device, etc.), otherwise the system may not operate properly.
-
Page 29: Using The Optical Drive
Blu-ray/DVD/CD recordable drive. Playing CDs/DVDs/Blu-ray Disc Media You can play your CDs/DVDs/Blu-ray Disc Media with various applications, such as Windows Media Player, Lenovo Blu-ray Disc Player, or Windows Media Center, and so on. see “Touch For convenient CDs/DVDs/Blu-ray Disc Media playing, inductive panel and multi-media buttons”... -
Page 30: Using Memory Cards
Chapter 2. Using Your Computer Using memory cards Your computer comes with one Multi-media Reader slot used to insert a memory card, such as an SD Card, a Multi-media Card, a Memory Stick, an xD-Picture Card, an SD pro card or a Memory Stick pro card. Note: Only use the memory card listed above;... -
Page 31: Inserting A Memory Card
Push the memory card until you hear a click. Gently pull the memory card out of the Multi-media reader slot. Using Lenovo Remote (Specific models only) You can use the remote control with Windows Media Center for convenient media enjoyment. -
Page 32: Using The Internet
Chapter 2. Using Your Computer Using the Internet Your computer comes with LAN port for high-speed DSL/cable modem connection and local area network (LAN), wireless LAN for wireless connection, and modem port for dial-up connection. Using LAN port The LAN port supports a standard RJ-45 connector, and allows you to connect the computer to a high-speed DSL/cable modem connection and local area network (LAN). -
Page 33: Using Wireless Lan
Attention: As the voltage of a telephone connection is higher than that of a network, do not attempt to connect a telephone cable to the LAN port or else a short circuit of the computer might occur. Using wireless LAN An isotropic antenna system is built into the display for optimal reception, enabling wireless communication wherever you are. - Page 34 Chapter 2. Using Your Computer Using modem port The modem port supports a standard telephone cable with one RJ-11 connector, and allows dial up access to an internet service provider (ISP). Important: Do not connect the modem port to a digital circuit cable, or else the current in the digital circuit may damage the modem.
-
Page 35: Securing Your Computer
Refer to the “Left-side View” on page 3 for the location of the security keyhole. Note: You are responsible for evaluating, selecting, and implementing the locking devices and security features. Lenovo makes no comments, judgements, or warranties about the function, quality, or performance of locking devices and security features. -
Page 36: Using Passwords
Chapter 2. Using Your Computer Using VeriFace VeriFace is a face recognition software which takes a digital snapshot, extracts key features of your face, and creates a digital map that becomes the system’s “password”. Note: The face registration and verification works best in the environment with steady and even light. - Page 37 Supervisor password With a Supervisor password, you can get full control of the computer. It also can be used as a power-on password if Password on boot is set to Enabled. Also, when you enter the BIOS Setup Utility with a Supervisor password, you are entitled to set all of the options.
- Page 38 Chapter 2. Using Your Computer To set a Supervisor Password: Only a system administrator will be able to perform this procedure. Turn on your computer. Press F2, while the initial screen is displayed. The BIOS Setup Utility screen opens. Select Security, using the cursor directional keys. Select Set Supervisor Password, and press the Enter key.
- Page 39 Password and type in the correct password. Then press Enter key once to move to Enter New Password field, type a new supervisor password in. Press the Enter key once to move to the Confirm New Password field. Retype the password you just entered to verify it. Commit your password to memory, and press the Enter key.
- Page 40 Chapter 2. Using Your Computer Press the Enter key once to move to the Confirm New Password field. Retype the password you just entered to verify it. Commit your password to memory, and press the Enter key. Press F10 to exit. Select OK in the Setup Confirmation window.
- Page 41 Note: Make sure the Password on boot is set to Enabled if you need the password protection at power on. Hard Disk Passwords Two types of the hard disk passwords help protect the information stored on the hard disk: Hard disk master password Hard disk user password, which requires a hard disk master password Note: To set a master password and a user password both as the Hard Disk...
- Page 42 Chapter 2. Using Your Computer Select Set HDD Master Password, and press the Enter key. The Set Hard Disk Master Password screen opens. Choose your Hard Disk Master Password, which can be from one to eight alphanumeric characters in any combination. Type it in the Enter New Password field.
- Page 43 Changing or Removing the HDD Passwords To change or remove the HDD password, do as follows: To change the HDD master password, select Set HDD Master Password and type correct HDD master password in the Enter Current Password field, and press Enter key to move to the Enter New Password field and type a new HDD master password in, and retype it in the Confirm New Password field.
-
Page 44: Installing Device Drivers
Chapter 2. Using Your Computer Installing Device Drivers A compatible device driver is a requirement to ensure correct operation and performance of each component in your computer. Lenovo provides all drivers that you need in your Disk “D:”. (Assuming current OS is Windows Vista ®... -
Page 45: Checking Battery Status
Checking Battery Status You can determine the percentage of battery power remaining by using Windows Power options. The rate at which you use battery power determines how long you can use the battery of your computer between charges. As each computer user has different habits and needs, it is difficult to predict how long a battery charge will last. - Page 46 Chapter 2. Using Your Computer Connect the power cord to the transformer pack. Plug the power cord into an electrical outlet. Connect the AC adapter to the AC power adapter jack of the computer. You can check the status of your battery at any time by looking at the battery meter at the bottom of your display.
-
Page 47: Charging The Battery
Do not attempt to disassemble or modify the battery pack. Attempting to do so can cause an explosion, or liquid leakage from the battery pack. A battery pack other than the one specified by Lenovo, or a disassembled or modified battery pack is not covered by the warranty. Danger: If the rechargeable battery pack is incorrectly replaced, there is danger of an explosion. - Page 48 Chapter 2. Using Your Computer Keep the battery pack away from fire. Do not expose the battery pack to water or rain. Do not attempt to disassemble the battery pack. Do not short-circuit the battery pack. Keep the battery pack away from children. Danger: Do not put the battery pack in trash that is disposed of in landfills.
-
Page 49: Chapter 3. Using External Devices
Chapter 3. Using external devices Your computer has many built-in features and connection capabilities. Attention: Do not connect or disconnect any external device cables other than USB and 1394 cables while the computer power is on; otherwise, you might damage your computer. - Page 50 Chapter 3. Using external devices Attention: When using high power consumption USB device such as USB ODD, use external device power adapter. Otherwise, it will cause the device unable to be recognized and used, or system shut down.
-
Page 51: Connecting An Ieee 1394 Device
Chapter 3. Using external devices Connecting an IEEE 1394 device - - - - - - - - - - - - - - - - - - - - - - - - - - - - - - - - - - - - - - - - Your computer comes with one IEEE 1394 connector used for connecting devices that are compatible with the IEEE 1394 interface, such as digital video cameras and external hard disk drives. -
Page 52: Connecting A Pc Card Device
Chapter 3. Using external devices Connecting a PC card device Your computer comes with PCI Express card (new card) slot used for connecting PC card devices that are compatible with the PCI Express card (new card) interface. - - - - - - - - - - - - - - - - - - - - - - - - - - - - - - - - - - - - - - - - - - - - - - - -... -
Page 53: Inserting A Pci Express Card
Inserting a PCI Express card Gently slide the PCI Express card with the front label facing upward. Slide until it clicks into place. Removing a PCI Express card Push the PCI Express card until you hear a click. Gently pull the PCI Express card out of the PCI Express card slot. Chapter 3. -
Page 54: Connecting An External Display
Chapter 3. Using external devices Connecting an external display You can connect an external display to your computer, such as VGA monitor and HDMI monitor (Specific models only). Connecting a VGA monitor You can connect a VGA monitor by using a VGA port. To connect a VGA monitor, plug the display cable to VGA port on your computer. - Page 55 Chapter 3. Using external devices Connecting an HDMI monitor (Specific models only) You can connect an HDMI monitor by using an HDMI port (Specific models only). To connect an HDMI monitor, use HDMI cable (not supplied) to connect HDMI monitor to the HDMI connector on your computer.
-
Page 56: Connecting A Headphone And Audio Device
Chapter 3. Using external devices Connecting a headphone and audio device Your computer comes with one headphone/SPDIF jack used for connecting headphones, speakers, and audio devices that are compatible with the SPDIF interface. - - - - - - - - - - - - - - - - -... - Page 57 Switch between headphone and SPDIF Right-click the Sound icon at the bottom-right corner of the task bar and select Playback Devices from the popup menu. When all players are turned off, select Speakers (headphone) or SPDIF Interface and click Set Default button. Click the OK button to save the settings.
-
Page 58: Connecting An External Microphone
Chapter 3. Using external devices Connecting an external microphone Your computer comes with one external microphone jack used for connecting external microphone. - - - - - - - - - - - - - - - - - - - - - - - - - - - - - - - -... -
Page 59: Connecting A Bluetooth Device
Connecting a Bluetooth device Your computer can connect to and transfer data wirelessly to Bluetooth devices, such as computers, PDAs, and cell phones. Enabling Bluetooth communications Slide the Wireless device switch latch to the right. Press Fn + F5. Note: When you do not need to use the Bluetooth function, turn it off to save battery power. -
Page 60: Chapter 4. Troubleshooting
This section lists frequently asked questions and tells where you can find detailed answers. For details about each publication included in the package with your computer, see Lenovo IdeaPad Y430 Setup Poster. What safety precautions should I follow when using my computer? See “Chapter 6. - Page 61 “Lenovo Warranty Service Telephone Numbers” on page 111. Where can I find warranty information? For the warranty applicable to your computer, including the warranty period and type of warranty service, see “Appendix A. Lenovo Limited Warranty” on page 100. Chapter 4. Troubleshooting...
-
Page 62: Troubleshooting
Chapter 4. Troubleshooting Troubleshooting If you do not find your problem here, see Chapter 2. The following section only describes problems that might prevent you from accessing the comprehensive information in Chapter 2. Display Problems When I turn on the computer, nothing appears on the screen and the computer does not beep while starting up. - Page 63 If these items are properly set, and the screen remains blank, have the computer serviced. When I turn on the computer, nothing appears on the screen, but I hear two or more beeps. Make sure that the memory card is installed correctly. If it is, but the screen is still blank, and you hear five beeps, have the computer serviced.
-
Page 64: A Password Problem
A Password Problem I forgot my password. If you forgot your user password, you must take your computer to a Lenovo authorized servicer or a marketing representative to have the password canceled. If you forgot your HDD password, Lenovo authorized servicer cannot reset your password or recover data from the hard disk. -
Page 65: Sleep Or Hibernation Problems
Sleep or Hibernation Problems The computer enters sleep mode unexpectedly. If the processor overheats, the computer automatically enters sleep mode to allow the computer to cool and to protect the processor and other internal components. Check the settings for sleep mode. The computer enters sleep mode (the sleep indicator turns on) immediately after Power-on self-test (POST). -
Page 66: Computer Screen Problems
Chapter 4. Troubleshooting If the sleep indicator is on, your computer is in sleep mode. Connect the AC adapter to the computer; then press any key or the power button. If the sleep indicator is off, your computer is in sleep/hibernation mode or power-off state. - Page 67 The screen is unreadable or distorted. Make sure that: The display device driver is installed correctly. The screen resolution and color quality are correctly set. The monitor type is correct. To check these settings, do as follows: Right-click on the desktop, and select Personalize from the popup menu.
- Page 68 Chapter 4. Troubleshooting Incorrect characters appear on the screen. Did you install the operating system or application program correctly? If they are installed and configured correctly, have the computer serviced. Missing, discolored, or bright dots appear on the screen every time you turn on your computer.
-
Page 69: Battery Problems
Sound Problems No sound can be heard from the speaker even when the volume is turned up. Make sure that: The Mute function is off. The headphone jack is not used. Speakers is selected as a playback device. For details, See “Switch between headphone and SPDIF” in Chapter 3. Battery Problems The battery cannot be fully charged by the power-off method in the standard charge time for your computer. -
Page 70: A Startup Problem
Chapter 4. Troubleshooting The computer does not operate with a fully charged battery. The surge protector in the battery might be active. Turn off the computer for one minute to reset the protector; then turn on the computer again. The battery does not charge. For details, See “Handling the Battery”... - Page 71 Your computer might lock when it enters sleep mode during a communication operation. Disable the sleep timer when you are working on the network. The computer does not start from a device you want. See the Boot menu of the BIOS Setup Utility. Make sure that the startup sequence in the BIOS Setup Utility is set so that the computer starts from the device you want.
-
Page 72: Chapter 5. Getting Help And Service
Getting Help and Service If you need help, service, technical assistance, or just want more information about Lenovo computers, you will find a wide variety of sources available from Lenovo to assist you. This section contains information about where to go for additional information about Lenovo computers, what to do if you experience a problem with your computer, and whom to call for service should it be necessary. -
Page 73: Getting Help On The Web
Lenovo hardware repair - If the problem is determined to be caused by Lenovo hardware under warranty, trained service personnel are available to provide the applicable level of service. - Page 74 Chapter 5. Getting Help and Service Engineering change management - Occasionally, there might be changes that are required after a product has been sold. Lenovo or your reseller, if authorized by Lenovo, will make selected Engineering Changes (ECs) available that apply to your hardware.
- Page 75 Customer Support Center telephone numbers and hours of operation, visit the Support Web site at http://consumersupport.lenovo.com. If the number for your country or region is not listed, contact your Lenovo reseller or Lenovo marketing representative. Chapter 5. Getting Help and Service...
-
Page 76: Getting Help Around The World
Getting Help around the World If you travel with your computer or relocate it to a country where your Lenovo machine type is sold, your computer might be eligible for International Warranty Service, which automatically entitles you to obtain warranty service throughout the warranty period. Service will be performed by service providers authorized to perform warranty service. -
Page 77: Chapter 6. Safety, Use, And Care Information
Follow and retain all information included with your computer. The information in this document does not alter the terms of your purchase agreement or the Lenovo Limited Warranty. For more information, See “Appendix A. Lenovo Limited Warranty” on page 100. -
Page 78: Conditions That Require Immediate Action
Contact the Customer Support Center for further guidance. For a list of Service and Support phone numbers, see http://consumersupport.lenovo.com. Frequently inspect your computer and its components for damage or wear or signs of danger. If you have any question about the condition of a component, do not use the product. -
Page 79: Safety Guidelines
Note: If you notice these conditions with a product (such as an extension cord) that is not manufactured for or by Lenovo, stop using that product until you can contact the product manufacturer for further instructions, or until you get a suitable replacement. -
Page 80: Service And Upgrades
Upgrades typically are referred to as options. Replacement parts approved for customer installation are referred to as Customer Replaceable Units, or CRUs. Lenovo provides documentation with instructions when it is appropriate for customers to install options or replace CRUs. You must closely follow all instructions when installing or replacing parts. - Page 81 Danger: Hazardous moving parts. Keep fingers and other body parts away. Attention: Before replacing any CRUs, turn off the computer and wait three to five minutes to let the computer cool before opening the cover. Power Cords and Power Adapters Danger: Use only the power cords and power adapters supplied by the product manufacturer.
- Page 82 Chapter 6. Safety, Use, and Care Information Protect power cords and power adapters from liquids. For instance, do not leave your power cord or power adapter near sinks, tubs, toilets, or on floors that are cleaned with liquid cleansers. Liquids can cause a short circuit, particularly if the power cord or power adapter has been stressed by misuse.
- Page 83 Extension Cords and Related Devices Danger: Ensure that extension cords, surge protectors, uninterruptible power supplies, and power strips that you use are rated to handle the electrical requirements of the product. Never overload these devices. If power strips are used, the load should not exceed the power strip input rating.
-
Page 84: Power Supply Statement
Chapter 6. Safety, Use, and Care Information outlet. If you cannot insert the plug into the outlet, contact an electrician for an approved outlet adapter or to replace the outlet with one that enables this safety feature. Never overload an electrical outlet. The overall system load should not exceed 80 percent of the branch circuit rating. -
Page 85: Lithium Coin Cell Battery Notice
Hazardous voltage, current, and energy levels are present inside any component that has this label attached. There are no serviceable parts inside these components. If you suspect a problem with one of these parts, contact a service technician. Lithium Coin Cell Battery Notice Danger: Danger of explosion if battery is incorrectly replaced. -
Page 86: Heat And Product Ventilation
Chapter 6. Safety, Use, and Care Information Products containing CR (manganese dioxide) lithium coin cell batteries may contain perchlorate. Perchlorate Material — special handling may apply. See http://www.dtsc.ca.gov/hazardouswaste/perchlorate. Heat and Product Ventilation Danger: Computers, AC adapters, and many accessories can generate heat when turned on and when batteries are charging. - Page 87 Chapter 6. Safety, Use, and Care Information Ventilation slots, fans and/or heat sinks are provided with the product for safety, comfort, and reliable operation. These features might inadvertently become blocked by placing the product on a bed, sofa, carpet, or other flexible surface. Never block, cover, or disable these features.
- Page 88 Chapter 6. Safety, Use, and Care Information CD and DVD Drive Safety Danger: CD and DVD drives spin discs at a high speed. If a CD or DVD is cracked or otherwise physically damaged, it is possible for the disc to break apart or even shatter when the CD drive is in use.
-
Page 89: Electrical Current Safety Information
Electrical Current Safety Information Danger: Electric current from power, telephone, and communication cables is hazardous. To avoid a shock hazard: Do not use your computer during a lightning storm. Do not connect or disconnect any cables or perform installation, maintenance, or reconfiguration of this product during an electrical storm. - Page 90 Chapter 6. Safety, Use, and Care Information Connect and disconnect cables as described in the following procedures when installing, moving, or opening covers on this product or attached devices. To connect: 1. Turn everything OFF. 2. First, attach all cables to devices. 3.
-
Page 91: Laser Compliance Statement
Laser Compliance Statement Some personal computer models are equipped from the factory with a CD or DVD drive. CD and DVD drives are also sold separately as options. CD and DVD drives are laser products. The drive’s classification label (shown below) is on the surface of the drive. CLASS 1 LASER PRODUCT LASER KLASSE 1 LUOKAN 1 LASERLAITE... - Page 92 Chapter 6. Safety, Use, and Care Information These drives are certified in the U.S. to conform to the requirements of the Department of Health and Human Services 21 Code of Federal Regulations (DHHS 21 CFR) Subchapter J for Class 1 laser products. Elsewhere, these drives are certified to conform to the requirements of the International Electrotechnical Commission (IEC) 60825-1 and CENELEC EN 60825-1 for Class 1 laser products.
- Page 93 Danger: Laser radiation when open. Do not stare into the beam, do not view directly with optical instruments, and avoid direct exposure to the beam. Liquid Crystal Display (LCD) Notice Attention: Mercury Information (does not apply to LED backlit models): The fluorescent lamp in the liquid crystal display contains mercury;...
-
Page 94: Caring Your Computer
Chapter 6. Safety, Use, and Care Information Caring Your Computer Though your computer is designed to function reliably in normal work environments, you need to use common sense in handling it. By following these important tips, you will get the most use and enjoyment out of your computer. - Page 95 Chapter 6. Safety, Use, and Care Information Place liquids away from your computer to avoid spills, and keep your computer away from water (to avoid the danger of electrical shock). Do not eat or smoke over your keyboard. Particles that fall into your keyboard can cause damage.
- Page 96 Chapter 6. Safety, Use, and Care Information - Wherever possible, ground your computer to facilitate safe electrostatic discharge. Note: Not all such appliances cause a significant electrostatic charge. When you handle options or CRUs, or perform any work inside the computer, take the following precautions to avoid static-electricity damage: - Limit your movement.
-
Page 97: Carry Your Computer Properly
Be Gentle with Your Computer Avoid placing any objects (including paper) between the display and the keyboard or under the keyboard. Do not drop, bump, scratch, twist, hit, vibrate, push, or place heavy objects on your computer, display, or external devices. Carry Your Computer Properly Before moving your computer, be sure to remove any media, turn off attached devices, and disconnect cords and cables. - Page 98 Chapter 6. Safety, Use, and Care Information When you leave the computer in your car, place it on the back seat to avoid being insolated. Carry the AC adapter and power cord with the computer. Handle Storage Media and Drives Properly If your computer comes with an optical drive, do not touch the surface of a disc or the lens on the tray.
-
Page 99: Other Important Tips
Take Care in Setting Passwords Remember your passwords. If you forget a supervisor or hard disk password, Lenovo authorized service providers will not reset it, and you might have to replace your system board or hard disk drive. Other Important Tips Your computer modem might use only an analog telephone network, or public-switched telephone network (PSTN). -
Page 100: Cleaning The Cover Of Your Computer
Chapter 6. Safety, Use, and Care Information Turn off your computer if you are replacing a device, or else verify that the device is warm- or hot-swappable. Before you install any of the following devices, touch a metal table or a grounded metal object. -
Page 101: Cleaning Your Computer Keyboard
Wipe the surface to remove the detergent. Rinse the sponge with clean running water. Wipe the cover with the clean sponge. Wipe the surface again with a dry, soft lint-free cloth. Wait for the surface to dry completely and remove any cloth fibers from the computer surface. -
Page 102: Cleaning Your Computer Display
By keeping these considerations in mind, you can improve performance and achieve greater comfort. Lenovo is committed to providing the latest information and technology to our customers with disabilities. -
Page 103: Ergonomic Information
Chapter 6. Safety, Use, and Care Information Ergonomic Information Working in the virtual office may mean adapting to frequent changes in your environment. Following some simple rules will make things easier and bring you the maximum benefits of your computer. Keeping in mind such basics as good lighting and proper seating, for example, can help you improve your performance and achieve greater comfort. - Page 104 Chapter 6. Safety, Use, and Care Information General Posture: Below are some general recommendations for assuming a healthy working posture. It is best to periodically make minor modifications in your working posture to deter the onset of discomfort caused by long periods of working in the same position. Frequent, short breaks from your work will also help to prevent any minor discomfort associated with your working posture.
-
Page 105: Questions About Vision
Chapter 6. Safety, Use, and Care Information What If You are Traveling? It may not be possible to observe the best ergonomic practices when you are using your computer while on the move or in a casual setting. Regardless of the setting, try to observe as many of the tips as possible. Sitting properly and using adequate lighting, for example, will help you maintain desirable levels of comfort and performance. - Page 106 Chapter 6. Safety, Use, and Care Information General Tips for Maintenance Check the capacity of your hard disk drive from time to time. If the hard disk drive gets too full, Windows produce errors. Note: You can check the capacity of each hard disk drive as follows. 1.
- Page 107 At least once a week, make a point to back up your data. If critical data is present, it is a good idea to perform a daily backup. Lenovo has many backup options available for your computer. CD-RW drives and CD- RW/DVD drives are available for most computers and are easily installed.
- Page 108 If required, you can find your country's Customer Support Center at the following Web address: http://consumersupport.lenovo.com. When calling the Customer Support Center, please make sure you have your machine type, model, and serial number available and the computer is in front of you.
-
Page 109: Appendix A. Lenovo Limited Warranty
Lenovo. What This Warranty Covers Lenovo warrants that each hardware product is free from defects in materials and workmanship under normal use during the warranty period. The warranty period for the product starts on the original date of purchase specified on your invoice unless Lenovo informs you otherwise in writing. - Page 110 How to Obtain Warranty Service If the product does not function as warranted during the warranty period, you may obtain warranty service by contacting Lenovo or an approved service provider. Each of them is referred to as a “Service Provider.” A list of Service Providers and their telephone numbers is available at consumersupport.lenovo.com.
- Page 111 If your Service Provider determines that it is unable to either repair or replace your product, your sole remedy is to return the product to your place of purchase or to Lenovo and your purchase price will be refunded. Exchange of a Product or Part When the warranty service involves the exchange of a product or part, the item your Service Provider replaces becomes Lenovo’s property and the...
-
Page 112: Your Additional Responsibilities
Personal Data you did not delete, you are in compliance with all applicable laws. Use of Personal Information If you obtain service under this warranty, Lenovo will store, use and process information about your warranty issue and your contact information, including name, phone numbers, address, and e-mail address. -
Page 113: Limitation Of Liability
Limitation of Liability Lenovo is responsible for loss of, or damage to, your product only while it is 1) in your Service Provider’s possession or 2) in transit in those cases in which the Service Provider is responsible for the transportation. - Page 114 Circumstances may arise where, because of a default on Lenovo’s part or other liability, you may be entitled to recover damages from Lenovo. In each such instance, regardless of the basis on which you are entitled to claim...
-
Page 115: Dispute Resolution
HAVE OTHER RIGHTS WHICH VARY FROM STATE TO STATE OR JURISDISCTION TO JURISDICTION. YOU ALSO MAY HAVE OTHER RIGHTS UNDER APPLICABLE LAW OR WRITTEN AGREEMENT WITH LENOVO. NOTHING IN THIS WARRANTY AFFECTS STATUTORY RIGHTS, INCLUDING RIGHTS OF CONSUMERS UNDER NATIONAL LEGISLATION GOVERNING THE SALE OF CONSUMER GOODS THAT... - Page 116 Appendix A. Lenovo Limited Warranty European Economic Area (EEA) Customers in the EEA may contact Lenovo at the following address: Lenovo Warranty & Service Quality Dept., PO Box 19547, Inverkip Road, Greenock, Scotland PA16 9WX. Service under this warranty for Lenovo...
-
Page 117: Warranty Information
Appendix A. Lenovo Limited Warranty - - - - - - - - - - - - - - - - - - - - - - - - - - - - - - - - - - - - - - - - - - - - - - - - - - - - - - - - - - -... -
Page 118: Types Of Warranty Service
Most CRUs are easy to install whereas others may require some technical skill and tools. CRU information and replacement instructions are shipped with your product and are available from Lenovo at any time upon request. You may request that a Service Provider install some CRUs under one of the other types of warranty service designated for your product. - Page 119 Under On-site Service, your Service Provider will either repair or exchange the product at your location. You must provide a suitable working area to allow disassembly and reassembly of the Lenovo product. For some products, certain repairs may require your Service Provider to send the product to a designated service center.
-
Page 120: Lenovo Warranty Service Telephone Numbers
The phone numbers provided below are correct as of the time of printing and are subject to change without notice. For the latest warranty service contact telephone number in a country please contact Lenovo, or your reseller in your country. - Page 121 New Zealand Russia Toll free Alternate No. Additionally, you can find support information, and updates, including service phone numbers for unlisted countries on the Lenovo Web site located at: http://consumersupport.lenovo.com. Appendix A. Lenovo Limited Warranty 0800 446 833 8-800-700-7888 +7-(495) 662-7888...
-
Page 122: Appendix B. Customer Replaceable Units (Crus)
Customers are responsible for replacing all external CRUs. Internal CRUs can be removed and installed by customers or by a Lenovo service technician during the warranty period. Your computer contains the following types of external CRUs: External CRUs (pluggable): These CRUs unplug from the computer. -
Page 123: Appendix C. Specifications
Appendix C. Specifications Specifications Size Width: approximate 334 mm Depth: approximate 241 mm Height: approximate 24 to 37.8 mm Environment Temperature – Operating with no optical disc in the drive: 5° to 35°C – Operating with an optical disc in the drive: 10° to –... - Page 124 Appendix C. Specifications Power source Input rating of the AC adapter: 90-264 V ac, 47 to 63 Hz 65 W (with integrated graphics card)/90 W (with (AC adapter) discrete graphics card) For models with discrete graphics card, the supplied 90W AC adapter with the unit is recommended. Otherwise, it will cause AC adapter overheat or machine malfunction.
-
Page 125: Appendix D. Notices
Consult your local Lenovo representative for information on the products and services currently available in your area. Any reference to a Lenovo product, program, or service is not intended to state or imply that only that Lenovo product, program, or service may be used. - Page 126 Web sites. The materials at those Web sites are not part of the materials for this Lenovo product, and use of those Web sites is at your own risk.
-
Page 127: Export Classification Notice
Appendix D. Notices extrapolation. Actual results may vary. Users of this document should verify the applicable data for their specific environment. The software interface and hardware configuration described in all the manuals included with your computer may not match the actual configuration of the computer you purchased. -
Page 128: Wireless Related Information
Appendix D. Notices Wireless related information Wireless Interoperability Wireless LAN PCI Express Mini Card is designed to be interoperable with any wireless LAN product that is based on Direct Sequence Spread Spectrum (DSSS), Orthogonal Frequency Division Multiplexing (OFDM) radio technology, and is compliant to: The IEEE 802.11a/b/g/n Standard on Wireless LANs, as defined and approved by the Institute of Electrical and Electronics Engineers. - Page 129 Due to the fact that Wireless LAN PCI Express Mini Card and Bluetooth Daughter Card operate within the guidelines found in radio frequency safety standards and recommendations, Lenovo believes the integrated wireless cards are safe for use by consumers. These standards and...
-
Page 130: Tv Tuner Information
Appendix D. Notices If you are uncertain of the policy that applies on the use of wireless devices in a specific organization (e.g., airport or hospital), you are encouraged to ask for authorization to use Wireless LAN PCI Express Mini Card or Bluetooth Daughter Card prior to turning on the computer. -
Page 131: Example Of Antenna Grounding
Example of antenna grounding Ground clamp Antenna lead-in wire Antenna discharge unit (NEC Section 810-20) Grounding conductors (NEC Section 810-21) Appendix D. Notices Power service grounding electrode system (NEC Article 250, Part H) Ground clamps Electronic service equipment... - Page 132 Appendix D. Notices The following notice applies to all countries and regions: Danger: Outdoor antenna grounding If an outside antenna or cable system is connected to the equipment, be sure the antenna or cable system is grounded as to provide some protection against voltage surges and built-up static charges.
-
Page 133: Electronic Emissions Notices
Electronic Emissions Notices The following information refers to Lenovo IdeaPad Y430, machine type 20005, 2781. Federal Communications Commission (FCC) Statement This equipment has been tested and found to comply with the limits for a Class B digital device, pursuant to Part 15 of the FCC Rules. These limits are designed to provide reasonable protection against harmful interference in a residential installation. -
Page 134: Industry Canada Class B Emission Compliance Statement
(1) this device may not cause harmful interference, and (2) this device must accept any interference received, including interference that may cause undesired operation. Responsible party: Lenovo (United States) Incorporated 1009 Think Place - Building One Morrisville, NC 27650 U.S.A. - Page 135 Um dieses sicherzustellen, sind die Geräte wie in den Handbüchern beschrieben zu installieren und zu betreiben. Des Weiteren dürfen auch nur von der Lenovo empfohlene Kabel angeschlossen werden. Lenovo übernimmt keine Verantwortung für die Einhaltung der Schutzanforderungen, wenn das Produkt ohne Zustimmung der Lenovo verändert bzw.
- Page 136 Dieses Gerät ist berechtigt, in Übereinstimmung mit dem Deutschen EMVG das EG-Konformitätszeichen - CE - zu führen. Verantwortlich für die Konformitätserklärung nach Paragraf 5 des EMVG ist die Lenovo (Deutschland) GmbH, Gropiusplatz 10, D-70563 Stuttgart. Informationen in Hinsicht EMVG Paragraf 4 Abs. (1) 4: Das Gerät erfüllt die Schutzanforderungen nach EN 55024 und EN 55022...
- Page 137 TV communications and to other electrical or electronic equipment. Such cables and connectors are available from Lenovo authorized dealers. Lenovo cannot accept responsibility for any interference caused by using other than recommended cables and connectors.
-
Page 138: Japan Compliance Statement For Power Line Harmonics
Appendix D. Notices Japanese VCCI Class B Statement Japan Compliance Statement for Power line Harmonics A statement of compliance to the IEC 61000-3-2 harmonics standard is required for all products connecting to the power mains and rated less than 20A per phase. Korea Class B... -
Page 139: Weee And Recycling Statements
General Recycling Statement Lenovo encourages owners of information technology (IT) equipment to responsibly recycle their equipment when it is no longer needed. Lenovo offers a variety of programs and services to assist equipment owners in recycling their IT products. Information on product recycling offerings can be found on Lenovo’s Internet site at... -
Page 140: Eu Weee Statements
For additional WEEE information go to: http://consumersupport.lenovo.com. - - - - - - - - - - - - - - - - - - - - - - - - - - - - - - - - - - - - - - - - - - - - - - - - - - - - - - - - - - - - - - - -... -
Page 141: Japan Recycling Statements
Collecting and Recycling a Disused Lenovo Computer or Monitor If you are a company employee and need to dispose of a Lenovo computer or monitor that is the property of the company, you must do so in accordance with the Law for Promotion of Effective Utilization of Resources. -
Page 142: Disposing A Disused Battery Pack From Lenovo Notebook Computers
You also can refer to the instructions at www.ibm.com/jp/pc/environment/recycle/battery http://www.ibm.com/jp/pc/environment/recycle/battery If you use a Lenovo notebook computer at home and need to dispose of a battery pack, you must comply with local ordinances and regulations. You also can refer to the instructions at www.ibm.com/jp/pc/environment/recycle/battery... -
Page 143: Notice For Users In The U.s.a
Notice for Users in the U.S.A. California Perchlorate Information: Products containing CR (manganese dioxide) lithium coin cell batteries may contain perchlorate. Perchlorate Material — special handling may apply. See http://www.dtsc.ca.gov/hazardouswaste/perchlorate. Notice on Deleting Data from Your Hard Disk As computers spread into every corner of life, they process more and more information. - Page 144 Appendix D. Notices Using the preinstalled recovery program, bring the hard disk back to factory-ship state. These operations, however, only change the file allocation of the data; they do not delete the data itself. In other words, the data retrieval processing is disabled under an operating system such as Windows.
-
Page 145: Trademarks
- - - - - - - - - - - - - - - - - - - - - - - - - - - - - - - - - - - - - - - - - - - - - - - - - - - - - - - - - - - - - - - - - - - - - - - - - - - - - - - - - - - - - - Lenovo, lenovo logo, IdeaPad, VeriFace, OneKey Rescue (OneKey... -
Page 146: Index
Index AC adapter ... 6 Jack ... 35 Using Battery ... 38 Charging Bluetooth ... 50 Connecting ... 119 Interoperability ... 8, 16 Switch ... 120 Usage Environment ... 16, 22 Camera ... 85 Caring Your Computer ... 8 CIR port Cleaning Computer Cover... - Page 147 Hibernation Mode Problems ...42 IEEE 1394 connector ...23 Internet Keyboard ...92 Cleaning ...55 Problems ...14 Using ...100 Lenovo Limited Warranty ...96 Maintenance Microphone ...2 Built-in ...49 External ...2, 18 Multi-media buttons ...56 Multi-media Reader Slot Notice Electronic Emissions EU Environmental...
- Page 148 Index ... 61 Hard Disk Drive ... 56 Hibernation Mode ... 55 Keyboard ... 55 Password ... 56 Sleep Mode ... 60 Sound ... 61 Startup ... 22 Remote..26 Security ... 3 Security keyhole ... 2 Speaker ... 114 Specifications Storage Media ...
- Page 149 If your product is not working correctly, DO NOT RETURN IT TO THE STORE. For technical assistance, contact a Lenovo support specialist 24 hours a day by calling toll free 1-877-4 LENOVO (1-877-453-6686). Additionally, you can find support information and updates on the Lenovo Web site located at http://consumersupport.lenovo.com.
- Page 150 New World. New Thinking. www.lenovo.com P/N:147001827...
Need help?
Do you have a question about the IdeaPad Y430 and is the answer not in the manual?
Questions and answers