Panasonic AG-AC8EJ Operating Instructions Manual
Panasonic ag-ac8ej memory-card camera-recorder
Hide thumbs
Also See for AG-AC8EJ:
- Specifications (2 pages) ,
- Operating instructions manual (125 pages) ,
- Quick manual (4 pages)
Table of Contents
Advertisement
Available languages
Available languages
Quick Links
Instrucciones de funcionamiento
Camascopio basado en tarjeta de memoria
Register now!!
This product is eligible for the
AVCCAM 3 Year Warranty
Repair Program.
For details, see page 7, 38.
http://panasonic.biz/sav/pass_e/
Vol.1
ENGLISH
Excerpted
Version
ESPAÑOL
Versión
extractada
Please read these instructions carefully before using this product, and save this manual for future
use.
Lea cuidadosamente estas instrucciones antes de usar este producto, y guarde este manual para
usarlo en el futuro.
F0913TC0
Printed in Japan
Memory Card Camera-Recorder
This document explains basic operations of the unit. For more detailed
explanation, please refer to "Operating Instructions Vol.2" (PDF file) which is
recorded in the enclosed CD-ROM.
Este documento explica el funcionamiento básico de la unidad. Para obtener
información más detallada, consulte las "Instrucciones de funcionamiento
Vol.2" (archivo PDF) que están grabadas en el CD-ROM adjunto.
Operating Instructions
AG-AC8EJ
Model No.
Vol.1
VQT5E00
Advertisement
Chapters
Table of Contents

Related Manuals for Panasonic AG-AC8EJ


Summary of Contents for Panasonic AG-AC8EJ
-
Page 1: Operating Instructions
Operating Instructions Instrucciones de funcionamiento Vol.1 Memory Card Camera-Recorder Camascopio basado en tarjeta de memoria AG-AC8EJ Model No. Register now!! This product is eligible for the AVCCAM 3 Year Warranty Repair Program. For details, see page 7, 38. http://panasonic.biz/sav/pass_e/ Vol.1 ENGLISH This document explains basic operations of the unit. -
Page 2: Information For Your Safety
Information for Your Safety For the AC mains plug of three pins Before use ∫ Caution for AC mains lead Remove the connector cover. For your safety, please read the following text How to replace the fuse carefully. The location of the fuse differ according to the This appliance is supplied with a moulded three type of AC mains plug (figures A and B). -
Page 3: Emc Electric And Magnetic Compatibility
ENGLISH ∫ Concerning the battery Warning Risk of fire, explosion and burns. Do not disassemble, heat above 60 oC or incinerate. CAUTION ≥ Danger of explosion if battery is incorrectly replaced. Replace only with the type recommended by the manufacturer. ≥... - Page 4 ∫ Disposal of Old Equipment and Batteries Only for European Union and countries with recycling systems These symbols on the products, packaging, and/ or accompanying documents mean that used electrical and electronic products and batteries must not be mixed with general household waste.
-
Page 5: To Remove The Battery
To remove the battery Main Power Battery (Lithium ion Battery) (Refer to page 16 for the detail.) Press the battery release button. Back-up Battery (Lithium Battery) ≥ For the removal of the battery for disposal at the end of its service life, please consult your dealer. -
Page 6: Cautions For Use
Cables not conforming to the HDMI standard like, remove air from the bag, and seal the bag.) will not work. Panasonic HDMI cable is When condensation has occurred, remove the recommended. Part No.: RP-CHE15 (1.5 m) battery and/or the AC adapter and leave the unit like that for about one hour. -
Page 7: This Unit
Details about user registration and the extended warranty: http://panasonic.biz/sav/pass_e Please note, this is a site that is not maintained by Panasonic Canada Inc. The Panasonic Canada Inc. privacy policy does not apply and is not applicable in relation to any information submitted. -
Page 8: Table Of Contents
Contents ∫ How to open the Operating Instructions PDF file When you insert the CD-ROM and open the [INDEX.pdf] in the CD-ROM, the Operating Instructions list will be displayed. Click the document name of the Operating Instructions you would like to open. ≥... -
Page 9: Accessories
Accessories Check the accessories before using this unit. Keep the accessories out of reach of children to prevent swallowing. Product numbers correct as of Sep. 2013. These may be subject to change. CD-ROM Battery pack Operating Instructions AC adaptor Optional accessories Some optional accessories may not be available in some countries. -
Page 10: Preparation
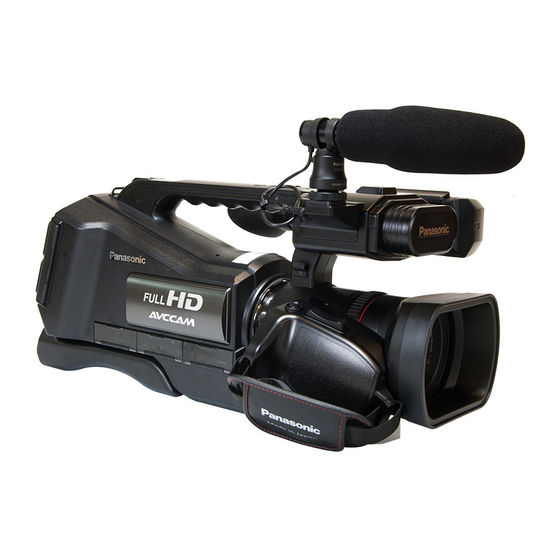
Preparation Names and Functions of Main Parts 4 5 6 18 19 Shoulder strap fixture Zoom lever [W/T] (In Recording Mode) Handle (l 27) Sub zoom lever [W/T] (l 27) Volume lever [rVOLs]/Thumbnail ≥ This lever functions in the same manner as display switch [ ] (In Playback the zoom lever. - Page 11 MANUAL FOCUS MENU O.I.S. 20 Ring LED 21 Shoulder strap fixture 22 Internal microphones 23 Recording lamp 24 Lens (l 14) 25 Lens hood Multi manual ring (l 28) Camera function button [CAMERA FUNCTION] (l 28) 28 Mode switch 29 Intelligent auto/Manual/Manual focus switch [iA/MANUAL/FOCUS] (l 26) 30 Cursor button 31 Optical Image Stabilizer button...
- Page 12 35 LCD monitor (Touch screen) (l 20) 39 Viewfinder (l 21) ≥ Extend the viewfinder before use. ≥ It can open up to 90o. 40 Speaker 41 Battery release button [PUSH] (l 16) 42 Battery holder (l 16) Video output terminal [VIDEO OUT] (l 30) Audio output terminal [AUDIO OUT] (l 30) ≥...
- Page 13 47 48 49 50 46 SD card cover (l 19) 47 Card slot 2 (left) (l 19) 48 Access lamp (card 2) (l 19) 49 Card slot 1 (right) (l 19) Access lamp (card 1) (l 19) (ENG) VQT5E00...
-
Page 14: Attaching The Eye Cup
∫ Adjust the length of the grip belt so that it fits your hand. 1, 2 Flip the belt cover and the belt. Adjust the length. 4, 5 Replace the belt. ∫ Attaching the eye cup Attach by aligning the notch of the eye cup attachment part with the protrusion at the inside of the eye cup. - Page 15 ∫ About the external stereo Attaching the external stereo microphone microphone to the unit Attach the microphone to the External stereo microphone accessory shoe. 1 Loosen the lock ring. 2 Attach the microphone. 3 Firmly tighten the lock ring. ≥...
-
Page 16: Power Supply
Please be advised that we are not liable for any accident or failure occurring as a result of use of a counterfeit battery pack. To ensure that safe products are used we would recommend that a genuine Panasonic battery pack is used. Inserting/removing the battery ≥... -
Page 17: Charging The Battery
When recording for a long time, keep the AC adaptor connected and use it together with the battery. This allows you to continue the recording even if a power failure occurs or the AC adaptor is unplugged from the AC outlet by accident. ≥ We recommend using Panasonic batteries (l 9, 16). (ENG) VQT5E00... -
Page 18: Charging And Recording Time
≥ If you use other batteries, we cannot guarantee the quality of this product. ≥ Do not heat or expose to flame. ≥ Do not leave the battery(ies) in a car exposed to direct sunlight for a long period of time with doors and windows closed. -
Page 19: Recording To A Card
Inserting/removing an SD card When using an SD card not from Panasonic, or one previously used on other equipment, for the first time on this unit, format the SD card. (l 24) When the SD card is formatted, all of the recorded data is deleted. -
Page 20: Turning The Unit On/Off
Preparation Turning the unit on/off Set the power switch to ON while pressing the lock release button B to turn on the unit. To turn off the unit Set the power switch to OFF while pressing the lock release button. The status indicator goes off. -
Page 21: Viewfinder Adjustment
∫ Slide while touching Move your finger while pressing on the touch screen. ∫ About the operation icons ≥ To operate the following icons using the cursor buttons, select the desired icon using the cursor buttons and then press the button in the center. (Excluding some functions) These icons are used to switch the menu and thumbnail display page, for item selection and setting etc. -
Page 22: Setting Date And Time
Preparation Setting date and time The clock is not set at the time of purchase. Make sure to set the clock. Select the menu. (l 23) : [OTHER FUNCTION] # [CLOCK SET] MENU Select the date and time to be set using the cursor button right or left, then adjust the desired value using the cursor button up or down. -
Page 23: Using The Menu Screen
Preparation Using the menu screen ≥ You can also perform operations by touch operation. (l 20) Press the MENU button. MENU Select the desired item, then Select the desired top menu A press the button in the center using the cursor button, then to enter the setting. -
Page 24: Basic
Basic Selecting a media to record [SD CARD 1] and [SD CARD 2] can be selected separately to record motion pictures or still pictures. Change the mode to Select the menu. (l 23) : [SW & DISP SETUP] # [MEDIA SELECT] MENU Select the media you want to record motion pictures or still pictures on... -
Page 25: Recording Motion Pictures
Basic Recording motion pictures Change the mode to Open the LCD monitor. Press the recording start/stop button B to start recording. A When you begin recording, ; changes to ¥. ≥ Recording will stop when you press the recording start/stop button again. ... -
Page 26: Intelligent Auto Mode
Basic Intelligent Auto Mode The modes (appropriate for the condition) are set just by pointing the unit to what you want to record. MANUAL FOCUS iA/MANUAL/FOCUS switch Slide the switch to change the Intelligent Auto Mode/Manual Mode/Manual Focus Mode. VQT5E00 (ENG) -
Page 27: Using The Zoom
Basic Using the zoom Zoom lever/Sub zoom lever T side: Close-up recording (zoom in) W side: Wide-angle recording (zoom out) Ring Zoom T side: Close-up recording (zoom in) W side: Wide-angle recording (zoom out) (ENG) VQT5E00... -
Page 28: Manual Recording
Basic Manual recording Set the iA/MANUAL/FOCUS switch to manual mode. is displayed in the Manual Mode. ≥ MANUAL FOCUS ∫ When using the multi manual ring Press the CAMERA FUNCTION button to select the desired item. ZOOM ZOOM ZOOM ≥... -
Page 29: Motion Picture/Still Picture Playback
Basic Motion picture/Still picture playback ≥ You can also perform operations by touch operation. (l 20) Change the mode to Select the play mode select icon A using the cursor button, then press the button in the center. Select the media type B and press the button in the center. -
Page 30: Watching Video/Pictures On Your Tv
Select the playback operation by selecting the operation icon and press the button in the center. E Operation icon TC 00:00:00:00 TC 00:00:00:00 TC 00:00:00:00 ≥ Operation icons and screen display will disappear when no operation is performed for a specific period of time. To display them again, press the cursor button. -
Page 31: Others
Others Specifications Memory Card Camera-Recorder Information for your safety Image sensor: Power source: 1/4.5 type (1/4.5z) 1MOS image sensor DC 9.3 V (When using AC adaptor) Effective pixels; 4140 K DC 7.2 V (When using battery) Motion picture ; 4140 K (16:9), 3110 K (4:3) Still picture;... - Page 32 Viewfinder: Operating humidity: 0.61 cm (0.24z) wide EVF (Approx. 263 K dots 10%RH to 80%RH equivalent) Battery operation time: Microphone: See page 18 Stereo (with a Zoom Microphone) AC adaptor Minimum required illumination: Information for your safety Approx. 2 lx (1/25 with Low Light Mode in the Scene Mode) Approx.
-
Page 33: About Copyright
≥ “AVCHD”, “AVCHD Progressive” and the ≥ Separate license contracts must be obtained “AVCHD Progressive” logo are trademarks of from MPEG LA where SD Memory Cards Panasonic Corporation and Sony containing information recorded with this Corporation. product are to be distributed to end users for ≥... -
Page 34: Información Para Su Seguridad
Información para su seguridad ADVERTENCIA: Para reducir el riesgo de incendio, de descarga eléctrica, o de daño del producto, ≥ No exponga esta unidad a la lluvia, humedad, goteo o salpicaduras. ≥ No ubique los objetos llenos con líquido, como floreros, sobre esta unidad. ≥... - Page 35 ESPAÑOL ∫ Eliminación de Aparatos Viejos y de Pilas y Baterías Solamente para la Unión Europea y países con sistemas de reciclado. Estos símbolos en los productos, su embalaje o en los documentos que los acompañen significan que los productos eléctricos y electrónicos y pilas y baterías usadas no deben mezclarse con los residuos...
- Page 36 Extracción de la batería Batería de alimentación principal (Batería de litio iones) (Consulte la página 47 para conocer detalles.) Presione el botón de liberación de la batería. Batería de carga de seguridad (Batería de litio) ≥ Si desea extraer la batería para desecharla al final de su vida útil, póngase en contacto con su distribuidor.
- Page 37 Si hay condensación, saque la batería y/o el con la norma HDMI no funcionarán. Se adaptador CA y deje la unidad así durante recomienda el cable Panasonic HDMI. N.° de aproximadamente una hora. Cuando la unidad pieza: RP-CHE15 (1,5 m) se acostumbre a la temperatura que la rodea, se desempañará...
- Page 38 “aviso de registro” 3 años de garantía gratis Asegúrese de conservar el correo electrónico con el “aviso de registro” durante el periodo de validez de la garantía. Detalles acerca de la inscripción del usuario y de la garantía extendida: http://panasonic.biz/sav/pass_e VQT5E00 (SPA)
- Page 39 Indice ∫ Cómo abrir Instrucciones de funcionamiento (formato PDF) Cuando coloca el CD-ROM y abre [INDEX.pdf] en el CD-ROM, se visualizará la lista de Instrucciones de funcionamiento. Haga clic en el nombre del documento de las Instrucciones de funcionamiento que desea abrir. ≥...
-
Page 40: Accesorios
Accesorios Revise los accesorios antes de usar esta unidad. Guarde los accesorios fuera del alcance de los niños para evitar que se los traguen. Números del producto correctos a partir de septiembre de 2013. Pueden sufrir modificaciones. Micrófono externo Batería Adaptador de CA CD-ROM Instrucciones de... -
Page 41: Preparación
Preparación Nombres y funciones de los principales componentes 4 5 6 18 19 Pieza de sujeción de la correa al En este caso, para alimentar utilice la batería hombro y el ruido se va a parar. Manija Botón photoshot [ ] (l 56) Palanca de reserva del zoom [W/T] Palanca de zoom [W/T] (en modo de... - Page 42 MANUAL FOCUS MENU O.I.S. 20 LED del anillo 21 Pieza de sujeción de la correa al hombro 22 Micrófonos internos 23 Testigo de grabación 24 Objetivo (l 45) 25 Visera del objetivo 26 Anillo manual múltiple (l 58) 27 Botón de funcionamiento de la cámara [CAMERA FUNCTION] (l 58) 28 Cambio de modo 29 Interruptor de enfoque manual/manual/...
- Page 43 35 Monitor LCD (Pantalla táctil) (l 51) 39 Visor (l 52) ≥ Extienda el visor antes del uso. ≥ Puede abrirse hasta 90o. 40 Altavoz 41 Botón de desbloqueo de la batería [PUSH] (l 47) 42 Porta batería (l 47) 43 Terminal de salida video [VIDEO OUT] ≥...
- Page 44 47 48 49 50 46 Tapa de la tarjeta SD (l 50) 47 Ranura de la tarjeta 2 (izquierda) (l 50) 48 Testigo de acceso (tarjeta 2) (l 50) 49 Ranura de la tarjeta 1 (derecha) (l 50) 50 Lámpara de acceso (tarjeta 1) (l 50) VQT5E00 (SPA)
- Page 45 ∫ Ajuste el largo de la empuñadura de manera que se adapte a su mano. 1, 2 Toque la cubierta de la correa y la correa. Ajuste el largo. 4, 5 Reemplace la correa. ∫ Colocación del cubilete Coloque al alinear la muesca de la parte del accesorio del cubilete con la protuberancia dentro del cubilete.
- Page 46 ∫ Acerca de los micrófonos Acoplamiento de los micrófonos estéreo externos estéreo externos en la unidad Acople los micrófonos en la zapata Micrófonos estéreo externo adicional. 1 Afloje el anillo de bloqueo. 2 Acople el micrófono. 3 Apriete con firmeza el anillo de bloqueo. ≥...
-
Page 47: Alimentación
Para asegurarse de utilizar productos seguros, le recomendamos que se utilice un paquete de baterías original de Panasonic. Insertar/extraer la batería ≥ Ajuste el interruptor de alimentación enOFF para apagar la unidad. (l 51) Meta la batería insertándola en la dirección señalada en la figura. -
Page 48: Carga De La Batería
Esto le permite continuar la grabación incluso si se produjera una falla en la alimentación o si el adaptador CA es desconectado de la toma de CA por accidente. ≥ Le recomendamos utilizar baterías Panasonic (l 40, 47). VQT5E00 (SPA) -
Page 49: Carga En Curso Y Tiempo De Grabación
≥ No podemos garantizar la calidad de este producto si se utilizan baterías de otras marcas. ≥ No caliente ni exponga a llama. ≥ No deje la/s batería/s en un coche expuesto a la luz directa del sol durante un largo período de tiempo con las puertas y las ventanillas cerradas. -
Page 50: Cómo Grabar En Una Tarjeta
Insertar/extraer una tarjeta SD Cuando usa por primera vez en este dispositivo una tarjeta SD que no es de Panasonic o una utilizada anteriormente en otro equipo, formatéela. (l 55) Cuando formatea la tarjeta SD, se borran todos los datos guardados. Una vez borrados los datos, no pueden recuperarse. -
Page 51: Encender/Apagar El Dispositivo
Preparación Encender/apagar el dispositivo Fije el interruptor de encendido en ON mientras presiona el botón de liberación del bloqueo B para encender la unidad. Para apagar la unidad Fije el interruptor de encendido en OFF mientras presiona el botón de liberación de bloqueo. -
Page 52: Ajuste Del Visor
∫ Deslice mientras toca Mueva el dedo mientras pulsa la pantalla táctil. ∫ Acerca de los iconos de funcionamiento ≥ Para operar los siguientes iconos usando los botones del cursor, seleccione el icono deseado usando los botones del cursor y luego presione el botón en el centro. (Se excluyen algunas funciones) Estos iconos se usan para alternar entre la página de visualización de miniaturas y el menú, para seleccionar... -
Page 53: Ajuste De La Fecha Y La Hora
Preparación Ajuste de la fecha y la hora El reloj no se configura en el momento de la compra. Asegúrese de configurar el reloj. Seleccione el menú. (l 54) : [OTRAS FUNCIONES] # [CONF. RELOJ] MENU Seleccione la fecha y hora a fijar usando el botón del cursor hacia la derecha o izquierda o luego ajuste el valor deseado usando el botón del cursor hacia arriba o... -
Page 54: Uso De La Pantalla De Menús
Preparación Uso de la pantalla de menús ≥ También puede realizar operaciones con el funcionamiento táctil. (l 51) Pulse el botón MENU. MENU Seleccione el elemento Seleccione el menú superior deseado, luego presione el deseado A usando el botón botón en el centro para del cursor y luego presione el ingresar el ajuste. -
Page 55: Básico
Básico Seleccionar un medio para grabar [TARJETA SD 1] y [TARJETA SD 2] se pueden seleccionar de forma separada para grabar las imágenes en movimiento o imágenes fijas. Cambie el modo a Seleccione el menú. (l 54) : [AJUSTE DISP y SW] # [SELEC. MEDIO] MENU Seleccione el medio que desea grabar, imágenes en movimiento o... -
Page 56: Grabación De Películas
Básico Grabación de películas Cambie el modo a Abra el monitor LCD. Pulse el botón de inicio/ parada de grabación B para iniciar la grabación. A Cuando comienza a grabar, ; cambia a ¥. ≥ La grabación se detiene si presiona de nuevo el botón de inicio/parada. -
Page 57: Modo Automático Inteligente
Básico Modo automático inteligente Los siguientes modos apropiados para la condición se ajustan apuntando el dispositivo a los que desea grabar. MANUAL FOCUS Interruptor Intelligent auto/Manual/Manual focus Deslice el interruptor para cambiar al modo automático inteligente/modo manual/modo de enfoque manual. Básico Uso del zoom Palanca del zoom/Palanca de reserva... -
Page 58: Grabación Manual
Básico Grabación manual Fije el interruptor Intelligent auto/Manual/Manual focus en el modo manual. se visualiza en el modo manual. ≥ MANUAL FOCUS ∫ Cuando usa el anillo manual múltiple Pulse el botón CAMERA FUNCTION para seleccionar la opción ZOOM ZOOM ZOOM... -
Page 59: Reproducción De Película/Fotografía
Básico Reproducción de película/fotografía ≥ También puede realizar operaciones con el funcionamiento táctil. (l 51) Cambie el modo a Seleccione el icono de selección del modo de reproducción A usando el botón del cursor, luego presione el botón en el centro. Seleccione el tipo de medio B y pulse el botón del centro. -
Page 60: Ver Vídeos/Imágenes En El Televisor
Seleccione la operación de reproducción al seleccionar el icono de funcionamiento y presionar el botón en el centro. E Icono de funcionamiento TC 00:00:00:00 TC 00:00:00:00 TC 00:00:00:00 ≥ Los iconos de funcionamiento y la visualización de la pantalla desaparecerán cuando no se realicen operaciones durante un periodo específico. -
Page 61: Especificaciones
Otros Especificaciones Camascopio basado en tarjeta de memoria Información para su seguridad Medio de grabación: Fuente de alimentación: Tarjeta de memoria SD 9,3 V de CC (Cuando se usa el adaptador Tarjeta de memoria SDHC de CA) Tarjeta de memoria SDXC 7,2 V de CC (Cuando se usa la batería) Consulte el volumen 2 de las Instrucciones de funcionamiento para obtener información... - Page 62 Función del Estabilizador de imagen: Masa: Óptico (estabilizador óptico de imagen híbrido, Aprox. 2270 modo activo (corrección de la rotación), [sin batería (suministrada) y una tarjeta SD función corrección de la inclinación) (opcional)] Monitor: Masa en operación: Monitor LCD de 7,5 cm (3,0z) de ancho (aprox. Aprox.
-
Page 63: Acerca De Los Derechos De Autor
≥ Se deben obtener contratos de licencia de “AVCHD Progressive” son marcas separados de MPEG LA donde las Tarjetas comerciales de Panasonic Corporation y de memoria SD que contienen información Sony Corporation. grabada con este producto se van a distribuir ≥... - Page 64 Web Site: http://panasonic.net © Panasonic Corporation 2013...
Need help?
Do you have a question about the AG-AC8EJ and is the answer not in the manual?
Questions and answers