Table of Contents
Advertisement
Quick Links
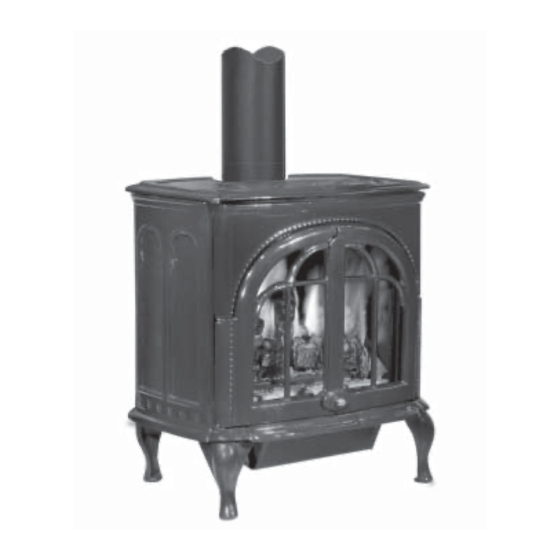
FREESTANDING
VENTED GAS
FIRED ROOM
HEATERS
These appliances may be
installed in an aftermarket
permanently located, manufac-
tured (mobile) home, where not
prohibited by local codes.
Report No. 116-S-08-5
WARNING: IF THE INFORMATION IN THIS MANUAL
IS NOT FOLLOWED EXACTLY, A FIRE OR EXPLO-
SION MAY RESULT CAUSING PROPERTY DAMAGE,
PERSONAL INJURY OR LOSS OF LIFE.
FOR YOUR SAFETY: Do not store or use gasoline
or other fl ammable vapors or liquids in the vicinity
of this or any other appliance.
FOR YOUR SAFETY: What to do if you smell gas:
• DO NOT light any appliance.
• DO NOT touch any electrical switches.
• Do not use any phone in your building.
• Immediately call your gas supplier from a
neighbor's phone. Follow your gas suppliers
instructions.
• If your gas supplier cannot be reached, call
the fi re department.
Installation and service must be performed by a
qualifi ed installer, service agency or the gas sup-
plier
.
INSTALLATION INSTRUCTIONS
Model CI1500DVF Series
Serefi na Series Direct Vent Gas Stoves
P/N 775,147M Rev C, 11/04
AVERTISSEMENT: ASSUREZ-VOUS DE BIEN SUIVRE
LES INSTRUCTIONS DONNÉ DANS CETTE NOTICE
POUR RÉDUIRE AU MINIMUM LE RISQUE D'INCENDIE
OU POUR ÉVITER TOUT DOMMAGE MATÉRIEL, TOUTE
BLESSURE OU LA MORT.
POUR VOTRE SÉCURITÉ: Ne pas entreposer ni utiliser
d'essence ni d'autre vapeurs ou liquides infl ammables dans
le voisinage de cet appareil ou de tout autre appareil.
POUR VOTRE SÉCURITÉ: Que faire si vous sentez une
odeur de gaz:
• Ne pas tenter d'allumer d'appareil.
• Ne touchez à aucun interrupteur. Ne pas vous servir
des téléphones se trouvant dans le batiment où vous
vous trouvez.
• Evacuez la piéce, le bâtiment ou la zone.
• Appelez immédiatement votre fournisseur de gaz
depuis un voisin. Suivez les instructions du fournisseur.
• Si vous ne pouvez rejoindre le fournisseur de gaz,
appelez le service dos incendies.
L'installation et service doit être exécuté par un qualifi é
installeur, agence de service ou le fournisseur de gaz.
MANUAL
Model CI2500DVF Series
Advertisement
Table of Contents

Subscribe to Our Youtube Channel
Related Manuals for Lennox Hearth Products 775


Summary of Contents for Lennox Hearth Products 775
-
Page 1: Installation Instructions
INSTALLATION INSTRUCTIONS MANUAL Model CI1500DVF Series Serefi na Series Direct Vent Gas Stoves P/N 775,147M Rev C, 11/04 AVERTISSEMENT: ASSUREZ-VOUS DE BIEN SUIVRE LES INSTRUCTIONS DONNÉ DANS CETTE NOTICE POUR RÉDUIRE AU MINIMUM LE RISQUE D’INCENDIE OU POUR ÉVITER TOUT DOMMAGE MATÉRIEL, TOUTE BLESSURE OU LA MORT. -
Page 2: Table Of Contents
fi red heater. It is our goal at Lennox Hearth Products to provide you, our valued customer, with an appli- ance that will ensure you years of trouble free warmth and pleasure. -
Page 3: High Altitude
• Proximity for Optimum Heat Transfer • Electrical Wiring (if optional blower is installed) The installation of this stove will require some research. Once your options are determined, consult with your local building department who will be able to give you the necessary... -
Page 4: Specifi Cations
Figure 1 (with ashlip) NOTE: DIAGRAMS & ILLUSTRATIONS NOT TO SCALE. DIMENSIONS CI1500DVF CI2500DVF 24-1/2” (622 mm) 30-1/2” (775 mm) 27-1/2” (699 mm) 28-1/2” (724 mm) 19” (483 mm) 22” (559 mm) 7” (178 mm) 7” (178 mm) 20-1/2” (521 mm) 23-1/2”... -
Page 5: Appliance And Vent Clearances
fl ooring, the appliance shall be installed on a metal or wood panel extend- ing the full width and depth of the stove body. Note: Ceramic tile is non-combustible and does not require a wood or metal panel under the appliance. -
Page 6: Manufactured Home Requirements
MANUFACTURED (MOBILE) HOME REQUIREMENTS These models may be installed in an after- market permanently located, manufactured home, where not prohibited by local codes. When installed in Manufactured Housing the following supplemental requirements must be met: • The appliance must be secured to the fl oor (i.e. - Page 7 EXTERIOR HORIZONTAL VENT TERMINATION CLEARANCE REQUIREMENTS See Item D in the Text Below. Center Line Exterior Wall of Termination *18” Horizontal Termination 18” Ventilated Soffit Inside Corner Detail D Fixed Closed Window = Air Supply Inlet = Vent Terminal y l t i t r l i t t s i...
-
Page 8: Typical Installation Sequence
2 plastic ties using scissors. Step 3: REMOVE FROM PALLET - A. Remove the trivet, then the cast iron stove top by carefully lifting them up and off and setting them aside (READ CAUTION BELOW). -
Page 9: Step 6 Remove Cardboard Pkg
B. If a wall-mounted thermostat is selected, mount it in a convenient location on a wall near the stove. If the warming shelves are being installed, see Homeowners Manual for installation instructions. C. Wire the thermostat within the millivolt control circuit using a maximum of 25 feet of 18 gage, 2 conductor wire. - Page 10 Horizontal Termination The vent must rise vertically, a minimum of 24" (610 mm) off the top of the appliance for Natural Gas and 36" for Propane Gas before the fi rst elbow. The horizontal run may extend up to 20 feet ( 6 meters) and include a vertical rise of up to 40 feet (12 meters) - see Figure 13.
- Page 11 Support Bracket Placement Diagram Support Building Brackets Horizontal / Inclined Run Support ( " Rise per Foot of Horizontal Run in the Framing Direction away from the Stove) Elbow Ceiling Firestop/Spacer Vertical Support Bracket Spacing Rise Every 5 ft (1.52 m)
- Page 12 DIRECT VENT SYSTEM COMPONENTS The following "Security Secure Vent IMPORTANT NOTE: Seal the fi rst section of pipe to the stove collar using mill-pac black, high temperature sealant. Model # SECURITY SECURE-VENT - Description SV4FK Vertical Flat Roof Term. Kit (w/flashing, storm collar, vertical Term.
-
Page 13: Step 10 Connect Gas Line
Step 11. INSTALLING LOGS AND GLOW- ING EMBERS The packaged log set and bag of glowing embers are located within the fi rebox of the stove. Installation Instructions: WARNING: If logs are not installed accord- ing to the directions shown here, fl ame... -
Page 14: Step 12 Reinstall Front Glass
Visually inspect the gasket on the backside of the frame. Gasket surface must be clean, free of irregularities and seated fi rmly. With the stove top off, position the glass front enclosure panel into the front opening with the gasket facing the relief door (reference Figure 8 &... -
Page 15: Step 15. Burner Adjustments
Burner On/Off Switch Top View Burner On/Off Front Switch Figure 31 SIT Millivolt Appliance Checkout The pilot fl ame should be steady, not lifting or fl oating. Flame should be blue in color with traces of orange at the outer edge. The top 3/8"... -
Page 16: Step 16 Install Top, Trivet & Ash Lip
Step 16. INSTALL STOVE TOP, TRIVET AND ASH LIP A. Place the cast iron top into position on the stove top (See Figure 35). Place the trivet into the recess on the cast iron top (See Figure 35). CAUTION: THE CAST IRON STOVE TOP IS VERY HEAVY AND MAY REQUIRE A MINIMUM OF TWO PEOPLE TO LIFT;... -
Page 17: Rating Plates
COMBUSTIBLES PROFONDEUR D'ALCÔVE MAXIMALE DIRECT VENT GAS STOVE / APPAREIL A GAZ AVEC EVACUATION DIRECTE VENTED GAS STOVE HEATER – NOT FOR USE WITH SOLID FUEL. FOYER DE CHAUFFAGE AU GAZ A EVACUATION - NE DOIT PAS ETRE UTILISE AVEC UN COMBUSTIBLE SOLIDE. - Page 18 Consult your local distributor for fi replace code information. Printed in U.S.A. © 2003 Lennox Hearth Products P/N 775,147M REV. C 11/2004 NOTE: DIAGRAMS & ILLUSTRATIONS NOT TO SCALE.
Need help?
Do you have a question about the 775 and is the answer not in the manual?
Questions and answers