Table of Contents
Advertisement
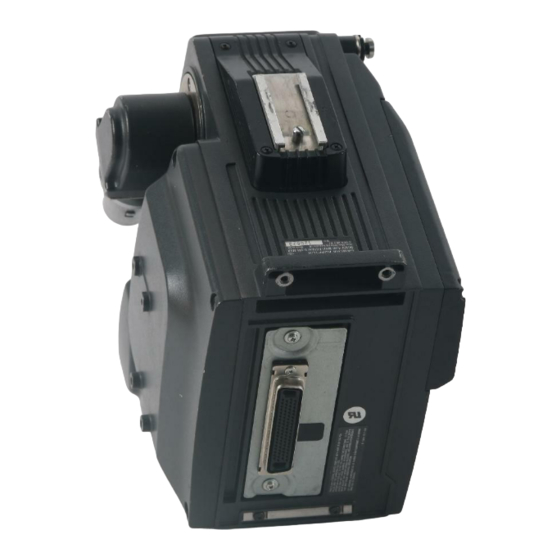
Camera Adaptor
Operating Instructions
Before operating the unit, please read this manual thoroughly and retain it for future
reference.
You can find the operating instructions in Japanese, English, French, German,
Italian and Spanish on the CD-ROM (packed together).
For details on the manuals supplied, see "Using the CD-ROM Manual" on page 7.
CA-TX50/50P
© 2004 Sony Corporation
*
3
-
8
6
3
-
1
3
1
(1)
-
1
3
*
Advertisement
Table of Contents

Related Manuals for Sony CA-TX50


Summary of Contents for Sony CA-TX50
- Page 1 Before operating the unit, please read this manual thoroughly and retain it for future reference. You can find the operating instructions in Japanese, English, French, German, Italian and Spanish on the CD-ROM (packed together). For details on the manuals supplied, see “Using the CD-ROM Manual” on page 7. CA-TX50/50P © 2004 Sony Corporation...
- Page 2 The manufacturer of this product is Sony Corporation, WARNING 1-7-1 Konan, Minato-ku, Tokyo, Japan. The Authorized Representative for EMC and product To reduce the risk of fire or electric shock, do safety is Sony Deutschland GmbH, Hedelfinger Strasse not expose this apparatus to rain or moisture.
- Page 3 Der autorisierte Repräsentant für EMV und Produktsicherheit ist Sony Deutschland GmbH, Le fabricant de ce produit est Sony Corporation, 1-7-1 Hedelfinger Strasse 61, 70327 Stuttgart, Deutschland. Konan, Minato-ku, Tokyo, Japon. Bei jeglichen Angelegenheiten in Bezug auf Le représentant autorisé...
-
Page 5: Table Of Contents
Table of Contents Overview ..............6 Using the CD-ROM Manual ......... 7 Preparations ............7 Reading the CD-ROM Manual ......7 Location and Function of Parts ......8 Front and Right Side .......... 8 Switches and Knobs on the Rear ......9 Connectors and Switches on the Rear and Left Side .............. -
Page 6: Overview
• Microphone or line-in audio input * It is required to perform the internal adjustment to change the teleprompter video signal transfer direction to input. Contact your Sony dealer for more information on changing the teleprompter video signal transfer direction. Overview... -
Page 7: Using The Cd-Rom Manual
Adobe Reader. In such a case, install the latest version you can download from the URL mentioned in “Preparations” above. Note If you have lost or damaged the CD-ROM, you can purchase a new one to replace it. Contact your Sony service representative. Using the CD-ROM Manual... -
Page 8: Location And Function Of Parts
Location and Function of Parts Front and Right Side Accessory Shoe Shoulder Strap fitting c CALL button a Camera connector (PRO 76-pin DIGITAL) b POWER switch a Camera connector (PRO 76-pin DIGITAL) control panel. This unit’s back tally indicator also lights Connects to the camera’s 76-pin connector. -
Page 9: Switches And Knobs On The Rear
Switches and Knobs on the Rear d CURSOR switch e Cursor knobs a RET 1/RET 2/RET 3/ PROMPTER buttons f PROD/ENG switch g PROGRAM knob b TALLY switch h INTERCOM knob i MIC/LEVEL switch c Back tally indicator a RET 1/RET 2/RET 3/PROMPTER buttons d CURSOR switch Select the return video signal* to be output from the Selects whether or not to display a box cursor in the... - Page 10 Note When the INCOM selector on the CCU-TX50/50P Camera Control Unit is in the PRIV position, the intercom operates only between the camera and the camera control unit regardless of the PROD/ENG switch position. g PROGRAM knob Adjusts the program audio reception level. When using a DXC-D50/D55 series camera, setting the MIC/LEVEL switch i to OFF/FRONT will enable this knob to adjust the balance between the program audio...
-
Page 11: Connectors And Switches On The Rear And Left Side
An internal adjustment can be made to enable both sides AC Adaptor for AC power sources. of the headset to receive audio, with intercom audio on Contact your Sony dealer for more information on refitting the the left side and program audio on the right side. CCU connector. - Page 12 REAR/LINE: Transfers audio from a line output for teleprompter video signals. connected to this unit’s AUDIO IN (CH1/CH2) Contact your Sony dealer for further information on the connector to the camera control unit. internal adjustment to change the teleprompter video signal transfer direction.
-
Page 13: Mounting On Video Camera
Note Mounting on Video Turn the POWER switch off before mounting the unit on Camera the camera. Fit the projection on the bottom of this unit into the This unit is dockable with the DXC-D50/D55 series slot on the camera. digital video camera. -
Page 14: Removing From The Camera
Tighten the two screws (M4 × 6) to fix the shoulder Notes on Use pad. Use and storage locations Avoid using or storing the unit in the following places: • Where it is subject to extremes of temperature (operating temperature: –10ºC to +45ºC (14ºF to 113ºF)). -
Page 15: Specifications
Note IN connector: max. 4.8 A Always verify that the unit is operating properly Operating temperature before use. SONY WILL NOT BE LIABLE FOR –10ºC to +45ºC (14ºF to 113ºF) DAMAGES OF ANY KIND INCLUDING, BUT Operating humidity NOT LIMITED TO, COMPENSATION OR... - Page 16 Sony Corporation Printed in Belgium...
Need help?
Do you have a question about the CA-TX50 and is the answer not in the manual?
Questions and answers