Table of Contents
Advertisement
Important:
read this instruction manual carefully
before putting the chainsaw into operation
and strictly observe the safety regulations!
Keep this instruction manual for future reference!
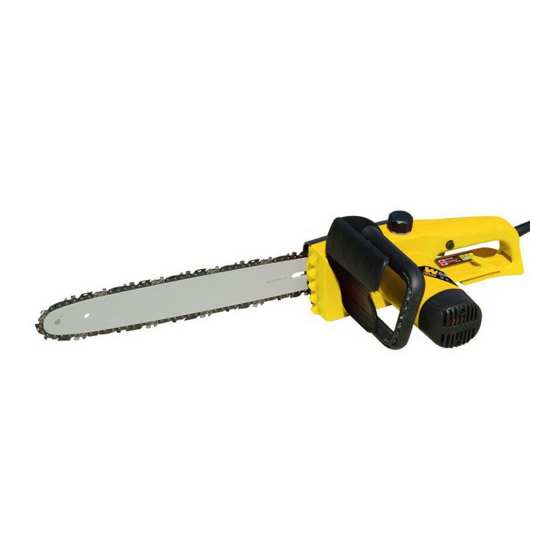
opErator'S manUaL
14" Electric Chainsaw
Model # 4014
Questions? problems?
Do not rEtUrn to StorE
Store personnel where the winch was purchased
are not trained to handle technical questions.
In order to answer questions in the most efficient and
speedy manner, contact Customer Service at:
(888) 315-3080 m-F 8-5 CSt or
by email: partsandservice@greatlakestec.com
Advertisement
Table of Contents

Subscribe to Our Youtube Channel
Related Manuals for Wen 4014


Summary of Contents for Wen 4014
- Page 1 14" Electric Chainsaw Model # 4014 Important: read this instruction manual carefully before putting the chainsaw into operation and strictly observe the safety regulations! Keep this instruction manual for future reference! Questions? problems? Do not rEtUrn to StorE Store personnel where the winch was purchased are not trained to handle technical questions.
-
Page 2: Table Of Contents
Chain Tension Adjustment ... . . 9 The WEN product you purchased has been factory pre-assembled for your convenience. Due to packaging restrictions, guide bar and saw chain installation will be necessary. After opening the carton, check for damage or missing parts. -
Page 3: Specifications
CHaInSaW SpECIFICatIonS SPECIFICATIONS Model 4014 Motor 120V, 60Hz, 8A Saw Chain Oregon 91VG, 3/8” Pitch Bar Length 14” Chain Speed at No Load 6m/s Lubrication of Chain Automatic Lubrication Chain Oil Required Oil Tank Capacity 100 cc (3.52 fluid ounces) -
Page 4: Important Safety Information
Important SaFEtY InFormatIon Warning – When using an electric chain saw, basic safety pre- cautions should always be followed to reduce the risk of fire, electric shock, and injury to persons, including the following: READ ALL INSTRUCTIONS. Make sure you read and understand all instructions Important Safety Information on pages 2 through 4. -
Page 5: While Operating Saw
10. Before cutting, always provide the following: Clear work area Secure footing Planned retreat path from falling tree 11. Inspect tree before cutting down. Make sure there are no dead limbs or branches that may fall on you. 12. To reduce the risk of electric shock, this saw has a polarized plug (one blade is wider than the other).This plug will fit in a polarized outlet only one way. -
Page 6: Kickback Safety Precaution
16. Carry chain saw from one place to another • With saw stopped and unplugged • By holding front handle (never use hand guard as handle) • With finger off trigger • With guide bar and chain to rear KICKBACK SAFETY PRECAUTIONS Warning –... -
Page 7: Extension Cords
EXTENSION CORDS If you use an extension cord, be sure to use one heavy enough to carry the current your electric saw will draw. An improper gauged extension cord will cause a drop in wire voltage resulting in loss of power and overheating. -
Page 8: Assembly
aSSEmBLY WarnInG - Check the chain tension before each use. always use protective gloves. INSTALLING GUIDE BAR AND SAW CHAIN 1. Remove sprocket cover locking nut and the sprocket cover. If guide bar and chain are already installed, turn chain tension screw counter clockwise 2 to 3 turns. IMPORTANT: Always loosen sprocket cover locking nut before turning the chain tension screw or else the sprocket cover and tension adjuster will be damaged. -
Page 9: Chain Lubricating Oil
WarnInG - always loosen sprocket cover locking nut before turning chain tension screw otherwise tension adjuster will be damaged. Do not over-tighten sprocket cover locking nut. CHAIN LUBRICATING OIL Use high quality chain lubricating oil to minimize wear between the saw chain and guide bar while in use. We recommend using SAE No. -
Page 10: Cutting Instructions
CUttInG InStrUCtIonS Before use: Check that the chain brake works properly and is not damaged. Visually inspect the entire saw to ensure all components are free from damage and work properly. Check the chain tension and adjust if necessary. WarnInG - always follow safety procedures. Use the chain- saw only for cutting wood and not other types of materials. - Page 11 WarnInG - a majority of kickback accidents occur during limbing. WarnInG - never attempt to cut logs while they are in a pile or when a couple of logs are lying together. Such at- tempts drastically increase the risk of kickback which can result in serious or fatal injury.
-
Page 12: Maintenance
maIntEnanCE GUIDE BAR AND OIL HOLES Clean guide bar before use. Follow instructions for removing and installing guide bar and saw chain. Remove guide bar and clean groove of the guide bar with a small screwdriver. Clean oil holes with a wire (see below). Check the sprocket and the clutch and clean the bar mount area before installing the bar. -
Page 13: Maintenance Chart
MAINTENANCE CHART Please note that the following maintenance intervals apply for normal operating conditions only. If you daily working time is longer than normal or cutting conditions are different, shorten the specified intervals accordingly. Visual inspection Complete machine Clean Switch Check operation Oil tank Clean... -
Page 14: Exploded View & Parts List
ExpLoDED VIEW & partS LISt ... - Page 15 partS LISt IteM# DeSCRIPtIOn IteM# DeSCRIPtIOn BeARInG 608 SPROCket COVeR SCABBARD ARMAtuRe SAW ChAIn BeARInG 607 GuIDe BAR ShIelD RInG WASheR WInD ShIelD SPROCket BOlt SCReW StAtOR GeAR BOx COVeR SWItCh BeARInG 6000Z CAPACItOR ShIelD RInG CORD BRACket BIG GeAR CORD SleeVe helICAl GeAR POWeR CORD...
-
Page 16: Warranty
LImItED WarrantY WEN Products warrants its power tools to be free of defects in materials and from work- manship for a period of one (1) year from date of original purchase. We will repair or re- place, at our option, any tool covered by this warranty that after inspection is found to be defective in materials or workmanship during the warranty period. - Page 17 notES...
Need help?
Do you have a question about the 4014 and is the answer not in the manual?
Questions and answers