Advertisement
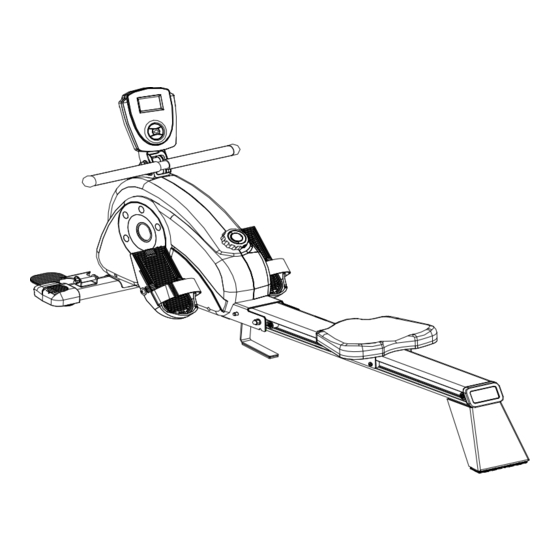
HS1100RW ROWER
Owner's Manual
Assembly
Usage
Parts
CAUTION: Weight on this product should not exceed 120 kgs.
CAUTION: Exercise of a strenuous nature, as is customarily done on this equipment,
should not be undertaken without first consulting a physician. No specific health claims are made
or implied as they relate to the equipment. Measurements made by the equipment are believed to
be accurate, but only the measurements of your physician should be relied upon.
IMPORTANT: Read all instructions carefully before using this product. Retain this owner's manual
for future reference.
Advertisement
Table of Contents

Related Manuals for Healthstream HS1100RW ROWER


Summary of Contents for Healthstream HS1100RW ROWER
- Page 1 HS1100RW ROWER Owner’s Manual Assembly Usage Parts CAUTION: Weight on this product should not exceed 120 kgs. CAUTION: Exercise of a strenuous nature, as is customarily done on this equipment, should not be undertaken without first consulting a physician. No specific health claims are made ...
-
Page 2: Table Of Contents
Table of Contents ■ 2 Safety Precautions Pre‐assembly Check / ■ 3‐7 Hardware Packing List ■ 5‐10 Assembly Exploded Drawing ■ 11 ■ 12‐14 Parts List ■ 15 Computer Instructions ■ 16 Trouble Shooting ... -
Page 3: Safety Precautions
SAFETY PRECAUTIONS Thank you for purchasing our product. Even though we go to great efforts to ensure the quality of each product we produce, occasional errors and /or omissions do occur. In any event should you find this product to have either a defective or a missing part please contact us for a replacement. This product has been designed for home use only. Product liability and guarantee conditions will not be applicable to products being subjected to professional use or products being used in a gym center. This exercise equipment was designed and built for optimum safety. However, certain precautions apply whenever you operate a piece of exercise equipment. Be sure to read the ... - Page 4 PRE‐ASSEMBLY PARTS CHECK LIST 89/91 32/33 PARTS NO. DESCRIPTION Q’TY 1 FRAME 1 2 SEAT RAIL 1 ...
-
Page 5: Hardware Packing List
HARDWARE PACKING LIST PART DESCRIPTION Q’TY SKETCH 26 Allen head bolt M8x55mm 2 25 Spring washer M8 9 24 Flat washer M8 7 11 Lock pin 2 31 Flat washer M8 2 38 Allen head bolt M8x15mm 7 42 Acorn nut M10 1 45 Flat washerφ20xφ10.2x2t 1 47 Allen head bolt M10x130mm 1 ... -
Page 6: Frame
ASSEMBLY INSTRUCTIONS Note: It is easier to assemble this Rowing Machine if you have a helper to assist. STEP 1: REMOVING THE TRANSPORT STRAP BUCKLE: Use one hand to pull out 40‐50 cm of the tension strap while holding the other half of the tension strap with the other. Ask your helper to remove the transport tension buckle and then discard it. Put the handlebar (3) back in to the handlebar holder (8) slowly. STEP 2: ATTACHING THE FRONT STABILIZER: Attach the front stabilizer (9) with its two wheel caps (20L/R) to the front curved bracket of the main frame (1) and then secure it with two Allen head bolts (26), two spring washers (25) and two flat washers into the tapped holes at the bottom of the machine (24) using the Allen key provided. – please note that the Stabilizer with caps are installed with the caps marked Left (L) and right (R) as viewed from the Tension adjuster knob side of the machine. ... -
Page 7: Seat Rail
STEP 3: ATTACHING THE SUPPORT BRACKET Attach the support bracket (18) to the bottom side of the main frame (1) and secure it with two flat washers (24) and two spring washers (25) and two Allen head bolts (38) into the tapped holes with the Allen key provided. STEP 4: ATTACHING THE FOOT PEDAL ROD Put the support rod (37) through the inner tube of The chain guard (1) It will stop at the middle groove position. Note: The groove of inner tube has one spring clip pre‐set (99) to stop the support rod moving too far so when inserted, the rod should an equal distance side to side of the rower ... -
Page 8: Rear Support Post
STEP 6: ATTACHING THE SEAT AND STOPPERS Slide the seat assembly (91) with the pre‐assembled seat carriage bracket (89) into the seat rail (2) from the far end of the seat rail, making sure that the seat itself is pointing forwards, towards the machine end (2). Put one of the long flat head bolts (80) with one stopper (81) through one side of the seat rail (2), then add the other stopper (81) and then secure the assembly with one nut (82). Make sure the seat assembly slides smoothly up and down the seat rail. STEP 7 ATTACHING THE REAR SUPPORT POST: Place the rear support post (12) to the bottom of the seat rail (2), and secure with three flat ... -
Page 9: Assembly
STEP 8 ATTACHING THE FOOT PEDALS: Notes: The foot pedals (32) with Velcro straps (33R/L) are pre‐assembled. Put the pivot shaft (36) through the inner tube of the chain guard (1). Then attach the left pre‐assembled foot pedal (32/33L) to the left side of pivot shaft (36) and secure with one flat washer (31), one spring washer (25) and one Allen head bolt (38) by hand for now. Repeat the same procedure for the right foot pedal (32/33R) this time, to the pivot shaft (36) assembly. After both foot pedals (32/33(L/R) are fixed, please use the Allen key tool supplied to tighten both pedals securely. ... - Page 10 STEP 10 ATTACHING THE COMPUTER: Lift the computer bracket (7) to the upright position. Remove the four pre‐inserted screws (56) from the computer (55). Connect the plug from the middle section sensor (51) to the socket of the extension sensor wire which comes from computer (55). Attach the computer (55) to the top computer bracket (7) and secure with the four screws (56). ...
- Page 11 HOW TO FOLD YOUR ROWER FOR STORAGE: Please lift the frame a little, and joggle it while pulling the spherical head locking pin (48) out of the the seat rail (2). Slide the seat (91) toward to the front end of seat rail (IMPORTANT!) (2) and fold the seat rail (2) to the upright position. Push the spherical head locking pin (48) through the bracket and the rower seat rail (2) to fix the seat rail (2). In the locked and upright position. Tension Adjustment: When you use your new Rower for the first time, it’s always start from tension level 1 and then increase ...
- Page 12 PARTS DESCRIPTION ...
-
Page 13: Parts List
PARTS LIST PART NO. DESCRIPTION Q’TY (PCS) 1 1 Main frame 2 1 Seat Rail 3 1 Handlebar 4 2 Foam grip 5 1 Handlebar sleeve 6 Cap 2 7 1 Computer bracket 8 Handlebar holder 1 9 1 Front stabilizer 10 Foot plate 2 11 2 Lock pin 12 1 ... -
Page 14: Allen Head Bolt M8X15Mm
34 4 Machine screw M5x15mm 35 6 Machine screw M5x10mm 36 1 Pivot shaft 37 1 Support rod 38 8 Allen head bolt M8x15mm 39 4 Sensor wire pad 40 4 Machine screw M4x10mm 41 1 Plug 42 1 Acorn nut M10 43 1 Flat washer φ20xφ10.2x2.5t Anti‐slippery pad 44 2 45 1 Flat washerφ20xφ10.2x2t 46 2 ... -
Page 15: Flat Head Bolt M8X85Mm
72 1 Nylon nut M10x7mm 73 7 Nylon nut M8 74 1 Flat washerφ16.5xφ32x0.5t 75 1 Drive belt 76 2 Nut 3/8”x4mm 77 2 Nut 3/8”x7mm 78 5 Round head screw M5x25mm 79 1 Spring 80 Flat head bolt M8x85mm 2 81 Stopper 4 82 Nut M8 2 83 4 Allen head bolt M8x24mm 84 1 Magnet holder 85 ... - Page 16 EXERCISE COMPUTER USER INSTRUCTIONS EXERCISE COMPUTER FUNCTION/SPECIFICATIONS CALORIES 0.0‐999.9 KCAL (THEORETICAL) DISTANCE 0.0‐999.9 KILOMETRES COUNTER 0~9999 (TOTAL STROKES) SPEED 0.0‐999.9 KM/H (CURRENT ROWING SPEED) TIMER 0.00‐99.59 MINUTES (COUNT UP) EXERCISE MONITOR OPERATING SPECIFICATIONS POWER SOURCE 2xAA(1.5V) POWER CELLS STORAGE TEMPERATURE ‐10c‐+60c NORMAL OPERATING TEMPERATURE 0c‐+40c USING THE EXERCISE MONITOR ON YOUR CYCLE The Exercise computer’s function has 5 function with 3 split LCD display screen. When the signal input, the exercise computer will display the function time, distance, calories in order. The computer will be turned on automatically by pressing MODE button or when you start pedaling. The computer will be shut off automatically if no signal is detected for 4 minutes. You can press MODE ...
-
Page 17: Trouble Shooting
TROUBLE SHOOTING Problem Cause Correction Monitor does not display Batteries not installed Insert batteries Securely plug sending unit into No speed or distance Sending unit not connected extension wire and the back of displays on the monitor the computer Sending unit not working properly Replace sending unit Computer not working properly Replace computer Securely connect the resistant No tension Resistant cable not connected cable Magnetic wheel not working Replace magnetic wheel properly Grinding Crank bearing defective Replace crank bearings Idle pulley defective Replace idle pulley Mag. flywheel defective Replace mag. flywheel Squealing ... - Page 18 TRAINING GUIDELINES Exercise Exercise is one of the most important factors in the overall health of an individual. Listed among its benefits are: Increased capacity for physical work (strength endurance) Increased cardiovascular (heart and arteries/veins) and respiratory efficiency Decreased risk of coronary heart disease Changes in body metabolism, e.g. losing weight Delaying the physiological effects of age Physiological effects, e.g. reduction in stress, increase in self‐confidence, etc. Basic Components of Physical Fitness There are four all encompassing components of physical fitness and we need to briefly define each and clarify its role. Strength is the capacity of a muscle to exert a force against resistance. Strength contributes to power and speed and is of great importance to a majority of sports people. ...
- Page 19 Reversibility If you stop exercising or do not do your program often enough, you will lose the benefits you have gained. Regular workouts are the key to success. Warm Up Every exercise program should start with a warm up where the body is prepared for the effort to come. It should be gentle and preferably use the muscles to be involved later. Stretching should be included in both your warm up and cool down, and should be performed after 3‐5 minutes of low intensity aerobic activity or callisthenic type exercise. Warm Down or Cool Down This involves a gradual decrease in the intensity of the exercise session. Following exercise, a large supply of blood remains in the working muscles. If it is not returned promptly to the central circulation, pooling of blood may occur in the muscles Heart Rate As you exercise, so the rate at which your heart beat also increases. This is often used as a measure of the required intensity of exercise. You need to exercise hard enough to condition your circulatory system, and increase your pulse rate, but not enough to strain your heart. ...
- Page 20 Endurance Circuit Training Cardiovascular endurance, muscle, strength, flexibility and coordination are all necessary for maximum fitness. The principle behind circuit training is to give a person all the essentials at one time by going through your exercise program moving as fast as possible between each exercise. This increases the heart rate and sustains it, which improves the fitness level. Do not introduce this circuit training effect until you have reached an advanced program stage. Body Building Is often used synonymously with strength training The fundamental principal here is OVERLOAD. Here, the muscle works against greater loads than usual. This can be done by increasing the load you are working against. Patronization This is the term used to vary your exercise program for both physiological and psychological benefits. In your overall program, you should vary the workload, frequency and intensity. The body responds better to variety and so do you. In addition, when you feel yourself getting “stale’, bring in periods of ...
- Page 21 STRETCHING Stretching should be included in both your warm up and cool down, and should be performed after 3‐5 minutes of low intensity aerobic activity or callisthenic type exercise. Movements should be performed slowly and smoothly, with no bouncing or jerking. Move into the stretch until slight tension, not pain, is felt in the muscle and hold for 20‐30 seconds. Breathing should be slow, rhythmical and under control, making sure never to hold your breath. HEAD ROLLS SHOULDER LIFTS Rotate your head to the right for one count, Lift your right shoulder up toward your Feeling the stretch up the left side of your ear for one count. Then lift your left neck. Next rotate your head back for one ...
- Page 22 INNER THIGH STRETCH TOE TOUCHES Sit with the soles of your feet together with Slowly bend forward from your waist, letting your knees pointing outward. Pull your feet your back and shoulders relax as you stretch as close Into your groin as possible. Gently toward your toes. Reach down as far as you push your knees towards the floor. Hold for ...
Need help?
Do you have a question about the HS1100RW ROWER and is the answer not in the manual?
Questions and answers
The tension on my rower HS1100RW Rower Health Stream Purchased from Rebel Sport pulls you back. How do I fix it? Cheers
To fix the tension issue on your Healthstream HS1100RW Rower, adjust the tension knob (64). Turning it clockwise will increase the tension, while turning it counter-clockwise will decrease the resistance. Start at tension level 1 and gradually increase as needed.
This answer is automatically generated