wiking Miro 1 Installation And User Manual
Hide thumbs
Also See for Miro 1:
- Installation and user manual (56 pages) ,
- Assembly instructions manual (24 pages) ,
- Manual (8 pages)
Table of Contents
Advertisement
Available languages
Available languages
Advertisement
Chapters
Table of Contents

Related Manuals for wiking Miro 1


Summary of Contents for wiking Miro 1
- Page 1 WIKING Miro 3 WIKING Miro 5 WIKING Miro 1 WIKING Miro 4 WIKING Miro 6 WIKING Miro 2 Installations- og brugsvejledning ......8 Installation- and User’s Manual .
-
Page 8: Table Of Contents
Brugsvejledning ..................13 Betjening af luftspjældet ................14 Værd at vide når du fyrer ................14 Optænding og fyring i din WIKING brændeovn ...........16 Værd at vide om røgrøret ................17 Værd at vide om skorstenen................17 Rengøring og vedligeholdelse af din brændeovn ........18 Ydeevnedeklaration ..................20... -
Page 9: Velkommen Som Wiking Brændeovnsejer
Velkommen som WIKING brændeovnsejer Kære WIKING-ejer Vi ønsker dig tillykke med din nye WIKING brændeovn og håber, at du får stor glæde af den. WIKING har i mere end 30 år udviklet og produceret kvalitetsbrændeovne, og vi er kendt i hele Europa for vores design og høje tekniske standard. -
Page 10: Installationsvejledning
Når du er sikker på at de løse dele er på plads, er du klar til installationen af brændeovnen. Ændring af røgafgang (WIKING Miro 1 - WIKING Miro 4) Hvis røgafgangen ønskes ændret fra topafgang til bagudgang gøres som følger: 1. - Page 11 Stillefødder (tegning B) WIKING Miro 3/Miro 4/Miro 5/Miro 6 har 4 stk. stillefødder indbygget i bundpladen. Åbn lågen under brændefaget. Løsn skruen (1) i hver side på den lodrette afdækningsplade bagerst i rummet ved hjælp af en unbraconøgle. Løft afdækningspladen (2) op, tip den nederste del lidt fremad og træk afdækningspladen ud.
- Page 12 Miro 1 76 kg 70,8 x 46,8 x 35,6 cm 65 cm 90 cm Miro 1 på piedestal 87 kg 110,4 x 46,8 x 35,6 cm 65 cm 90 cm Miro 2 79 kg 70,8 x 46,8 x 35,6 cm...
-
Page 13: Brugsvejledning
Typeskilt og serienummer (tegning C) Typeskilt og serienummer er på WIKING Miro 1/Miro 2 klæbet på en udtræksplade, der er pla- ceret i venstre sideplade ved siden af lukkekrogen. Løsn skruen og træk ud i det lille håndtag. -
Page 14: Betjening Af Luftspjældet
Fyring med kul og energikoks WIKING Miro er ikke konstrueret til fyring med kul og energikoks. Opbevaring af træ Vandindholdet på maks. 20% opnås ved at opbevare træet minimum 1 år, helst 2 år, udendørs under halvtag. - Page 15 Brændsel Maksimal afbrænding pr. time Træ 2,5 kg Advarsel: For høj varme kan ødelægge både brændeovn, skorsten og røgrør. Hvis du derfor overskrider ovennævnte grænser, er brændeovnen, skorstenen og røgrøret ikke længere om- fattet af fabriksgarantien. Typisk indfyringsinterval for nominel indfyring Brændsel Typisk indfyringsinterval Træ...
-
Page 16: Optænding Og Fyring I Din Wiking Brændeovn
Placer 2 stk. brænde (5-8 cm i diameter) vandret i bunden af brændkammeret (svarende til 1-2 kg). Placer 5-8 stk. optændingspinde på kryds og tværs ovenpå. Læg 2 stk. optændingsblokke ned imellem de øverste lag optændingspinde. WIKING anbe- faler optændingsblokke af god kvalitet, da disse hverken ryger eller lugter. -
Page 17: Værd At Vide Om Røgrøret
WIKING brændeovn. Vær opmærksom på, at en muret skorsten er længere tid om at blive gennemvarm end en stålskorsten. -
Page 18: Rengøring Og Vedligeholdelse Af Din Brændeovn
Rengøring af glaslåge Din WIKING brændeovn er udstyret med rudeskyl, hvilket reducerer sodbelægningen på glas- set. Hvis der alligevel opstår soddannelser på glasset, kan det rengøres ved at tørre glasset over med et stykke fugtigt køkkenrulle, som er dyppet i aske. - Page 19 Fjederen i automatikken kontrolleres mindst hvert 2. år. WIKING Miro 1-4 (tegning G1): Løft toppladen af brændeovnen. Skru de 2 skruer (1) i toppen af begge sideplader af. Åbn lågen til brændefaget og skru skruen (2) i begge sider af (gælder kun WIKING Miro 3-4).
-
Page 20: Ydeevnedeklaration
Ydeevnedeklaration Ydeevnedeklarationen kan downloades fra vores hjemmeside via følgende links: WIKING Miro 1 www.wiking.com/dop/miro1 WIKING Miro 2 www.wiking.com/dop/miro2 WIKING Miro 3 www.wiking.com/dop/miro3-miro5 WIKING Miro 4 www.wiking.com/dop/miro4-miro6 WIKING Miro 5 www.wiking.com/dop/miro3-miro5 WIKING Miro 6 www.wiking.com/dop/miro4-miro6... -
Page 21: Problemløsning
Problemløsning Hvis du oplever, at brændeovnen ikke fungerer optimalt, kan du I dette skema se de typiske fejl, samt hvordan du løser dem. Hvis du ikke selv kan løse dem og/eller, der opstår andre, så kontakt venligst din montør eller brændeovnsforhandler. Problem Mulig årsag Gør følgende... -
Page 24: Garanti Og Reklamationsbestemmelser
Garanti og reklamationsbestemmelser 5 års udvidet reklamationsret Tillykke med din nye WIKING brændeovn. Vores produkter er alle af en god håndværksmæssig kvalitet, fremstillet af førsteklasses mate- rialer og underlagt en grundig kvalitetskontrol. Vi føler os derfor overbeviste om, at du har fået et produkt, der vil fungere problemfrit mange år frem i tiden. - Page 25 - det findes på typeskiltet bag på brændeovnen. Uberettiget reklamation/tilkaldelse af service Inden du reklamerer, bør du selv kontrollere din WIKING brændeovn for fejlmuligheder, som du selv kan afhjælpe - se evt. i den medfølgende brugermanual. Såfremt det viser sig, at din reklamation og krav om afhjælpning er uberettiget vil de dermed forbundne omkostninger blive...
- Page 26 Using the Air Damper ..................32 Some Things Worth Knowing about Firing ............33 Lighting and Firing your WIKING Wood-Burning Stove ........34 Some Things Worth Knowing about the Smoke Pipe ......... 35 Some Things Worth Knowing about the Chimney ..........35 Cleaning and Maintaining your Wood-Burning Stove .........
-
Page 27: Welcome
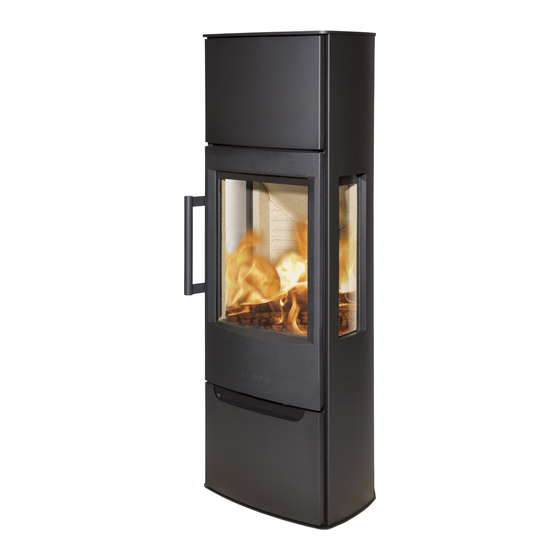
WIKING Miro is a beautiful wood-burning stove that fits in any home where pure and simple lines are desired. This stove has a large front pane, and in addition WIKING Miro 1, WIKING Miro 3 and WIKING Miro 5 have two broad side panes allowing the flames to be viewed from many angles. -
Page 28: Installation Instructions
Only when you are confident that the individual components are in place, you may begin with the installation of the wood-burning stove. Changing the Smoke Outlet from Top Outlet to Rear Outlet (WIKING Miro 1 - Miro 4) Proceed as follows to change the smoke outlet from top outlet to rear outlet: 1. -
Page 29: General Information
Allen key. Hook the cover plate back in place and tighten the two screws. The adjustable feet of WIKING Miro 1/Miro 2 stand on the plinth, which is delivered along with the wood-burning stove. First you mount the stove on the plinth (see separate instructions). Tilt the stove backwards and adjust the screws to get the desired position. -
Page 30: Technical Data
- in front Miro 1 76 kg 70,8 x 46,8 x 35,6 cm 65 cm 90 cm Miro 1 on pedestal 87 kg 110,4 x 46,8 x 35,6 cm 65 cm 90 cm Miro 2 79 kg... -
Page 31: Height Requirements
Height Requirements The WIKING Miro has a smoke outlet at the top and at the back. It can be installed with an approved smoke pipe and a steel chimney, or connected to a brick chimney with a fullform smoke pipe. -
Page 32: Storing Wood
Firing with Coal or Coke The WIKING Miro is not designed for firing with coal and coke. Storing Wood Water content of maximum 20% is achieved by storing the wood for at least one year - prefe- rably two years - outdoors, beneath a shed roof. -
Page 33: Some Things Worth Knowing About Firing
Norsk only be used in the case of overheating, if there is a fire in the chimney and when the fire in the stove has been allowed to go out completely in connection with cleaning, for instance. Some Things Worth Knowing about Firing Maximum Firing Amount Maximum amounts per hour: Fuel... -
Page 34: Lighting And Firing Your Wiking Wood-Burning Stove
2. Place two pieces of wood (5-8 cm in diameter) horizontally in the bottom of the combustion compartment (corresponding to 1-2 kg).Place 5-8 pieces of kindling randomly on top. 3. Place two firelighters between the top layer of kindling. WIKING recommends using high- quality firelighters, as they do not produce smoke or odours. -
Page 35: Some Things Worth Knowing About The Smoke Pipe
WIKING stove. Please be aware that it takes longer to heat a brick chimney than a steel chimney. -
Page 36: Chimney Fire
Cleaning the Glass Door Your WIKING wood-burning stove is equipped with a pane-flush system, which reduces the build-up of soot on the glass. If soot somehow accumulates on the pane, it can be cleaned by wiping the glass with a moist paper towel dipped in ash. -
Page 37: Chimney Sweeping
Mount the rear plate, the side plates and the top plate again. WIKING Miro 5-6 (Drawing G2): Lift the top plate off the stove. Lift the front (1) of the heat storage compartment up and forward, unhooking it from the four guide pins (2). Loosen the two screws (4) at the top in all sides of the heat storage compartment. -
Page 38: Declaration Of Performance
Check that the regulating lever moves smoothly. • Inspection of the seals and the replacement of worn parts. If you have any questions, please consult our FAQ page at www.wiking.com, or contact your local wood-burning stove dealer. Declaration of Performance... -
Page 39: Trouble Shooting
Trouble Shooting If you experience that your wood-burning stove is not functioning optimally, consult this table to find some usual problems that may arise and how to solve them. If you cannot solve them and/ or other problems occur, pleas contact your maintenance man or wood-burning stove dealer. Problem Possible Cause Try the Following... -
Page 40: Guarantee And Claim Conditions
Guarantee and Claim Conditions - Five Years’ Extended Right to Invoke Lack of Conformity Congratulations on the purchase of your new WIKING wood-burning stove. All of our products are of high-quality craftsmanship, manufactured in first-class materials and subject to a thorough quality control process. That is why we are convinced that you have purchased a product that will function problem-free for many years to come. -
Page 41: Service And Maintenance
– you will find it on the type sign on the back of the stove. Unwarranted Claims/Service Calls Before registering a claim, you should inspect your WIKING wood-burning stove for possible faults that you yourself can rectify; consult the enclosed user instruction manual as needed. -
Page 52: Garantibevis
It is important that you record your dealers name, address and telephone number on this section, as he is responsible for any ajustment which may be required during the warranty period. Modeltype · Model type Købsdato · Date of purchase Forhandler · Dealer Adress Tel. HWAM A/S DK-8362 HØRNING www.wiking.com...
Need help?
Do you have a question about the Miro 1 and is the answer not in the manual?
Questions and answers