Table of Contents
Advertisement
Advertisement
Table of Contents

Related Manuals for EasyN H3 Series


Summary of Contents for EasyN H3 Series
- Page 2 Forword Forword Forword Forword This series product is specific on network video surveillance including wired box ip camera, wireless box ip camera, wired dome ip camera wired IR waterproof ip camera, etc. It uses processor with high-performance chips to realize audio/video capture, compression, transmission, and the standard H.264 coding algorithm can confirm the clear-fluent effect of video transmission.
-
Page 3: Table Of Contents
Forword Forword Forword Forword........................- 1 - 2 Features........................- 3 - 3 Appearance and interface....................- 5 - 3.1 Device appearance..................... - 5 - 3.2 Device interface....................- 5 - 4 Network connection..................... - 6 - 4.1 Connection instruction..................- 6 - 4.2 Access instruction.................... -
Page 4: Features
1 Product Product Product Overview Overview Product Overview Overview IP Camera is designed as web server running on network, it can transmit real-time video to anywhere through internet, and user can view real-time live video via web browser any time. It is available to large stores, schools, factories, houses, etc. Basic function: IPCAM can transmit real-time live video data to remote place through internet with hardware compression method MJPE which providing high-quality video image and 25fps frame rate on LAN/WAN (local area network/wide area... - Page 5 DDNS(free) Built in free DDNS system,like http://demo.easyn.hk, 'demo' is serial code CMS software EasyN multi-window mangement software System security Supports three-level account, password, user multi-level authority management Support 32G TF card local memory,support alarm recording and picture Local memory memory, Support EasyN NVR...
-
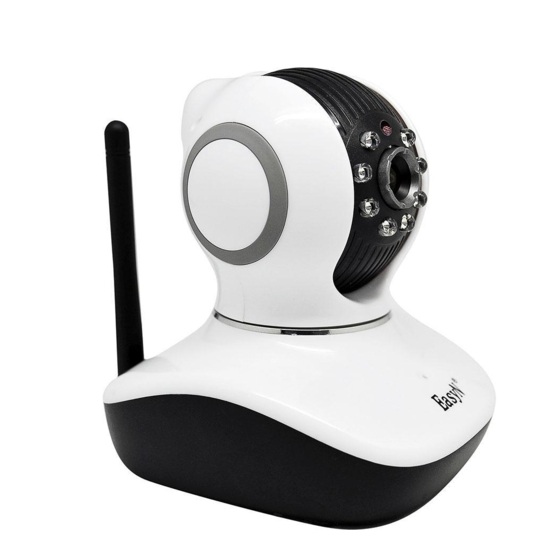
Page 6: Device Appearance
Others Shape material plastic Environment indoors Power supply DC12V 2A Operating temperature -10~50 °C Operating humidity 10%~90%RH Dimension Item size :130x120x120mm (L*W*H) Package size:170 x170x 170mm (L*W*H) Item weight:470g (Note:for real products ) Weight Package weight:725g Accessories Power adapter,CD,manual,warranty card,srews ,bracket ,antenna System System requirement Microsoft Win98 SE/ME/2000/XP,Vista IE5.0, NET4.5,firefox,chrome... -
Page 7: Device Interface
3.2 Device Device Device Device interface interface interface interface Picture Picture 2- 2- 2- 2- device device interface Picture Picture device device interface interface interface :external power adapter power power power power DC 5V/2A Ethernet Ethernet Ethernet Ethernet interface interface interface interface:... -
Page 8: Network Connection
4 4 4 4 Network Network Network Network connection connection connection connection Picture Picture Picture 3- 3- 3- 3- network network network connection connection guide guide Picture network connection connection guide guide Connection Connection instruction instruction 4.1 Connection Connection instruction instruction Connect camera to router and connect power adapter before accessing IP Camera,... -
Page 9: Software Operating
computer-1 can access camera-1, then configure router-1 ( do port forwarding in router-1) ,to transfer the computer-2’s access apply to go through router-1 then to camera-1. Normally, computer-2 only can reach router-1 without port forwarding for camera-1. Connect network ADSL 4.3 Connect Connect Connect network... - Page 10 Software Software operation operation 5. 5. 5. 5. Software Software operation operation IPcamera IPcamera tool tool 5.1 IPcamera IPcamera tool tool In picture 3,camera-1 and computer-1 are in different subnets,run Devfind.exe in CD,click search,then select searched IP Camera to modify the parameters,refer to picture 4. Picture Picture Picture 4- 4- 4- 4- LAN...
- Page 11 5.2 Login Login Login Login device device device device IPCAM can be accessed from “open” function in camera finder or directly by inputting access link (IP added port) via browser. The two sentences should be in ,same size,same font ,right? Picture Picture Picture 5 5 5 5 login...
- Page 12 Operations Operations 5.3 Operations Operations Record: click Snapshot: click ,it will change into ,then we can listen sound coming Listen: click from camera terminal on computer monitoring interface, click again to disable the function. , it will change into , then we can talk to camera terminal via Talk: click headset on computer terminal.
- Page 13 Basic Basic network network configuration configuration 5.4 Basic Basic network network configuration configuration � � � � Basic Basic network network configuration configuration Basic Basic network network configuration configuration IP IP IP IP address: address: address: address: it can support manually modifying IP, mask, gateway, DNS, etc. Http Http Http...
- Page 14 5.5 DDNS DDNS DDNS DDNS configuration configuration configuration configuration In picture 3 , router-1 obtain wide area network IP address through ADSL , the IP address is dynamic ,we could not know the real-time IP address of the device from internet,therefore,we need to obtain the address through DDNS server in internet,...
-
Page 15: Installation
E-mail E-mail service service configuration configuration 5.6 E-mail E-mail service service configuration configuration Picture Picture email email service service configuration configuration Picture Picture 14- 14- email... -
Page 16: Login And Logout
Software Software Software Software condition: condition: condition: condition: Windows2000/WindowsXP/Windows2003/Windows Vista/Windows 7,recommendation Windows XP Installation steps Installation Installation Installation steps steps steps Double click installation package,it pops up as below: Select path then click “next”. After installation, it creates an icon on desktop as below: At program list as below: Login Login... -
Page 17: Software Interface
【Login】the default user is admin and no password,click “ok”to access software main interface. 【Logout】only admin authority can logout,user and guest authority can not It needs to input administrator user and password when logout. Software Software interface interface Software Software interface interface Software interface includes six blocks: 1 system button list... - Page 18 Click to change to preview interface Click to change to playback interface Click to change to map operating interface Click to change to configuration interface Click to change to log operating interface Logout or change user Click to logout ◆ Devices list: 【List mode 】...
-
Page 19: Device Management
mode Circle view button, single click to enable/disable Devices list fold/unfold button, click to fold/unfold Alarm information list fold/unfold button, click to fold/unfold 2.3 DEVICE MANAGEMENT 2.3.1 Add device Firstly click “Config” button on label list to access device management page. 6.5 Device management Add device Firstly click “Config”... - Page 20 button to add device to area. ◆ Add device manually: Click button then pop up add device dialog, as below: 【Name】Device name, support custom, length less than 30 byte. Only display name instead of IP after input name. 【 Channel 】 Support different channel on case that one device has many channels, presently device only supports one channel.
-
Page 21: Image Preview
After add groups, configure groups Configuration: select group, click “+” in front of device IP or name, then select Channel 01, click button to add device channel to group. Notice: single group can support 16-picture view Add device channel to the group Remove the device channel from the group Adjust the order to display devices in the group, selected device exchanges position with the front device... - Page 22 1. Non-cycle preview Click “+” in front of device’s name or IP, then double click Channel 01 or drag Channel 01 to the window to view video. It displays a blue triangle after device connected Channel 01, if the display as , it means device does not connect.
- Page 23 : 【 】 Connected All connect device in selected area 【 】 Disconnected All disconnect device in selected area 【 】 Arm All devices in selected area arm 【 】 Disarm All devices in selected area disarm 【 】 Start Manual Record of Area enable manual record in selected area 【...
-
Page 24: Ptz Control
changes into label of disable-manual-record label. 【 】 Main Stream connect device with main stream, on tick means current selection is main stream. 【 】 Sub Stream connect device with sub stream, on tick means current selection is sub stream. 【... - Page 25 Enlarge aperture, need device hardware support Narrow aperture, need device hardware support Enlarge focus, need device hardware support Narrow focus, need device hardware support Focus forward adjustment, need device hardware support Focus back adjustment, need device hardware support Light button, click to light on/off, need device support Wiper button, click to wiper on/off, need device support 2.5.2 Preset position configuration Client software supports 256 preset positions, for actual amount of preset...
-
Page 26: Video Management
【 】 Goto preset position Select window to call preset position, then select preset position number, click “Goto” button. 【 】 Del preset position Select window to delete preset position, then select preset position number, click “Del” button. 1. Image color configuration Click “Color”... - Page 27 record”, picture as above: 【 】 enable plan record Select channel to record, then left click to drag out a green box(the box range is the time to record). Click “Save” to finish. 【 】 disable plan record Untick “Enable the plan of record”, then click “Save”. Or cancel the green box then click “Save”.
- Page 28 default path is D:\. Note: Software can support 20 pieces of disk partitions. 1. Alarm Record Alarm Type: 【 】 Motion Detection Alarm on motion detection 【 】 Input Alarm Alarm on external input signal 【 】 Lost Connect Alarm on lost connection 【...
-
Page 29: Playback
【 】 Alarm Duration Time Alarm duration time, default is 10 seconds, selecting range is 5-60 seconds. 【 】 Pre-recorded alarm Length Pre-recording’s length on alarm, default is 5 seconds, selecting range is 1-15 seconds. Arm and Disarm 【 】 Press “Preview”, select area or device for arming, after arming it will display logo in front of device IP or name. - Page 30 Snapshot button; select windows then press this button for snapshot Enlarge button; press this button then select area for enlarging on windows Full screen button; press this button for full screen show, double click on single windows for one windows full screen Drop down options for selecting playing speed, default is normal Sound button;...
-
Page 31: Electron Map
Step 1: select file type and device channel Step 2: select searching time then click “Search”, the eligible files should list on device tree Step 3: select playback windows then double click record file to view video, it can support one video displaying on four windows at the same time 6.10 Electron map 1. - Page 32 6.11 Parameters configuration To connect device for configuration on parameters configuration page (double click device channel, the image should display on right side image frame). 1. Color 【 】 Brightness drag slider to select best brightness 【 】 Saturation drag slider to select best saturation 【...
- Page 33 【 】 Stream Type support main stream and second stream 【 】 Resolution different resolution for different model 【 】 Frequency support 50Hz and 60Hz, default is 50Hz 【 】 Bit Rate different bit rate for different model 【 】 Frame Spaced N standard or 60Hz device has range 1-30fps, P standard or 50Hz device has range 1-25fps...
- Page 34 【 】 Camera Name tick to enable adding name on image 【 】 Time OSD tick to enable adding time on image 【 】 OSD Name input OSD name then click Apply button, it can support 18 bit iii. Network To configure network parameters on current condition, the software only displays network parameters of current device, despite it is manually configured or DHCP.
- Page 35 Step 4: click “Linkage Alarm” to select alarm type Step 5: enable arm function for device, otherwise it can not support alarm linkage For ptz control, it should be fulfill with right parameters, different ptz has different protocol, protocol code and baud rate. System After select time, click “Set Time”...
-
Page 36: User Management
6.12 User management Factory set administrator name is admin, no password. Login with administrator then add, delete and configure user authority. User authority includes three levels: admin, user and guest. “admin” authority: administrator, enable to manage device, manage user, view video, playback video, configure map, inquire log, and exchange user and exit software “user”... -
Page 37: Other Settings
【 】 All logs record all information of system 【 】 System log record information of user login, logout and user configuration, etc. 【 】 Operation log record user operations 【 】 Alarm log record device alarm information 2.11.1 Log Retention Time Step 1: click “Config”... -
Page 38: Port Forwarding
【 】 Time verify tick and configure time, software verify time to all devices at appointed time to match time on PC 【 】 Snapshot format format of snapshot, support JPG and BMP 【 】 Snapshot save path the save path of snapshot 【... -
Page 39: Warranty Instruction
Please adjust video parameters for camera ( mode, brightness, contrast, saturation, etc). If the background light is too strong,please adjust the range to view. � The camera camera camera camera finder finder finder finder can can not not find find find find device. -
Page 40: Warranty Card
8.3 Warranty Warranty Warranty Warranty card card card card Please cut the below form for information and return with device Product model Manufacture date Client agency User name User address Contact (TEL/mobile phone) maintain time Problem details result note: MH3E-E-A2 - 39 -...
Need help?
Do you have a question about the H3 Series and is the answer not in the manual?
Questions and answers