Table of Contents
Advertisement
Advertisement
Table of Contents

Subscribe to Our Youtube Channel
Related Manuals for EasyN FS-613A F Series


Summary of Contents for EasyN FS-613A F Series
-
Page 2: Table Of Contents
3.1 Smart phone Access ......................25 3.2 Java Phone Access ......................27 3.3 3G mobile phone platform access ..................29 3.4 IPhone app for EasyN IP Camera..................32 3.4.1 Features ........................32 3.4.2 Operations and functions demostration..............32 4 How to view the camera in outside network ................34 4.1 Using a router to access the Internet .................34... -
Page 3: Welcome
We never stop trying! 1 Welcome IP Camera is a new generation product combined with analog camera & IP video technology. Despite all functions which analog cameras have, IP camera can compress and encrypt video and audio signal then through internet send them to remote terminals with its built-in processor and web server. -
Page 4: Packing List
We never stop trying! Supporting Dynamic IP (DDNS) ,Built-in Free DDNS Giving alarm in cause of motion detection, sending photo to email or FTP, record videos on pc when alarms. Supporting multiple network protocols: TCP/IP、 HTTP、 ICMP、 DHCP、 FTP、 SMTP、 PPPoE etc. -
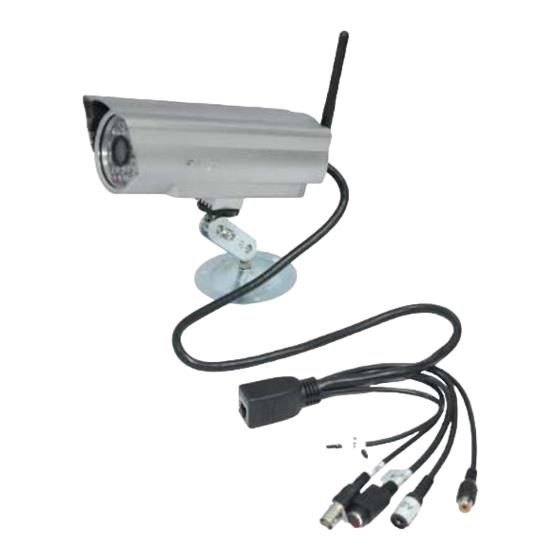
Page 5: Product Views
We never stop trying! 1.3 Product views 1.3.1 Front view 1.3.2 Interface view - 5 -... -
Page 6: Pc System Requiements
We never stop trying! 1.4 PC System Requiements Minimum Hardware Configuration CPU: Pentium 1.6 GHz Memory: 256MB Audio card: need audio monitor, two way talkback essential Hard Disk : if need to record video image,no less than 40G Operation System: 32 bit simple/ English Windows2000、Windows XP、 Windows2003、Windows Vista &... - Page 7 We never stop trying! Only click Next,you will complete the software installation. - 7 -...
-
Page 8: Software Operation
IP Camera terminal shall be installed in an indoor environment. 2 Software operation 2.1 IP Camera Finder When the Device has been mounted properly, you can double click the Icon “EasyN IP Camera Finder” and a dialog box will pop up. - Page 9 We never stop trying! Wizard Mode(if you not familiar the settings pls chose this mode): Select ‘Connect to the router’or ‘Connect to a computer directly’ according to your requirments,then click ‘Next’. - 9 -...
- Page 10 We never stop trying! Select the right device then Click ‘Next ‘ You can use One key Set or Manually set,here we recommend ‘One Key Set’ if you are not familiar with the setting, click ‘next’ after Set IP Address(Note: You have to wait for 40 seconds to restart the device after setting Ip address) - 10 -...
- Page 11 We never stop trying! Click ‘Next’ - 11 -...
- Page 12 We never stop trying! Here you have finished the setting,click’open’ to login the ip camera. Advanced Mode (if you are already familiar with the settings pls chose this mode): Basic Properties There are some device informations in the Basic Properties ,such as Device MAC,System Firmware Version, Web UI Version.
-
Page 13: Camera Login In Ie (Lan)
We never stop trying! Note: The software searches IP Servers automatically over LAN. 1 .The ip camera and the pc should be in the same LAN 2 To install more than one cameras in the LAN,all of the cameras port and IP address can not be same. - Page 14 We never stop trying! To access the camera ,start your web browser and type in the camera’s IP address,Such as http://192.168.2.126:102 The Camera Login page pop-up. Enter your account and password on the login page as shown above Administrator’s username is: admin and no password. - 14 -...
- Page 15 We never stop trying! Please Sign in with ActiveX Mode(for IE) Note: Before IE monitoring through web, it is necessary to install a ActiveX. - 15 -...
-
Page 16: Camera Icon Functions
We never stop trying! 2.3 Camera Icon Functions Rotate the cameras(pan/title) Auto Pan/Titlt Adjust Pan/Tilt Speed: If you want to detect 4 or 9 views, need to click this icon Flip: To see the flip image. Mirror: To see the mirror image. Resolutions: can chose 320*240 or 640*480 Mode: can chose 50HZ ,60HZ or outdoor Brightness and Contrast:can set the brightness and contrast... -
Page 17: Setting Details
We never stop trying! 2.4Setting Details Alias Settings: You can Input the new name as you like. Data&Time Settings: Data&Time Settings page. Users Settings: Eight accounts are acceptable for this system.Here the eight users can Configure their user names and password as administrator ,Operator or Visitor. Administrator: You can setup the advanced configurations of the IP Camera. -
Page 18: Multi-Device Settings
We never stop trying! 2.4.1 Multi-Device Settings Use multiple cameras in LAN In the Multi-Device Settings page, you can see all devices searched in LAN. You can add more cameras list in LAN for monitoring - 18 -... -
Page 19: Network Settings
We never stop trying! 2.4.2 Network Settings - 19 -... -
Page 20: 3Wireless Lan Settings
We never stop trying! About http port, In most cases, you can leave this value as however numbers 2.4.3Wireless LAN Settings Click the Scan button (at least two times),select your wifi SSID, and write in your wifi’s password. ADSL Settings ( pls don’t use it ,if you use routers) When connected to the Internet through ADSL directly ,you can enter the ADSL username and password obtained from ISP. -
Page 21: 4Ddns Service Settings
DDNS or Proxy Server: If you access the DDNS host through a proxy, you should input the Proxy IP.(if use our Built-in ddns,it’s should be user.easyn.hk) DDNS or Proxy Port: Proxy Port.(if use our Built-in ddns, the port should be 808 or 80) 2.4.5 Mail and FTP Service... -
Page 22: 6Alarm Service Settings
We never stop trying! Settings the FTP Service: 2.4.6Alarm Service Settings: Enter Alarm Service Settings page to configure Motion Detection function. Scheduler - 22 -... - Page 23 We never stop trying! You can set the exact time when the alarms will be open on. Send Mail on Alarm Sent picture and mail inform to customer’s e-mail after alarmed. (firstly you should finish the Mail Service Settings.) REC automatically and save to PC When you enable motion detect and open the camera monitoring page on the PC.
-
Page 24: Mobile View
We never stop trying! Maintenance: Upgrade Device Firmware: Upgrade Device Firmware and device embeded web UI software in This page. Restore Factory Settings: Restore factory settings of the device. Reboot Device:Reboot the device. Back: Back to Monitoring Mode. 3 Mobile View First of all, the mobile phone must open the internet access function. -
Page 25: Smart Phone Access
Use the browser on the phone to visit the address of the IP camera, e.g. http://demo.easyn.cn (“demo” is the Serial No. Each device has only one Serial No) Next, taking the Opera mini 4 Version on Windows Mobile as an example, we are going to introduce the whole procedure.Enter access address http://demo.easyn.cn in... - Page 26 We never stop trying! Description for the monitor image: - 26 -...
-
Page 27: Java Phone Access
Firstly you need to open Internet function on your phone. Next install the mobile phone software. There are two ways for the installation: 1 . Access to the download website http://mob.easyn.cn through the phone When the phone gets access to the website, the following interface will appear... - Page 28 We never stop trying! Run MobileView on the phone, and then the following interface will appear: (different phones may have different interfaces) Select “add” to add the equipment to be visited, the following interface will appear: Input the device access address/Serial No: Input the camera Serial No or access address. For example, if the camera Serial No is “abcd”, input “abcd”.
-
Page 29: Mobile Phone Platform Access
2 is to upward, 8 downward, 4 & 6 leftward & rightward. Users can also directly use direction key to contro 3.3 3G mobile phone platform access First open ‘3g.easyn.hk’ via your 3G mobile phone browser. Take Antroid operating system for example. 1.Select Android and screen size... - Page 30 We never stop trying! 2.Click Register to get a account 3.After you finished registering, use your account to login. Click ‘Management’ to add a ip camera,as below: 4.Click add, fill the Camera Name( define as you like), Camera SN( on the label of the device),Account( default account is admin), Password(default password is None),click ok to finish, you can view the camera via single Channel or 4 Channels(add more than 4 cameras),as below:...
- Page 31 We never stop trying! Single Channel 4 Channels Note:For single channel view ,you control camera from directions(up,down,right,left) 5. Snapshot setting click management---Modify----settings---ok Enable snapshot and set the interval as above. - 31 -...
-
Page 32: Iphone App For Easyn Ip Camera
We never stop trying! 3.4 IPhone app for EasyN IP Camera With this app you can remotely view and control your EasyN IP camera from your iPad, iPhone or iPod Touch. From wherever you are! 3.4.1 Features - Control the cameras in all 8 directions (if supported by the camera) - Page 33 Camera name: define it as you like Camera server: For inner access, input IP address the ip camera, For outer access,input our built-in domain name (on the label of device) e.g hjey.easyn.hk.How to fill the port,you can refer to chapter 4.1.1) Account settings: input user name and password( same as IE browser view) After filling all the information, click ‘save’...
-
Page 34: How To View The Camera In Outside Network
We never stop trying! 4. Click ‘control’ button .Here you can set horizontal or vertical patrol for the IP Camera with pan/tilt. 4 How to view the camera in outside network 4.1 Using a router to access the Internet Using a router to access the Internet by shared ADSL If a router is set for dial-up Internet access, it is not required to set ADSL dial-up account and password on the IP Camera. - Page 35 We never stop trying! 5.1.1 Do port forwarding in your routers: - 35 -...
-
Page 36: Static Ip User
4) Enter DDNS Settings Page and enable DDNS service. Click <Submit> and the device will reboot 5) You can access the Camera from Internet by domain name( like: http://demo.easyn.hk 5.2 Static IP user Static IP user is not need to use DDNS for remote access. When finished the setting of the IP Camera in LAN, and port forwarding in the routers,you can access the Camera directly from Internet by the WAN IP. -
Page 37: How To Use Other Ddns
We never stop trying! Take the WRT54G router of LINKSYS for example, 1) Obtain the IP address of the router (LAN gateway address), user name and password for logon to the router from the network administrator, 2) Enter the LAN IP address of the router; Open the Status page to find out the WAN address of the router. -
Page 38: Intelligent Video Alarm System
Intelligent Video Alarm System is a software with centralized management and powerful function and enable extending,the software supports all series products of EasyN.The following take managing Fseries product for example. To compare with managing on web page,the intelligent system can not only support browser viewing and multi-ch viewing,but also support much characteristic function. -
Page 39: Registration And Login
Put in user name as you like Set password Confirm password Put in registration email Put in verify code displayed behind Login Run browser,then put in http://app.easyn.hk/html/en/ then press Enter button on keybord,then displaying the following page: - 39 -... -
Page 40: Add Equipments
We never stop trying! Put in user name and password then press Login button,access the main page,here will show the times about login and time about the nearly login,as the following picture: 5.2Add equipments As the following picture,press Camera list to choose ipcam to add on; - 40 -... -
Page 41: Download And Run Active X
We never stop trying! Define as you like Inner ddns name Put in user name Put in password 5.3 Download and run Active X If it is the first time to access the page,please run the Active X before playing video,the means as below: (1) access cameras list page click camera list button then displaying as the following picture:... - Page 42 We never stop trying! Press mouse left button on “Here” to download the Active X,display following picture: Click “run” button then starting download, After download,display a dialog for asking to set up,as following picture: - 42 -...
-
Page 43: Monitor Video Viewing
We never stop trying! Click run button,(if the pc has a firewall or other protect software,it will ask for permission,pls permit). Click the next button,dialog as following: 5.4 Monitor video viewing Click camera list button on left menu,the network video equipments will display as a list,as following picture: - 43 -... - Page 44 We never stop trying! Click the “View” button,the live video will display,as the following picture: Click the “ multi-picture view” buttom on the left menu,access multi-ch viewing page,as the following picture” - 44 -...
-
Page 45: Snapshoot At Appointed Time
We never stop trying! 5.5Snapshoot at appointed time Click camera list button on left menu,select “setting” button the camera you want to get the snapshot,as the following picture: Click “modify” button,as the following picture: - 45 -... -
Page 46: Alarm Setting
We never stop trying! Here can set the snapshot appointed time and how many pictures to upload. After setting,click “” buttom to save the settings. Click the “” button on the menu on the right of the page,select the equipment,the picture uploaded to the server at appointed time could be viewed. -
Page 47: Alarm Time Slot Setting
We never stop trying! Click “setting”,access the alarm snapshoot setting page,as the following picture: 5.6.1 Alarm time slot setting Only at the alarm time slot the alarm system could make alarming action. Support function for select weeken,appoint time,induce alarm setting and alarm actions. Such as the following picture: 5.6.2snapshoot at appointed time Support setting time slot for snapshoot,snapshooting with an interval time. -
Page 48: Faq
We never stop trying! Set the time slot 6 FAQ Note: Any quesetions you would meet, please check Network connections firstly. Check the working status revealed by the indicators on the network server, hub, exchange and network card. If abnormal, check the network connections. 1. - Page 49 We never stop trying! 4.No pictures Problems with ActiveX Controller If Internet Explorer is used as WEB Browser, download ActiveX controller and set the safety property of IE in the PC when you view it first time: “IE” browser > “Tool” > “Internet Proper” > “Security”> “Custom Level” > “ActiveX control and Plug-ins”...
- Page 50 We never stop trying! FCC warning statement This equipment has been tested and found to comply with the limits for a Class B digital device, pursuant to part 15 of the FCC Rules. These limits are designed to provide reasonable protection against harmful interference in a residential installation.
-
Page 51: Warranty Card
We never stop trying! 7 Warranty Card Manufacturing Date: Product Specification: Inspector: Version number : Product Model Sale Dates User Company User name Customer Address Contact Number Results of Maintain Date Failure Conditions Maintenance Remark: Note: please fill the card and offer it with products if guarantee of repair - 51 -... - Page 52 www.easyntech.com Ver.: MFEE1103A...
Need help?
Do you have a question about the FS-613A F Series and is the answer not in the manual?
Questions and answers