Table of Contents
Advertisement
Quick Links
Advertisement
Table of Contents

Related Manuals for Caliber RDD570BT


Summary of Contents for Caliber RDD570BT
-
Page 1: Instruction Manual
RDD570BT DVD/MP3/MPEG4/USB/SD/MMC/WMA player with fm tuner INSTRUCTION MANUAL... - Page 2 W a r n i n g s Only connect this unit to a 12V DC power supply with negative grounding. Never install this unit where the operation for safety driving is restrained. Never use the video display function in the front when driving to prevent the violation of laws &...
- Page 3 P r e c a u t i o n s Never disassemble or adjust the unit without any professional guide. For details, please consult any professional car shop / dealer for inquiry. If the front panel or TFT monitor is squalid, please use a clean silicone cloth and neutral detergent to wipe off the spot.
- Page 4 D e c l a r a t i o n This product incorporates copyright protection technology that is protected by U.S patents and other intellectual property rights. Use of this copyright protection technology must be authorized by Macrovision, and is intended for home and other limited viewing uses only unless otherwise authorized by Macrovision.
-
Page 5: Table Of Contents
C o n t e n t s Before using Display file list....14 Fast playback....14 Front Panel......01 Previous / Next....14 Remote Control....03 Change folder....15 Basic operations Repeat playback....15 Power on/off....06 Repeat A-B..... 15 Mute....... 06 Random playback.... - Page 6 C o n t e n t s Rotate picture....20 Installation and uninstall Select picture slide mode. 20 Notes of installation..36 Playback information Unit installation....36 display......20 The assembly step of Bluetooth mode detached panel....38 Trim Ring installation..40 Select Bluetooth as playing Uninstall......
-
Page 7: Before Using
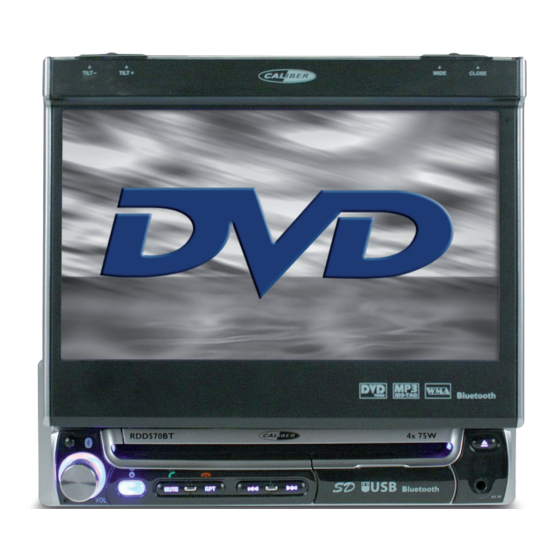
B e f o r e u s i n g Front Panel ② ① ① ② ③ ⑬ ④ ⑤ ⑥ ⑦ ⑧ ⑨ ⑩ ⑪ ⑫ 1. [AS/TILT+] Key: Auto Save / Increase display angle 2. [BAND/TILT-] Key: Change radio band / Decrease display angle 3. - Page 8 B e f o r e u s i n g 13. Eject disc 14. [OPEN/Close] Key: Open / Close the TFT monitor 15. [DISP/WIDE] Key: Display information / Change display mode Auxiliary LCD LOUD 1. Disc indicator Light up when disc is inside;...
- Page 9 B e f o r e u s i n g...
- Page 10 B e f o r e u s i n g...
- Page 11 B e f o r e u s i n g Notes of remote control using 1) Aim the remote control at the remote sensor on the unit. 2) Remove the battery from the remote control or insert a battery insulator if the battery has not been used for a month or longer.
-
Page 12: Remote Control
Basic operations Power on / off Press any key on the front panel or the [POWER] key on the remote control to turn on the power under standby mode. The unit goes back to the last status after power on. Press and hold the [SRC] key on the front panel or press the [POWER] key on the remote control to turn off the power under work mode. -
Page 13: Display System Time
Basic operations Display system time Press and hold the [DISP] key on the front panel to switch the display information between system time and playing source when the TFT monitor is closed. Using the TFT Monitor Open / Close monitor Press the [OPEN/CLOSE] key on the front panel or remote control to push the display panel out or in. -
Page 14: Radio Mode
Radio mode Select radio as playing source Open the SOURCE MENU and then touch RADIO. Select one radio band Press the [BAND] key on the display panel or remote control or touch the [BAND] icon on the user interface to select one radio band among FM1, FM2, FM3, AM1 and AM2. -
Page 15: Manual Save
Radio mode Manual save When one expected radio station has been detected…… (1) Press the MEM icon on the user interface and the preset menu will be opened. (2) Press one preset button among P1~P6. (3) If you want to abort, press the [Exit] button. Preview scan Preview scan searching is such a process that the searching pauses when a station is received and then played for 5~10 seconds. -
Page 16: Rds Operations
RDS operations The unit provides basic functions of RDS, including PI (Program Identification), radio station name , RT (Radio Text), CT (Clock Time), AF (Alternative Frequency), TA (Traffic Announcement) and PTY (Program Type) Selection. AF function Alternative Frequencies Lists are used for the same program service and used in conjunction with the PI code (Program Identification code) to assist automatic tuning. -
Page 17: Pty Function
RDS operations PTY function PTY is the abbreviation for Program Type which is a code defining the type of program being broadcast (e.g. News or Rock). Six PTY options will display on the screen. To view more PTY options, touch the scroll bar and arrows on the screen. When one PTY option is touched (e.g. -
Page 18: Disc Mode
Disc mode Insert a disc Upon inserting a disc, the unit will switch to disc mode automatically. Notes: ① Please confirm whether there is a disc in the unit before you insert another one. ② Some recorded discs, such as CD-R, CD-RW, DVD-R, DVD+R, DVD-RW, DVD+RW cannot be played back because of different recording status. -
Page 19: Onscreen Control Buttons
Disc mode Onscreen control buttons Disc type MP3/WMA MPEG Picture Icon Numeric Numeric Numeric Numeric Numeric Numeric keypad keypad keypad keypad keypad keypad Setup menu Setup menu Setup menu Setup menu Setup menu Setup menu Fast forward Fast forward Fast forward Fast forward Fast rewind Fast rewind Fast rewind Fast rewind Previous... -
Page 20: Suspend Playback
Disc mode Suspend playback Press the [ ] key on the front panel or remote control or open the onscreen control buttons menu and then touch the[ ] button. To resume normal play, repeat the above operation. Stop playback To stop playback, press the [■] key on the remote control or open the onscreen control buttons menu and then touch the[■] button. -
Page 21: Repeat Playback
Disc mode Repeat playback Press the [RPT] key on the remote control repeatedly or open the onscreen control buttons menu and then touch the [ ] button repeatedly to alter repeat mode according to the following table. Disc type Repeat mode Repeat Chapter →... -
Page 22: Direct Search
Disc mode Direct search When a DVD, VCD or CD disc is played back, you can search for a particular chapter / track by pressing the numeric keys of the remote control. For example, if you want to select the 15 track, you should press numerical key [1] and [5]. -
Page 23: Select Multi-Angle Views
Disc mode Select multi-angle views Press the [ANGLE] key on the remote control repeatedly to choose a angle during the playback of a DVD disc or video file containing hooting multi-angle views. Select audio channel For DVD containing multi-language audio files, press the [AUDIO] key on the remote control repeatedly or open the onscreen control buttons menu and then touch the [AUDIO] button repeatedly to change dialogue language. -
Page 24: Playback Information
Disc mode Playback information Touch the top center area of TFT LCD when playing back DVD and VCD discs and the playback information will be displayed on the top area of the TFT. For DVD DVD Video Audio 6 ch Eng Time 00:00:59/00:00:43 Subtitle... -
Page 25: Sd/Usb Mode
SD/USB mode Select SD/USB as playing source Method 1: Repeatedly Repeatedly remote control front panel Method 2: Open the 'SOURCE MENU' and then select SD . Notes The unit will switch to SD card mode or USB mode after a SD card or ①... -
Page 26: Play The Next Or Previous File
SD/USB mode Play the next or previous file The operation is the same as disc mode. Repeat playback The operation is the same as disc mode. Random playback The operation is the same as disc mode. Intro playback The operation is the same as disc mode. Search for a particular file The operation is the same as disc mode. -
Page 27: Bluetooth Mode
Bluetooth mode Bluetooth is a wireless transmission way for short distance operating at 2.4GHz. The bluetooth module can connect with the mobile phones having bluetooth function. After connecting, you can control your mobile phone through the unit. As different mobile phones provide different bluetooth functions, so not all of the functions undermentioned are available to different phones. - Page 28 Bluetooth mode ③ After the name of the Bluetooth module appears on the pairing list on your mobile phone, you should select it. At this time, a pairing code is required. The Bluetooth module will exit pairing mode if there is no pairing instruction from your mobile phone during the pairing time (90s) and 'Phone Pairing Fail' is displayed on the screen.
-
Page 29: Music Mode
Bluetooth mode Voice transfer While talking, touch the 'Voice transfer' icon on the screen to transfer audio from the unit to your mobile phone, and touch again to transfer audio from your mobile phone to the unit. Note: Some mobile phones will transfer audio from the unit to themselves once the incoming call is answered. -
Page 30: Other Modes
Other modes External peripheral devices with RCA audio and video outputs can be connected with the unit. To enter AUX IN mode, open the SOURCE MENU and then touch AUX IN. amera This player is “camera ready”. Before accessing any camera features, you must purchase and install a rear video camera. -
Page 31: Setup
Setup Setup procedures (1)Enter setup mode Press the [SETUP] key on the remote control or touch the setup icon ] on the user interface. The following menu appears after entering the setup mode. The GENERAL sub-menu is highlighted by default. SETUP MENU Language General... -
Page 32: Audio
Setup Language ● Select one language of system menu display ● DVD Audio Select one dialogue language of DVD disc. Note: If the DVD disc does not contain the selected language, the dialogues you listening to will be in default language. ●... -
Page 33: Rating
Setup ● Pairing code You should enter the pairing code when the bluetooth module is pairing with another bluetooth device. The original paring code is 1234 and you can change the paring code when the bluetooth module is on. Rating Some DVD discs have built-in parental lock which prevents children to watch some scenes as force or eroticism especially. -
Page 34: Hardware
Setup Procedures of changing the rating: (1) Open the parental lock According to the same method mentioned in the first step of changing password. 2 Change the rating Select an appropriate rating from the 'rating' list. 3 Close the parental lock Repeat the operation of the first step to enter a 6-digit password (old or new) and then confirm. -
Page 35: P.vol
Setup P.VOL P.VOL means Programmable Volume. You can balance the volume among different audio sources using this function. ● Source Select one playing source that you want to set relative volume. ● Level You can set relative volume level from -6 to 6. TS CAL When the touch function is not sensitive or valid, you should calibrate the touch screen by this function. - Page 36 Audio control allows you to easily adjust the audio system to get the best possible sound effect. Enter the EQ setup mode Press the [SEL] key on the remote control or touch the EQ icon in the user interface and the following interface will display on the screen EQ selection USER...
-
Page 37: Troubleshooting
Troubleshooting What appears to be trouble is not always serious. Please check the following points before calling a service center. Problem Cause Corrective action General Install new fuse with correct rating. Unit fuse blown. Unit can not Car battery fuse blown. Install new fuse with correct rating. - Page 38 Troubleshooting 常见故障排除向导 (Continued) Problem Cause Corrective action Disc playback A disc inside the unit already. Eject current disc and insert new one. Cannot insert disc Disc is warped or scratched. Use disc in good condition. Disc is dirty or wet. Clean disc with soft cloth.
-
Page 39: Device Connection
Device connections Notes of connection This unit is designed to be used in a vehicle with a 12-volt battery and negative grounding. Before installing this unit to a recreational vehicle, a bus, or a truck, make sure the battery voltage is appropriate for this unit to be used, otherwise, install a transformer by professional to convert the output voltage to 12V. -
Page 40: Control Cables
Device connections Control Cables Auto Brightness Control To avoid the display being too bright at night time, if the headlight cable is connected to ILLUMI, turning on the headlight will dim the backlight of the TFT LCD and vice versa. Telephone Mute If the MUTE cable is connected to a car phone, other audio outputs mute when one call is received by the car phone. -
Page 41: Parking Brake Cable Connections
Device connections Parking Brake Cable Connections Parking Brake Lead Green Wire Battery Car Frame Brake Light Parking Brake Switch Parking Brake Switch Reverse Driving Cable Connections Reverse Driving Signal Light Car Frame Pink Cable Reverse Driving Cable Car Battery Car Frame Gearbox... -
Page 42: Installation And Uninstall
Installation and uninstall Notes of installation 1) Before installation, please make sure proper connections are conducted and the unit operates normally. Improper connection may result in damage to the unit. 2) Use only accessories designed and manufactured for this unit and other unauthorized accessories may result in damage to the unit. - Page 43 Installation and uninstall Dashboard Rubber Sheath M5 X 24 Mounting Bracket M2 X 2 Long Assemble Bar ( ) Picture 2 4 Insert the unit into the bracket, fasten the M4×6 screw to the fireproofing board available at the back of the dashboard, and use 4 pieces of M2×2 screw to lock the assemble bars and the mounting bracket in position.
-
Page 44: The Assembly Step Of Detached Panel
Installation and uninstall The assembly step of detached panel 1、Press this button,It's ok when heard "KA KA". 2、Grasped the right-end of the knock-down panel, you can remove the panel by upward direction, which is like the following picture. - Page 45 Installation and uninstall The assembly step of detached panel 1、Put the knock-down panel on the fixed panel by downward direction. 2、(1) Before the next assembly, make sure this place is ok. (2) This complexion is NG. DVD-6666M 3、Pressed both sides of the knock-down panel, make sure it's OK. DVD-6666M...
-
Page 46: Trim Ring Installation
Installation and uninstall Trim Ring installation Attach the trim ring around the front panel with two indentions on one side facing upwards Uninstall Disassemble trim ring (1) Push the trim ring upward and pull out the upper part. (2) Push the trim ring downward and pull out the lower part. Disassemble the unit (1) Unscrew the 4 pieces M2×2 screws. -
Page 47: Specifications
Specifications General Reference Supply Voltage.............12V(DC) Operating Voltage Range..........10.5~15.8V(DC) Max Operating Current..............10A Grounding System........Car Battery Negative Pole Installation Dimension(W×H×D)....178 mm×50mm×(165+25)mm Installation Angle..............0°~30° Net Weight................2.3kg Signal Noise Ratio..............55dB Residual Noise Sensitivity(S/N=30dB)........20dBμV Frequency Range............87.5-108.0MHz Station Seeking Level............20~30dBμV Distortion...................1.5% Stereo Separation(1KHz)............20dB Antenna Impedance..............75Ω Frequency Range............ - Page 48 Specifications Video Normal Video Input Level CVBS ...........1.0±0.2V Video Input Impedance..............75Ω Video Output Impedance..............75Ω Video Output Level...............1.0±0.2V (Under normal video input level) TFT Monitor Screen Diagonal..............7 inches Usable Display Area..........154.1(W) × 87.0 (H) Resolution.............1440 (W) × 234 (H) Brightness................400cd/m (Measure the center brightness after 30 minutes) Contrast................300( TYP.
-
Page 49: Appendix
Appendix Region Code According to DVD sale region, the whole world is divided into six regions. A DVD disc can be played back only when its region code is compatible with that of the player in use. Region 1: USA, Canada, East Pacific Ocean Islands; Region 2: Japan, West Europe, North Europe, Egypt, South Africa, Middle East;... -
Page 50: Wiring Diagram
Appendix Wiring Diagram VIDEO OUT YELLOW MONITOR YELLOW CAMERA BATTERY CAMERA BLACK NAV BOX PINK HAND BRAKE INDICATION PRK SW PARKING BRAKE SWITCH MICROPHONE BT ANT BATTERY AUX IN R BATTERY YELLOW BLACK WHITE HEAD LIGHT SWITCH AUX IN L HEAD LIGHT ILLUMI ORANGE... - Page 51 P/N:12707500XXXX...