Table of Contents
Advertisement
Quick Links
Document-No.
Issue
Dated
Postal address
Phone
Fax
eMail
Internet
Copyright
Technical
modifications
CLM1000 Professional(Plus)
E461757
03
07.01.2014
Christ-Elektronik GmbH
Alpenstraße 34
DE-87700 Memmingen
+49 (0)8331 8371 – 0
+49 (0)8331 8371 – 99
info@christ-elektronik.de
http://www.christ-elektronik.de
It is forbidden to reproduce or process (using electronic systems), copy
or distribute any part of this document. Translation into another
language requires written authorisation. This document is for the
personal use of the owner of the device or Christ-Elektronik GmbH
personnel only.
Christ-Elektronik GmbH reserves the right to modify the designations,
specifications and technical data without prior notice.
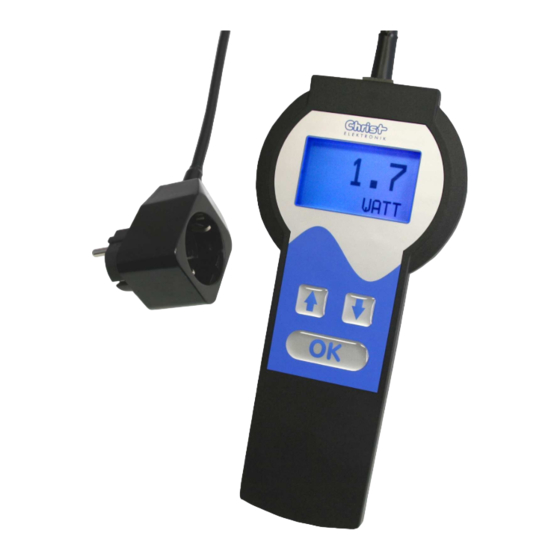
Instruction manual
Wattmeter
Advertisement
Table of Contents

Related Manuals for Christ Elektronik CLM1000 Professional


Summary of Contents for Christ Elektronik CLM1000 Professional
- Page 1 Instruction manual Wattmeter CLM1000 Professional(Plus) Document-No. E461757 Issue Dated 07.01.2014 Postal address Christ-Elektronik GmbH Alpenstraße 34 DE-87700 Memmingen Phone +49 (0)8331 8371 – 0 +49 (0)8331 8371 – 99 eMail info@christ-elektronik.de Internet http://www.christ-elektronik.de Copyright It is forbidden to reproduce or process (using electronic systems), copy or distribute any part of this document.
-
Page 2: Table Of Contents
Table of contents Seite General information ....................2 Maintenance ......................2 Safety instructions ....................2 Operation ........................ 3 Brief instruction ....................... 3 Contrast setting ....................... 3 CLM1000-Professional operational system ............. 4 2.3.1. Settings menu for CLM1000-Professional ............... 5 2.3.2. Displaydarstellungen des CLM1000-ProfessionalFehler! Textmarke nicht definiert. 2.3.3. -
Page 3: General Information
General information Maintenance INFORMATION! This device is made to DIN EN ISO 9001 standard and has left the factory flawless condition regarding technical safety. To maintain this condition and ensure safe operation pay attention to the information and warnings contained in this instruction manual. Safety instructions DANGER! If the casing, connection cable or another part of the device is damaged,... -
Page 4: Operation
Operation Brief instruction Unplug the load (e.g. household appliance, HIFI, PC…) and plug it in the adapter of the measuring device. Subsequently connect the adapter of the measuring device to the socket. All readings are saved even after unplugging the wattmeter or a mains failure. -
Page 5: Clm1000-Professional Operational System
• Time over Stand-By threshold [hh:mm] • Setting the display color for different performance levels The CLM1000 Professional-Plus has the following options: • Setting of date and time • Setting the transmission speed of the interface • Sending the actual measurement data •... -
Page 6: 2.3.1. Settings Menu For Clm1000-Professional
2.3.1. Settings menu for CLM1000-Professional Through the simultaneous pressing of the two arrows for about 2 seconds, the setting menu of CLM1000-Professional will appear. The various menu items can be selected using the arrow keys. With "EXIT" the setting menu will be closed. Start a new measurement If the OK button is pressed for the shown setting, then all 17.10.2007... - Page 7 Setup of the interface and of the data logger (only Plus-Version) If the OK button is pressed for the shown setting, then the interface 17.10.2007 14:10:06 - Set Data Log and the data logger menu appears on the display. - Var. Color = OFF - ON% >...
- Page 8 2.3.2. Display representations of CLM1000-Professional Displayimage Mode Range Description Power consumption of the Active power [W] 0,0 - 4224 Watt RESET 35.9 connected consumer in Watts WATT 1(10) Voltage [V] 100,0 - 264,0 V Instantaneous voltage 233.6 RESET VOLT 0.201 2(10) AMPERE Current [A]...
-
Page 9: 2.3.3. Description Of The On% Function
Displayimage Mode Range Description Max. Current [A] 0,000 - 16,00 A Maximum current of the 0.231 RESET measuring Amax 0.196 8(10) Amin Min. Current [A] 0,000 - 16,00 A Minimum current of the measuring Max. Power [W] 0,0 - 4224 W Maximum real power of 43.7 RESET... -
Page 10: Interface (Only Plus-Version)
Interface (only Plus-Version) The measuring instrument CLM1000 has a USB- interface. The USB-Interface: current measuring data and the stored data can be transferred cyclically in the CSV- mode. In addition, the provided transmission cable can be used. The CLM1000 uses internally a USB-RS232 converter. After the successful installation of the WINCLM program, the interface of the CLM1000 is recognized and can be used as COM Port on your computer. - Page 11 The measuring data of the CLM1000 will be transferred in the CSV-format. Structure of a The individual values will be separated by a semicolon; (ASCII code 0x3B). data block: The end of a data record is marked with CR(Carrige Return ASCII code 0x0D) and LF(Line feed ASCII code 0x0A).
- Page 12 The current and the stored measuring data can be stored, analyzed and Visualising visualized in the CSV- format with the visualising tool WINCLM. The Software: stored * csv file can be opened and processed with the usual spread- sheet programs. Example visualization WINCLM: The WINCLM software and the software description can be downloaded from the homepage of Christ-Elektronik GmbH.
-
Page 13: Error Handling
Error handling The CLM1000 gives users warning of internal errors which occurred! If there is an error the display is red and displays the occurred error! Error Meaning Solution Internal error 1! Unplug the CLM1000 and plug it ERROR1 CLM1000 doesn’t start! again! If the error continues to exist the CLM1000 can’t be used. -
Page 14: Technical Data
Technical data CLM1000 variant types and measurings CLM1000 H=Home S=Standard P=Professional (Plus) Modes Range Resolution ● ● ● Real power 0,0 - 4224 W 0,1 W / 1 W Real power (min/max) 0,0 - 4224 W 0,1 W / 1 W ●... -
Page 15: Display And Operation
Display and operation Display 128*64 Display with varying background lighting Control elements 3 membrane buttons Measuring principle and accuracy Measuring principle Voltage is measured directly at the load and current is measured by a precision shunt. Measuring rate approx. 1 second Sampling rate approx. -
Page 16: Faq
Question 1: The displayed current varies between 0 mA and 3 mA? Answer 1: The measured current almost corresponds to the one of the no-load operation's detection. As a result the displayed value varies between 0 mA (no-load operation detection) and the minimum measurable current of 2 mA. Consider the tolerance of +- 3 mA too. -
Page 17: Software And Data Evaluation
Software and data evaluation Installation of the VCP driver If the driver is already installed, the computer will identify it during the Check the connection and a corresponding message will be displayed. installation of the driver Furthermore the CLM1000 will be indicated in the device manager, under the connections as USB serial port like USB serial port (COM 22). -
Page 18: Installation Terminal Software Hterm
Installation terminal software HTerm Terminal software such as Freeware HTerm is required to transfer the measured values to the computer. For example the software HTerm is available for download on the following Internet page: http://www.heise.de/download/hterm- eea223273b529eea4efb930f381de933-1378287065-2653283.html 1. Click the download button to start the download. Installation 2. -
Page 19: Configuration Of Hterm
Configuration of HTerm 1. Connect the CLM1000 Professional Plus to the network and the computer. 2. Open the sub-point Connections (COM&LPT) in the device manager of the computer and note the COM-port of the CLM1000. Therefore open Start->System control->Hardware and sound-> Device manager- >Connections (COM&LPT). - Page 20 8. Click the button "Connect" to connect the measurement instrument. 9. Transfer data as described page 6. 10. The data might be saved in *.csv format, be treated and represented graphically with ® spreadsheet software like Microsoft Excel or Apache Open Office .
-
Page 21: Import *.Csv Files
Import *.csv files Import the data in the corresponding program before treating text files in spreadsheet software ® like Microsoft Excel or Apache Open Office™ Calc. The following instruction indicates step for ® step how to import *.csv files in Microsoft Excel 2010. - Page 22 The wizard for text conversion appears automatically after the data import. First select the option "Delimited". Click on „Next“. Activate "semicolon" as delimiter. Now, the data in the preview should be separated with columns. Click on „Next“. 7. Columns that should not be imported might be selected in the text conversion wizard under the following point.
- Page 23 Input the location in which the imported data should be inserted. Mark the cell in which the left upper corner of the imported data should appear. Click on „OK“. Once the work with the wizard is done, the parts of a line of the text file are split into different columns of the table.
Need help?
Do you have a question about the CLM1000 Professional and is the answer not in the manual?
Questions and answers