
Related Manuals for Panasonic SDR-S100


Summary of Contents for Panasonic SDR-S100
-
Page 1: Operating Instructions
Operating Instructions SD Video Camera SDR-S100 Model No. Before use, please read these instructions completely. Web Site: http://www.panasonic-europe.com VQT0T60... -
Page 2: End User License Agreement
Before opening the CD-ROM package, please read the following. End User License Agreement You (“Licensee”) are granted a license for the Article 6 Indemnification Software defined in this End User License The Software is provided “AS-IS” without Agreement (“Agreement”) on condition that you warranty of any kind, either expressed or agree to the terms and conditions of this implied, including, but not limited to, warranties... -
Page 3: Table Of Contents
Contents End User License Agreement .... 2 Image stabilizer function ....42 This is for reducing image shakes during recording. Preparation Colour night view functions..... 43 This allows recording in dark locations. Scene mode ........44 Information for your safety ....5 This is for recording in various Introduction ......... - Page 4 Contents (continued) With a PC..........74 Installing MotionSD STUDIO ....78 Installing the Web Camera Driver ..79 Connection and recognition procedures ........81 Using MotionSD STUDIO ....83 Reading the MotionSD STUDIO operating instructions....84 Using the unit as a Web Camera..84 To disconnect USB cable safely ..85 Software application uninstallation ........86 Verifying the driver......87...
-
Page 5: Information For Your Safety
Connector Cover Connector replacement fuse cover can be purchased Cover as follows. from your local Panasonic Dealer. IF THE FITTED MOULDED PLUG IS ∫ How to replace the Fuse UNSUITABLE FOR THE SOCKET The location of the fuse differ according to OUTLET IN YOUR HOME THEN THE the type of AC mains plug (figures A and B). - Page 6 Information for your safety (continued) WARNING TO REDUCE THE RISK OF FIRE OR SHOCK HAZARD AND ANNOYING INTERFERENCE, USE ONLY THE RECOMMENDED ACCESSORIES AND DO NOT EXPOSE THIS EQUIPMENT TO RAIN OR MOISTURE. DO NOT REMOVE THE COVER (OR BACK); THERE ARE NO USER SERVICEABLE PARTS INSIDE. REFER SERVICING TO QUALIFIED SERVICE PERSONNEL.
-
Page 7: Introduction
Introduction Dear Customer, We would like to take this opportunity to thank you for purchasing this Panasonic SD Video Camera. Please read these Operating Instructions carefully and keep them handy for future reference. -
Page 8: Cards That You Can Use With This Unit
Microsoft Corporation in the United written authorization. States and/or other countries. ≥ Panasonic will in no way be liable for any ≥ Leica is a registered trademark of Leica damages sustained directly or indirectly microsystems IR GmbH and Dicomar is a... - Page 9 Or go on line through our Internet Accessory ordering application at www.panasonic.co.uk. Most major credit and debit cards accepted. All enquiries transactions and distribution facilities are provided directly by Panasonic UK Ltd. It couldn’t be simpler! Also available through our Internet is direct shopping for a wide range of finished products, take a browse on our website for further details.
-
Page 10: Accessories
Accessories Check the accessories before using this unit. SD Memory Card Wireless remote (2 GB) control RP-SDQ02G N2QACC000008 Button-type battery CR2025 Battery pack Hand strap CGA-S303 VFC4127 AC mains lead USB cable A RJA0053-3X VFA0453 (EB/GC) United Kingdom and Hong Kong Special Administrative Region of China B K2CJ2DA00008... -
Page 11: Parts Identification And Handling
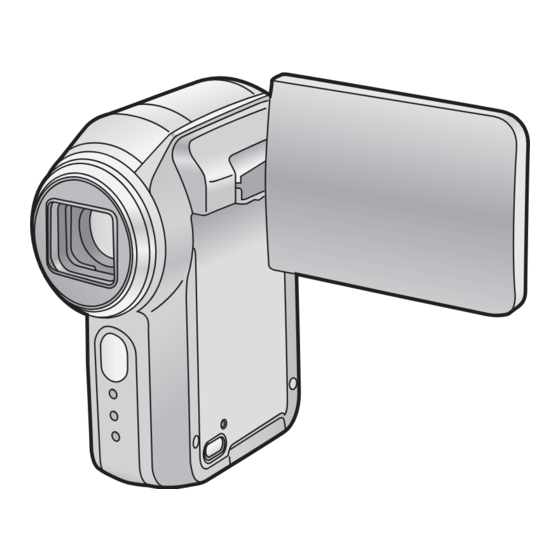
Parts identification and handling 1 Lens hood (P12) 2 Lens cover 3 Built-in flash (P55) 4 Lens (LEICA DICOMAR) 5 Remote Control Sensor (P14) 6 Indication lamp (P33) 7 Tripod mount (P12) 8 Zoom lever [W/T] (P37) Volume lever [rVOLs] (P59) 9 Record button (P34, 51) 10 Cursor button (P23) ≥Press up, down, left or right to select items. -
Page 12: Lens Hood
Parts identification and handling (continued) 26 LCD monitor (P22, 108) Due to limitations in LCD production technology, there may be some tiny bright or dark spots on the LCD monitor screen. However, this is not a malfunction and does not affect the recorded picture. 27 Power LCD button [POWER LCD] (P31) 28 Reset button [RESET] (P102) 29 Card access lamp [ACCESS] (P16) -
Page 13: Remote Control
Multi-connector [MULTI] Only connect the supplied multi cable and supplied headphone cable to this connector as the sound may not be output correctly if you connect other cords. ∫ Connecting headphones 1 (optional: ‰ 3.5 mm stereo mini plug) using the headphone cable (supplied) 2 MULTI Hand strap fixture We recommend using the hand... -
Page 14: Remote Control Usable Range
WARNING “THE LITHIUM BATTERY IS A CRITICAL COMPONENT (TYPE NUMBER CR2025 MANUFACTURED BY PANASONIC). IT MUST NEVER BE SUBJECTED TO EXCESSIVE HEAT OR DISCHARGE. IT MUST THEREFORE ONLY BE FITTED IN EQUIPMENT DESIGNED SPECIFICALLY FOR ITS USE. REPLACEMENT BATTERIES MUST BE OF THE SAME TYPE AND MANUFACTURER. -
Page 15: Inserting/Removing An Sd Card
∫ Operating with remote control (P27) The menu screen transition is the same as when the buttons on the main unit are used. 1) Press the [MENU] button. 2) Select a menu item. MENU ≥The play/pause button [ ], stop button [∫], Fast-rewind button [:], Fast-forward button [9] and [ENTER] button can be used in place of pressing the cursor button... - Page 16 Inserting/Removing an SD card (continued) Securely close the card slot cover. ∫ About the SD Memory Cards that you can use SD card capacity Recording mode 32 MB, 64 MB, 256 MB, 512 MB, 1 GB, 8 MB, 16 MB (Maximum) 128 MB 2 GB...
-
Page 17: Inserting/Removing The Battery
Inserting/Removing the Battery Remove the battery cover. 1While pushing the battery cover, 2slide it in the direction of the arrow. Insert the battery. 1Place the battery label side up. 2Insert the projecting parts of the battery in the holes on the unit. 3Put the battery cover back in its original place. -
Page 18: Charging The Battery
Charging the Battery When this unit is purchased, the battery is not charged. Charge the battery before using this unit. ¬ Set the power switch to [OFF]. (P19) Connect the AC adaptor (supplied) A to this unit and the AC outlet. 1Open this unit’s terminal cover. -
Page 19: Turning The Unit On/Off
Turning the unit on/off How to turn on the power Set the power switch to [ON]. The status indicator 1 lights red and, in motion picture recording mode or still picture recording mode (P21), the lens cover opens. How to turn off the power Set the power switch to [OFF]. - Page 20 Turning the unit on/off (continued) To cancel quick start Press the menu button, use the cursor button to select [ SETUP]# QUICK START]#[OFF]. (P27) ≥ To cancel quick start standby, turn off the ≥ When the LCD monitor is opened in power.
-
Page 21: Selecting A Mode
Selecting a mode The Mode Dial is used to switch between recording and playback modes. Rotate the mode dial slowly but surely. Set the desired mode 1. Rotate the mode dial, and set the desired mode pictograph to the position shown in the illustration. Motion picture 0h00m00s 0h00m00s... -
Page 22: Using The Lcd Monitor
Using the LCD monitor Adjusting the monitor’s angle 180o 180o A When recording 1 Face-to-face 2 Normal B When playing back Rotating the LCD monitor beyond the angles given above may damage it. ∫ About face-to-face recording Turning the LCD monitor in direction 1 is convenient for recording shots of yourself while viewing the monitor or allowing the person or persons whose shots are being recorded to watch what is being recorded. -
Page 23: Using The Cursor Button
Using the cursor button One-touch navigation This unit has a cursor button for selecting recording functions, performing playback operations, etc. so it is easy to operate this unit with one hand. Press the cursor button while simultaneously viewing the screen. Press the cursor button to operate the operation icons 1 and menu screen 2 appearing on the LCD monitor. - Page 24 Using the cursor button (continued) Using the recording function ¬ When the mode dial is at the position Press the button in the centre. 1 An operation icon appears on the LCD monitor. While an operation icon is displayed, a blue border appears around the outside of the button in the centre of the cursor button.
- Page 25 About the operation icons which are displayed Each time the button in the centre is pressed while an operation icon is displayed, the indication changes as shown below. ¢ The operation icon is off. Motion picture recording mode ([AUTO/MANUAL/FOCUS] switch is set to [AUTO]) ([AUTO/MANUAL/FOCUS] switch is set to [MANUAL]) Motion picture playback mode...
- Page 26 Using the cursor button (continued) List of operation icons for each mode Mode Icon Direction Function Tele-macro (P38) Soft skin mode (P39) — (1/2) Backlight compensation (P40) Manual adjustment mode (P48) (Only in manual white balance Motion picture adjustment) recording mode White balance (P47) Shutter speed (P49) Iris or gain value (P49)
-
Page 27: Using The Menu Screen
Using the menu screen Refer to the “Menu list” (P90) for information about the menus. Press the [MENU] button. The menu setting screen is displayed. BASIC ADVANCE (The menu displayed differs depending on the SETUP position of the mode dial.) ≥... - Page 28 Using the menu screen (continued) Press the cursor button right or press BASIC the button in the centre. SCENE MODE WIND CUT REC MODE ASPECT CLOCK SET EXIT SETUP ENTER MENU Press the cursor button up or down in BASIC order to select the desired item.
-
Page 29: Setting Date And Time
Setting date and time The clock is not set at the time of purchase. If the screen shows the incorrect date/time, then adjust it. ¬ Rotate the mode dial to select Press the menu button, then use the BASIC cursor button to select SCENE MODE WIND CUT BASIC]#[... -
Page 30: Adjusting Lcd Monitor
Setting date and time (continued) Changing the date and time display style Press the menu button, select SETUP SETUP]#[ DATE/TIME], then use DISPLAY the cursor button to select the desired DATE/TIME DATE FORMAT display style. (P27) FORMAT CARD DATE QUICK START ≥... -
Page 31: Changing The Picture Quality On The Lcd Monitor
(LCD AI) Changing the picture quality on the LCD monitor Press the menu button, then use the cursor button to select SETUP POWER SAVE SETUP]#[ LCD AI]# BEEP SOUND LCD AI NORMAL [DYNAMIC] or [NORMAL]. (P27) DYNAMIC LCD SET INITIAL SET [DYNAMIC] –... -
Page 32: Check Before Recording
Recording Check before recording First, format the SD card if one which has been used on another device is going to be used for the first time on this unit. (P66) When the SD card is formatted, all of the recorded data (files) is deleted. - Page 33 ∫ About the indication lamp 1 The indication lamp flashes when signals from the remote control are sensed and during self-timer operation. When [ REC LAMP] in [ ADVANCE] is set to [ON], the lamp lights during recording. You can therefore confirm recording when this unit is attached to a tripod or when using the remote control.
-
Page 34: Motion Picture Recording (Mpeg2 Motion Pictures)
Motion picture recording (MPEG2 motion pictures) Record motion pictures onto an SD card. Rotate the mode dial to select The lens cover now opens automatically. Press the record button to start recording. Ending the recording Press the record button again. 1 [¥] and [;] are red during recording. -
Page 35: Changing The Recording Mode Of The Motion Picture
– Motion pictures can be recorded for longer. ∫ About the kinds of SD cards that can be used We recommend using the following SD Memory Cards made by Panasonic for motion picture recording. Pro High Speed Super High Speed... - Page 36 MotionSD STUDIO. (P74)) When using any other card When motion pictures are to be recorded, use a Panasonic SD card or another SD card which can be used to record motion pictures. (P35) ≥...
-
Page 37: Zoom In/Out Function
Zoom in/out function This is for moving the zoom lever to adjust the magnification. You can make people and objects appear closer and landscapes can be recorded in wide angle. You can zoom in up to 10k optically. ¬ Rotate the mode dial to select Move the zoom lever. -
Page 38: Tele-Macro Function
Zoom in/out function (continued) ∫ To use the zoom microphone function Interlocked with the zooming operation, the microphone will collect sounds clearly far away with the tele-shot or those in the vicinity with the wide-angle shot. ¬ Rotate the mode dial to select Press the menu button, then use the ADVANCE cursor button to select... -
Page 39: Soft Skin Mode
Soft skin mode This is for making skin colours appear softer for a more attractive appearance. This is more effective if you record the bust image of a person. ¬ Rotate the mode dial to select Press the button in the centre of the cursor button to display the icon shown in the illustration. -
Page 40: Backlight Compensation Function
Backlight compensation function This is for protecting a backlit subject from being darkened. Use this function when the light is emanating from behind the subject and the subject appears dark. ¬ Rotate the mode dial to select Press the button in the centre of the cursor button to display the icon shown in the illustration. -
Page 41: Wind Noise Reduction Function
Wind noise reduction function This is for reducing the wind noise coming into the microphone when recording. ¬ Rotate the mode dial to select Press the menu button, then use the BASIC cursor button to select SCENE MODE WIND CUT BASIC]>[ WIND CUT]>[ON]. -
Page 42: Image Stabilizer Function
Image stabilizer function This is for reducing image shakes during recording. Reduces the image shaking due to hand movement when recording. ¬ Rotate the mode dial to select Press the menu button, then use the ADVANCE cursor button to select D.ZOOM ADVANCE]>[ OIS]>[ON]. -
Page 43: Colour Night View Functions
Colour night view functions This allows recording in dark locations. This function allows you to record colour subjects in dark locations to stand out against the background. Attach this unit to a tripod, and you can record images free from vibration. ≥... -
Page 44: Scene Mode
Scene mode This is for recording in various situations. When you record images in different situations, this mode automatically sets optimum shutter speeds and apertures. ¬ Rotate the mode dial to select Set the [AUTO/MANUAL/FOCUS] switch to [MANUAL]. AUTO MANUAL FOCUS Press the menu button, use the BASIC... - Page 45 Sports mode Portrait mode ≥ For slow-motion playback or playback ≥ If this mode is used indoors, the screen pause of recorded scenes, this mode may flicker. If so, change the scene mode presents free of camera shakes. setting to [OFF]. ≥...
-
Page 46: Manual Focus Adjustment
Manual focus adjustment This allows subjects to be focused manually. If auto focusing is difficult due to the conditions, then manual focusing is available. ¬ Rotate the mode dial to select Set the [AUTO/MANUAL/FOCUS] switch to [MANUAL]. AUTO MANUAL FOCUS Move the switch down and set it to the [FOCUS] position. -
Page 47: White Balance
White balance This is for recording in natural colours. The automatic white balance function may not reproduce natural colours depending on the scenes or lighting conditions. If so, you can adjust the white balance manually. ¬ Rotate the mode dial to select Set the [AUTO/MANUAL/FOCUS] switch to [MANUAL]. - Page 48 White balance (continued) To set the white balance manually Select [ ] mode, fill the screen with a white subject and then press the cursor button up to select the [ ] indication. ≥ When the [ ] display changes from flashing to on, setting is complete.
-
Page 49: Manual Shutter Speed/Aperture Adjustment
Manual shutter speed/aperture adjustment Shutter Speed Adjust it when recording fast-moving subjects. Aperture Adjust it when the screen is too bright or too dark. ¬ Rotate the mode dial to select Set the [AUTO/MANUAL/FOCUS] switch to [MANUAL]. The icon shown in the illustration is displayed automatically. - Page 50 Manual shutter speed/aperture adjustment (continued) ∫ When recording fast-moving objects, then playing them back as still pictures for viewing General guidelines for the shutter speed ≥ For recording golf swings or tennis shots: 1/500 to 1/2000 ≥ For recording volleyball matches: 1/100 to 1/350 ≥...
-
Page 51: Still Picture Recording (Jpeg Still Pictures)
Still picture recording (JPEG still pictures) For the number of still pictures to be recorded on an SD card, refer to P89. Rotate the mode dial to select The lens cover opens automatically. Press the record button halfway (not all the way down) to bring the subject into focus. - Page 52 Still picture recording (JPEG still pictures) (continued) Press the record button all the way down (as far as it will go) to record. To record still pictures clearly ≥ When zooming in on the subject with a magnification of 4k to 10k, it is difficult to reduce the slight shaking from holding this unit by hand.
-
Page 53: Number Of Pixels And Picture Quality For Still Picture Recording
∫ Number of pixels and picture quality for still picture recording PICTURE SIZE Changing the recording size Press the menu button, use the BASIC cursor button to select SCENE MODE 2048 PICTURE SIZE BASIC]>[ PICTURE SIZE], 1280 PICT.QUALITY then set the desired size. (P27) CLOCK SET HDTV –... - Page 54 Still picture recording (JPEG still pictures) (continued) ∫ About the shutter chance mark ≥ The shutter chance mark does not appear in manual focus mode. ≥ When the subject is not easily focused, focus on the subject manually. (P46) ≥ You can record still pictures on the SD card even if the shutter chance mark does not appear, but pictures may be recorded without being focused.
-
Page 55: Built-In Flash
Built-in flash Use the built-in flash in order to record still pictures in dark places. ¬ Rotate the mode dial to select Slide the [OPENß] flash lever. The flash rises. ≥ The flash will flash when the record button is pressed. - Page 56 Built-in flash (continued) To adjust the brightness of the flash Press the menu button, use the cursor ADVANCE button to select FLASH ADVANCE]>[ FLASH LEVEL], RED EYE FLASH LEVEL then set the desired brightness level. (P27) REC LAMP – [ßj]: If the brightness is too high EXIT SETUP ENTER...
-
Page 57: Self-Timer Recording
Self-timer recording This is for recording using the timer. You can record still pictures on an SD card using the timer. ¬ Rotate the mode dial to select Press the button in the centre to display the icon shown in the figure. Press the cursor button left to select the [Ø] self-timer icon. -
Page 58: Motion Picture Playback (Mpeg2 Motion Pictures)
Playback Motion picture playback (MPEG2 motion pictures) Rotate the mode dial to select The lens cover closes automatically. The motion pictures (up to 12 scenes) recorded on the SD card are displayed as thumbnails. Press the cursor button up, down, left or right to select the scene to be 3/24 3/24... -
Page 59: Slow-Motion Playback
Slow-motion playback The motion pictures will be played back at a speed approx. 1/5 the normal speed. 1) Press the cursor button up during motion picture playback to pause the playback. 2) Keep pressing the cursor button right. (Slow-motion pictures will be played back in reverse when you keep pressing the cursor button left.) ≥Normal playback is restored when the cursor... -
Page 60: Playing Back Motion Pictures By Date
Motion picture playback (MPEG2 motion pictures) (continued) Playing back motion pictures by date 1) Press the menu button, then use the cursor button to select PLAY SETUP PLAY MODE VIEW ALL PLAY SETUP]#[ PLAY MODE]# REPEAT PLAY BY DATE RESUME PLAY [BY DATE]. -
Page 61: Still Picture Playback (Jpeg Still Pictures)
Still picture playback (JPEG still pictures) Rotate the mode dial to select The lens cover closes automatically. The still pictures (up to 12 scenes) recorded on the SD card are displayed as thumbnails. Press the cursor button up, down, left or right to select the scene to be 3/24 3/24... -
Page 62: Playing Back Still Pictures As A Slide Show
Still picture playback (JPEG still pictures) (continued) Playing back still pictures as a slide show Press the menu button, then use the PLAY SETUP cursor button to select PLAY MODE PICTURE LOCK SLIDE SHOW PLAY SETUP]#[ PLAY MODE]# DPOF SET [SLIDE SHOW]. -
Page 63: Deleting Scenes
Deleting scenes This is for deleting scenes recorded on SD cards. The deleted scenes cannot be restored. ∫ Deleting multiple files from the thumbnail display. ¬ Rotate the mode dial to select Press the menu button, then use the DELETE cursor button to select SELECT DELETE]... - Page 64 Deleting scenes (continued) ∫ Deleting scenes one at a time ¬ Rotate the mode dial to select Press the [ ] button during playback. DELETE SCENE? SETUP ENTER When the confirmation message appears, use the cursor button to select [YES], then press the button in DELETE SCENE? the centre.
-
Page 65: Locking Scenes
Locking scenes This is for preventing scenes from being deleted by mistake. Scenes recorded on an SD card can be locked so that they may not be deleted by mistake. (However even if you lock some scenes on an SD card, formatting the card will delete all the scenes.) ¬... -
Page 66: Formatting An Sd Card
Formatting an SD card This is for initializing (formatting) cards. Please be aware that if an SD card is formatted, then all the data recorded on the card will be erased. Store important data on a PC, etc. When saving scene recorded using this unit to a PC, you must use MotionSD STUDIO. -
Page 67: Dpof Setting
DPOF setting This is for writing the printing data on an SD card You can write the data of pictures to be printed, number of copies, and other information (DPOF data) onto the SD card. ¬ Rotate the mode dial to select Press the menu button, then use the PLAY SETUP cursor button to select... -
Page 68: Pictbridge
DPOF setting (continued) ∫ What is DPOF? DPOF stands for Digital Print Order Format. This enables picture printing information to be written onto an SD card so that it can be used on a system supporitng DPOF. ≥ The DPOF setting can be established for up to 999 scenes. -
Page 69: Print Setting
Press the cursor button up, down, left PictBridge 3/24 3/24 or right to select a scene to be printed, then press the button in the centre. The number of pictures set is displayed. SETUP ENTER Press the cursor button up or down to PictBridge 3/24 3/24... - Page 70 PictBridge (continued) Use the cursor button to select PictBridge PAGE LAYOUT], then press the DATE PRINT PAPER SIZE cursor button right to enter the layout STANDARD PAGE LAYOUT setting. PRINT – STANDARD: Layout specific to the printer SETUP ENTER – No frame print –...
-
Page 71: Playback On Tv
Playback on TV Images recorded by this unit can be played back on a TV. ¬ Insert an SD card with recordings into the unit. Open the terminal cover and then connect the multi cable (supplied) to the multi-connector terminal [MULTI] and the TV. - Page 72 Playback on TV (continued) Connecting to a TV with a 4:3 TV aspect ratio When motion pictures recorded with a 16:9 aspect ratio (the motion picture recording menu’s [ASPECT] setting is [16:9]) or still pictures recorded with the same aspect ratio (the still picture recording menu’s [PICTURE SIZE] setting is [HDTV]) are played back on a TV with a 4:3 aspect ratio, the images shown on the LCD monitor may be elongated vertically.
-
Page 73: Using This Unit's Recorded Data On Other Devices
To display the on-screen information on the TV The information displayed on the LCD monitor (operation icon and mode indication, etc.), date and time (P29) can be displayed on the TV. Press the [OSD] button on the remote control. DATE/ START/ ≥... -
Page 74: With A Pc
With a PC When the CD-ROM (supplied) is inserted into the PC, the CD launcher starts. Video editing software MotionSD STUDIO 1.0E This software allows pictures to be acquired from this unit, edited and output. You can also send a picture acquired from this unit by e-mail, and edited pictures can be written to the DVD drive. - Page 75 ≥ Even if the system requirements mentioned in these operating instructions are fulfilled, some personal computers cannot be used. ≥ This software is not Macintosh compatible. ≥ This software is not compatible with Microsoft Windows 3.1, Windows 95, Windows 98, Windows Me and Windows NT. ≥...
- Page 76 With a PC (continued) Operating environment for MotionSD STUDIO 1.0E (Video Editing Software) Personal computer IBM PC/AT compatible personal computer Microsoft Windows 2000 Professional SP4/Microsoft Windows XP Home Edition SP2/Microsoft Windows XP Professional SP2 Intel Pentium III 800 MHz or higher (including compatible CPU) (Intel Pentium 4 1.6 GHz or higher recommended) 256 MB or more (512 MB or more recommended) High Colour (16 bit) or more (32 bit recommended)
- Page 77 Operating environment for using the unit as a Web camera Personal computer IBM PC/AT compatible personal computer Microsoft Windows 2000 Professional SP4/Microsoft Windows XP Home Edition SP1 or SP2/Microsoft Windows XP Professional SP1 or SP2 (The standard driver of OS is used after Windows XP SP2.) Intel Pentium III 450 MHz or higher or Intel Celeron 400 MHz or higher 128 MB or more (256 MB or more recommended)
-
Page 78: Installing Motionsd Studio
Installing MotionSD STUDIO ≥ Before attempting to start up the CD launcher, close all other software applications which are running. ≥ Do not perform any other operations on your PC while MotionSD STUDIO is being installed. Insert the CD-ROM into the PC. The CD launcher starts. -
Page 79: Installing The Web Camera Driver
Installing the Web Camera Driver ≥ Before attempting to start up the CD launcher, close all other software applications which are running. ≥ Install the driver if you are using Windows XP SP1 or Windows 2000 SP4. (With Windows XP SP2, the driver does not need to be installed because the Web camera is run using the operating system’s standard driver.) ≥... - Page 80 ∫ If the CD launcher fails to start automatically after the CD-ROM has been inserted into the PC Select [start]>[My Computer] (or double-click [My Computer] on the desktop), and double-click [PANASONIC]. (The CD launcher can also be started up by opening [PANASONIC] and double-clicking [autorun (.exe)]). VQT0T60...
-
Page 81: Connection And Recognition Procedures
Connection and recognition procedures After the driver and software applications are installed, the unit must be connected to the PC and be correctly recognized by the PC. ≥ Connect after installing the driver and software applications. If you connect this unit to a PC before installation, this unit may not be properly recognized. ≥... - Page 82 This has no affect on operation so click [Yes]. – [Panasonic SD Video Camera Web Camera Device] is displayed. – The recognition procedure is completed automatically, and there may be no need to conduct any further steps.
-
Page 83: Using Motionsd Studio
≥ If you use MotionSD STUDIO to edit images and then output them to an SD card, use an SD card made by Panasonic or one that allows motion picture recording. (P35) ≥ If you use MotionSD STUDIO to output a large number of scenes to an SD card, DVD R/RW or DVD-RAM, the scenes may be displayed as thumbnails or it may take time to output. -
Page 84: Reading The Motionsd Studio Operating Instructions
For details on how to use MotionSD STUDIO, read the PDF instructions or the help files. Select [start]> [All Programs (Programs)]> [Panasonic]> [MotionSD STUDIO 1.0E]> [Manual (PDF format)]. ≥ After starting the software, on the menu select [Help]>[Help] to display the help files. -
Page 85: To Disconnect Usb Cable Safely
∫ Software that can be used when using the unit as a Web Camera (±: Available, —: Not available) Windows XP Windows 2000 Windows Messenger Messenger Messenger Windows ± — — Messenger Windows XP ± ± — MSN Messenger ± ±... -
Page 86: Software Application Uninstallation
Remove] or [Add/Remove]). ≥ Proceed with the uninstallation by following the on-screen instructions. ≥ Select [Panasonic SD Video Camera Web Driver] to uninstall the Web camera driver. ≥ To remove the Web camera driver from the PC’s device manager, verify the driver by “... -
Page 87: Verifying The Driver
[USB video device #X (X: number)] may appear. Windows 2000: [Panasonic SD Video Camera Web Camera Device] appears at [Imaging device]. (When the unit is in PC Connection mode) [USB Mass Storage Device] appears at [USB (Universal Serial Bus) controller]. - Page 88 Verifying the driver (continued) ∫ If the driver has not been recognized properly [!] or [Unknown device] appears at [USB (Universal Serial Bus) controller] or [Other devices], etc. (Where the display will appear depends on the type of PC you are using.) Disconnect the USB cable, uninstall then re-install the [Web Camera Driver] (P79) and connect the USB cable again.
-
Page 89: Approximate Number Of Recordable Pictures On An Sd Card
Details Approximate Number of Recordable Pictures on an SD Card Number of recordable pictures ∫ Picture quality and number of recordable pictures (using SD Memory Cards) Picture size (2048t1512) (1280t960) Picture quality 8 MB 16 MB 32 MB 64 MB 128 MB 256 MB 1230... -
Page 90: Menu List
Menu list Motion picture recording QUICK START] (P19) POWER SAVE] (P92) menus BEEP SOUND] (P92) ∫ [ BASIC] LCD AI] (P31) LCD SET] (P30) BASIC SCENE MODE INITIAL SET] (P92) WIND CUT DEMO MODE (P92) REC MODE DEMO ASPECT 16:9 CLOCK SET Still picture recording EXIT... -
Page 91: Still Picture Playback Menus
∫ [ Motion picture playback SETUP] menus SETUP ∫ [ DELETE] DISPLAY DATE/TIME DATE FORMAT D/M/Y FORMAT CARD DELETE POWER SAVE 5 MINUTES SELECT SETUP ENTER EXIT MENU DISPLAY] (P92) DATE/TIME] (P30) SETUP ENTER EXIT MENU DATE FORMAT] (P29) SELECT] (P63) FORMAT CARD] (P66) ALL] (P63) POWER SAVE] (P92) -
Page 92: Setup Menu
Setup menu ∫ [ ∫ [ POWER SAVE] DISPLAY] ≥OFF ≥ON ≥OFF ≥5 MINUTES The screen indications are selected as [OFF]: The power saving function is not shown in the illustration below. activated. [5 MINUTES]: When about 5 minutes passed without any operation, this unit automatically turns off to prevent the battery from running down. -
Page 93: Indications
Indications Recording indications 1 Motion picture recording 2 Still picture recording 0h00m00s R 0h00m R1700 15:42 15:42 15.12.2005 15.12.2005 Remaining battery power Sports mode Portrait mode Remaining time left for R 0h00m Low light mode recording Spotlight mode 0h00m00s Time code Surf &... - Page 94 Indications (continued) Playback indications 1 Motion picture playback 2 Still picture playback 1/24 1/24 1/24 1/24 SETUP PLAY SETUP PLAY Playback 2048 pixels or more QXGA 1600 or more, less than UXGA Pause 2048 pixels 5 6 Cue/Review playback 1280 or more, less than SXGA 1600 pixels Last/first file paused...
- Page 95 Confirmatory indications CANNOT RECORD. Data writing to the SD card has failed. This card is not compatible or it cannot be recognized by CHECK CARD. the unit. THIS CARD CANNOT An 8 MB or 16 MB SD card has been inserted in motion RECORD IN VIDEO MODE.
- Page 96 Indications (continued) You have set the [AUTO/MANUAL/FOCUS] switch to CHANGE TO MANUAL [AUTO] and are attempting to set [SCENE MODE] from MODE. the menu screen. CANCEL NIGHT VIEW You are attempting to set [SCENE MODE] from the menu MODE. screen while COLOUR NIGHT VIEW is set. (P43) You are attempting to set [LCD AI] from the menu screen TURN OFF POWER LCD.
-
Page 97: About Recovery
∫ About recovery When the SD card was accessed, you tried to playback a scene displayed as a thumbnail in shades of blue and white (P102) or faulty control information or a play list created on another device was read, a control information recovery message or play list delete message such as those shown below may be displayed. -
Page 98: Functions Cannot Be Used Simultaneously
Functions cannot be used simultaneously Some functions in this unit are disabled or cannot be selected due to the unit’s specifications. The table below shows examples of functions restricted by various conditions. Conditions which Conditions which Functions disable the Functions disable the functions functions... -
Page 99: Trouble Shooting
Trouble shooting Problem Check points ≥ Is the battery fully charged? This unit cannot be > Charge the battery using the AC adaptor. (P18) turned on. ≥ If you do not use the unit for approximately 5 minutes, the power is automatically turned off to conserve the This unit is turned off battery charge. - Page 100 Trouble shooting (continued) Problem Check points ≥ Has the SD card’s write protect switch been set to [LOCK]? > No recording is possible while the write protect switch is set to [LOCK]. (P16) ≥ Is the SD card’s memory full? >...
- Page 101 Problem Check points ≥ Have you selected video input on the TV? Although this unit is > Please read the operating instructions of your TV and correctly connected to a TV, playback images select the channel that matches the input used for the connection.
- Page 102 Trouble shooting (continued) Problem Check points ≥ Scenes displayed as thumbnails in shades of blue and white cannot be played back or deleted. If the scenes The scenes are not are unnecessary, format the SETUP PLAY correctly displayed in SD card to erase the data. ≥...
-
Page 103: About Condensation
Others About condensation Shortly after removing a chilled bottle When this unit is taken to a location with a significant temperature differ- from the refrigerator in summer, you will ence such as from a cold place to a see that it is covered with tiny droplets of hot place. -
Page 104: Explanation Of Terms
Explanation of terms Automatic white balance Outside of the effective range of automatic white balance adjustment, the White balance adjustment recognizes the image will become reddish or bluish. colour of light and adjusts so the white Even within the effective range of colour will become a purer white. -
Page 105: Auto Focus
Auto focus Recording a subject that is surrounded by objects with glossy The lens is moved forward or backward surfaces or by highly reflective automatically to bring the subject into objects focus. Since whatever is shiny or listens is brought into focus, it is hard to focus on Auto focus has the following charac- the subject to be recorded. -
Page 106: Cautions For Use
Cautions for Use ≥ Do not leave rubber or plastic products About this unit in contact with the unit for a long time. Read the operating instructions When you use the unit in a sandy or before use. dusty place such as a beach, do not ≥... -
Page 107: About The Battery
once every year and store it again after About the battery you have completely used up the charged capacity. The battery used in this unit is a ≥ Dust and other matter attached to the rechargeable lithium-ion battery. It is battery terminals should be removed. -
Page 108: Lcd Monitor
Cautions for Use (continued) When the status indicator flashes at Moreover, do not fold or drop the SD intervals of about 0.5 second (on for card, and do not strongly vibrate it. ≥ The SD card may break or the about 0.25 sec. -
Page 109: Specifications
Specifications SD Video Camera: Information for your safety Power source: DC 9.3 V (AC adaptor)/7.4 V (Battery) Power consumption: When recording: 3.9 W (AC adaptor)/3.5 W (Battery) Signal system CCIR: 625 lines, 50 fields PAL colour signal Image sensor 1/6-inch 3CCD image sensor Total pixels Approx. - Page 110 Specifications (continued) Card reader/writer function (No copyright protection support) USB 2.0 compliant (Hi-Speed) PictBridge-compliant Web Camera function Flash GN 4.5 Available flash range: approx. 1 m to 2 m Approx. 49.9 mm (W) k 96.7 mm (H) k 80.4 mm (D) Dimensions (excluding the projecting parts) Mass...
-
Page 111: Battery Pack
AC adaptor: Information for your safety Power source: AC 100 V to 240 V, 50/60 Hz Input capacitance: 0.25 A Output: DC 9.3 V 1.0 A Battery pack: Information for your safety Maximum voltage: DC 8.4 V Nominal voltage: DC 7.4 V Rated capacitance: 760 mAh VQT0T60... - Page 112 VQT0T60 F0805Mk0 ( 1000 A) Matsushita Electric Industrial Co., Ltd. Web Site: http://www.panasonic.co.jp/global/...
Need help?
Do you have a question about the SDR-S100 and is the answer not in the manual?
Questions and answers