Table of Contents
Advertisement
1
Image Vault
PRO Command
®
PRO COMMAND
This manual supports Image Vault PRO Command Digital Video Recorders
(DVR). It includes hardware and software information. It is designed to aid in
installation and operation of your PRO Command DVR. Refer also to your Quick
Reference Guide, your built-in software help system, and check our web site
for the latest updates. Please read this manual thoroughly before installing and
configuring your Image Vault PRO Command recorder.
Version 10.x Edition
Image Vault, LLC
101 Security Parkway — New Albany IN 47150-0559
Ph 888.462.4382 — Fax 812.296.0038
www.image-vault.com
Image Vault
is a registered trademark of Image Vault, LLC.
®
Other trademarks are property of their respective companies.
Advertisement
Table of Contents
Troubleshooting

Related Manuals for Image Vault PRO COMMAND


Summary of Contents for Image Vault PRO COMMAND
- Page 1 This manual supports Image Vault PRO Command Digital Video Recorders (DVR). It includes hardware and software information. It is designed to aid in installation and operation of your PRO Command DVR. Refer also to your Quick Reference Guide, your built-in software help system, and check our web site for the latest updates.
-
Page 2: Table Of Contents
Image Vault PRO Command ® TABLE OF CONTENTS Scope of This Manual .................... 4 PART I - HARDWARE ..................... 5 Before Installation ..................6 1.1 Warnings ..........................6 1.2 Physical Inventory ......................6 Facilities ...................... 7 2.1 Front Panel ..........................7 2.2 Rear Panel..........................8 Connecting System Components ............. - Page 3 Image Vault PRO Command ® TABLE OF CONTENTS 4.3 Transaction Data .......................41 4.4 Audit Data ...........................42 4.5 Error Log ..........................43 4.6 Skins ............................43 4.7 QuickView Action Buttons ....................44 4.8 Camera Window Behavior ....................45 Evidence Management ................46 5.1 Catalog ..........................46 5.2 Range Lock ..........................47...
-
Page 4: Scope Of This Manual
SCOPE OF THIS MANUAL This manual is designed to provide you with information necessary to install and operate your PRO Command DVR. This manual assumes you have the appropri- ate DVR for your application and all of the necessary supporting hardware such as cameras, monitors, cables, etc. -
Page 5: Part Ihardware
This is only a rough approximation. Actual storage time will depend on environmental factors as well as software setup and hard drive capacity. The balance of PART I of this book is designed to aid in setting up and using your Image Vault PRO Command hardware. -
Page 6: Before Installation
Any effort to mount other equipment to the Image Vault, modify the chassis, or penetrate the chassis in any way will void Image Vault manufacturer’s warranty. WARNING: Do not turn off or reboot the DVR while it is in the boot- up process. -
Page 7: Facilities
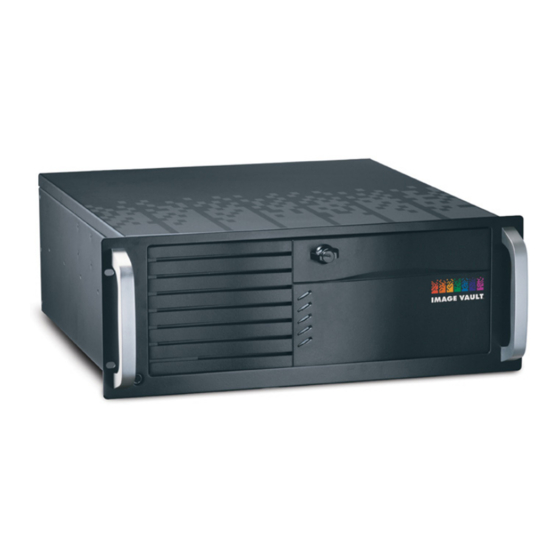
® 2 FACILITIES Image Vault PRO Command models all use the same chassis and offer the same hardware features. This section provides detailed information about each hard- ware component. From time to time Image Vault may modify the chassis slightly. -
Page 8: Rear Panel
Image Vault PRO Command ® 2.2 Rear Panel Input Voltage. Set to 115 V for use in USA. Set to 230 V for international use if appropriate. AC Power Input. Standard 3-prong IEC inlet (115 V or 230 V at 50/60 Hz). -
Page 9: Connecting System Components
Image Vault PRO Command ® 3 Connecting System Components Pick a level surface to place the Digital Video Recorder (DVR). The system should have adequate ventilation and should be clear of moisture and dirt. The following sections detail setup of specific items. 3.1 4 Camera/30 FPS Model: Video & Audio Capture, Monitor Output Video In: Connect up to 4 NTSC video cameras to the BNC connectors on the main breakout cable. -
Page 10: Camera/60 Fps Model: Video & Audio Capture, Monitor Output
Image Vault PRO Command ® 3.3 8 Camera/60 FPS Model: Video & Audio Capture, Monitor Output Video In: Connect up to 8 NTSC video cameras to the BNC connectors on the main breakout cables. The breakout cables are connected to the DB15 port on the rear of the DVR. Cameras 1 to 4 connect to the left and Cameras 5 to 8 con- nect to the right. -
Page 11: Camera/120 Fps Model: Video & Audio Capture, Monitor Output
Image Vault PRO Command ® 3.5 16 Camera/120 FPS Model: Video & Audio Capture, Moni- tor Output Video In: Connect up to 16 NTSC video cameras to the BNC connectors on the video input breakout cables. The camera input breakout cables are connected to the DB15 ports to the left. The top-left connector inputs are for cameras 1 to 8. -
Page 12: Camera/480 Fps Model: Video & Audio Capture, Monitor Output
Image Vault PRO Command ® 3.6 16 Camera/480 FPS Model: Video & Audio Capture, Moni- tor Output Video In: Connect up to 16 NTSC video cameras to the BNC connectors on the video input breakout cables. The camera input breakout cables are connected to the DB15 ports to the left. The top-left connector inputs are for cameras 1 to 8. -
Page 13: Camera/240 Fps Model: Video & Audio Capture, Monitor Output
Image Vault PRO Command ® 3.7 32 Camera/240 FPS Model: Video & Audio Capture, Moni- tor Output Video In: Connect up to 32 NTSC video cameras to the BNC connectors on the video input breakout cables. The camera input breakout cables are connected to the DVI ports to the left. The bottom DVI connector inputs are for cameras 1 to 16. -
Page 14: Ip Cameras
Image Vault PRO Command ® 3.9 SVGA Video Output: Security Monitor Image Vault will interface with al- most any standard SVGA (800x600 or 1024x768) monitor. The SVGA monitor output is generally used as the security monitor. It may display various combi-... -
Page 15: External Inputs
DVR’s POS port. Pigtail accessory cables are avail- able from Image Vault for various printer styles; sold separately. Functionally this acts like one cable as illustrated. - Page 16 ACCESS CONTROL Multi-Device Print Server Serial Data Con- nection Though not as common, Image Vault also supports multi-device serial print server ap- plications. The wiring is the same as the direct connection, but through software your DVR can differentiate source channels.
- Page 17 Image Vault for the approved device. Warning: You can harm the DVR by connecting a data device that is not approved by Image Vault and/or by using an improperly constructed cable. If you manu- facture your own cable, tap the POS device as follows: •...
- Page 18 Image Vault PRO Command ® IV-G POS Wiring to Gilbarco This diagram illustrates the proper wiring of the IV-G pigtail kit used to capture data from Gilbarco register systems. Plug into the “JNL PNTR” Port on the G-Site Register DB9F...
- Page 19 Image Vault PRO Command ® POS Quad Data Hub Wiring The primary function of the POS Quad Data Hub is to bring up to four serial data sources into one serial stream. Specify the accessory kit desired when ordering data hubs. Any of the accessory kit hardware can be bundled with the Quad hub.
- Page 20 Image Vault PRO Command ® Network POS Data Capturing POS data from a network print server does not require any additional cables. The DVR must be connected to the same local network as the POS data source. Coordinated software configuration of the network print server(s) and DVR is required. In software setup you have the options of receiving POS data directly from one network POS source, multiple sources, or from the print server.
-
Page 21: Usb Storage Devices
3.14 Remote Playback PC to DVR Communication A remote playback PC is a computer running the Image Vault PRO Command playback software application. This software application allows your PC to make a remote connection to your PRO Command DVR. Remote connection methods include modem and network. - Page 22 Image Vault PRO Command ® Local Area Network (LAN) Connection Connect the DVR to a conventional Ethernet network using standard, com- mercially available CAT-5 network cables. Do not use a network crossover cable when connecting your DVR to a LAN hub. Contact the Network Administrator before connecting the DVR to any existing network.
- Page 23 Virtual Private Network (VPN). The following procedure assumes the DSL cable modem connects a LAN to the internet through a router. Use this proce- dure even if Image Vault is the only network device used on the “inside” side of the router.
-
Page 24: Initialization
Image Vault PRO Command ® unable to make a remote connection through the router, contact Image Vault Technical Service at 1.888.462.4382. Be sure to have the information required in Step 1. 4 Initialization Be sure to observe all cautions and warnings and other written requirements relating to installation. -
Page 25: Cd-R Or Dvd-R Disk
4.4 CD-R or DVD-R Disk Insert the blank CD-R or DVD-R disk into the CD/DVD-R drive on the front of the unit. Image Vault will perform the necessary disk processing when it writes video or setup data to the disk. -
Page 26: Part Ii Software
Image Vault PRO Command ® PART II SOFTWARE Software on your DVR includes all of the features in the remote playback software application you install on your PC. There are only a few differences. The most significant difference is with the live monitor and live status modes which are only available locally on the DVR itself. Unless otherwise noted all playback software features apply to local operation as well as remote playback. -
Page 27: Specifications & Requirements
1 Software Specifications & Requirements There are two main software packages. PRO-Command Record is the full-featured application running on your PRO Command DVR. This software includes all live and playback modes of operation. PRO-Command Playback is the remote play- back software application you install on your PC. Use PRO-Command Playback to connect remotely to review video or configure the DVR. A version of the playback... -
Page 28: Software On The Dvr
Image Vault PRO Command ® 2 Software on the DVR Your DVR has all of the software built-in to check recording status live, view live security video, playback recorded video, and fully configure the DVR. To use any of these capabilities an SVGA monitor and mouse must be connected to the DVR. - Page 29 Image Vault PRO Command ® Live Status Mode Description Item A: Menu Bar. File, Source, Configure and Help menus. Item B: System Status Section. Indicates DVR is operating and shows the status of remote connections. Item C: Frame Data. The first two columns indicate file location. The third col- umn indicates actual image size of images being written to the hard drive. The last column indicates the camera or audio input number.
-
Page 30: Live Monitor Mode
Image Vault PRO Command ® 2.2 Live Monitor Mode Use the Live Monitor Mode to watch video as it is being captured and digitized. The video is live. Note that the presence of video does not automatically mean it is being recorded. From this mode you may re-arrange camera order and number of cameras displayed, jump to Live Status Mode, open Playback Mode, check viewer performance or make a CD/DVD copy of the most recent video. - Page 31 Image Vault PRO Command ® Live Monitor Mode Description Item A: Menu Bar. File, Source, Configure and Help menus. Item B: Live Camera Windows. From one to 16 camera windows may be displayed (see also Item F). To move a camera from one square to another click on the desired camera and drag to the desired location.
-
Page 32: Playback Mode
Image Vault PRO Command ® 2.3 Playback Mode Playback Mode is used to review recorded video, audio, and data. Use Playback Mode to configure the DVR’s recording process and all other advanced features. Playback Mode on the DVR is almost identical to the remote playback software (PRO-Command Playback). For complete information refer to the online help in your software. - Page 33 Image Vault PRO Command ® images. When zoomed, you may want to enable “Use Smart Smooth Zooming” for better screen display. Item H: PTZ Menu Icon. Click this icon to access A PTZ window for options to control a PTZ camera remotely.
-
Page 34: Software On Your Pc
Follow the directions provided. If you already have an earlier version of playback on your PC, you do not need to uninstall it. The older version will be needed to connect to existing Image Vault DVRs you have in the field running recording software older than Version 9.0. After completing installation the initial main menu will still be on the screen. From here you may choose to open this manual electronically or take advantage of any of the other extras found on the CD. -
Page 35: Modem Configuration
Image Vault PRO Command ® 3.4 Network Communication Network (TCP/IP) communication provides excellent flexibility and potentially the highest communication speed. Using TCP/IP, multiple remote PCs may connect to the same DVR at the same time. With additional network hardware the DVR may be accessed outside your LAN via DSL, VPN, WAN, or open Internet. Contact your Network Administrator and/or ISP for support with these applications. - Page 36 Image Vault PRO Command ® Network Communication Peer-to-Peer and LAN are two classic YOUR forms of network communication. Peer-to-Peer is where one PC commu- nicates directly with another PC without Crossover CAT-5 Cable any hubs or other network hardware. Only a Cat-5 Ethernet crossover cable is used.
- Page 37 Image Vault PRO Command ® Establish TCP/IP Network communication as follows: Make the necessary physical network connections. For Peer-to-Peer applications use the crossover network cable provided with the DVR. For other types of connections (e.g., Ethernet hub) use standard com- mercially available network cables.
-
Page 38: Opening Copied Video
Image Vault PRO Command ® where the username and password provided are valid. After connecting to one or more DVRs, you may connect to additional DVRs by choosing Connect from the File Menu and repeating Steps 5 and 6. 3.5 Opening Copied Video PRO-Command Playback can open video files copied or downloaded from a DVR. -
Page 39: Playback Operation
Image Vault PRO Command ® 4 Playback Operation This chapter provides an overview of operational features found in the playback software (Local Playback Mode or remote PRO-Command application). Each fea- ture is explained in a general sense. For detailed explanations of specific features please refer to the online help built into your software. - Page 40 Image Vault PRO Command ® Continuous Play of Open Cameras: Check Continuous to play video at any speed in either direction. Click “Go Live” to play the selected camera in nearly real time. To play all open cameras together check “Cycle Through Open Windows”...
-
Page 41: Playing Audio
Image Vault PRO Command ® 4.2 Playing Audio Each audio channel is synchronized with associated video. On DVRs equipped with standard capture cards: Mic 1 is associated with Cameras 1 through 4; Mic 2 is associated with Cameras 5 through 8; Mic 3 is associated with Cameras 9 through 12;... -
Page 42: Audit Data
PRO Command ® 4.4 Audit Data Image Vault PRO Command features three distinct audit logs. The System Audit keeps a record of system events ranging from log-in activity to camera signal detection to power loss. The User Audit specifically tracks user activity. It provides the data for the Viewing Performance indicator calculation. The External Event Audit is a running record of recording triggers defined by the user when config- uring motion detection, data rules, and external inputs. -
Page 43: Error Log
Image Vault PRO Command ® 4.5 Error Log The Error Log is a history of system-generated fault entries. It also provides a real-time indication of recorder status. To access the Error Log select “View Error Log” from the Status menu. -
Page 44: Quickview Action Buttons
Image Vault PRO Command ® 4.7 QuickView Action Buttons These short-cut buttons are user configurable with custom labels and functions. Eight buttons are provided. A button may be setup to open cameras or perform a specific type of audit search. Show/Hide: To show the QuickView Action buttons enable “Show QuickView Buttons” in the Playback Options menu. Disable to hide the buttons. -
Page 45: Camera Window Behavior
Image Vault PRO Command ® 4.8 Camera Window Behavior The Playback Options menu includes three important options that determine how your camera windows will appear and behave. Auto-Tile: Enable Auto-Tile from the Playback Options menu to make camera windows tile and auto-arrange automatically as you open and close cameras. Dis- able this feature to allow windows to open in cascade style at original size. -
Page 46: Evidence Management
5 Evidence Management This chapter outlines the major features commonly associated with handling evidence. All Image Vault video, in its original format, is encrypted and tamper- proof. This means your Image Vault video, whether copied to CD, DVD, USB device, or downloaded to your PC is valid in a court of law so long as it is being viewed in its original format. -
Page 47: Range Lock
Image Vault PRO Command ® 5.2 Range Lock Range Locks (Catalog Menu) are used to write-protect a period of recorded video along with associated audio and data. Range Locked video will not be overwritten with the passage of time unless you remove the Range Lock or set Auto-Range Lock to “first in/first out.” Range Locked video may be reviewed, even if the... -
Page 48: Download Video To Remote Pc
Image Vault PRO Command ® hours). The finished CD/DVD) will eject automatically when copying is com- plete. If additional disks are required you will be prompted to insert additional blank discs. For a USB device you have the option to eject the device after copying is complete when picking date and time. -
Page 49: User Management
Image Vault PRO Command ® 6 User Management This chapter describes features related to user management. Administrative fea- tures are those which involve setup or advanced operation of the DVR but do not involve recording or playback processes. Each feature is explained in a general sense. For detailed explanations of specific features please refer to the online... -
Page 50: User Inactivity Timeouts
User Inactivity Settings are accessed from the Configuration menu. 5.3 User Performance PRO Command DVRs automatically record all user login activity along with keep- ing a detailed record of everything users do while logged in. The User Perfor- mance Indicator is an optional feature which uses this data to track how actively the DVR is being monitored. - Page 51 Image Vault PRO Command ® Indicator Color On Daily Percentage Met: the indicator will turn from red to green when the user has been logged in for the acceptable percentage of the required viewing time for the current day only without regard to the percentage number displayed.
-
Page 52: Recording Setup
Image Vault PRO Command ® 7 Recording Setup Your Image Vault DVR has numerous options allowing you to “fine-tune” how it records video and data. Nearly all features discussed in this section require logging in at the Service permission level. Most features, once configured and “tweaked” for optimum performance, will rarely ever be changed again unless something changes in your system. Your recorder may be set up to record continuously, continuously during sched- uled periods, or on demand. -
Page 53: Camera Setup & Forced Recording Options
Image Vault PRO Command ® Monitor Switch Rate: This is the analog monitor output dwell time as it cycles between cameras. Use Record Schedule: Enable to allow forced system recording according to the Record Schedule. Forced recording requires additional setup (see Section 7.2). - Page 54 Image Vault PRO Command ® tionally among its cameras. Capture hardware and resolution affect maximum actual frame rate. Capture Resolution: Set (by camera) the Capture Resolution of each camera. Us- ing high resolutions will dramatically increase image file size and may reduce the maximum capture rate. Analog or IP Camera: Enable (by camera) “Analog Camera” all inputs except those being used by IP cameras. When configuring an IP camera you will also be...
-
Page 55: Motion Detection Triggered Recording
Image Vault PRO Command ® 7.3 Motion Detection Triggered Recording Internal motion detection allows a camera to record when there is activity in the field of view of the camera. Each camera is configured independently. By factory default motion detection is enabled on all cameras. Factory default settings are acceptable for most applications. To configure motion detection select “Motion Detection Setup” from the Status menu. To adjust motion detection behavior select the camera to adjust and modify settings as desired. - Page 56 Image Vault PRO Command ®...
-
Page 57: External Input (Dry Contact) Triggered Recording
Image Vault PRO Command ® 7.4 External Input (Dry Contact) Triggered Recording You may use up to 16 external dry contact inputs to trigger video recording, create audit entries, and trigger PTZ presets. To configure this feature select “External Inputs” from the Status menu. - Page 58 Image Vault PRO Command ® Using External Inputs: Select the input number to configure and enable “Use This Event.” Enter a meaningful name in the “Input Name” field. Enable all cam- eras you want to have record when the contact is triggered. To restrict the hours when the input is active adjust the “Event Schedule” as desired. Pre/Post Recording Time: “Event Duration” is how long after the contact returns to normal until the specified cameras stop recording. Enable “Use Pre-Event”...
-
Page 59: Data Device Setup
Image Vault PRO Command ® 7.5 Data Device Setup You should configure the data device setup before configuring Data Rule trig- gers. Transaction data will not be captured until the Data Device Setup is done. To successfully capture, store, and use data to trigger recording and audit log- ging follow these simple steps: Connect hardware using proper wiring accessories (Part 1, Section 3.11). - Page 60 1 or network port on the DVR. This can be also used to save transaction data to send to Image Vault to create filters for new or unique POS devices. If you experience problems verify your hardware configuration (Part I, Section 3.11) and your Data Stream Setup. If you are unable to resolve a problem with reasonable effort, please contact Image Vault Technical Service (1.888.462.4382) for direction.
-
Page 61: Transaction Data Triggered Recording
Image Vault PRO Command ® 7.6 Transaction Data Triggered Recording A Data Rule is a virtual recording trigger based on specific data being captured from any Data Device source. Up to 16 Data Rules may be defined (Section 6.8) to trigger video recording based on specific words, phrases, or value ranges. Note: Data Device Setup (Section 6.8) must be completed before the Rules as described in this section will function. To set up Data Rules select “Data Device Rules” from the Status menu. - Page 62 Image Vault PRO Command ®...
-
Page 63: Alarm Output Setup
Image Vault PRO Command ® 7.7 Alarm Output Setup The “Alarm Output” feature allows you to define what events generate an alarm and how each alarm is sent. You may set up alarms for camera loss, system events (rebooting or pressing the “Copy Video to Media” button), Data Rule triggers or external (dry contact) input triggers. Alarms may be sent in the form of email, SMS text message, dry contact closure output, or dial-up to a service bureau. To configure these features select “Alarm Output Setup” from the Status... - Page 64 Image Vault PRO Command ® Electrical Contact: No setup is required on the Notifications Setup dialog. For hardware information refer to Alarm Output (Part I, Section 3.9). This momen- tary contact is normally open and closes for ½ second (500 milliseconds) when activated. Alarms Each alarm is independently configured with your choice of notification options. This is why you must enter your notification options before configuring the actual alarms. Camera Loss Alarms: Send an alarm when a camera signal is lost. You have the added option of grouping cameras and you may set the “Number of Hours...
-
Page 65: System Setup
Image Vault PRO Command ® 8 System Setup System setup involves those features which involve DVR operation but do not directly involve video, audio or data processes. Each feature is explained in a general sense. For detailed explanations of specific features please refer to the help menu built into your software. Service level permission is required in order to access and configure most of the items described below. -
Page 66: Location
Image Vault PRO Command ® the DHCP settings will appear to the right on the network configuration dialog. Host Name When connecting remotely a user may specify either the IP Address of the DVR or its Host Name. The default Host Name will be the DVR’s serial number, though you may change this as desired. Changing the host name will require the DVR to be rebooted before the change will take effect. -
Page 67: Record Monitor Setup
Image Vault PRO Command ® 8.5 Record Monitor Setup Select “Recorder Monitor Setup” from the Status menu to specify how the Live Monitor Mode will appear and behave. Set the number of cameras displayed (lay- out), their order, lock this down to prevent changes, determine whether the DVR will boot-up in Live Monitor Mode or Live Status Mode, enable or disable motion grids in Live Monitor Mode. -
Page 68: Software Updates
Updates are available from the website (www.image-vault.com). Updates may be emailed to you at no charge. If you request the update via CD, Image Vault may charge a nominal shipping fee. Always check the website or Image Vault Techni- cal Service to verify compatibility before installing any updates. -
Page 69: Limit Recorder Days
Image Vault PRO Command ® 8.9 Limit Recorder Days This feature is generally not used except in cases where local jurisdictions restrict the maximum storage time of DVR. Using this feature will cause video older than the specified period to be deleted each day. Select “Limit Recorder Days” from the Configuration menu in local Playback Mode to restrict maximum recorder storage time. -
Page 70: Shutdown/Reboot Dvr
Service level user. All other users will need a Tech Support Override to complete. Please contact Image Vault Technical Service (1.888.462.4382) for an override if you do not have access to the Service level. - Page 71 This means poor quality image whether viewing locally or remotely. • Check camera connections. • Check camera focus. • Move the camera to another input. If the camera becomes clear, con- tact Image Vault Technical Service. If the camera remains distorted try a different camera. • If the problem appears on remote playback only, check the VGA set- tings on your PC. Insufficient color depth on your PC display settings will cause images to display improperly. Cannot Connect via Modem Using PRO-Com- mand.
-
Page 72: B Factory Defaults
Image Vault PRO Command ® Power Loss These are general steps. No matter how obvious they may seem, check each one. • Check your product is switched on. • Check that your UPS is switched on. • Check that power cords are firmly connected at both ends. • Verify the AC outlet has power. • Check that you are not connected to a switched power outlet. • Check your circuit breaker. • If you can verify that you have power to the DVR, press the Reset but- ton on your DVR. •... -
Page 73: System Audit Messages
For a complete list of the POS Interface data devices that are directly supported by your DVR, check www.image-vault.com. If you need support for a device that is not listed, contact Image Vault Technical Service. APPENDIX C: SYSTEM AUDIT MESSAGES Message..........Meaning... -
Page 74: Legal Notices
The Uninterruptable Power Supply (UPS): Image Vault REQUIRES that you install a UPS as part of the digital recorder sys- tem. Failure to install a UPS may cause damage to the system’s hard drive during power fluctuation, resulting in loss of recorded images or the inability to record. -
Page 75: Warranty
If a mechanical or electrical component of the Image Vault digital recorder mal- functions during normal use, Image Vault will, at its option, repair or replace any such unit (or component) as long as the original purchaser owns the product. - Page 76 E.2 Factory Repair 90-Day Warranty on Parts and Labor (Product Outside Original Warranty) If an Image Vault DVR is OUT of Warranty (beyond 1 year from date of purchase) Image Vault will warranty Repairs and Labor for a period of 90 days from date of repair.
- Page 77 Image Vault PRO Command ® Notes...
Need help?
Do you have a question about the PRO COMMAND and is the answer not in the manual?
Questions and answers