Table of Contents
Advertisement
Quick Links
NAPCO iSeeVideo
R
ISV WLHDCAM
333 Bayview Avenue
Amityville, New York 11701
For Sales and Repairs, (800) 645-9445
Installation Guide
For Technical Service, (800) 645-9440
Publicly traded on NASDAQ
Symbol: NSSC
WI1973 010/12
© NAPCO 2012
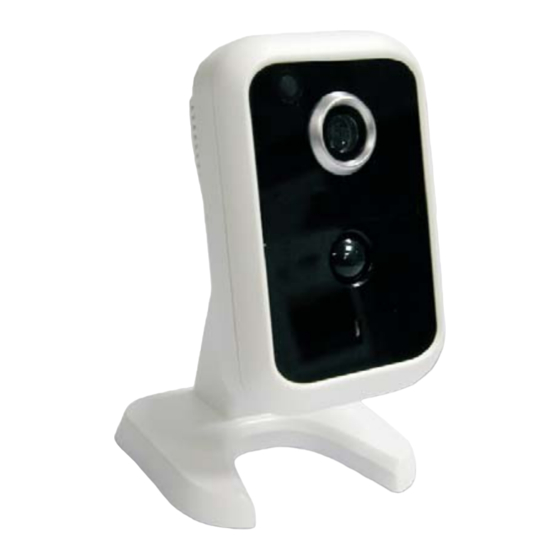
Indoor 720P HD Wireless IP Camera
ISV WAP
Internet
ISV WLHDCAM
Internet
VideoAlert.net SERVER
Designed exclusively for use with NAPCO iSeeVideo VideoAlert.net Server
COMPATIBLE
1
Advertisement
Table of Contents

Subscribe to Our Youtube Channel
Related Manuals for NAPCO iSeeVideo ISV WLHDCAM

Summary of Contents for NAPCO iSeeVideo ISV WLHDCAM
-
Page 1: Installation Guide
For Technical Service, (800) 645-9440 Publicly traded on NASDAQ Symbol: NSSC WI1973 010/12 © NAPCO 2012 Indoor 720P HD Wireless IP Camera ISV WAP Internet ISV WLHDCAM Internet VideoAlert.net SERVER Designed exclusively for use with NAPCO iSeeVideo VideoAlert.net Server COMPATIBLE... -
Page 2: Table Of Contents
Configuring the wireless connection ....4 Securing the wireless connection ......4 Account Activation..........6 Adding Cameras to an Existing Account....8 NAPCO Security Systems, Inc. Configuring Motion Detection......10 For Sales and Repair, call toll free: (800) 645-9445 Advanced Settings ...........11 For direct line to Technical Service, call toll free: (800) 645-9440 Setting a Motion Schedule .......11... -
Page 3: System Overview
Overview of the iSeeVideo System The NAPCO iSeeVideo system allows remote video internet monitoring of homes and businesses through a unique subscription based account system that provides the opportunity to realize recurring revenue from residential and commercial video installations. The system is comprised of the following... -
Page 4: Configuring The Wireless Connection
Input/output Controls and Indicators Terminals DI is a N/O input (activates upon short of DI to GND) Light Sensor DC Power DO is an open collector output that must be connected to a low One D/I and current relay or directly to an RJ45 for One D/O EOLR terminal on an alarm... - Page 5 Activating the iSeeVideo account Following are the steps for account activation. These activation steps include the branding of the cam- era to your Company’s personalized iSeeVideo web page, registration of the camera and adding Us- ers to the account. NEW ACTIVATION 1.
-
Page 6: Account Activation
3. Create Subscriber Account Now Click to bring up the Subscriber Details screen, where the basic account information is entered. Enter your name, address, telephone number and other information in the appropriate fields as shown in the image at right. The User ID and Password entered at this step will be- come the Master User of the account and will be the only User to have administrative privileges (the ability to pro-... - Page 7 7. My Account Click My Account to view account information. From this screen, you can update your account information (My Information), and add Users to the account. To add a new User to the account, click Add a New User. 8.
-
Page 8: Adding Cameras To An Existing Account
Adding or Replacing cameras on an existing account. Once the camera has been registered and the account has been created, additional cameras, if any may be added to the account through the following steps: 1. Return to the www.videoalert.net login screen and click the NEW ACTIVATION button The New Activation screen will appear. - Page 9 4. The next screen that appear will allow the registration of the camera to the correct account. A pull-down menu will appear, listing all accounts assigned to the Dealer ID entered in the branding screen. Select the correct account from the list by clicking it and then click Next continue.
-
Page 10: Configuring Motion Detection
CONFIGURING THE ISV WLHDCAM Once the ISV WLHDCAM(s) have been and powered up, and the account has been activated, the cameras may be configured. The next several pages will guide you through the on-line configuration process. Note: If the cameras are only to be used for live view- ing and there are no plans to trigger video motion events to the server, configuration is not required. -
Page 11: Advanced Settings
ADVANCED SETTINGS To enter Advanced Settings, click the tool icon Firmware Version The firmware version of the camera will display. If there is a new version available, a message will display, along with a button to upgrade to the new version. Camera Time Zone Use to set the time zone of the camera. -
Page 12: Napco Limited Warranty
NAPCO will, within said period, In no event shall NAPCO be liable for an amount in at its option, repair or replace any product failing to excess of NAPCO's original selling price of the product,...
Need help?
Do you have a question about the iSeeVideo ISV WLHDCAM and is the answer not in the manual?
Questions and answers