Table of Contents
Advertisement
Advertisement
Table of Contents

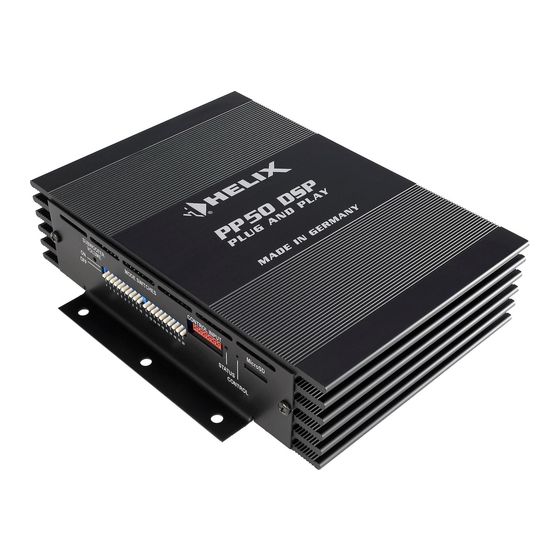
Summary of Contents for HELIX PP50DSP
- Page 1 HELIX DSP PC-Tool Software Operating Instructions Version: June 2011...
-
Page 2: Table Of Contents
Contents System requirements ..................3 Installing the HELIX DSP PC-Tool Software ..........4 Connecting the PP50 DSP to the PC ............. 6 Connecting the C-DSP/P-DSP to the PC ............7 Starting the software ..................8 Operating controls ..................10 Description of the main navigation menu ............10 Channel selection .................. -
Page 3: System Requirements
• At least 25 MB free hard disk space • 1 free USB port for connecting the HELIX Optical & USB Interface • Screen resolution of at least 1024 x 768 pixels or greater The software has been tested on the following operating systems: Windows XP, Windows Vista (32 bit) and Windows 7. -
Page 4: Installing The Helix Dsp Pc-Tool Software
Installing the HELIX DSP PC-Tool software In order to use the HELIX DSP PC-Tool software you must first install it on your PC according to the following instructions: • Important: Ensure that the processor and/or USB interface are not yet connected to your computer. - Page 5 Now double-click on the “USB driver.exe” file to install the USB communication driver. This driver must be installed before you start the “HELIX DSP PC-Tool Rev X.xx.exe” program!The following window will appear on your PC when you install the USB driver: Important information: If this window does not open, please execute the “USB driver.exe”...
-
Page 6: Connecting The Pp50 Dsp To The Pc
Do not attempt to force the connector into the “CONTROL IN- PUT” the wrong way up. Connector to CONTROL INPUT • Connect the HELIX Optical & USB Interface USB connector to a free USB port on your PC. • Switch on the PP50 DSP via your car radio. -
Page 7: Connecting The C-Dsp/P-Dsp To The Pc
Connect the P-DSP directly to the computer using the supplied USB cable.Use the USB port on the P-DSP. Please note: It is not possible to use the HELIX USB Interface with this processor. Only use the P-DSP USB port to connect to the computer. -
Page 8: Starting The Software
The most recent version of the operating software has been installed on the PP50 DSP and/or the C-DSP/P-DSP: instructions can be found in the user manual of the respective device In order to start the software, please execute the HELIX DSP PC-Tool Rev 1-XX.exe file. The following window will then appear on your screen: Now press the “Connect”... - Page 9 It is then necessary to close the program completely and restart it. • Once the PP50 DSP has been connected to the PC via the HELIX USB Interface, the amplifier will be in PC mode, which deactivates various functions such as the under voltage detector or the automatic switching on/off using High Level or Remote, for example.
-
Page 10: Operating Controls
Operating controls Main navigation menu Reset button: The Reset button is used to reset all the adjustments made in the software. Pressing this button also resynchronizes the connection between the device and the software. Important information: If you accidentally press the Reset button while adjusting the DSP without having saved your se- tup, you will loose all your data. - Page 11 Please note: The PP50 DSP memory is only able to manage a single setup generated using this software. The C-DSP/P-DSP memory is able to manage two different setups. These can be selected via the software. Selecting the setups A–D: The PC-Tool software allows the direct comparison of a maximum of four different setups using the “Setup A”...
-
Page 12: Channel Selection
Channel selection Selecting channels for adjustment: Select the channel you want to adjust. To do so, simply click on the respective box with the left mouse button. The active channel is indicated by the red LED (top front left in the example). The software allows each channel to be adjusted separately. -
Page 13: Channel Routing - Configuring Inputs And Outputs
Channel routing - configuring inputs and outputs The C-DSP/P-DSP allows input channels to be freely allocated to the output channels. To perform this allocation, click on the “Configure Inputs/Outputs” box in the DSP PC-Tool main menu once the software starts. This will then present you with the following input mask: Naming inputs: On the left hand side of this mask you can allocate a name to each of the input channels (C-DSP:... -
Page 14: Naming Outputs
Naming outputs: Just as with the inputs, you are also able to allocate names to the outputs “A-H” on the right hand side of the input mask. They are selected using the right or left mouse button. In this case, however, the selected configuration does immediately affect the default settings of the high-pass and low-pass filters in the DSP main menu. -
Page 15: Allocating Inputs To Outputs
Please note: These default settings may, of course, be modified in the DSP main menu. They are only used to protect the connected loudspeaker and are not recommendations for correct settings! Allocating inputs to outputs: In the center of the input mask, you can allocate any of the input signals to each of the eight out- puts A-H. - Page 16 The following examples are provided as way of clarification: If, for example, Output A “Front L Full” is allocated to Input A “Front L Full”, then please select “Front Full L” in all four entry fields. CORRECT: INCORRECT: If, for example, a sum signal is generated for the subwoofer from four channels front and rear, the following setting is useful: If, for example, a front-center signal is generated from the two front channels,...
-
Page 17: High And Low-Pass Filter Settings
High- and low-pass filter settings This section makes it possible to configure almost any type of high-pass and low-pass filter for the selected channel. When doing so, the following parameters are adjusted separately: crossover frequency, filter characteristics, slope and the Q-factor. The functions of the individual parameters are described below. -
Page 18: Linkwitz
• Only practical in combination with very high quality loudspeaker systems; not recommended for subwoofers Linkwitz • Very good impulse behavior • No steep transition from the passband to the stopband • No gain at the crossover frequency • Only useful in combination with very high quality loudspeaker systems; not particularly recom- mended for subwoofers Chebyshev •... -
Page 19: Slope
Fig. 2: Low-pass filter characteristics Slope Use this slide control to adjust the slope of the filter in 6 dB increments from “0 dB” per octave (filter not active) to a maximum of “-42 dB” per octave on the C-DSP and a maximum of 30 dB per octave on the P-DSP (= filter with very steep slope). - Page 20 Fig. 4: Effect of slope on the low-pass The value you select for the slope depends heavily on the type of application. The following points may aid your decision: • The steeper the slope, the worse the filter impulse behavior. •...
-
Page 21: Q-Factor
Q-factor (Q-Factor) This slide control is only active if you select the “Self-Define” characteristics. The slope for this characteristics setting is fixed at -12 dB and there is the option of adjusting the Q-factor of the high- or low-pass between 0.5 and 2.0 in increments of 0.1. The Q-factor effect is illustrated below using the example of a high- and low-pass filter with a crossover frequency of 1000 Hz. -
Page 22: High-Pass And Low-Pass Filter Bypass Function
Important information about the PP50 DSP: If you are using the PP50 DSP with the PP 7E or PP 7S subwoofers, please adjust the subwoofer channel high-pass filter settings as follows: • Crossover frequency: 49 Hz • Characteristics: Self-Define • Q-Factor: High- and low-pass filter bypass function Use the bypass button to completely bridge the effect of a high- or low-pass filter with a single... -
Page 23: Adjusting The Output Level
Adjusting the output level The output level of each of the channels may be adjusted using the “Output level” slide control. This increments depend on the governor setting. The “–10” to “+5 dB” band has increments of 1 dB, the “–30 dB” to “-10 dB” band increments of 2 dB and that below “–30 dB” has increments of 6 dB. -
Page 24: Adjusting The Phasing And Time Alignment
Adjusting the phasing and time alignment Time alignment overview page (“Overview”) So that you don’t have to constantly switch backwards and forwards between the individual chan- nels when adjusting the time alignment and phase, you can use the Overview button to display all the channel values simultaneously. -
Page 25: Adjusting The Time Alignment
Adjusting the time alignment (“Time Alignment”) It is only possible to achieve a clean natural response of the music if the time alignment is adjus- ted correctly. The program therefore allows sensitive adjustments in increments of 7 mm. The software provides two different ways of adjusting the time alignment: •... - Page 26 Important information: • The time alignment function may only be used to achieve optimum stereo reproduction for one listening position in the vehicle. However, spatial reproduction in the other positions is usually worse with time alignment! • Always switch on the time alignment before you adjust the frequency response with the equali- zer.
-
Page 27: Adjusting The Equalizer
Adjusting the equalizer Graphic 1/3 octave equalizer Each of the DSP channels has its own equalizer which affects the frequency response in high resolution 1/3-octave increments. The front and rear channels therefore have 30 slide controls for the bands between 25 Hz and 20 kHz. The subwoofer channel has 10 bands from 25 Hz to 200 Hz. -
Page 28: Pp50 Dsp: Parametric Filter
PP50 DSP: Parametric filter In addition the graphic 1/3 octave equalizer, the PP50 DSP also has one parametric filter for each channel which may be used to make even finer acoustic adjustments. This filter is intended exclu- sively for compensating excess gain in the frequency response (range: 0 to -30 dB). This prevents any boosts and therefore eliminates any dips in the frequency response. -
Page 29: P-Dsp: Graphic Equalizer Fine Adjustment Function
The “Q” slide control is used to adjust the bandwidth of the frequency cut. A low Q-factor equates to a broad band reduction, while a high Q-value equates to a particularly narrow band cuts. The effect of the “Q” control is illustrated in the following diagram: P-DSP: Graphic equalizer fine adjustment function The FineEQ function is used to precisely adjust the 1/3 octave equalizer and provides a similar function to the parametric filter of the PP50 DSP. -
Page 30: C-Dsp: Graphic Equalizer Fine Adjustment Function
C-DSP: Graphic equalizer fine adjustment function The C-DSP also has a fine adjustment function for each individual band in the 1/3 octave equali- zer. Its functionality is identical to that of the P-DSP, although the setting options are significantly more comprehensive. This makes it possible to adjust the central frequencies of each of the bands of the C-DSP by increments of 1/24 octaves which allows almost any frequency to be selected as required. -
Page 31: Measuring Frequency Responses
Measuring frequency responses To optimally adjust setting of the equalizer using the “HELIX DSP PC-Tool” it is absolutely neces- sary to be able to measure the frequency responses of the loudspeakers in your vehicle. Even absolute professionals are unable to make perfect adjustments using their hearing alone. -
Page 32: Measurement Software
“Rosa Rauschen.mp3” and copy them to the USB memory. We recommend creating a CD of the test signal if possible. Appropriate car radio settings for taking readings To take readings it is important that your car radio is set up correctly. All sound controls should be set to either “linear”... - Page 33 This opens a window in which you can select the directory where you previously saved the “Praxis Setup ATF.ini” configuration file. Click with the mouse on “Open” to automatically load the configuration file, and “LOAD CONFIG” will be temporarily displayed. Now you need to adjust the microphone you are going to use to take the measurements: “Setup”...
-
Page 34: Frequency Response Readings
Frequency response readings • Ensure that you have correctly adjusted the time alignment using the HELIX DSP PC-Tool be- fore you start the measurement. • Sit in the driver’s seat with the measuring microphone. • It is best to place your PC (Notebook/Netbook) on the passenger seat so that you can use it easily. - Page 35 Bear in mind that the “Praxis” measurement software is set up so that the frequency response is measured in the same 1/3 octave intervals with the same center frequencies you set in the HELIX DSP PC-Tool equalizer. •...
-
Page 36: Important Information About The Pp50 Dsp
Important information about the PP50 DSP • If you are using the PP50 DSP with the PP 7E or PP 7S subwoofers, please use the following settings for the subwoofer channel high-pass filter crossover frequency: 49 Hz characte- ristics: Self-Define Q-factor: •... - Page 37 Audiotec Fischer GmbH Gewerbegebiet Lake II · Hünegräben 26 · 57392 Schmallenberg · Germany Tel.: +49 (0) 2972 9788 0 · Fax: +49 (0) 2972 9788 88 E-mail: helix@audiotec-fischer.com · Internet: www.audiotec-fischer.com...
Need help?
Do you have a question about the PP50DSP and is the answer not in the manual?
Questions and answers