
Subscribe to Our Youtube Channel
Related Manuals for Yachting Naki 800C


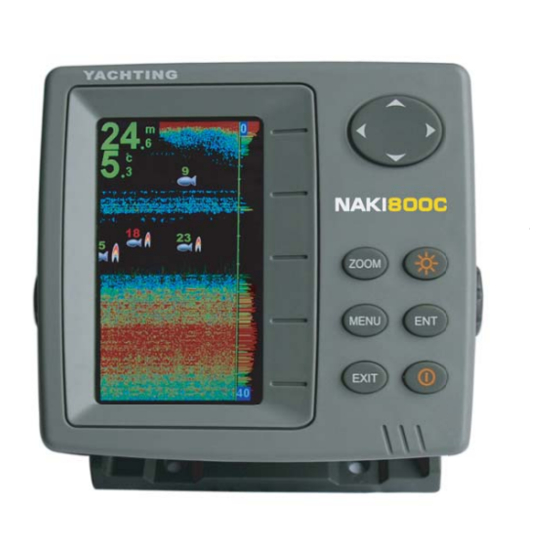
Summary of Contents for Yachting Naki 800C
- Page 1 NAKI 800C, NAKI 810C, NAKI 820C Color Fishfinder Installation and Operation Instructions...
- Page 3 Yachting Electronic Co., Ltd. Yachting Electronic may find it necessary to change or end our policies, regulations, and special offers at any time. We reserve the right to change or improve its products and to make changes in the content without obligation to notify any person or organization.
- Page 4 Introduction Thank you for choosing our Fish Finder. And welcome to the innovations of Yachting Electronic Co., Ltd! We have been committed to fish finder R&D activities all the way and its products have been reputed for their cutting-edge technologies and reliable performance.
-
Page 5: Table Of Contents
Table of contents Understanding sonar ...................1 No-skipping detection...................2 Dual beam sonar (NAKI810C/820C Only)............3 Installation......................4 Packing list.......................4 Tool List (not included)..................5 Transducer installation..................5 Transom installation..................5 Shoot-thru-hull transducer installation............9 Sonar unit installation..................12 Operation ......................15 Understanding the Fishfinder screen..............15 Real time sonar window..................16 Keyboard instruction..................17 Data interface ......................19 Menu Operation....................20... - Page 6 TCG Control....................28 2. Display......................30 Depth Range....................30 Zoom Range....................31 Backlight......................32 Echo Style....................33 Keel Offset....................34 3. System......................35 Beeper......................35 Simulator.....................35 Language.....................36 System Info....................37 Load Default....................38 4. Units......................39 Temperature....................39 Depth......................40 5. Alarm......................41 Fish ID......................41 Shallow......................42 Battery......................43 Trouble Shooting....................44 Maintenance......................46 Guarantee Conditions...................47 Specifications and features..................48 Specifications...................48 Features....................49...
-
Page 7: Understanding Sonar
Understanding sonar If you are familiar with how sonar works, skip ahead to the next segment. But, if you have never owned sonar Fishfinder before, this segment will tell you the basic work- ing theory about sonar. How sonar works Based on the sonar technology, the Fishfinder could detect the underwater condition, including fish, structure,... -
Page 8: No-Skipping Detection
No Skipping Detection Adopted high detecting technique, your fishfinder has a high detecting precision, which enable a “No-skipping detection”. When sonar works, it continually samples the echo at same interval (for your fish- finder, it is 0.06mS). And the continuous signals form different sampling point. The shorter the distance between 2 sampling points is, the higher precision your fishfinder will be able to detect minimal object (thinking about the fishing net, the smaller the hole is, the smaller fish that not being able to leak). -
Page 9: Dual Beam Sonar (Naki810C/820C Only)
Dual beam sonar (NAKI810C / 820C Only) NAKI810C / 820C Fishfinder adopts a 200 / 83(50) kHz Dual Beam sonar system, with which the sonar coverage has a different area of 20°/ 60°(12°/ 35°)correspondingly, which enable you get the best bottom information. By the Dual beam sonar setting, you can use the narrow 20°(12°)beam to penetrate the deep bottom while you are still being able to use the wide 60°(35°)beam for a wide detection. -
Page 10: Installation
Installation Do not begin the installation unless you have read the manual instruction carefully, which contains information critical to the correct installation of your Fish- finder. And for any problems you meet during the installation, please contact your local dealer for help. Packing list Before you install the transducer and sonar unit, please check the Packing List below and make sure you are not missing any items. -
Page 11: Tool List (Not Included)
Tool List (not included) - Hand drill, - 5/32” drill bits, - Phillips and flat-head screwdriver, - Pencil - Marine sealant. - 2-part, slow-cure epoxy (for shoot-thru-hull transducer installation) Transducer Installation Transom installation 1. Select the mounting location When you select a mounting location for the transducer, the flowing should be considered in advance. - Page 12 surface make them not separating easily. Note: when match the transducer and pivot, please be careful not assembling them reversedly. see figure-2 a-right b-wrong (figure-2) b) Put the locking nut into the slot of pivot then insert the pivot bolt hand-tighten the pivot bolt (figure-3) Note Do not over tighten the pivot-bolt with Allen wrench otherwise you will not being able to adjust the angle of transducer...
- Page 13 Do not push the pivot into the bracket (figure-5) 4. Initial installation of transducer a) Apply marine sealant to the 4 x 15mm screws and the two holes on transom. Hold the bracket against transom again slightly tighten the template by two 4 x 15mm screws (see figure-6).
- Page 14 the template touchs the transducer (figure-6) Note Note Make sure the cable between the transducer and the first clamp is not tighten. otherwise the transducer cable is easily damaged when adjust the transducer. To avoid this matter please rotate the transducer to the utmost position before tighten the first cable clamp (figure-7).
-
Page 15: Shoot-Thru-Hull Transducer Installation
happens when the boat run at a certain speed note the speed of your boat c) Adjust the transducer in a small scope and run the boat at the noted speed (step 2). Then observe the sonar display. If the sonar display is normal, go to the next step. If not, please adjust the transducer until it comes out normal. - Page 16 inner hull Resin flotation material expoxy outer hull (figure-8) With double-hulled boat, you could make the shoot-thru-hull installation only when some flotation materials (such as plywood, balsa, wood or foam) are removed from the chosen area. Please see figure-8. Warning: contact your boat dealers to get the full specifications of your boat. And never try to remove any materials from the inner hull before you completely know about the composition of your hull.
- Page 17 2. Find a better mounting location a) Fill the hull with enough water to submerge the transducer. b) In the sump of the boat, place the transducer at the identified mounting position, face down. To make the transducer in position, some heavy object could be used. c) Turn on the sonar unit, run the boat to water area that the depth is about 20feet to test whether the sonar display is normal (if needed, please adjust the sensitivity and depth range).
-
Page 18: Sonar Unit Installation
Sonar unit installation 1. Find a mounting location 64.3 148.3 29.4 53.1 (unit:mm) (figure-9) When you begin the installation of you Fishfinder, the following should be considered: a) The location should be convenient for your choosing the best viewing angle. b) There should be enough room for the sonar unit tilting &... - Page 19 control head (figure-10) bracket 2) Assemble the locking knob locking knob (figure-11) 3. Fix the fish finder on the installation surface which you choose before...
- Page 20 4. Connect the power cable to the boat Your Fishfinder include a 1.5m long power cable, which is used to connect to the transducer and battery. Properly connect the power cable to the transducer and battery, then it is ready to use. Caution: some boats may have 24 or 36 volt electric system, however for your Fishfinder, only 12 volt electric system could be adopted.
-
Page 21: Operation
Operation Understanding the fishfinder screen water surface water depth ............water temp......real time ...... sonar window 83(or 50)khz ........ fish symbols sonar history ....... window 200kHz fish symbols ........instant ......sonar returns bottom shape ......depth range ...... -
Page 22: Real Time Sonar Window
Real time sonar window The plot on the screen demonstrates the sonar history, which varies at different time segment. So, considering the boat and targets may continually move when the sonar works, the information displayed on the screen only shows the time segment when the targets were detected.To understand the display correctly, you could imagine right side... -
Page 23: Keyboard Instruction
Keyboard instruction Up Arrow key Right Arrow key Down Arrow key Left Arrow key Backlight Key ZOOM MENU Power Key EXIT The Fishfinder sound a tone when you press the key which means the unit has accepted a command. 1. MENU Key The MENU key is used to enter into a menu setting. -
Page 24: Exit Key
5. POWER Key The POWER/CLEAR key is used to turn the Fishfinder on or off. During the operation, you can use it to clear screen. 6. EXIT Key The EXIT key is used to exit a menu setting and back to the superior menu EXIT Key can also be used to “hold”... -
Page 25: Data Interface
Data Interface Data Interface SDUCER DATA The sonar unit provides a Data Interface, which is for software updating and GPS connector. 1) For software updating, please download the latest software version from www.goyachting.cn. 2) For GPS connector, simply connect a standard GPS reveiver to the unit, then the tracking point data can be collected and navigation path is ploted on displayed. -
Page 26: Menu Operation
Menu Operation 1. Sonar Chart Speed Chart Speed control how fast the sonar information moves across the screen. With the high speed, you could see more information across the screen; however the fast moving information makes you feel difficult to interpret the fish details and bottom. -
Page 27: Noise Filter
3) Press Right Arrow to enter into Sonar setting. 4) Use the Up / Down Arrow to select the Chart Speed option. 5) Press Right Arrow to enter into the setting. 6 ) Press Right / Left Arrow to increase or decrease the value. 7) Press ENT to confirm the setting. -
Page 28: Color Line
7) Press ENT to confirm the setting. 8) Press EXIT to exit the menu setting. Color Line Color Line is used to distinguish between weak and strong echoes, which is very helpful for you to know well whether the bottom is hard or soft; and also help you to distinguish weeds from trees, or fish from structure;... -
Page 29: Sensitive
5) Press Right Arrow to enter into the setting. 6 ) Press Right / Left Arrow to increase or decrease the value. 7) Press ENT to confirm the setting. 8) Press EXIT to exit the menu setting. Sensitive Sensitive determines how echoes will be displayed on the screen. Increasing the sensitivity will make you see more details on the screen. -
Page 30: Fish Id Sens
7) Press ENT to confirm the setting. 8) Press EXIT to exit the menu setting. Fish ID. Sens. Fish ID. Sens. adjust the threshold of fish size display. Selecting a higher setting allows weak returns being being displayed as fish, which is helpful especially when you are intending to find smaller fish species or bait fish. -
Page 31: Water Type
Water Type Water Type is used to distinguish between fresh or salt water. The sonar spread faster in salt water then in fresh water. So, to make your Fishfinder have an accurate performance, please make sure the current water type setting of your Fishfinder is in line with the water condition. -
Page 32: Frequency( Naki810C / 820C Onlyl)
Frequency (Only for NAKI810C and NAKI820C model) Frequency is used to set which sonar returns will be displayed on the screen when the transducer is working. a) In 200 kHz, the screen and Real Sonar Window will only display the 200 kHz narrow beam sonar returns. - Page 33 5) Press Right Arrow to enter into the setting. 6 ) Press Up / Down Arrow to change the option. 7) Press ENT to confirm the setting. 8) Press EXIT to exit the menu setting. (for 83/200kHz) (for 50/200kHz) Note: a) for the fish target detected under 200kHz, the depth redout on the fish ID is displayed in Green color.
-
Page 34: Tcg Control
TCG Control This function is optimized for high power-output sonar system. It could help the sonar work properly in a noisily environment. In order to control the surface noise and self-ring of transducer, the sensitivity is automatically changed in different depth. The diagram below shows the sensitivity changes according to depth. -
Page 36: Display
2 Display Depth Range Depth Range determine in which portion the bottom will display in the screen. For example, if the actual depth is 10m, and the current Depth Range is 0~ 20m, then the bottom will display on 50% position from the top screen. Also if the Depth Range is 0~40, then he bottom will display on 25% position from the top screen. -
Page 37: Zoom Range
Zoom Range Zoom Range is used to enlarge some certain depth segment, which is helpful for you to see small details, fish signals and bottom structure. Your fishfinder has a wonderful performance to see any depth segment with any scale. For example, if the current Depth Range is 0~40m, by setting Zoom Range to 20~25m, you can see the sonar image of the 20~25m depth segment with a 8x scale. -
Page 38: Backlight
Note: there is a spacing requirment between the Bottom and Top setting, otherwise, a "Error setting" will appear. 1) With meter unit: the value of (Bottom - Top) should be ≥ 3m 2) With feet unit: the value of (Bottom - Top) should be ≥ 10feet. Backlight The backlight allow the unit to be used at night. -
Page 39: Echo Style
Echo Style The default background color of the fishfinder is white, however there are 3 options for you to suit your preferences: white, blue, and night view. To set the Echo Style: 1) Press MENU to enter into menu setting. 2) Use the Up / Down Arrow to select Display option. -
Page 40: Keel Offset
Keel Offset For all fishfinders, the transducer is installed underwater. So, there is a distance from the transducer surface to water surface. And the sonar unit only detect the distance from transducer surface to bottom. So, the depth display on the screen is not the actual water depth. -
Page 41: System
3. System Beeper Beeper is used to set whether the sonar unit sound a tone or not when a key is pressed. To set the Beeper 1) Press MENU to enter into menu setting. 2) Use the Up / Down Arrow to select System option. 3) Press Right Arrow to enter into System setting. -
Page 42: Language
2) Use the Up / Down Arrow to select System option. 3) Press Right Arrow to enter into System setting. 4) Use the Up / Down Arrow to select the Simulator option. 5) Press Right Arrow to enter into the setting. 6) Press Up / Down Arrow to change the option. -
Page 43: System Info
System Info. Aiming to provide the users top quality sonar fishfinder, we will never stop updating the software of the sonar operating system, which will make the unit working beter or with new features or function. The new upgraded software can be downloaded in free in our website: www.goyachting.cn You can find out what version your sonar unit is using by running the System Info commond. -
Page 44: Load Default
To set the System Info. 1) Press MENU to enter into menu setting. 2) Use the Up / Down Arrow to select System option. 3) Press Right Arrow to enter into System setting. 4) Use the Up / Down Arrow to select the System Info. option. 5) Press Right Arrow to enter into the System Info. -
Page 45: Units
4. Units Temperature Fahrenheit and Celsius are available for the temperature measure. To set the Temperature: 1) Press MENU to enter into menu setting. 2) Use the Up / Down Arrow to select Units option. 3) Press Right Arrow to enter into Units setting. 4) Use the Up / Down Arrow to select the Temperature option. -
Page 46: Depth
Depth Feet and Meter are available for the depth measure. To set the Depth: 1) Press MENU to enter into menu setting. 2) Use the Up / Down Arrow to select Units option. 3) Press Right Arrow to enter into Units setting. 4) Use the Up / Down Arrow to select the Depth option. -
Page 47: Alarm
5. Alarm Fish ID. Fish ID. is used to set whether the Fishfinder sounds an alarm tone or not when it detects what it determines to be a fish. When the option is “on”, the sonar unit will sound an alarm; and it will not sound when the option is “off”. To set the Fish ID: 1) Press MENU to enter into menu setting. -
Page 48: Shallow
Shallow The Fishfinder sound an alarm tone when the bottom goes shallower or equal than the alarm’s setting. To set the Shallow: 1) Press MENU to enter into menu setting. 2) Use the Up / Down Arrow to select Alarm option. 3) Press Right Arrow to enter into Alarm setting. -
Page 49: Battery
Battery The Fishfinder sounds an alarm tone when the battery strenth is lower then the setting. To set the Battery: 1) Press MENU to enter into menu setting. 2) Use the Up / Down Arrow to select Alarm option. 3) Press Right Arrow to enter into Alarm setting. 4) Use the Up / Down Arrow to select the Battery option. -
Page 50: Trouble Shooting
Trouble shooting Unit doesn’t power up. a) Check the cable connection and wiring. Make sure the cable is properly connected to the Fishfinder. The red wire connects to positive terminal, and black to negative terminal or ground. b) Make certain the battery voltage is not lower than the warning value (10v) c) Check the fuse. - Page 51 routing Fishfinder”s power and the transducer cable away from the electrical source. b) Electrical noise from the boat's motor can interferes with the sonar, which will cause some weaker signals being eliminated. Try increasing the Noise Reject level or routing Fishfinder”s power and the transducer cable away from the electrical source. Nothing appears on the display even you can see fish under the transducer.
-
Page 52: Maintenance
Maintenance With a view to making most of your Fishfinder, we recommend you follow the steps bellow and carry out maintenance. a) For the case Cleaning the sonar unit’s outer case (except for the screen) with a cloth dipped mild detergent solution, and then wipe it dry. -
Page 53: Guarantee Conditions
Guarantee Conditions a) We assure you this product is free from defects in materials and workmanship. The warranty coverage is One Year from the date of purchase, during which if the unit fails to perform as described in the product’s written specifications, we will repair or replace it free of charge. -
Page 54: Specifications And Features
Specifications and features Specifications: Display: ............4.3”(110mm), TFT LCD Sunlight Viewable Backlighting Resolution: ..........480H x 272W pixels 16bpp(65,536 color per pixel) Depth Capability........NAKI800C:600 feet (200 m) NAKI810C:800 feet (270 m) NAKI820C:2100 feet (700 m) Operating frequency………..…..……200 kHz for NAKI800C 200 / 83kHz for NAKI810C 200 / 50KHz for NAKI 820C Sonar coverage………......NAKI800C: 20 degree Cone Angle NAKI810C: 20 / 60 degree Cone Angles... -
Page 55: Features
Case Size……......... 5.8" x 5.3" x 2.5" (148 x 136 x 64 mm) Power Cable Length.........4.5ft(1.5m) Transducer Cable Length......18ft (6.0m) Features Windows style of menu system. Real time sonar windows display the latest sonar returns. 3 different color display modes to match your viewing preferences, including special night view model. - Page 57 Yachting Electronic Co., Ltd Building107, No.508, Heyan Road, Nanjing, 210038, China Tel: + 86 25 84680809 Fax: 0086 25 85359123 Email: info@goyachting.cn...
Need help?
Do you have a question about the Naki 800C and is the answer not in the manual?
Questions and answers