
Related Manuals for Vego SX600

Summary of Contents for Vego SX600
-
Page 1: Table Of Contents
TABLE OF CONTENTS Safety Information Table of Contents Notice Scooter Diagram Setup Guide Charging Instructions Pre-Ride Checklist Specifications Trouble Shooting 13-14 Maintenance Schedule 15-18 Limited Warranty 19-22... -
Page 2: Notice
NOTICE YOUR INSURANCE POLICIES MAY NOT PROVIDE COVERAGE FOR ACCIDENTS INVOLVING THE USE OF THIS SCOOTER. TO DETERMINE IF COVERAGE IS PROVIDED, YOU SHOULD CONTACT YOUR INSURANCE COMPANY. -
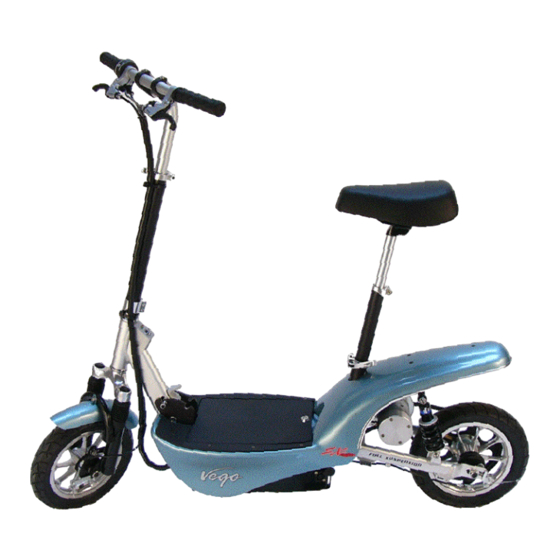
Page 3: Scooter Diagram
SCOOTER DIAGRAM • Throttle • Rear brake (rotates clockwise) •Front brake • Brake cut- off sensor • Handlebar (signals quick motor to stop release when brake • Handlebar is applied) release button • Battery gauge • Circuit • On/Off breaker on switch •... -
Page 4: Setup Guide
SETUP GUIDE Unfold Scooter (a) Loosen quick release lever and pull the gray locking lever upwards. (b) Unfold scooter. Note: The gray locking lever will not move freely if you are putting presure on the steering t u b e . Install Handlebars CAUTION: If you are not familiar... - Page 5 SETUP GUIDE Adjust Handlebar Height P r e s s the small sil- ver button while insert- ing the han- dlebar into the steer tube. Make sure the silver button is locked into one of the four preset height s e t t i n g s . Tighten Handlebars Tighten the quick release lever to lock the handlebars in place.
- Page 6 SETUP GUIDE Install Seat Fully insert the seat assem- bly and tighten quick release lever at the base of the seat tube. Adjust seat height using the upper quick release lever. Do not adjust seat height at the base of the seat tube or extend the seat post past warning line.
- Page 7 SETUP GUIDE Inflate Tires Make sure to add air to the tires before riding. Use the pump included with your Ve g o s c o o t e r. Fasten the pump head to the air valve on the wheels.
-
Page 8: Setup Guide
Vego scooter. Please wear your helmet every time you r i d e ! Turn Power On Turn the scooter power on using the key. -
Page 9: Charging Instructions
CHARGING You can recharge the batteries one of two ways. • On board charging. With the batteries installed in the scooter plug the charger into the charge port on the side of the scooter. On board charging simultaneously charges both batteries. •... -
Page 10: Pre-Ride Checklist
PRE-RIDE CHECKLIST Warning : If you do not perform these simple saftey checks before each ride, you risk serious injury due to improperly maintained equipment. •Read and understand all safety instructions. •Check all four quick release levers for tightness. a. Handlebar quick release lever b. -
Page 11: Specifications
SPECIFICATIONS Motor: 600 watt brushed DC motor with rare earth magnets. Patent pending Controller: PWM controller with advanced battery manage- ment and motor temp sensor Batteries: Two quick release 24V, 11.5 AH packs with hard mount plugs. Charger: 3 amp fan cooled. Frame: All aluminum TIG welded dual suspension frame.. -
Page 12: Trouble Shooting
TROUBLE SHOOTING Problem Symptom Solution •Charge light does not •Green Power light illu- •Battery charge jack is come on, scooter will nates when charger is not properly connected not recharge. plugged into household to the charger. See outlet but red charge Charging section of light does not illuminate this manual for... - Page 13 TROUBLE SHOOTING Problem Symptom Solution •Charge light does not •No red power light •Try a different out- come on. Scooter will not comes on when the let. If there is still no recharge. charger is plugged into a power light the working household charger must be power outlet.
-
Page 14: Maintenance Schedule
MAINTENANCE SCHEDULE Below are tips to help keep your scooter running well. This schedule is calculated based on a 1 mile daily commute ride. Item Inspection Instructions •Tires • Every 30 days check the side- walls and tread for damage. Tires will need replacement about once a year. - Page 15 MAINTENANCE SCHEDULE Inspection Instructions Item •Bearings • Vego scooters use all sealed bearings. The only bearings that require adjustment are the head- set. Adjust the headset only if it feels loose. •Brakes •Once a year check the brake shoes for wear. The brake system...
- Page 16 MAINTENANCE SCHEDULE Item Inspection Instructions •Batteries • Immediately after every ride charge your batteries. The batter- ies are rated at 750 charge cycles. That means if you ride everyday you will need a new battery pack after about two years. The best method to ensure good battery life is to charge the batteries to full after every ride.
- Page 17 MAINTENANCE SCHEDULE Item Inspection Instructions • Every 6 months check the front •Front Fender fender for tightness and align- ment. Often a loose fender will make a buzz or rattle sound. If the fender is misaligned, straighten it using your hands while peering straight down on the front tire from above.
-
Page 18: Limited Warranty
If any of the foregoing is determined by Vego to have been defective during the one (1) year period, as your sole remedy, Vego will, at its option, either repaint the product (if applicable) or repair or replace a component using a new or remanufactured component. - Page 19 LIMITED WARRANTY WARRANTY CONDITIONS AND EXCLUSIONS: This limit- ed warranty is conditioned upon the Product being operated under nor- mal conditions and being properly used and maintained. WARRANTY CLAIMS MUST BE MADE DURING THE APPLICABLE WARRAN- TY PERIOD. This limited warranty does not cover: •...
- Page 20 • Damage caused by use of a charger not supplied by Vego. • Damage occuring during transportation of the product (such claims are the sole resposibility of the shipper).
- Page 21 LIMITED WARRANTY DISCLAIMER OF WARRANTIES. EXCEPT FOR THE FOREGOING LIMITED WARRANTY, VEGO MAKES NO OTHER EXPRESS OR IMPLIED WARRANTIES TO THE EXTENT PER- MITTED BY LAW SPECIFICALLY DISCLAIMS AND EXCLUDES ALL IMPLIED WARRANTIES, INCLUDING WITHOUT LIMITA- TION TO THE IMPLIED WARRANTIES OF NONINFRINGEMENT OF THIRD PARTY RIGHTS, MERCHANTABILITY AND FITNESS FOR A PARTICULAR PURPOSE.
Need help?
Do you have a question about the SX600 and is the answer not in the manual?
Questions and answers