Table of Contents
Advertisement
Quick Links
Advertisement
Table of Contents

Related Manuals for Kyocera FS-1200


Summary of Contents for Kyocera FS-1200
- Page 1 Table of Contents FS-1200 User’s Manual Kyocera Laser Printer...
- Page 2 (contents of its read-only memory). This manual, any copyrightable subject matter sold or provided with or in connection with the sale of the page printer, are protected by copyright. All rights are reserved. Copying or other reproduction of all or part of this manual, any copyrightable subject matter without the prior written consent of Kyocera Corporation is prohibited.
- Page 3 Introduction IBM PROGRAM LICENSE AGREEMENT THE DEVICE YOU HAVE PURCHASED CONTAINS ONE OR MORE SOFTWARE PROGRAMS ("PROGRAMS") WHICH BELONG TO INTERNATIONAL BUSINESS MACHINES CORPORATION ("IBM"). THIS DOCUMENT DEFINES THE TERMS AND CONDITIONS UNDER WHICH THE SOFTWARE IS BEING LICENSED TO YOU BY IBM.
- Page 4 Program. Typeface Trademark Acknowledgement All resident fonts in this printer are licensed from Agfa Corporation. Helvetica, Palatino and Times are registered trademarks of Linotype-Hell AG. ITC Avant Garde Gothic, ITC Bookman, ITC ZapfChancery and ITC Zapf Dingbats are registered trademarks of Inter- national Typeface Corporation.
-
Page 5: Fcc Statement
If any modification/change is introduced to this equipment without prior permission, Kyocera as the manu- facturer cannot guarantee compliance with FCC rules. To use equipment which does not comply with FCC rules is prohibited. The printer may be optionally installed with the following units: Conforming to the Class B limits DU-20/21 Duplexer... -
Page 6: Interface Connectors
Laser notice This printer is certified in the U.S. to conform to the requirements of DHHS 21 CFR Subchapter for Class I (1) laser products, and elsewhere is certified as a Class I laser product conforming to the requirements of IEC 825-1. -
Page 7: Cdrh Regulations
The printers generate ozone gas (O unpleasant smell. To minimize concentration of ozone gas to less than 0.1 ppm, we recommend you not to install the printer in a confined area where ventilation is blocked. IMPORTANT SAFEGUARDS Read all of these instructions and save these instructions for later use. -
Page 8: Ce Marking Directive
Manufacturer's address: declares that the product Product name: Page Printer Model number: FS-1200 (as tested with enhancement optional units:PF-20, DU-20, HS-20 and ST-20 etc.) conforms to the following product specifications. EN 55 022:1998 Class B EN 61 000-3-2:1995 EN 61 000-3-3:1995... -
Page 9: Declaration Of Conformity (Australia)
Product name: Model number: Description of device: This Page Printer Model FS-1200 is the 12ppm; A4 size and utilized plane paper; laser; dry toner etc. The printer can be equipped with several enhancement optional units as a paper feeder as PF-20, a duplexer as DU-20, a paper handler/stacker as HS-20, a bulk paper stacker as ST-20 etc. -
Page 10: Canadian Department Of Communications Compliance Statement
The manufacturer has been employed with ISO9001 scheme. The manufacturer has been attested by JQA and BS. KYOCERA ELECTRONICS AUSTRALIA PTY., LTD Unit 6, 112 Talavera Road, North Ryde NSW 2113, Australia Phone: +61 2-9888-9999 Fax: +61 2-9888-9588 Canadian Department of Communications compliance statement This Class B digital apparatus complies with Canadian ICES-003. -
Page 11: Prolonged Non-Use And Moving The Printer
Prolonged Non-use If you ever leave the printer unused for a long period of time, remove the power cord from the wall outlet. We recommend you consult with your dealer about the additional actions you should take to avoid possible damages that may occur when the printer is used next time. -
Page 12: Energy Star
This printer is equipped with a sleep timer function that conforms with the standards of the E Program. This function makes it possible to reduce the amount of electrical power consumed by the printer. -
Page 13: Maintenance Features
Thanks to the inboard cassette configuration, the printer requires no more space than the average com- puter. • Long life modules The main modules in this laser printer such as the drum, developer unit, and fuser unit have been designed for long life. Print Engine Features •... -
Page 14: Software Features
Kyocera Digital Library CD-ROM (included with the printer) for details. • PDF417 two-dimensional bar codes The printer includes the capability that allows the user to implement the two-dimensional stacked bar code symbology, PDF 417, or Portable Data File 417. - Page 15 To view these documents, you need the Adobe Acrobat software installed in your computer. For details, read the instructions on the CD-ROM package. The User's Manual guides you through topics concerning the operations and maintenance of the printer. The PRESCRIBE 2e Programming Manual explains how to use the PRESCRIBE 2e commands in docu- ment files for formatting, and their parameters in detail for experienced users, using pictures and samples.
-
Page 16: Table Of Contents
Message Display ... 2-2 Interface Indicator ... 2-2 Resolution Indicator ... 2-2 Paper Size Indicator ... 2-3 Copy Indicator... 2-3 Symbolic Indicators ... 2-4 Control Keys... 2-5 Printer... 1-1 Printer... 1-1 ... 1-3 Parts... 1-5 ... 1-7 ... 1-18 ... 1-21 ... - Page 17 Table of Contents 2.2. Operating Switching Power On ... 2-6 Stack Selection... 2-6 Feed Selection ... 2-6 On-line/Off-line Setting ... 2-7 Canceling Printing... 2-7 Status Printout ... 2-8 Form Feed ... 2-10 2.3. Using the Mode Select Menu Mode Select Menu... 2-11 2.4.
- Page 18 Characters out of position ... 5-6 Indicators and Messages Indicators ... 5-7 Maintenance Messages... 5-8 Error Messages ... 5-10 5.6. Correcting a Paper Appendix A Printer Appendix B Paper B.1. General Paper Availability ...B-1 Paper Specifications ...B-1 B.2. Selecting the Right Paper B.3. Special Paper Transparency ...B-5...
- Page 19 RS-232C interface ...C-4 RS-422A interface ...C-5 C.3. RS-232C/RS-422A Protocol PRESCRIBE FRPO D0 command ...C-7 C.4. RS-232C Cable Connection Preparing an RS-232C Cable ...C-7 Connecting the Printer to the Computer...C-8 Index...Index-1 Mode Select Menu xviii ... C-1 ... C-6 ... C-7 ...Last page...
-
Page 20: Installing The Printer
Positioning the Printer Clearance Allow at least the necessary minimum clearance around the printer (see below). A total space of 92 cm by 61 cm by 138 cm (36 by 24 by 54 inches) is needed. 30 cm (12 inches) -
Page 21: Basic Requirements
3 meters (10 feet). Level and well supported Place the printer on a sturdy table or desk. Do not place the printer on an unstable cart, stand, or table. The printer may fall, causing injury, or serious damage to the printer. -
Page 22: Power Supply
1.2. Unpacking and Inspection The printer is packed as shown below. Unpack the printer following diagrams 1 and 2 on the next page. While unpacking it, check that the listed parts are all accounted for. Examine the package for any signs of damage that may have been caused during transportation. If the car- ton is found to be badly damaged, leave the carton unopened and immediately notify the dealer from whom you purchased the printer. -
Page 23: List Of Shipped Components
(D) User's Manual and Kyocera Digital Library (CD-ROM), including the printer drivers and manuals. (E) Plastic bag for Developer Unit To remove the printer from the box, grasp the handholds on either side of the printer. Lift the printer from the carton as shown below. -
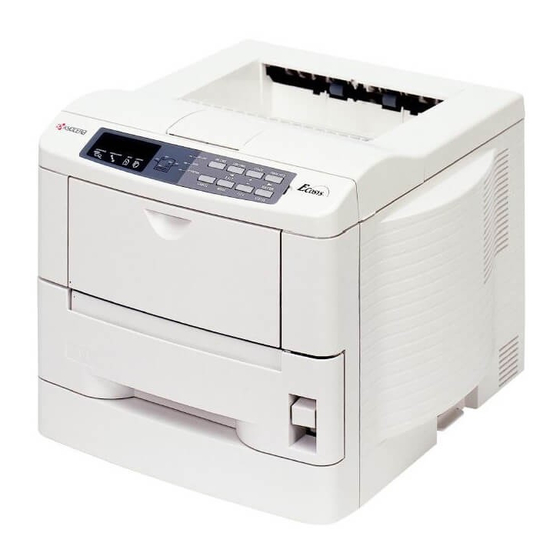
Page 24: Names Of Parts
1.3. Names of Parts This section takes you on a guided tour of the printer, pointing out its major parts. The part names intro- duced here will be used throughout this manual. Front View Face-down Output Tray Power Switch Side Cover... -
Page 25: Interior View
Rear View Rear Cover Parallel Interface Connector Optional Interface Slot Cover *: To protect the printer against static discharge, the connector must be covered with the supplied protective cap when not in use. Toner Container Release Lever (Green) Top Cover... -
Page 26: Setting Up And Interfacing
Setting Up and Interfacing Before you can use the printer for the first time, you must set up the printer by installing the printer compo- nents and interfacing with the computer. Follow the steps that follow. (Omit step 7 if you do not have an optional face-up output tray.) -
Page 27: Close The Top Cover
Close the top cover by pressing the arrowed part in this diagram. 4—Install the waste toner bottle The waste toner bottle is in the toner kit supplied with the printer. The waste toner bottle must be installed in the printer. Install the waste toner bottle in the printer as follows. - Page 28 Open the side cover on the left side of the printer. Insert the waste toner bottle with the bottle tilted slightly towards you as shown in the figure. Ensuring that it is correctly inserted, close the side cover. 1.4. Setting Up and Interfacing...
- Page 29 When loading custom sizes into the cassette, the size must be input into the printer on the control panel. (Refer to 2.7. Setting Custom Sizes) Standard size paper settings are indicated as fixed positions in the cassette.
- Page 30 Set the stack of paper so that it is under the clips as shown. Hold the cassette as shown in the illustration and insert the paper cassette into the printer cassette slot. Gently push it straight into the slot as far as it will go.
- Page 31 Depending on the size of the paper you use, mount the paper stopper on the face-up output tray as shown below. With the optional face-up tray installed, an extra 40 cm of space is required at the back of the printer.
-
Page 32: Connect The Printer To The Computer
8—Connect the printer to the computer The printer has one computer cable connector and a slot for installing an optional interface. The one marked " " is for a parallel (Centronics standard) interface. You may also use an optional interface (IB-10), if you have already have one installed. -
Page 33: Print A Status Page
1.4. Setting Up and Interfacing 10—Print a status page Test that the printer works by printing out a status page as follows. (for information about the status page refer to 2.8. Setting the Paper Type in this manual) Switch on the printer's power. The message display should indicate 6HOIýWHVW. -
Page 34: Install The Printer Driver
1.4. Setting Up and Interfacing 13—Install the printer driver Printer drivers are provided for using the printer with Windows 95, Windows 98, or Windows 3.1. Use the Kyocera Digital Library CD-ROM supplied with the printer. To install the printer driver, proceed as follows. - Page 35 Windows 95 The Printer Wizard screen will appear. Click on Next >. A screen for selecting the printer to be connected will appear. Select the most appropriate printer and click on Next. Next, Click the manufacturer and model of your printer... screen will appear. At this point, select Have Disk ...
- Page 36 (Standard KPDL driver) [CD-ROM Drive Name]:\drivers\[Language]\kpdl\9x Select Kyocera FS-1200 click on Next >, and follow the on-screen instructions to install. Once the driver has been properly installed, a Kyocera printer icon will be added to the printers folder. When printing under Windows 95/98, be sure to set the emulation of this printer to PCL 6 (default setting).
-
Page 37: Mp (Multi-Purpose) Tray Feeding
MP (Multi-Purpose) Tray Feeding The MP tray is incorporated on the front of the printer. It can be used in one of two modes: first mode or cassette mode. The MP tray can hold about 100 sheets of paper (A4 size, 0.1 mm thickness). - Page 38 To use the first mode (automatic manual feeding mode), simply place a sheet of paper on the MP tray in the same manner as above, even while the printer is presently feeding the paper in the printer's cassette. Press the MODE key. Then use + or – keys to display 3DSHUýKDQGOLQJýýý!.
-
Page 39: Feeding Envelopes
To avoid trouble, we recommend that envelopes are delivered face-up. Use the STACK key on the printer control panel to select the face-up tray. Not all envelopes print well. See Appendix B for details on suitable types of envelopes. -
Page 40: Memory Card
A memory card is a microchip card containing, for example, nonresident fonts and/or macros, forms, etc. The printer reads the contents of the card into its internal memory when power is switched on. The presence of this data in the printer memory can be confirmed on the status printout. -
Page 41: Memory Expansion Installation
By installing an optional memory card into your printer, the memory in the FS-1200 can be increased to a max- imum of 68 MB. - Page 42 Be sure to remove the memory card first if inserted in the printer's memory card slot. Withdraw the main circuit board completely from the printer as follows: Turn the printer's power off. Unplug the printer's power cable and disconnect the printer from the host computer.
-
Page 43: Dimm To Be Used
DIMM align with the corresponding protusions in the slot. Close the clips DIMM slot to secure the DIMM. When you have finished installing the DIMM, re- insert the main board into the printer by reversing the removal procedure. 1-24 DIMM... -
Page 44: Removing Dimm
Circuit Board from the Printer to put the main circuit board back into the printer. Testing the Expansion Memory After you have finished installing DIMM in the printer, test the printer to see if the installation has been successful. To test the expansion memory, proceed as follows: Make sure the power switch is off. -
Page 45: Operating The Laser Printer
Chapter 2 Operating the Laser Printer This chapter explains the printer's control panel and operating procedures. It covers the fun- damental information you will need to use the page printer. 2.1. Control Panel The printer control panel comprises a message display, keys, and indicators, as shown below. -
Page 46: Message Display
The printer is receiving data, generating graphics, reading an memory card, or print- ing. :DLWLQJ The printer is waiting for a command that says the job is over before printing the last page. Pressing the FORM FEED key allows you to obtain the last page immediately. 6OHHSLQJ The printer is in Sleep mode. -
Page 47: Paper Size Indicator
Monarch (3-7/8 × 7-1/2 inches) Business (4-1/8 × 9-1/2 inches) with only the MP tray feeding. While the printer isý 3URFHVVLQJ data to print, the SIZE indicator indicates the paper size selected by the application software. Copy Indicator Indicates the number of copies set in the current interface (ì- äää), and the number is reduced as printing proceeds. -
Page 48: Symbolic Indicators
Flashing: Indicates there is insufficient toner. Lit: Indicates that the printer is out of toner. Replace with a new toner container. See Section 4.1. Flashing rapidly: Indicates the possibility that paper may be jammed at this point, open and remove any jammed paper. -
Page 49: Control Keys
Most of the panel functions can also be controlled by PRESCRIBE 2e commands or commands gen- erated by application software. The printer obeys the most recently received printer settings sent from the application software, or from the printer driver, which take priority over control panel set- tings. -
Page 50: Operating Procedures
The current selection is indicated by a green light on the printer symbol above the key. Also, if the printer is being used with the optional sorter or stacker, the destination of the paper from each can be selected. Feed Selection The FEED key selects the paper feed cassette [&DVVHWWH] or MP tray... -
Page 51: On-Line/Off-Line Setting
On-line/Off-line Setting By pressing the ON LINE key you can change the printer between the on-line state, in which it prints the data it receives from the computer, and the off-line state, in which it stores the data for printing later. -
Page 52: Status Printout
If you want to check the printer's current status, including memory available, and option settings, you can find the information you need on the status page. To print out a status page, the printer must be on-line. Proceed as follows: Make sure the message display indicatesý5HDG\. - Page 53 Sample Status Page 2.2. Operating Procedures...
-
Page 54: Form Feed
Depending on the software, the messageý:DLWLQJ may be displayed in the message display when you get to the end of a print job. This occurs when the software does not issue a final form feed to the printer indi- cating the end of the print data. If you wait awhile,ý)RUP)HHGý7LPH2XW will be displayed and the last page will be printed automatically. -
Page 55: Using The Mode Select Menu
This section explains how to use the MODE key on the control panel. The MODE key allows you to set or change the printer environment such as the number of copies to make, emulation, page orientation, code set, etc. to your specific needs. - Page 56 3DSHUý KDQGOLQJý ! 2WKHUVý ý ý ý ý ý ý ý ý ! / *: These items are available only when the printer is installed with the applicable option unit/kit. For items with the ! mark on the message display, the which give access to more items to change the relevant settings.
-
Page 57: Configuring Interfaces
To configure each interface, press the MODE key and use the + or – key to select the interface you wish to make settings for. This interface selection does not select which interface data will be received from. The printer auto- matically selects that interface. -
Page 58: Ram Disk
Note however that data written to the RAM DISK is lost if the printer is reset or its power turned off. RAM DISK settings can be made from the printer's control panel. -
Page 59: Operating A Memory Card
Fonts written in a memory card as font data are automatically loaded in the printer when it is switched on and are usable on all the printer interfaces simultaneously. -
Page 60: Deleting Data From A Memory Card
Check that the message display has changed toý:DLWLQJ, then press the writes the file to the memory card and instructs the printer to automatically print out a memory card write information page as shown below. -
Page 61: Formatting A Memory Card
The size remaining in the memory card for storing data in bytes. Printing a list of data names The printer prints a list of all data names (referred to as partitions) stored in a memory card for reference. (Printing a list is also available for a font card.) The printout (example above) includes the following information. -
Page 62: Setting Custom Sizes
When setting sizes other than A5, A4, B5, Letter or Legal into the paper cassette, set the size of the paper to be used into the printer by the following procedure. Displayý 3DSHUý KDQGOLQJ! on the printer's display panel and press the – keys to displayý!&DVVHWWHýVL]Hý!, orý&DVVHWWHýìýVL]H if you have an optional cassette installed. -
Page 63: Setting The Paper Type
This printer is capable of printing under the optimum setting for the type of paper being used. Setting the paper type for the paper source from the printer's control panel will cause the printer to auto- matically print in the mode best suited to that type of paper. This allows you to easily achieve high-quality printing results. -
Page 64: Making Settings
Paper Type User Setting The following describes the procedure used to set a user-defined paper type for the printer. Eight custom user settings may be registered. After having been set, any of these may be called up when setting the paper type for a paper source. - Page 65 key after selecting the paper type you want to customize. Pressing the + and – keys will Press the cycle through a display of the submenus given in the table below. Submenus displayed !!3DSHUý ZHLJKW !!'XSOH[ý SDWK (only when the paper type is &XVWRPý...
-
Page 66: Sleep (Ecopower) Mode
You can use the large value. If the printer receives no data for the period adjusted as above, it times out and enters into sleeping mode, indicatingý6OHHSLQJ on the message display. When you send data for printing to the printer again or press a key on the control panel, the printer starts warming up, indicatingý3OHDVH ZDLW, and becomes... -
Page 67: 2.10. Dumping Received Data
2.10. Dumping Received Data It is possible to print data received by the printer as hexadecimal code for the purposes of debugging pro- grams and files. Pressing the ENTER key once whileý!3ULQWý+(;ð'803 is shown on the message display will cause aý"... -
Page 68: 2.11. Kir 2 Level
2.11. KIR 2 Level 2.11. KIR 2 Level This printer incorporates the KIR 2 (Kyocera Image Refinement 2) smoothing function. KIR 2 provides high quality printing by providing a software-type improvement to the resolution. The KIR setting isý2II. The KIR setting isý2Q. -
Page 69: 2.12. Ecoprint Mode
2.12. Ecoprint Mode The Ecoprint enables you to reduce the amount of toner consumed on the page so as to save your printing costs. You can set to Ecoprint mode on, as follows. (The factory- setting isý2II. ) The Ecoprint mode setting isý2Q when the printing image becomes lighter, yet very readable. -
Page 70: 2.13. Resource Protection
!5HVRXUFH SURWï 3HUPDQHQW In this mode, the printer stores fonts, macros, symbol sets, etc. in memory that were downloaded as perma- nent PCL resources. All temporary resources are lost when the emulation mode is changed from PCL 6 to another or vice versa. -
Page 71: Setting The Audio Warning (Buzzer)
In addition to the message displayed when the paper supply is exhausted, or when paper jamming occurs, an audio warning is made to sound. This is useful, for example, when the printer is in a location some dis- tance from the user. - Page 72 2.15. Setting the Audio Warning (Buzzer) The alarm will continue to sound while the error condition continues (if the printer is in the sleep mode, the alarm will be silent for that period alone). The alarm will cease to sound, however, when the CANCEL key is pressed.
-
Page 73: Chapter 3 Fonts
Manual on the supplied CD-ROM.), spacing, pitch, height, style, stroke weight, and typeface family. The printer has 80 PCL/PS compatible fonts and a bitmap font for a line printer loaded into it. Also fonts may be downloaded to the printer's memory from a memory card or disk. These fonts are referred to as download-... -
Page 74: List Of Fonts
List of Fonts This section contains a full list of the printer's internal fonts. You can print the same font list from the printer by using the printer's control panel key. To print a list of fonts, refer to Mode Select Menu, List of fonts. - Page 75 Font number Font samples 3.2. List of Fonts...
- Page 76 3.2. List of Fonts KPDL Fonts (1)
- Page 77 3.2. List of Fonts KPDL Fonts (2)
-
Page 78: Chapter 4 Maintenance
Turning the Ecoprint mode ON conserves toner. Refer to Chapter 2 for details. ** In the case of a new printer in which a toner kit has been installed for the first time, the number of pages that can be printed will be 2,500. - Page 79 4.1. Toner Kit Replacement To replace the toner container, proceed as follows. Open the printer's top cover all the way. Please do not touch the developer unit release lever inside the printer. Press the toner container release lever (Green) to release the old toner container from the printer.
- Page 80 &OHDQý SULQWHUý 3UHVVý &217,18( will be displayed after replacement. After cleaning the inside of the printer (See Section 4.2. Cleaning), the message will disappear when the CONTINUE key is pressed, and the printer will be ready for printing.
-
Page 81: Replace The Waste Toner Bottle
4.1. Toner Kit Replacement Replace the Waste Toner Bottle When replacing the toner container, the used waste toner bottle in the printer should also be replaced with a new one from the new toner kit. Open the printer side cover. - Page 82 Locate the new waste toner bottle in the toner kit, and install in the printer as shown right. Do not cap the new waste toner bottle. Insert the new waste toner bottle with the bottle tilted slightly towards you as shown in the figure.
-
Page 83: Cleaning
&OHDQ SULQWHU was displayed, the messageý &OHDQ SULQWHU 3UHVVý &217,18( will be displayed after replacement. After cleaning the inside of the printer following the procedure shown below, press the CONTINUE key; the message will disappear and the printer will be ready for printing. Main Charger Unit The main charger unit grid should be cleaned when the toner container is changed. - Page 84 The grid cleaner pad is impregnated with water. Perform the following cleaning procedure before the pad dries. Attach the grid cleaner to the printer with the pad uppermost, as shown in the diagram. After attaching the grid cleaner, repeat the action of slowly pulling out and then pushing back in the main charger unit at least 5 times.
-
Page 85: Paper Feed Unit
4.2. Cleaning Paper Feed Unit To avoid print quality problems due to paper dust and debris, clean the paper feed unit in the following man- ner. Pull the paper feed unit release lever up and draw the paper feed unit all the way out until it stops. Wipe the paper dust on the registration roller and the paper ramp using the wiper cloth included in the toner kit. -
Page 86: Chapter 5 Troubleshooting
If the printing is abnormal With the printer on-line and ready, press the STATUS key to print a status page. You can also optimize print quality using the KIR test pattern printed at the bottom of the status page. To adjust the print status, see Chapter 2. -
Page 87: Power Problems
If the above checks do not solve the problem, call for the assistance of a service person. 5.3. Interface Problems If the printer prints a status page correctly but does not print data from the computer correctly (or at all), there may be an interface problem. Check the interface (network) cable. -
Page 88: Print Quality Problems
Completely blank printout Check the developer unit. Open the printer top cover and check that the developer unit is inserted correctly and check that the devel- oper 's connector is connected properly. Call for the assistance of a service person. -
Page 89: Dropouts, Horizontal Streaks, Stray Dots
5.4. Print Quality Problems Dropouts, horizontal streaks, stray dots Clean the charger wire. Open the printer side cover. Pull the green main charger wire cleaning knob slowly in and out a few times. See Section 4.2. Note the spacing of the defects. -
Page 90: Faint Or Blurred Printing
Display the print density menu from the control panel and select a lighter density setting. See Section 2.8. Clean the main charger wire. Open the printer's side cover. Pull the green main charger wire cleaning knob slowly in and out a few times. See Section 4.2. -
Page 91: Dirt On The Top Edge Or Back Of The Paper
5.4. Print Quality Problems Dirt on the top edge or back of the paper Check the paper chute and the ramp. Draw out the paper feed unit and check for toner on the paper ramp. Clean the paper ramp (see Section 4.2.) using the wiper supplied, or a soft, dry, lint-free cloth. -
Page 92: Indicators And Messages
Flashing Flashing ATTENTION The printer has run low on toner. The toner should be replaced as soon as possible. Install a new toner kit. See Section 4.1.(Toner Empty) There is a paper jam. There is a possibility that paper may be jammed at the point indicated by flashing, open and remove any jammed paper. -
Page 93: Maintenance Messages
3UHVV &217,18( This message will be displayed when replacing the toner container after the message 5HSODFHý7RQHUý&OHDQýSULQWHU has been displayed. After cleaning the inside of the printer, press the CONTINUE key and the printer will be ready for printing. 5HSODFH :DVWHð... - Page 94 EXIT key and printing starts. &DOO VHUYLFH Mechanical error (n=í,ýì,ýë, ...)-Call a service person. The printer does not operate SHUVRQ(Qãíìëêéèç when a message beginning withý( is displayed. The total number of pages printed is also indicated.
-
Page 95: Error Messages
You can abandon printing by the CANCEL key. 3ULQW RYHUUXQ The data transferred to the printer was too complex to print on a page. Press the 3UHVV &217,18( CONTINUE key to resume printing. (The page may break in some pages.) You can abandon printing by the CANCEL key. - Page 96 ),7 extinguishes automatically when the job times out; the printer receives the next data from the host computer; or if you press any key on the printer's control panel. Try adding more memory in the printer to prevent this error.
-
Page 97: Correcting A Paper Jam
Also, look for tiny pieces of paper that may have been torn off and overlooked when the jammed paper was removed. If you cannot solve the problem by changing the paper, there may be a problem with the printer. Call a ser- vice person. - Page 98 5.6. Correcting a Paper Jam When pulling the paper, pull it gently so as not to tear it. Torn pieces of paper are difficult to remove and may be easily overlooked, deterring the jam recovery. Rear Cover Figure 5.2. Rear Cover Paper Feed Unit Figure 5.3.
-
Page 99: Appendix A Printer Specifications
Appendix A Printer Specifications Item Printing method Electrophotography, laser scan. Printing speed 12 pages/minute (A4 or letter-size paper, when printing multiple copies of the same page) Resolution 600 dpi (vertical and horizontal) with KIR 2 (Kyocera Image Refinement 2) 300 dpi (vertical and horizontal) with KIR 2 (Kyocera Image Refinement 2) First print Approx. -
Page 100: Printer Specifications
Printer Specifications Item Operating noise During printing: (in accordance with ISO During standby: 7779 [Bystander Position, During sleep mode: sound pressure level at the front]) Dimensions 373 mm (14.7") wide × 310 mm (12.2") high × 383 mm (15.1") deep (Excl. -
Page 101: B.1. General Guidelines
B.1. General Guidelines The printer is designed to print on high-quality copier bond paper (the kind used in ordinary dry copier machines), but it can accept a variety of other types of paper as well within the limits specified below. -
Page 102: B.2. Selecting The Right Paper
Remember that all paper is not the same. Some of the factors to consider when selecting paper for the printer are as follows:... -
Page 103: Moisture Content
Store paper in its original carton. Place a pallet etc. under the carton to separate it from the floor. After removing paper from storage, let it stand in the same room as the printer for 48 hours before use. Avoid leaving paper where it is exposed to heat, sunlight, or damp. -
Page 104: Special Paper
B.3. Special Paper This section explains printing on special paper. The page printer can use the following types of special paper. In this case, set the media type according to the table below. Paper type... -
Page 105: Transparency
90° ±0.2° To avoid trouble, Transparency must be delivered face-up. If Transparency jams frequently, pull the top of the sheet very gently as it leaves the printer. Adhesive-Backed Labels The basic rule for printing on adhesive labels is that the adhesive must never come into contact with any part of the printer. -
Page 106: Preprinted Paper
B.3. Special Paper Envelopes The printer can print on envelopes using paper with a basis weight of 60 to 79 g/m² (16 to 21 lbs/ream). Enve- lopes must be manually fed. An envelope is a more complex object than a single sheet of paper. For this reason, it may not be possible to obtain consistent printing quality over the entire envelope surface. -
Page 107: Appendix C Host Computer Interface
Parallel Interface Parallel interface communication modes The printer features fast data transmission on the parallel interface. The parallel interface mode can be acti- vated from the printer's control panel (see Chapter 2, Operating the Laser Printer) as follows: Use a parallel printer cable that complies with the IEEE1284 standard. -
Page 108: Interface Signals
The pins of the parallel interface connector carry the signals listed in Table C.1. Asterisks in the table indi- cate signals that are active low. The table also indicates whether each signal is incoming or outgoing with respect to the printer. Table C.1. Parallel Connector Pin Assignments... - Page 109 Detailed descriptions of the signals follow. Strobe* [nStrobe] (Pin 1) A negative-going Strobe* pulse causes the printer to read and latch the data on the Data 0 [1] to Data 7 [8] signal lines. Data 0 [1] to Data 7 [8] (Pins 2 to 9) These eight signals form the data byte sent from the host computer to the printer.
-
Page 110: Serial (Rs-232C/Rs-422A) Interface (Option
Unused. SG - Signal Ground - (Pin 7) All signals can transmit between the printer and the host computer to send each signals with a signal ground. DTR - Data Terminal Ready - (Pin 20) This output is used as a buffer nearly-full handshake line. It is held high (above 3 volts) when the buffer can accept more data. -
Page 111: Rs-422A Interface
This pin is connected directly to the printer frame. SG - Signal Ground - (Pin 7) All signals can transmit between the printer and the host computer to send each signals with a signal ground. RDB - Receive Data - (Pin 18) RDA - Receive Data Inverted - (Pin 3) These pins carry asynchronous data sent from the computer to the printer. -
Page 112: Rs-232C/Rs-422A Protocol
C.3. RS-232C/RS-422A Protocol A protocol is a set of rules the computer follows in sending data to the printer. The RS-232C/RS-422A param- eters are stored in battery backed-up memory. They are indicated on the status printout. They can be changed by the FRPO (firmware reprogram) command described in the Programming Manual. The param- eters and their identification codes are given below. -
Page 113: Prescribe Frpo D0 Command
Appendix C. If you have an IBM communication adapter cable type 1502067, you will have to resolder the wiring at the printer end of the cable. The procedure is as follows. Unscrew the plastic cover from the printer end of the cable. -
Page 114: Connecting The Printer To The Computer
The three RS-232C protocols are XON/XOFF and DTR. The printer performs all three of them simulta- neously, using positive logic for DTR. Set the computer to the same parameters as the printer. On many computers this can be done by setting DIP switches before power is turned on. Another method is as follows: In DOS, enter the following commands: C:\>MODE COM1:96,N,8,1,P... -
Page 115: Index
Call service person En 5-9 Call service person Fn 5-9 Canceling Printing 2-7 Cancelling data 2-2 Cassette size B-2 Centronics 1-13 Clean printer Press CONTINUE 5-8 Cleaning grid cleaner 4-7 main charger unit 4-6 paper feed unit 4-8 Contents of carton 1-4... - Page 116 1-7 life 4-1 release lever 4-2 replacement 4-1 sealing strip 1-7, 4-2 Toner kit 4-1 Toner low TK-25 Clean printer 5-4, 5-5, 5-8 Top cover 1-6 Top cover Open 5-8 Transparency B-5 Troubleshooting error messages 5-10 guidelines 5-1 indicators 5-7...
-
Page 117: Mode Select Menu
!&RGHýVHWV are available. (*2) *2: The printer can be set to print error data during KPDL emula- tion. If this is set toý2Q, error data will be printed if trouble occurs during printing. This is set toý2II before leaving the factory. - Page 118 *6: Althoughý $XWR is the default setting and this menu does not usually appear, page protection mode will be forcibly set to on (*4) if aý3ULQWýRYHUUXQý3UHVVý&217,18( error occurs due to insufficient printer memory. Be sure to return this (*5) setting toý$XWR in order to maintain high printer memory efficiency.
- Page 119 ý ý íê (*13) *13:After the printer accepts all data and there is no more data *14:This is the total number of pages printed by the printer up to *15:Resouce protection is available only when the printer has more (*14) (*15) *16:These menus are for service personnel.
Need help?
Do you have a question about the FS-1200 and is the answer not in the manual?
Questions and answers