Miele S 560 Operating Instructions Manual
Hide thumbs
Also See for S 560:
- Operating instructions manual (44 pages) ,
- Operating instructions manual (44 pages)
Table of Contents
Advertisement
Quick Links
Advertisement
Table of Contents

Related Manuals for Miele S 560


Summary of Contents for Miele S 560
-
Page 1: Operating Instructions
S 560 / S 570 S 700 / S 800 series These operating instructions apply to standard models S 560 - S 578, S 711 - S 748 and S 812 - S 848 as well as to other models which are distinguished by names rather than numbers. -
Page 2: Table Of Contents
Contents Caring for the environment Description of the appliance Warning and Safety instructions Preparing for use Using the accessories Floorhead ............14 Crevice nozzle . -
Page 3: Caring For The Environment
Caring for the environment Disposal of packing material Disposal of your old appliance The transport and protective packing Old appliances may contain materials material has been selected from materi- which can be reclaimed or recycled. als which are environmentally friendly Please contact your dealer, your local for disposal and can normally be recy- waste collection centre or scrap mer-... -
Page 4: Description Of The Appliance
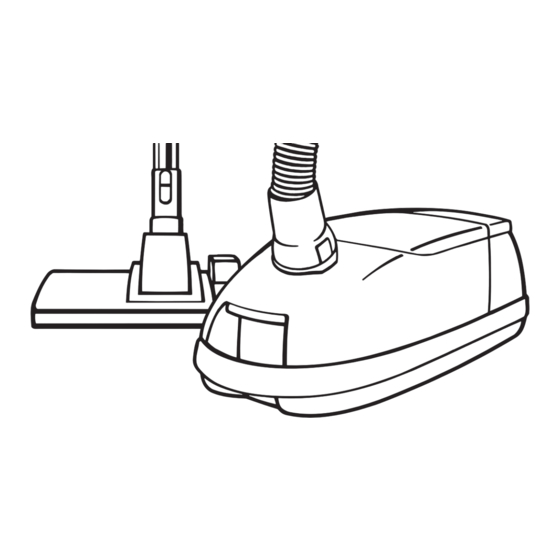
Description of the appliance Some models are supplied with a Miele Electrobrush or Turbobrush as standard (not illustrated). These brushes are supplied with their own operating instructions. - Page 5 Release button for accessories compartment x Hose connector y Suction hose The illustration shows the maximum number of features available on these Miele vacuum cleaners. Those features marked * depend on the model and may vary or not be available...
-
Page 6: Warning And Safety Instructions
Warning and Safety instructions Before using for the first time This appliance meets statutory A damaged vacuum cleaner can safety requirements. Inappropriate be dangerous. Check the packag- use can however lead to personal ing, the vacuum cleaner and accesso- injury and damage to property. ries for any signs of damage. - Page 7 Warning and Safety instructions Do not vacuum up liquids or damp Do not pull or carry the appliance dirt. This will cause major faults by the cable. When disconnecting and could seriously impair the function- from the mains socket pull by the plug ing and electrical safety of the appli- not by the cable.
-
Page 8: Using Accessories
If the cable is damaged it should vacuuming with a Miele Electro- or be replaced together with a com- Turbobrush do not touch the rotating plete cable rewind by a Miele service roller brush. technician. It is not advisable to vacuum di- rectly with the handle, i.e. -
Page 9: Preparing For Use
Preparing for use Attaching the suction hose ^ Insert the hose connector into the suction socket until it clicks into posi- tion. To remove the suction hose from the cleaner ^ Press the release buttons at the side of the hose connector and lift the hose from the socket. - Page 10 Preparing for use Connecting the suction tube sections (depending on model) Both sections of the suction tube have locating arrows marked on them. When connecting the two sections, ensure that the two arrows point towards each other. Adjusting the telescopic suc- tion tube (depending on model) One part of the telescopic tube is...
- Page 11 For hard flooring, such as stone and floors which are susceptible to scratching, e.g. par- quet, we recommend using the special Miele floor brush (see "Optional acces- sories"). It is also important to observe the flooring manufacturer's cleaning and care instructions.
-
Page 12: Accessories Supplied
Preparing for use Accessories supplied Other tools, in addition to the floor- head(s), are supplied with the vacuum cleaner to help deal with various types of cleaning. a Crevice nozzle b Crevice nozzle extension (depending on model) c Dusting brush d Upholstery nozzle e Filter grille The filter grille e is supplied separately... - Page 13 Preparing for use To open the accessories com- partment ^ Press the release button and the lid will open. ^ Take out the accessory you require. ^ Press down firmly on the lid to close S 812 - S 848 series accessories compartment The extension for the crevice nozzle is located in the compartment underneath...
-
Page 14: Using The Accessories
Using the accessories The different tools can either be fitted to the hand-piece or, as required, to the suction tube. Floorhead Also for cleaning stairs. Crevice nozzle For cleaning in folds, crevices or cor- ners. Crevice nozzle extension (depending on model) This accessory can be used to extend the length of the crevice nozzle. -
Page 15: Dusting Brush
Using the accessories Dusting brush For cleaning skirting boards, ornate or carved articles, etc. The head of the dusting brush can be swivelled to attain the best cleaning position. Upholstery nozzle For cleaning upholstery, mattresses, cushions, curtains, covers etc. -
Page 16: Operation
^ Hold the plug and unwind cable to the required length: – S 560 - S 578: max. approx. 6.5 m – S 711 - S 748: max. approx. 6.5 m – S 812 - S 848: max. approx. 8.5 m... -
Page 17: Switching On And Off
Operation Switching on and off ^ Press the On-Off switch. Vacuuming ^ When vacuuming pull the cleaner be- hind you on its wheels. You can stand it upright for vacuuming stairs and curtains etc. When vacuuming especially fine dust, e.g. sawdust, sand, plaster, flour, talcum powder etc., electro- static charges build up naturally. -
Page 18: Regulating The Suction
Operation Regulating the suction The suction power can be regulated to suit the type of flooring. The higher the wattage the more powerful the suction. Reducing the suction power reduces the amount of effort required to ma- noeuvre the floorhead. Setting the suc- tion power selector according to the degree of soiling and type of flooring being cleaned will save energy. - Page 19 Operation Rotary selector ^ Turn the rotary selector manually to the suction power setting you require. Slide selector ^ Move the slide selector manually to the suction power setting you require.
- Page 20 Operation + / - controls Press the controls to select the suction power you require. ^ Press the control to select a higher setting. ^ Press the control to select a lower setting. When switched on the vacuum cleaner operates at the power setting last used. A single short press on the control moves the suction power up or down one setting at a time.
-
Page 21: Opening The Air Inlet Valve
Operation Automatic setting If the Automatic setting is chosen the vacuum cleaner automatically adjusts the suction power to suit the surface being cleaned. This ensures the correct power setting for the type of floor or carpet being cleaned. ^ Keep pressing the - control until the Automatic setting is activated. -
Page 22: Blowing Out
Operation Blowing out (depending on model) The adapter is used to attach the suc- tion hose connector to the blower con- nection socket so that the vacuum cleaner can be used to blow out air, e.g. for dusting off multi-layered radia- tors and blowing dust out of inaccessi- ble corners so that it can be vacuumed up. -
Page 23: Park System
Setting down, transportation and storage Park system A Park system has been designed for conveniently parking the vacuum cleaner during pauses. ^ Fit the lower clip on the floorhead into the slot on the back of the vacuum cleaner from above (see illustration). Switching on and off with the Park system (depending on model) -
Page 24: Maintenance And Care
– Dustbag – F/J/M for models S 560 - S 578 and – Exhaust filter S 711 - S 748 – Dust compartment filter (for motor – G/N for models S 812 - S 848. -
Page 25: When To Change The Dustbag
Maintenance and care When to change the dustbag Change the dustbag when the colour marker in the dustbag change indicator fills the display. Dustbags are designed for single use only. Do not attempt to re-use them as suction would be reduced. Checking the dustbag change indica- ^ Attach the standard floorhead to the suction tube. -
Page 26: Replacing The Dustbag
Maintenance and care Replacing the dustbag ^ Press the release button for the dust compartment lid and raise the lid as far as it will go. ^ To remove the dustbag hold the bag by the collar and pull it out of its holder. -
Page 27: When To Change The Exhaust Filter
ACTIVE HEPA filter Replace the SUPER air clean filter every time you start a new packet of dustbags. A SUPER air clean filter is supplied with every packet of Miele dustbags. Replace the ACTIVE air clean or the ACTIVE HEPA filter approx. -
Page 28: Exhaust Filter Change Indicator
The indicator light will go out when it is pressed. You can replace the exhaust filter sup- plied with the vacuum cleaner with one of the other Miele exhaust filters if you wish (see "Replacing one type of filter with another"). -
Page 29: Replacing The "Super Air Clean" Filter
Maintenance and care Replacing the "SUPER air clean" filter ^ Open the dust compartment lid. ^ Release the filter grille and raise it upwards. Grasp the used SUPER air clean filter by the clean, unsoiled section (see arrow) and take it out. ^ Replace it with a new SUPER air clean filter. -
Page 30: Replacing The "Active Air Clean" Filter And The "Active Hepa" Filter
Maintenance and care Replacing the "ACTIVE air clean" filter and the "ACTIVE HEPA" filter ^ Open the dust compartment lid. ^ Release the catch and remove the fil- ter. ^ To insert the new filter, fit it so that it engages at the back and then close the catch. -
Page 31: Replacing One Type Of Filter With Another
Maintenance and care Replacing one type of filter with another Depending on model your vacuum cleaner will be fitted as standard with one of the following exhaust filters: a SUPER air clean, b ACTIVE air clean or c ACTIVE HEPA Please note 1. -
Page 32: When To Change The Dust Compartment Filter (Motor Protection)
Replace the dust compartment filter ev- ery time you start a new packet of dustbags. A dust compartment filter is supplied with every packet of Miele dustbags. To replace the dust compartment filter ^ Open the dust compartment lid. ^ Unclip the filter frame, remove the old filter and replace with a new one. -
Page 33: When To Change The Thread Lifters
(bayonet connection) and pull out the pin. b Take out the roller. Remove all threads and hair etc, then replace the individual parts in the cor- rect order. Spare parts are available from your Miele dealer or from the Miele Spare Parts Department. -
Page 34: Cleaning And Care
Cleaning and care Always disconnect the vacuum cleaner from the electricity supply for maintenance work and for clean- ing. Switch off at the wall socket and remove the plug (pull on the plug, not the cable). Vacuum cleaner and accessories External surfaces of the vacuum cleaner and of the accessories can be cleaned with a dry cloth or a slightly... -
Page 35: Problem Solving Guide
Problem solving guide The vacuum cleaner has switched it- self off automatically. A temperature limiter switches the vacuum cleaner off automatically if it gets too hot. Some models also have a warning light , which comes on to in- dicate that it has overheated. Overheating can occur if, for instance, large articles block the suction tube or the dustbag is full or contains particles... -
Page 36: After Sales Service
In the event of a fault that you cannot easily remedy, please contact – your Miele Dealer – the nearest Miele Service Depart- ment. (See address on back page). Please note that telephone calls may be monitored and recorded to im-... -
Page 37: Optional Accessories
Optional accessories Electrobrush (depending on model) Models designed to take an Electro- brush have a release button on the cover cap to the connection socket. If there is no release button on this cover cap an Electrobrush cannot be fitted. The Electrobrush is particularly suitable for intensive vacuuming of carpets which are subject to hard wear. - Page 38 Optional accessories Floor brush (supplied as standard with some mod- els) Special brush for cleaning hard floors (parquet, stone, PVC), and flooring which might be scratched, (e. g. with a high shine). Universal brush For dusting books, shelves, etc. Radiator brush (can only be used if attached to the crevice nozzle) For cleaning radiators, narrow shelves...
- Page 39 Optional accessories Mattress nozzle (supplied as standard with some mod- els) For cleaning upholstery, mattresses, cushions, curtains, covers etc. Crevice nozzle (300 mm) For cleaning in folds, crevices or cor- ners.
- Page 40 – Micro-dusting brush – Micro-crevice nozzle – Angled extension CarClean Set Plus The CarClean Set Plus has been de- signed as an accessory for Miele cylin- der vacuum cleaners for valeting the in- terior of cars. It consists of: – Hand-held Turbobrush –...
- Page 41 Optional accessories ACTIVE air clean filter (supplied as standard with some mod- els) The ACTIVE air clean filter is a special active charcoal filter which absorbs odours from the dust collected in the dustbag. It helps, therefore, to prevent a build-up of odours occuring. Do not use aroma capsules in your cleaner if you use this filter.
-
Page 42: Electrical Connection
Electrical connection All electrical work should be carried out by a suitably qualified and competent person in strict accordance with na- tional and local safety regulations. The voltage and rated load are given on the data plate located underneath the vacuum cleaner. Please ensure that these match the household mains sup- ply. - Page 44 Alteration rights reserved / (560/570/700/800) - 1403 M.-Nr. 05 773 281 / V00 This paper consists of cellulose which has been bleached without the use of chlorine.
Need help?
Do you have a question about the S 560 and is the answer not in the manual?
Questions and answers