Advertisement
Table of Contents
- 1 Table of Contents
- 2 Operation and Functions of the Room Unit
- 3 In Programming Mode
- 4 Control and Operating Characteristics
- 5 Setting the Time and Date
- 6 System Configuration
- 7 Maintenance and Service
- 8 Peak Limiter Alarm Signals
- 9 System Operating Status
- 10 Shutting down for Long Periods
- 11 Special Maintenance
- Download this manual
Advertisement
Table of Contents

Subscribe to Our Youtube Channel
Related Manuals for CLIMAVENETA AW HT 0031


Summary of Contents for CLIMAVENETA AW HT 0031
- Page 1 INSTALLATION - USER - MAINTENANCE MANUAL High temperature air/water heat pump for heating water up to 65°C and operation with outside temperatures down to -20°C. Domestic hot water production and built-in water circuit assembly. AW HT 0031÷0071...
-
Page 2: Table Of Contents
INDEX U I A U I A U I A General warnings Checking and starting up the unit Definitions Operation of the room temperature control unit Waiver of liability Operation and functions of the room unit Fundamental safety rules using the buttons Receiving and handling the product Operation and functions of the room unit in programming mode... - Page 3 Installer: legal representative of the company designated in all European Union countries, excluding Italy, designated by the owner to position and connect the Climaveneta unit by the Climaveneta distributor, under its sole responsibility, water circuit, electrical circuit, etc. to the system; this person...
- Page 4 RECEIVING AND HANDLING THE PRODUCT When the items are consigned by the carrier, check that The instruction manual is an integral part of the unit the packaging and the unit are undamaged. and should therefore be read and kept carefully.. If damage or missing components are noted, indicate this on The packaging should not be removed until the unit is the delivery note.
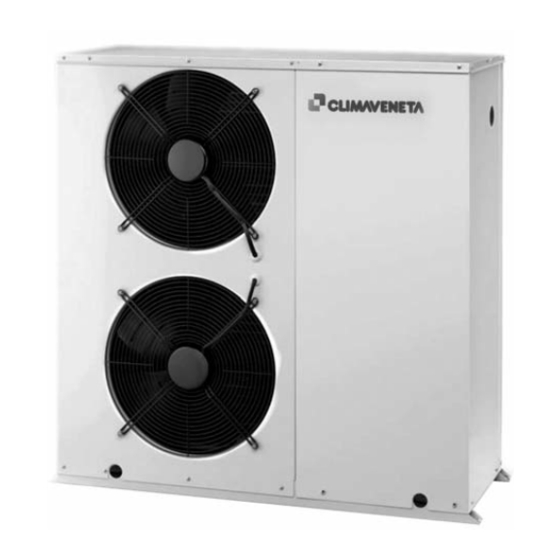
- Page 5 DESCRIPTION OF STANDARD UNIT The air-cooled units with axial-flow fans for heating only oper- They are factory tested and on site installation is limited to ate on R407C refrigerant and are suitable for outdoor installa- water and electrical connections. tion. The units are CE marked, as established by the EU directives, including the latest amendments, and the corresponding approximated national legislation:...
- Page 6 DIMENSIONAL DRAWINGS U I A 1 - Water connections IN 0031-0061 dia. 1”1/4 M 1 - Water connections OUT 0031-0061 dia. 1”1/4 M Dimensions 0031 0041 0061 0071 1470 1240 1240 1400 1700 1477 Weight distribution 0031 0041 0061 0071 W1 rear R W2 rear L W3 front L...
- Page 7 Before connecting the pipes, make sure they do not contain uid. stones, sand, rust, dross or other foreign bodies which might Climaveneta cannot be held liable for any damage to the damage the system. unit and/or the system following the failure to install these Construction of a bypass is recommended to enable the devices or the filter.
- Page 8 The heat pumps must be fitted with a filling/top-up sys- tem connected to the return line and a drain valve in the Electrical conductivity less than 200 mV/cm (25°C) lowest part of the system. Chlorine ions less than 50 ppm Systems containing antifreeze or covered by specific Sulphuric acid ions less than 50 ppm...
- Page 9 FILLING THE SYSTEM The system must be filled to a pressure of between 1 and 2 bars. - Before starting to fill, place the unit mains It is recommended that this operation be repeated after switch QF1 in the OFF position. the unit has been operating for a number of hours.
- Page 10 PUMP CURVES 0071 0041-0061 0031 Water flow-rate [m The pressure head refers to the values at the fittings. AW HT GB 05/2009...
- Page 11 ELECTRICAL CONNECTIONS The heat pumps must be installed downstream of a main Voltage must be within a tolerance of ±10% of the rated switch (QF1, see wiring diagram), as required by the stan- power supply voltage for the unit (for three phase units, dards in force in the country where the unit is installed.
- Page 12 MAINS POWER SUPPLY CONNECTIONS ELECTRICAL PANEL LAYOUT AW 0031-0041 HT - Before connecting the unit to the power supply, make sure SINGLE-PHASE WITH PEAK LIMITER that switch QF1 is open, suitably padlocked and marked. - Remove the inspection panel by removing the ten screws. - Use cable gland A for the main electrical power cable and cable gland B for other external cables to be connected by the installer.
- Page 13 ELECTRICAL PANEL LAYOUT ELECTRICAL PANEL LAYOUT AW 0041-0071 HT AW 0041-0071 HT THREE-PHASE THREE-PHASE WITH PEAK LIMITER KA3 KA4 KA5 KA3 KA4 KA5 400V-3Ph-50Hz 400V-3Ph-50Hz Electronic controller Electronic controller C2/C3/C4 Fan start capacitor Peak limiter Auxiliary circuit protection fuse ”L” 230VAC C2/C3/C4 Fan start capacitor Auxiliary circuit protection fuse ”N”...
- Page 14 DOMESTIC HOT WATER 3-WAY VALVE (YV3) To configure a 3-way for the production of domestic hot DEACTIVATION CONTACT FOR EXCESS POWER CON- water (supplied by Climaveneta), make the following con- SUMPTION (SA3) nections as shown on the instruction sheet enclosed with The heat pump accepts a external deactivation signal from the accessory.
- Page 15 • The room unit must be located around 1.5 metres from the floor, in a part of the room where the sensor can measure the room temperature as precisely as possible; it must be sheltered from streams of cold air, sunlight or other sources of heat. •...
- Page 16 DOMESTIC HOT WATER STORAGE TEMPERATURE SENSOR (BT1) The domestic hot water temperature inside the storage cylinder is measured using sensor BT1, connected to terminals M and BX1. OUTSIDE AIR TEMPERATURE SENSOR (BT2) Installation instructions The outside air temperature sensor must be installed outside of the home in a reference position to correctly measure the tem- perature, without being affected by sunlight, flue gas, near air outlets, doors and windows.
- Page 17 INSTALLER TERMINAL BOARD AW 0031-0041 HT SINGLE-PHASE 4 5 6 7 8 9 10 11 12 13 14 15 16 17 18 19 20 21 SA3 SA4 SA5 SA1 SA2 GN1 230V - 1Ph - 50Hz 230 VAC 1A max INSTALLER TERMINAL BOARD AW 0041-0071 HT THREE-PHASE 4 5 6 7 8 9 10 11 12 13 14 15 16 17 18 19 20 21 SA3 SA4 SA5...
- Page 18 AW 0031-0041 HT SINGLE-PHASE WITH PEAK LIMITER AW HT GB 05/2009...
- Page 19 AW 0041-0071 HT THREE-PHASE GB 05/2009 AW HT...
- Page 20 AW 0041-0071ts HT THREE-PHASE WITH PEAK LIMITER AW HT GB 05/2009...
- Page 21 GENERAL TECHNICAL DATA AW HT 0031 0041 0041 0061 0071 Heating capacity 10,4 14,9 14,1 19,7 26,6 Power input C.O.P. 4,16 4,26 4,27 4,19 4,36 Heating capacity 10,4 15,1 14,3 19,7 27,1 Power input C.O.P. 3,47 3,60 3,58 3,52 3,66 Rated water flow 1,79 2,56...
- Page 22 CHECKING AND STARTING UP THE UNIT PREPARING FOR FIRST START UP - Position the main unit switch QS1 in the ON position. The unit must be started up for the first time by the Techni- - Move the switch QF1 (outside the unit) to “ON”. cal Service.
- Page 23 OPERATION OF THE ROOM TEMPERATURE CONTROL UNIT BUTTONS Room temperature probe Select heating mode Select central heating or DHW Cancel setting Confirm setting Correct ambient Comfort set point Browse and set parameters Occupancy button Display information Hour and minutes Temperature and parameters display Xxxxxxxxxxxxxxxxxx Xxxxxxxxxxxxxxxxxx...
-
Page 24: Operation And Functions Of The Room Unit
OPERATION AND FUNCTIONS OF THE ROOM UNIT USING THE BUTTONS Select heating operating modes Push DHW Repeatedly pressing button 1 selects the This is activated by pressing the DHW mode button different heating operating modes: at least three seconds. This manually activates the production of domestic hot Automatic heating mode water only. -
Page 25: In Programming Mode
OPERATION AND FUNCTIONS OF THE ROOM UNIT IN PROGRAMMING MODE The settings that are not available directly using the buttons 4. Press OK to confirm. are managed in programming mode. In this example the bottom of the display shows the first The individual settings are arranged into operating pages row “language”... - Page 26 Example of subdivision into Enduser levels, operating pages and rows: Commissioning Engineer Enduser User level Time of day and date Hours / Minutes Hours 1...24 h User level Operator section Day / Month Minutes 0 to 60 min Radio Year Time program heating circuit 1 Start daylight saving Time program 3/HCP...
-
Page 27: Control And Operating Characteristics
OEM LEVEL (WITH PASSWORD) The procedure shown below is used by authorised person- 4. Turn the knob and select the operating page correspond- nel to access the operating pages and set the correspond- ing to the OEM level, “Authorised Technician”. ing group of parameters. -
Page 28: Setting The Time And Date
SETTING THE TIME AND DATE The controller is fitted with a clock that manages the hour, minutes, month, day of the week and year. To ensure correct operation of the controller, the time and date must be set correctly. Parameters contained on the TIME OF DAY AND DATE operating page (Enduser level) Parameter Description... - Page 29 AUTOMATIC DAYLIGHT SAVING CHANGEOVER Parameters contained on the TIME OF DAY AND DATE operating page (Engineer level) Parameter Description Screen displayed number AUTO AUTO AUTO PROG 3sec. PROG Commissioning Room Temperature Time of day and date Engineer Setting the start of the Operator section summer period ensures automatic...
- Page 30 LANGUAGE SETTING Parameters contained on the OPERATOR SECTION operating page (Enduser level) Parameter Description Screen displayed number AUTO AUTO AUTO PROG PROG Time of day and date Room Temperature Time of day and date Operator section Operator section Time prog heating circuit 1 The following languages can be AUTO...
- Page 31 TIME BAND PROGRAMMING Time prog heating circuit 1 Parameters contained on the TIME PROG HEATING CIRCUIT 1 operating page (Enduser level) Parameter Description Default setting number The controller manages the heating circuit based on the time and the day of the week. The on and off Mon –...
- Page 32 Time program 4/DHW (domestic hot water production) Parameters contained on the TIME PROGRAM 4/DHW operating page (Enduser level) Parameter Description Default setting number The controller manages domestic hot water production based on the time and the day of the week. Mon –...
- Page 33 Holidays program The holidays program can only be used in “Automatic” mode Parameters contained on the HOLIDAYS HEATING CIRCUIT 1 operating page (Enduser level) Parameter Description Default setting number Start Vacation period --.-- (day/month) End Vacation period --.-- (day/month) Operating modes during the vacation period. The operating modes may be: Frost protection - Frost protection - Reduced set point (Temperature selected by parameter 712).
- Page 34 HEATING CIRCUIT Direct heating circuit The heat pump is connected directly to the heating circuit (radiant panels, radiators, fan coils). The temperature is controlled by starting and stopping the heat pump. ROOM TEMPERATURE SET POINT CONTROL Parameters contained on the HEATING CIRCUIT 1 operating page (Enduser level) Parameter Description...
- Page 35 WATER OUTLET SET POINT COMPENSATION BASED ON OUTSIDE AIR TEMPERATURE, HEATING CURVE (SLOPE). Parameters contained on the HEATING CIRCUIT 1 operating page (Enduser level) Parameter Description Default setting number The heating curve compares the outside temperature and the water outlet temperature fort heating. 720 = 1,5 The slope can be modified to allow correct operation of the heat pump based on the type of heating circuit (radiant panels, radiators etc.).
- Page 36 SUMMER/WINTER CHANGEOVER LIMIT Parameters contained on the HEATING CIRCUIT 1 operating page (Enduser level) Parameter Description Default setting number The limit for summer / winter changeover is used to activate and deactivate the heating circuit throughout the 730 = 25°C year, based on the outside temperature.
- Page 37 ACCELERATED SHUT-DOWN Parameters contained on the HEATING CIRCUIT 1 operating page (Engineer level) Parameter Description Default setting number Accelerated shut-down is used to switch over more rapidly from the Comfort set point to the reduced set 780 = Down to point, keeping the heat pump off.
- Page 38 DOMESTIC HOT WATER The controller manages domestic hot water production using a 3-way valve installed outside of the unit. The production of domestic hot water is guaranteed in both summer and winter, according to the operating limits shown in this manual.
- Page 39 ADDITIONAL ELECTRIC HEATER FOR DHW STORAGE CYLINDER Parameters contained on the operating page (Engineer level) Parameter Description Default setting number The heat pump can manage an additional electric heater used for the DHW storage cylinder, using contact 5896 = none SA1 (see the instruction sheet enclosed with the electric heater kit).
- Page 40 ANTI-LEGIONELLA FUNCTION Parameters contained on the DOMESTIC HOT WATER operating page (Engineer level) Parameter Description Default setting number 1640 Anti-Legionella function 1640 = off The Anti-Legionella function ensures the elimination of the Legionella bacteria that reside in domestic water vessels; such bacteria typically die when the water temperature is above 70°C. The Anti-Legionella function must be activated by an authorised technician.
-
Page 41: System Configuration
SYSTEM CONFIGURATION The system must be configured by the operator. SYSTEM DIAGRAM WITH DIRECT HEATING No changes are required to the parameters, simply connect the probes and the utilities as shown in the diagram for correct operation. Heat pump connected directly to the heating circuit.The storage tank 14 is required to ensure the minimum water content required for correct heat pump operation. - Page 42 SYSTEM DIAGRAM WITH DIRECT HEATING AND DOMESTIC HOT WATER PRODUCTION No changes are required to the parameters, simply connect the probes and the utilities as shown in the diagram for correct operation. Heat pump connected directly to the heating circuit with domestic hot water produc- tion Q3.
- Page 43 SYSTEM DIAGRAM WITH DIRECT HEATING, DOMESTIC HOT WATER PRODUCTION AND ELECTRIC HEATER Heat pump connected directly to the heating circuit with domestic hot water produc- tion Q3 and auxiliary heating element DHW K6. The storage tank 14 is required to ensure the minimum water content required for correct heat pump operation.
-
Page 44: Maintenance And Service
MAINTENANCE AND SERVICE ERROR SIGNALS When a fault occurs, an error message is displayed , pressing the button on the remote unit shows the causes on the dis- play. The following error messages are possible. No.: error message Location. Reset Heat pump on Priority Man. - Page 45 No.: error message Location Reset Heat pump on Priority Man. Auto 174: Alarm contact 4 active 176: Water pressure 2 too high 177: Water pressure 2 too low 178: Heating circuit 1 control temperature 179: Heating circuit 2 control temperature 201: Frost alarm B21/71 204: Fan overload...
- Page 46 Parameters contained on the FAULT operating page (Engineer level) Parameter Description Default setting number 6710 If the remote alarm contact RD1 is featured, the alarm relay can be reset by setting parameter 6710 = YES. The alarm still remains active. 6711 The pending error messages originating from the heat pump are reset by setting parameter 6711 = YES.
- Page 47 TEST INPUTS/OUTPUTS Parameters visible only at the “OEM level” to check the correct operation of the components and sensors connected to the heat pump. Warning: when testing the inputs/outputs, the limits are not active TEST RELAY OUTPUTS Parameters contained on the INPUT/OUTPUT TEST operating page (OEM level) Maintenance message Description...
-
Page 48: Peak Limiter Alarm Signals
TEST CONTACT INPUT E Parameters contained on the INPUT/OUTPUT TEST operating page (OEM level) Parameters from 7911 to 7917 are used to test the ‘E’ group of inputs Parameter Description Default setting number 7911 Input EX1 Flow switch 7912 Input EX2 Low pressure switch 7913 Input EX3... -
Page 49: System Operating Status
SYSTEM OPERATING STATUS “ENDUSER LEVEL” SYSTEM OPERATING STATUS” The operating status of the heat pump in the different modes can be checked as follows: • Press the INFO button (6) • Read the message shown on the display • Turn the knob (4) to display the operating status of each utility (Heat pump, DHW, etc.) •... - Page 50 User Enduser (from INFO button) Engineer level (from parameter 8000) The thermostat is off The thermostat is off Manual control active Manual control active Ready-to-lay function active Ready-to-lay function active Restricted heating mode Excess temperature protection active Restricted, boiler protection Restricted, domestic water priority Restricted, buffer priority Forced heating enabled...
- Page 51 User Enduser (from INFO button) Engineer level (from parameter 8000) Emergency operation Emergency operation Fault Fault Shutdown Shutdown, Outside temperature Shutdown, Externally Shutdown, economy mode Limitation period active Asymmetrical three-phase current Low pressure Fan overload Compressor 1 overload Compressor 2 overload Source pump overload Switch outlet to utilities Minimum OT limitation...
-
Page 52: Shutting Down For Long Periods
SHUTTING DOWN FOR LONG PERIODS After deactivating the heat pump: the water may be hot), or antifreeze must be added in - Disconnect the unit from the power supply. the proportion recommended by the manufacturer. - Make sure the remote keypad (if featured) is in the “OFF” It is recommended to use non-toxic food grade position. -
Page 53: Special Maintenance
For information on technical assistance and obtaining spare parts, contact CLIMAVENETA S.P.A. AFTER SALES DEPARTMENT - RESIDENTIAL BUSINESS Via Duca d’Aosta 121 - 31031 Mignagola di Carbonera (TV) ITALY Tel: +39.0424.509500 Fax: +39.0424.509563 www.climaveneta.com - info@climaveneta.com GB 05/2009 AW HT... - Page 54 88 Bai Yun Rd, Pudong Xinghuo New dev. zone 201419 Shanghai China Tel 008 621 575 055 66 Fax 008 621 575 057 97 Climaveneta Polska Sp. z o.o. Ul. Sienkiewicza 13A, 05-120 Legionowo, Poland Tel +48 22 766 34 55-57 Fax +48 22 784 39 09 info@climaveneta.pl...
Need help?
Do you have a question about the AW HT 0031 and is the answer not in the manual?
Questions and answers