Table of Contents
Advertisement
Quick Links
Advertisement
Table of Contents

Related Manuals for Monoprice 612120


Summary of Contents for Monoprice 612120
-
Page 2: Package Contents
1 INTRODUCTION 1.1 Package Contents Please take an inventory of the package contents to ensure you have all the items listed below. If anything is missing or damaged, please contact Monoprice Customer Service for a replacement. 1x 16-Channel DMX-512 Controller... -
Page 3: General Overview
113°F (45°C). 1.3 General Overview The Monoprice 612120 DMX Controller is a universal intelligent lighting controller. It allows the control of up to 12 devices, with up to 16 channels each and up to 240 programmable scenes. Six chase banks can contain up to 240 steps composed of the saved scenes in any order. -
Page 4: Controls And Connections
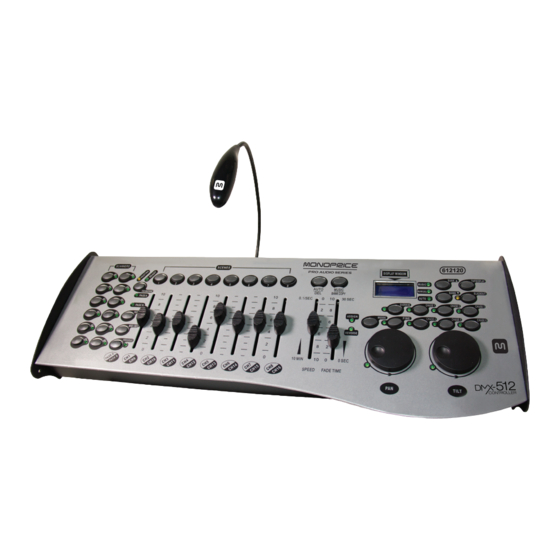
Stand Alone refers to a fixture's ability to function independently of an external controller and usually in sync to music, due to a built in microphone. 2 CONTROLS AND CONNECTIONS 2.1 Top Panel 2 29 28 27 612120 AUTO MUSIC BANK COPY 30 SEC 0.1/SEC... - Page 5 4. CHANNEL FADERS Allows adjustment of DMX values. Channels 1-8 are adjusted when the PAGE A LED is lit and Channels 9-16 are adjusted when the PAGE B LED is lit. 5. PAGE A LED When illuminated, indicates that Channels 1-8 are available for adjustment. 6.
- Page 6 16. MIDI/REC BUTTON Activates MIDI external control and is used to confirm the record/save process. 17. ASSIGN LED During initial setup, indicates that the controller is in Channel assign mode. 18. AUTO/DEL BUTTON During programming, pressing this button deletes the current function. Otherwise, pressing this button activates Auto mode.
- Page 7 DMX OUT DMX OUT DMX IN AUDIO MIDI DC INPUT LAMP POWER MACHINE 1=Ground 1=Ground 2=Data + 3=Data + DC 9V-12V US B 0.1-1VP-P 300mA min DMX Polarity select 30. AUDIO INPUT JACK Direct audio feed for use in sound-active mode 31.
-
Page 8: Setting Up The System
3 OPERATING INSTRUCTIONS 3.1 Setup 3.1.1 SETTING UP THE SYSTEM 1. Using DMX cables, connect your intelligent lighting fixtures to the controller, as specified in the fixture manual(s). 2. Once everything is connected, plug the included AC adapter into the DC connector on the back panel. -
Page 9: Wheel Assignment
3.1.3 WHEEL ASSIGNMENT Because not all intelligent lighting fixtures are alike or share the same control attributes, the Monoprice 612120 DMX Controller allows you to assign to the wheel the correct pan and tilt channel for every individual fixture, including 16-bit channel assignments. -
Page 10: Copy Scanner
3.1.6 COPY SCANNER To save time, you can copy the settings from one Scanner to that of another. In this example, we will review how to copy Scanner 1 to Scanner 2. 1. Press and hold the SCANNER 1 button. 2. -
Page 11: Operation
3.2 Operation 3.2.1 MANUAL MODE Manual mode allows direct control of all scanners. You are able to move them and change attributes by using the channel faders and wheel. Note that all changes made while in Manual made are temporary and will not be recorded. 1. -
Page 12: Entering Program Mode
3.3 Programming A Program (Bank) is a sequence of different Scenes (or steps), that will be performed one after another. Programs can consist of up to 8 Scenes each. 3.3.1 ENTERING PROGRAM MODE 1. Press the PROGRAM button repeatedly until the LED blinks. 3.3.2 CREATE A SCENE A scene is a static lighting state. -
Page 13: Running A Program
3.3.3 RUNNING A PROGRAM 1. Use BANK UP and BANK DOWN buttons to change Program banks, as necessary. Note: If the Blackout LED is illuminated, press the BLACKOUT button to deselect it. 2. Press the AUTO/DEL button repeatedly until the AUTO LED turns on. 3. -
Page 14: Create A Chase
3.4 Chase Programming A chase is created by using previously created scenes. Scenes become steps in a chase and can be arranged in any order you choose. It is highly recommended that, prior to programming chases for the first time; you delete all chases from memory. See 3.4.9 Delete All Chase Programs for instructions. -
Page 15: Copy Bank Into Chase
3.4.4 COPY BANK INTO CHASE 1. Press and hold the PROGRAM button to enter Programming mode. 2. Press the desired CHASE button. 3. Use the BANK UP and BANK DOWN buttons to select the BANK to be copied. 4. Press MUSIC/BANK COPY button to prepare the copy. 5. -
Page 16: Delete A Scene In A Chase
3.4.7 DELETE A SCENE IN A CHASE 1. Press and hold the PROGRAM button to enter Programming mode. 2. Press the desired CHASE button that contains the scene to be deleted. 3. Press the TAP/DISPLAY button to switch the LCD display to steps. 4. -
Page 17: Copy A Scene
3.5.2 COPY A SCENE 1. Press and hold the PROGRAM button to enter Programming mode. 2. Use the BANK UP and BANK DOWN buttons to select the Bank that contains the scene to be copied. 3. Press the SCENE button that corresponds to the scene to be copied. 4. -
Page 18: Running In Auto-Mode
3. Alternatively you can press a single CHASE button or several CHASE buttons in sequence and all selected chases will loop in the order selected. Note: Multiple selected chases will loop and run in the order originally selected. 4. Use the FADE TIMER to adjust the duration time. 3.6.2 RUNNING IN AUTO-MODE Note: In Auto mode, programs will be triggered by the controller's FADE TIME and SPEED fader settings. -
Page 19: Data Transfer
BLACKOUT 3.8 Data Transfer It is possible to transfer the programs stored in one Monoprice 612120 DMX Controller to another by performing the following steps: 1. Use a DMX cable to connect the output of the source controller to the input of the destination controller. -
Page 20: Dmx Primer
4 APPENDIX 4.1 DMX Primer There are 512 channels in a DMX-512 connection. Channels may be assigned in any manner. A fixture capable of receiving DMX 512 will require either one channel or a number of sequential channels. The user must assign a starting address on the fixture that indicates the first channel reserved in the controller. -
Page 21: Specifications
Note that some DMX fixtures use a 5-pin XLR-type connector instead of a standard 3-pin XLR connector. You can make a 3-pin to 5-pin cable by wiring the cable using the pin connections listed below. 5 Pins canon (socket) 3 Pins canon (plug) Pin 1: GND (SCREEN) Pin 1: GND (SCREEN) Pin 2: Signal (-) -
Page 22: Dmx Dipswitch Quick Reference Chart
4.4 DMX Dipswitch Quick Reference Chart DMX ADDRESS QUICK REFERENCE CHART DIP SWITCH POSITION DMX DIP SWITCH SET 0=OFF 1=ON X=OFF or ON 128 160 192 224 256 288 320 352 384 416 448 480 129 161 193 225 257 289 321 353 385 417 449 481 130 162 194 226 258 290 322 354 386 418 450 482 131 163 195 227 259 291 323 355 387 419 451 483 68 100 132 164 196 228 260 292 324 356 388 420 452 484...
Need help?
Do you have a question about the 612120 and is the answer not in the manual?
Questions and answers