Table of Contents

Related Manuals for Garrison 043-6127-2


Summary of Contents for Garrison 043-6127-2
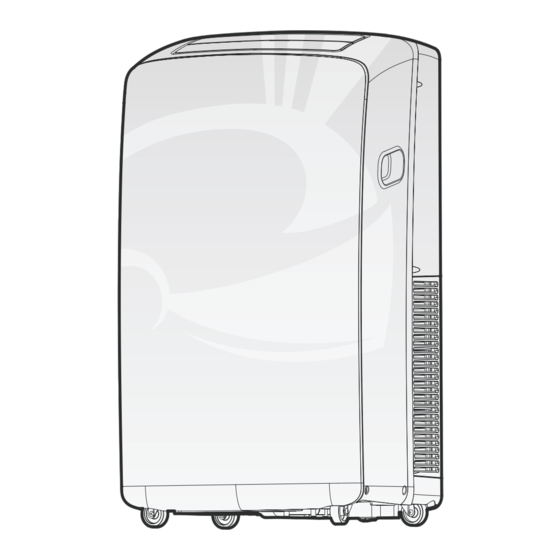
- Page 1 PORTABLE AIR CONDITIONER Model No. 043-6127-2/043-6128-0/043-6129-8/043-6130-2/043-6131-0/ 043-5499-2 Toll-free: 1-800-268-6591 IMPORTANT: Please read this manual carefully Instruction Manual before running this unit and save it for future reference.
- Page 2 Model No. 043-6127-2/043-6128-0/043-6129-8/043-6130-2/043-6131-0/043-5499-2 | Contact us: 1-800-268-6591 Specifcations Installation Requirements 3–6 Installation Instructions 7–12 Air Conditioner Use 13–25 Air Conditioner Care 26–28 Troubleshooting 29–30 Assistance or Service Air Conditioner Safety Warranty 1. Temperature Control 2. Fan Speed Control 3. Cool, Dry and Fan Only Mode 4.
-
Page 3: Specifications
Model 043-6127-2 Model 043-6130-2 Voltage 115 V AC, 60 Hz Voltage 115 V AC, 60 Hz 25.5 50.5 Model 043-6128-0 Model 043-6131-0 Voltage 115 V AC, 60 Hz Voltage 115 V AC, 60 Hz 50.5 Model 043-6129-8 Model 043-5499-2 Voltage... -
Page 4: Parts Supplied
Model No. 043-6127-2/043-6128-0/043-6129-8/043-6130-2/043-6131-0/043-5499-2 | Contact us: 1-800-268-6591 PARTS SUPPLIED Check that all parts are included in parts package. A. Foam Seal G. Outer Window Slider Section B. Flexible Exhaust Hose with Adaptors Attached H. Inner Window Slider Section " Screws (2) Bolts (4) ¹⁄... -
Page 5: Location Requirements
LOCATION REQUIREMENTS Horizontal Slide Window Vertical Slide Window 23 5/8-64 1/8" (60-163 cm) 23 5/8-64 1/8" (60-163 cm) NOTES: • The fexible exhaust hose allows placement of the air conditioner between 23 / " (60 and 163 cm) from window or door. and 64 / •... - Page 6 Model No. 043-6127-2/043-6128-0/043-6129-8/043-6130-2/043-6131-0/043-5499-2 | Contact us: 1-800-268-6591 ELECTRICAL REQUIREMENTS • The Portable Air Conditioner should be connected to a 115 V, 60 HZ, 15 A fuse, grounded 3-prong outlet. • The use of a time-delay fuse or time-delay circuit breaker is recommended.
- Page 7 UNPACK THE AIR CONDITIONER Remove packaging materials • Remove and dispose of/recycle packaging materials. Remove tape and glue residue from surfaces before turning on the air conditioner. Rub a small amount of liquid dish soap over the adhesive with your fngers. Wipe with warm water and dry. •...
- Page 8 Model No. 043-6127-2/043-6128-0/043-6129-8/043-6130-2/043-6131-0/043-5499-2 | Contact us: 1-800-268-6591 WINDOW INSTALLATION Window slider kit has been designed to ft most standard vertical and horizontal window applications. Roll the air conditioner to selected location, see “Location Requirements.” 1. Insert the windows exhaust adaptor into the slot on the window slider kit.
- Page 9 Rain cover - Vertical Installation A. Window Exhaust Adaptor B. Rain Cover C. Outlet Grille D. Bolts Inserted into Unused Holes in Window Slider Kit Rain cover - Horizontal Installation A. Window Exhaust Adaptor B. Rain Cover C. Outlet Grille D.
- Page 10 Model No. 043-6127-2/043-6128-0/043-6129-8/043-6130-2/043-6131-0/043-5499-2 | Contact us: 1-800-268-6591 4. Open the window. 5. Measure the window opening. • If the window opening is too narrow for the window slider kit, remove the inner slider section from the window slider kit. A. Inner slider section B.
- Page 11 7. Insert ⁄ " screw (provided) into the hole in the inner slider section that is closest to the end of the outer slider section of the window slider kit. A. ⁄ " Screw (provided) B. Inner Slider Section C. Outer Slider Section 8.
- Page 12 Model No. 043-6127-2/043-6128-0/043-6129-8/043-6130-2/043-6131-0/043-5499-2 | Contact us: 1-800-268-6591 COMPLETE INSTALLATION 1. Place the window-lock bracket on top of the lower window and against the upper window sash. 2. Use ⁄ " drill bit to drill a starter hole through the hole in the bracket.
-
Page 13: Starting
PORTABLE AIR CONDITIONER USE Operating your Portable Air Conditioner helps you to obtain the best possible results. IMPORTANT: This section explains proper air conditioner operation. • The air conditioner display shows the current room temperature. • When changing modes while the air conditioner is operation, the compressor will stop for 3 to 5 minutes before restarting. -
Page 14: Set Mode
Model No. 043-6127-2/043-6128-0/043-6129-8/043-6130-2/043-6131-0/043-5499-2 | Contact us: 1-800-268-6591 NOTE: When the air conditioner is turned on for the frst time after it is plugged in, it will run in the Smart Mode control. When the air conditioner is turned on at all other times, it will run according to the previous setting. -
Page 15: Temperature Setting
Plus or Minus button to adjust the temperature. NOTE: Heating is NOT available on cooling only air conditioner. HEAT ION (OPTIONAL) Press the ION button to start or stop the Plasma Generator. When the ION indicator light of the appliance fashes, the Plasma Generator will turn on. FAN SPEED 1. -
Page 16: Button And Function
Model No. 043-6127-2/043-6128-0/043-6129-8/043-6130-2/043-6131-0/043-5499-2 | Contact us: 1-800-268-6591 • Press the Minus button to lower the temperature. Press the Minus button once to decrease the set temperature by 2°F (1°C), or press twice to decrease the set temperature by 4°F (2°C). -
Page 17: Indication Symbols
INDICATION SYMBOLS Cooling Indicator Auto Fan Speed Dry Indicator High Fan Speed Fan Only Indicator Medium Fan Speed Heating Indicator Low Fan Speed Smart Indicator Signal Transmit Sleep Indicator Set Timer Display Ifeel Indicator Super Indicator Set Temperature Display USING THE REMOTE CONTROL NOTE: Each mode and relevant function will be further described in the following pages. - Page 18 Model No. 043-6127-2/043-6128-0/043-6129-8/043-6130-2/043-6131-0/043-5499-2 | Contact us: 1-800-268-6591 NOTE: • Use 2 LR03 AAA (1.5 V) batteries. Do not use rechargeable batteries. Replace batteries with new ones of the same type when the display becomes dim, or after 6 months. •...
- Page 19 TIMER ON/OFF It is convenient to set the timer on with TIMER ON/OFF buttons before you leave so that you will come back to the comfortable room temperature you set. TIMER ON TIMER ON button can be used to turn on the unit automatically at the time you set. 1.
- Page 20 Model No. 043-6127-2/043-6128-0/043-6129-8/043-6130-2/043-6131-0/043-5499-2 | Contact us: 1-800-268-6591 CHANGING AIR DIRECTION SWING Press SWING once to change vertical airfow direction. Press again to stop airfow louver at desired airfow direction. SWING NOTE: • Airfow is automatically adjusted to a certain angle in accordance with the operation mode after turning on the unit.
- Page 21 • Dry-Dries the room. The air conditioner automatically selects the temperature. The fan runs on Low speed only. NOTE: Dry mode should not be used to cool the room. • Fan Only-Only the fan runs. Press FAN button to adjust fan speed. NOTE: Auto fan speed cannot be selected in Fan Only mode.
- Page 22 Model No. 043-6127-2/043-6128-0/043-6129-8/043-6130-2/043-6131-0/043-5499-2 | Contact us: 1-800-268-6591 Cooling only models Indoor temperature Operation mode Target temperature 73ºF (23ºC) or below FAN ONLY 73-79ºF (23-26ºC) Room temperature decreases 3ºF after 3 minutes of operation Over 79ºF (26ºC) COOLING 79ºF (26ºC) NOTE: Temperature, airfow and direction are controlled automatically in Smart Mode.
- Page 23 FAN SPEED 1. Press FAN button, Choose desired fan speed. Auto High Medium • Auto-Automatically controls fan speed depending on current room temperature and temperature control setting. Low for quieter cooling. • High or maximum cooling. Mid for normal cooling. NOTE: Auto fan speed cannot be selected in Fan Only mode.
- Page 24 Model No. 043-6127-2/043-6128-0/043-6129-8/043-6130-2/043-6131-0/043-5499-2 | Contact us: 1-800-268-6591 SLEEP MODE SLEEP mode can be set in Cooling, Heating or Dry operation mode. This function gives you a more comfortable environment for sleep. SLEEP NOTE: • The appliance will stop operation automatically after operating for 8 hours.
- Page 25 3. Press CLOCK button again once the current time is set. NORMAL SOUNDS When your air conditioner is operating normally, you may hear sounds such as: • Air movement from the fan. • Clicks from the thermostat cycle. • Vibrations or noise due to poor wall or window construction. •...
-
Page 26: Draining
Model No. 043-6127-2/043-6128-0/043-6129-8/043-6130-2/043-6131-0/043-5499-2 | Contact us: 1-800-268-6591 DRAINING THE AIR CONDITIONER A. Secondary Drain Plug B. Secondary Drain Cover C. Primary Drain Plug D. Primary Drain Cover 1. Unplug the air conditioner or disconnect power. 2. Move the air conditioner to a drain location or outside. - Page 27 CLEANING THE AIR FILTER A. Evaporator Air Intake Filter Panel Door B. Condenser Air Intake Filter Panel Door 1. Press ON/OFF to turn off the air conditioner. 2. Open the flter panel door on the back of the air conditioner and remove. 3.
- Page 28 Model No. 043-6127-2/043-6128-0/043-6129-8/043-6130-2/043-6131-0/043-5499-2 | Contact us: 1-800-268-6591...
- Page 29 Before calling for service, try the suggestions below to see whether you can solve your problem without outside help. AIR CONDITIONER WILL NOT OPERATE • The power supply cord is unplugged. Plug into grounded 3-prong outlet. See “Electrical Requirements.” • Time-delay fuse or circuit breaker of the wrong capacity is being used.
- Page 30 Model No. 043-6127-2/043-6128-0/043-6129-8/043-6130-2/043-6131-0/043-5499-2 | Contact us: 1-800-268-6591 • The current air conditioner replaced an older model. The use of more effcient components may cause the air conditioner to run longer than an older model, but the total energy consumption will be less. Newer air conditioners do not emit the”...
- Page 31 Before calling for assistance or service, please check “Troubleshooting” section. It may Before calling for assistance or service, please check “Troubleshooting” section. It may save you the cost of a service call. If you still need help, follow the instructions below. save you the cost of a service call.
- Page 32 Model No. 043-6127-2/043-6128-0/043-6129-8/043-6130-2/043-6131-0/043-5499-2 | Contact us: 1-800-268-6591 YOUR SAFETY AND THE SAFETY OF OTHERS ARE VERY IMPORTANT. We have provided many important safety messages in this manual and on your appliance. Always read and obey all safety messages. This is the safety alert symbol.
- Page 33 This product is not guaranteed against wear or breakage due to misuse and/or abuse. Garrison® is a registered trademark of Garrison Company and is used under licence. Made in China...
Need help?
Do you have a question about the 043-6127-2 and is the answer not in the manual?
Questions and answers
Is there an air filter
Yes, the Garrison air conditioner part number 043-6127-2 has an air filter that may require cleaning if it is dirty or obstructed.
This answer is automatically generated
i have the same model my question is which whole do we need to keep the water pipe connected to drain the water, it says it has two primary and secondary drain can you please help
For draining the Garrison 043-6127-2 model, use the Primary Drain Port to connect the water pipe.
This answer is automatically generated
Where can I recharge the gas to the portable air conditioner? And what kind of gas do you use?
What does the display "E5" Mean?
my model: 043-6131-0. Do-I have to drain the water out of this unit ?