Mitsubishi Electric PFD-P250 Service Handbook
City multi
r410a
Hide thumbs
Also See for PFD-P250:
- Installation manual (17 pages) ,
- Operation manual (76 pages) ,
- Installation manual (27 pages)
Table of Contents
Advertisement
Advertisement
Table of Contents

Related Manuals for Mitsubishi Electric PFD-P250


Summary of Contents for Mitsubishi Electric PFD-P250
- Page 1 Service Handbook PFD-P250, P500VM-E PUHY-P250, P500YGM-A AIR CONDITIONERS CITY MULTI PFD-P250, P500VM-E Models PUHY-P250, P500YGM-A Service Handbook TENTATIVE Issued in Mar. 2006 HWE05250 New publication effective Mar. 2006. Printed in Japan Specifications subject to change without notice.
- Page 2 I Indoor Unit Components [1] Indoor Unit Components and Internal Structure ..............3 [2] Control Box of the Indoor Unit ................... 7 [3] Indoor Unit Circuit Board ....................8 - 1 -...
- Page 3 - 2 -...
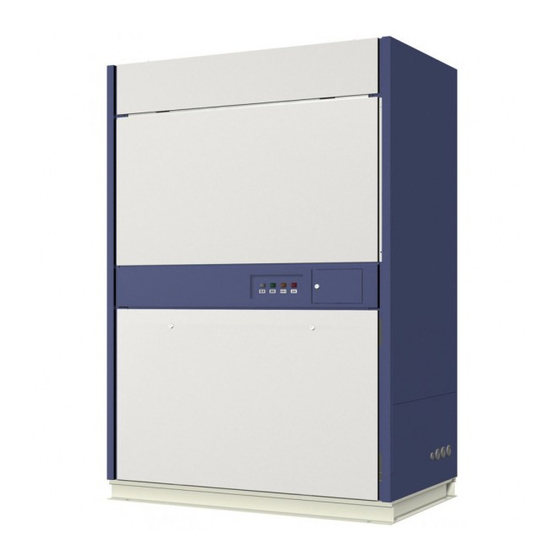
- Page 4 [ I Indoor Unit Components ] I Indoor Unit Components [1] Indoor Unit Components and Internal Structure 1. PFD-P250VM-E models (1) Front view of a indoor unit Panel for air filter maintenance Panel for refrigerant circuit maintenance Operation panel (remote controller) Lock key X 2 Panel for controller/fan related parts maintenance Display lamp...
- Page 5 [ I Indoor Unit Components ] (3) Front view of internal structure Suction temperature thermistor (on the right side of heat exchanger) Linear expansion valve (LEV) Air filter Heat exchanger X 2 (front / back) Sub drain pan Drain pan Drain hose Pulley X 2 Pipes (gas/liquid)
- Page 6 [ I Indoor Unit Components ] 2. PFD-P500VM-E models (1) Front view of a indoor unit Panel for air filter maintenance Panel for refrigerant circuit maintenance Operation panel (remote controller) Display lamp Panel for controller maintenance Lock key X 4 Panel for fan related parts maintenance (2) Rear view of a indoor unit - 5 -...
- Page 7 [ I Indoor Unit Components ] (3) Front view of internal structure Air filter Suction temperature thermistor (on the right side of heat exchanger) Sub drain pan Heat exchanger X 2 (front:No. 1; back:No. 2) Linear expansion valve (LEV) Drain pan Pulley X 2 Drain hose Bearing...
- Page 8 [ I Indoor Unit Components ] [2] Control Box of the Indoor Unit 1. PFD-P250VM-E models Relay(X11,Z1,Z3) Transformer Controller board Electro magnetic contactor (52F) Surge breaker (51F) Fuse (F1) Motor wiring Surge absorber board Circuit board for external I/O Power supply terminal bed Terminal block for transmission line (upper) Terminal block for MA remote controller (lower) 2.
- Page 9 [ I Indoor Unit Components ] [3] Indoor Unit Circuit Board 1. PFD-P250,P500VM-E models (1) Indoor Control Board CN3A Remote controller connection CN33 Power supply output Lamp output (to transformer) CN60 CN51 CN90 LEV output Drain pump Switch input Fan output...
- Page 10 II Refrigerant Circuit [1] Principal Parts and Functions ..................11 - 9 -...
- Page 11 - 10 -...
- Page 12 [ II Refrigerant Circuit ] II Refrigerant Circuit [1] Principal Parts and Functions 2. Indoor unit (1) PFD-P250,500VM-E Part Symbols Notes Usage Specifications Check method name (functions) Linear ex- 1. Adjusts superheat at the heat DC12V Continuity check pansion exchanger outlet of the indoor...
- Page 13 [ II Refrigerant Circuit ] - 12 -...
- Page 14 III Control [1] Functions and Factory Settings of the Dipswitches ............15 [2] Controlling the Outdoor Unit .................... 20 [3] Operation Flow Chart....................... 28 [4] Controlling the Indoor Unit ....................29 - 13 -...
- Page 15 - 14 -...
-
Page 16: Functions And Factory Settings Of The Dipswitches
[ III Control ] III Control [1] Functions and Factory Settings of the Dipswitches 1. Outdoor unit (1) Main board Function according to switch setting Switch setting timing Switch Function Unit address setting Set to 00 or 51-100 with the dial switch Before power on For self-diagnosis/op- Refer to the LED monitor display on 1-10... - Page 17 [ III Control ] Function according to switch setting Switch setting timing Switch Function Reset of the integrat- ed operation time Val- Disabled Enabled Anytime after power on id/Invalid (comp 1 side) Reset of the integrat- ed operation time Val- Disabled Enabled Anytime after power on...
- Page 18 [ III Control ] (2) Compressor INV board Function according to switch Switch setting timing setting Switch Function Enabling/disabling the following error Error detec- Error detec- Anytime after power on detection functions; tion enabled tion disabled ACCT or DCCT sensor circuit error (530X Detail No.
- Page 19 [ III Control ] 2. Function of the switch (Indoor unit) (1) Dipswitches [SW1,3,7] Function according to switch setting Switch setting timing Notes Switch Function Not available Available Clogged filter detection Filter check reminder 100h 2500h time setting Remote display option Fan output Thermo-ON signal While the unit is stopped...
- Page 20 [ III Control ] [SW8] Function Operation by switch setting Switch setting timing Compulsory thermo OFF setting during test run Normal control Anytime (used in the grouped indoor units connected to after power on Compulsory thermo OFF different outdoor units) (2) Slide switches Switch Function...
-
Page 21: Controlling The Outdoor Unit
[ III Control ] [2] Controlling the Outdoor Unit -1- Initial Control When the power is turned on, the initial processing of the microcomputer is given top priority. During the initial processing, control processing of the operation signal is suspended. The control processing is resumed after the initial processing is completed. - Page 22 [ III Control ] -4- Compressor Frequency Control Depending on the capacity required, the frequency of the compressor is controlled to bring the evaporation temperature (Te) close to the target evaporation temperature (Tem) during cooling operation, and to keep constant condensing temper- ature (49°C =2.88MPa) during heating operation.
-
Page 23: Defrost Operation Control
[ III Control ] -5- Defrost Operation Control (1) Starting the defrost operation Defrost operation is started when the pipe temperature (TH5) of -10°C or below (-8°C or below for P500-type) has con- tinuously been detected for 3 minutes after the integrated compressor operation time of 50 minutes have passed (90 min- utes when the defrost prohibit timer is set to 90 minutes). -
Page 24: Refrigerant Recovery Control
[ III Control ] -6- Refrigerant Recovery Control Recovery of refrigerant is performed during heating operation to prevent the refrigerant from accumulating inside the unit while it is stopped (unit in fan mode), or inside the indoor unit that is in cooling mode or in heating mode with thermo off. It is also performed during cooling operation to prevent an excessive amount of refrigerant from accumulating in the outdoor heat exchanger. - Page 25 [ III Control ] -7- Capacity Control of Outdoor Fan and Heat Exchanger (1) Control method The outdoor fan air flow rate is controlled to keep constant evaporation temperature during cooling operation and to keep constant condensing temperature during heating operation. The capacity of the heat exchanger on the P500 models of outdoors is controlled by the 4-way valve (21S4b) or the so- lenoid valve (SV5b).
- Page 26 [ III Control ] -9- Control at Initial Start-up When the unit is started for the first time, it will run the following course of operation. (1) Flow chart of initial operation mode Start of initial operation mode Step 1 Operation of No.1 compressor only P250 60 Hz.
-
Page 27: Emergency Operation Mode
[ III Control ] -10- Emergency Operation Mode When compressors (No.1 or No.2) fails, the unit goes into the emergency operation mode to respond to the problem. The unit can be put into this mode by performing an error reset on the remote controller. (1) Starting the emergency operation 1) When an error occurs, the error source and the error code will be displayed on the display on the remote controller. -
Page 28: Operation Mode
[ III Control ] -11- Capacity Control between Outdoor Units (when two refrigerant circuits are connect- The following two capacity control methods between indoor units are available. Control to make only one of the outdoor units (which has the smaller address) operate and keep running during low-load hours at startup. -
Page 29: Operation Flow Chart
[ III Control ] [3] Operation Flow Chart (1) Heating operation (For warming up the indoor unit) Normal operation Defrost operation Heating operation Unit in the stopped state *Note 1,2 During test run mode Defrost operation 4-way valve ON 4-way valve OFF 1. -
Page 30: Controlling The Indoor Unit
[ III Control ] [4] Controlling the Indoor Unit <Indoor unit control> There are two controller circuit boards with two refrigerant circuits inside the indoor unit or 16 and 20 HP. There is one controller circuit board with one refrigerant circuit. Each refrigerant circuit is controlled independently (in case of one refrigerant circuit, one-to-one control of indoor unit and outdoor unit) in the following method. -
Page 31: Actuator Control
[ III Control ] -2- Actuator Control (1) LEV Control • The degree of LEV opening is set to the initial degree depending on the condensing pressure at start-up. • After the start-up, the degree of LEV opening is controlled every minute so that the superheat detected by the thermistors TH22 (liquid pipe) and TH23 (gas pipe) of the indoor unit can be within a certain range. - Page 32 [ III Control ] Miscellaneous When the errors other than described in the chart, the unit makes an error stop without performing emergency operation. (Only the indoor fan operates, however; it stops when the fan is in trouble.) When one of the two refrigerant circuits, the outdoor unit with the refrigerant circuit in error performs emergency operation or makes an error stop, while the other outdoor unit keeps normal operation.
- Page 33 [ III Control ] -7- Switching Between Pulse and Level of MA Remote Controller External Input The start/stop operation can be performed by either of the MA remote controller or the external input (pulse/level). DIPSW on the address circuit board (No.1 and No. 2) Valid operation SW1-9 = OFF External input (level)
- Page 34 IV Test Run Mode [1] Items to be checked before a Test Run................35 [2] Test Run Method ......................36 [3] Standard Operation Data (Reference Data) ..............37 - 33 -...
- Page 35 - 34 -...
- Page 36 [ IV Test Run Mode ] IV Test Run Mode [1] Items to be checked before a Test Run Check for refrigerant leak and loose cables and connectors. Measure the insulation resistance between the power supply terminal block and the ground with a 500V megger and make sure it reads at least 1.0Mohm.
- Page 37 [ IV Test Run Mode ] [2] Test Run Method Procedures Turn on the main power. It will take approximately one minute until the unit is operable. Leave the unit on for 12 hours (to power the outdoor unit compressor crankcase heater). Run an individual test on each of the refrigerant circuit to make sure that pipes or wires are not cross-connected.
- Page 38 [ IV Test Run Mode ] [3] Standard Operation Data (Reference Data) (1) Cooling operation Indoor unit model Outdoor unit model Operation PFD-P500VM-E PUHY-P500YGM-A Ambient Indoor 27/19 Operat- tempera- ing condi- Outdoor 35/- ture °C tions Piping Total pipe length Outdoor Compressor frequency 50Hz:70/50...
Need help?
Do you have a question about the PFD-P250 and is the answer not in the manual?
Questions and answers