Table of Contents
Advertisement
Quick Links
Advertisement
Table of Contents

Related Manuals for KTM 990 ADVENTURE


Summary of Contents for KTM 990 ADVENTURE
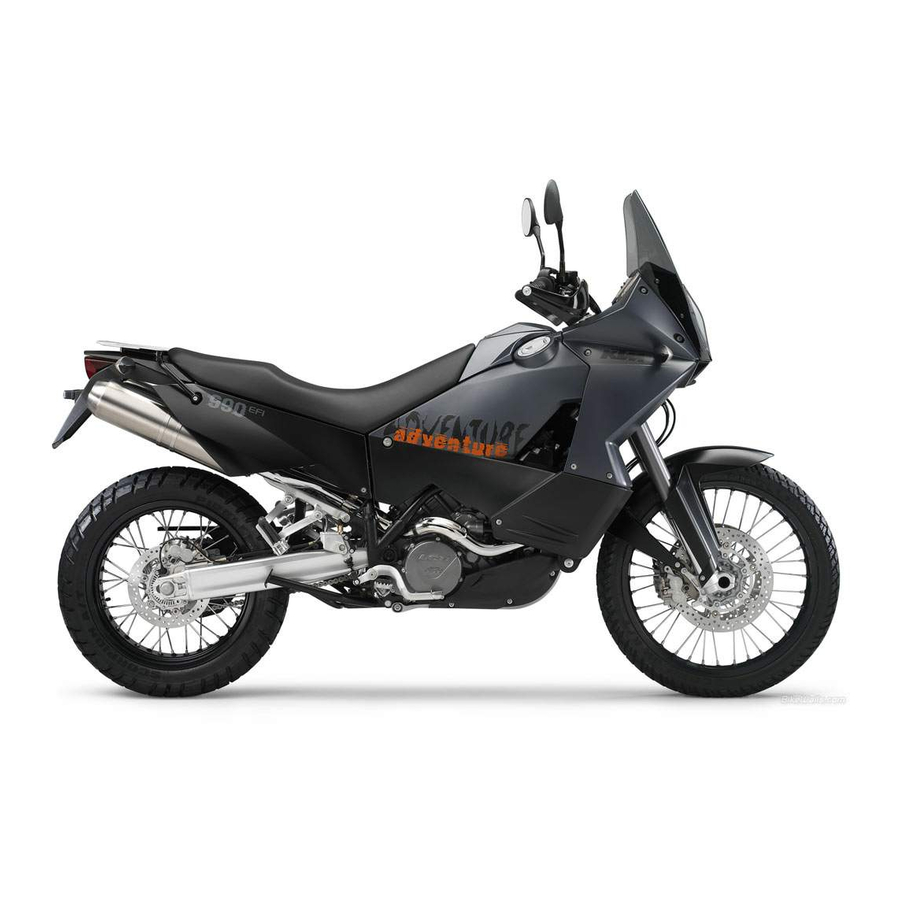
- Page 1 OWNER’S MANUAL 2007 990 ADVENTURE 990 ADVENTURE S ART. NR. 3.211.149 EN...
-
Page 2: Introduction
INTRODUCTION We would like to congratulate you on your purchase of a KTM motorcycle. You are now the owner of a state-of-the-art sport motorcycle that guarantees to bring you lots of fun and enjoyment, provided that you clean and maintain it appropriately. -
Page 3: Important Information
IMPORTANT INFORMATION INTENDED PURPOSE The KTM 990 Adventure is designed to resist the usual wear and tear of normal use on roads and easy terrain (unpaved roads). OWNER'S MANUAL Carefully read the entire Owner's Manual before you start riding your motorcycle, even if this will take a little time. It contains use- ful tips and information on the best way to handle the motorcycle and how to protect yourself from injuries. -
Page 4: Warranty
The service work specified in the „Lubrication and Maintenance Schedule“ must be performed by an authorized KTM workshop. This is the only place that has the qualified technicians and the special tools required for the 990 Adventure. Be sure to have the workshop verify all service work carried out in the service manual to avoid losing your right to claim under the warranty. -
Page 5: Table Of Contents
GENERAL TIPS AND WARNINGS FOR STARTING THE MOTORCYCLE .......24 Instructions for initial operation ....24 Running in the LC8 engine . - Page 6 Checking the chain for wear ..... . .49 General informations about KTM disc brakes ...50 Adjusting of free travel at the hand brake lever .
-
Page 7: Engine Number, Engine Type
» SERIAL NUMBER LOCATIONS Chassis number The chassis number is located on the right side of the steering head tube and on the type label. Write this number into the relevant area on page 1. Engine number, engine type The engine number and engine type are embossed in the engine case near the shift lever. Write this number into the relevant area on page 1. -
Page 8: Operation Instruments
» OPERATION INSTRUMENTS Clutch lever The clutch lever [1] is located on the left side of the handlebar. The adjusting screw [A] is used to change the original position of the clutch lever (see maintenance work on chassis and engine). The clutch is hydraulically actuated and adjusts itself automatically. -
Page 9: Multi-Functional Digital Speedometer
Use the MODE and SET [1] button to change the display and the basic settings in the display. Display [2] shows all of the information that may be of interest to you. 5 display modes can be selected with the MODE button. The indicator lamps [3] provide additional information on the motorcycle's running condition. Display TEST... - Page 10 OPERATION INSTRUMENTS CLOCK TRIP 1 TRIP 2 TRIP F » CLOCK You will recognize the CLOCK display by the blinking dots between the hours and minutes. It displays the speed, temperature of the cooling liquid and the clock. To switch to the next display mode, press the MODE button. The speed, temperature of the cooling liquid and the total kilometers or miles traveled are shown in the ODO mode.
-
Page 11: Setting Options In The Display
OPERATION INSTRUMENTS 10 sec » Setting options in the display KILOMETERS OR MILES. You can have the speed and distance shown in kilometers or miles in the display. The dis- play can be adapted to the respective country on long-distance trips. To switch from kilometers to miles, switch on the ignition and press the MODE [1] button for approx. - Page 12 » OPERATION INSTRUMENTS RESETTING TRIP 2 The trip meter 2 runs continuously and counts up to 999.9. It can be used similarly to TRIP 1 or together with a switch available as an accessory (see below) for trips according to a roadbook.
-
Page 13: Cooling Liquid Temperature Display
OPERATION INSTRUMENTS 120°C (248°F) 110°C (230°F) 100°C (212°F) 70°C (158°F) 60°C (140°F) 50°C (122°F) 40°C (104°F) » Cooling liquid temperature display The temperature display [1] is shown in 7 bars. The more bars that light up, the hotter the cooling liquid. When the lowest bar lights up, the cooling liquid has reached a temperature of approx. -
Page 14: Indicator Lamps
» OPERATION INSTRUMENTS Indicator lamps The green indicator lamp will blink in the blinker rhythm when the blinker is switched on. NOTE: The indicator lamp will blink faster when a blinker is broken. The green indicator lamp will light up when the gearbox is in an idling position. -
Page 15: Abs Button – Models With Abs (Antilock Brake System)
NOTE: The brake system will still function but ABS control will no longer be active. Continue to drive carefully and have the ABS checked at an authorized KTM workshop. NOTE: The ABS warning lamp can also light up if there is a large deviation between the speed of the front and rear wheel in extreme driving situations, e.g. -
Page 16: Tachometer
OPERATION INSTRUMENTS » Tachometer The tachometer shows the engine speed in revolutions per minute. Do not run the engine beyond the black mark at 9500 rpm. The speed limiter will set in at 9600 rpm, drastically reducing the engine power above this rotational speed. -
Page 17: Emergency Off Tip Switch, Starter Tip Switch
OPERATION INSTRUMENTS » Combination switch The rocker switch LIGHTS [1] actuates the high beam or low beam. = High-beam light = Low-beam light The light signal (high beam) is actuated with button [2]. The indicator switch [3] returns to central position after actuation. Press flasher switch towards switch housing to switch off the flasher. -
Page 18: Storage Compartment
Filler caps The 990 Adventure has 2 separate fuel tanks. Both filler caps [2] can be locked and are equipped with a tank vent system. To open, insert the ignition key, turn 45° in a clockwise direction and fold up the filler cap. -
Page 19: Shift Lever
» OPERATION INSTRUMENTS Fuel taps Both fuel taps [1] must be open when the motorcycle is running. The level in the fuel tanks is equalized by means of a connecting hose. Only close the fuel taps to remove the tanks. -
Page 20: Foot Brake Pedal
» OPERATION INSTRUMENTS Side stand Fold the side stand [1] forward to the stop with your foot and put the weight of the motor- cycle on the stand. Make sure it is standing securely on a firm surface. The side stand is linked to the safety start system;... -
Page 21: Compression Damping Of Fork
» OPERATION INSTRUMENTS Compression damping of fork The fork's damping action during compression travel (compression damping) can be adjusted. This allows you adjust the damping behavior to match your driving style and the payload. The adjusting screws [2] are located under the cap [1] on the lower end of the fork legs. More information is provided in the chapter "Adjusting the fork and shock absorber.“... -
Page 22: Damping Action During Compression Of Shock Absorber
The damping rate can be adjusted in the low and high-speed range (Dual Compression Control). The designation low and high-speed refers to the movement of the shock absorber and not to the motorcycle's driving speed. The adjusting screw [1] for the low-speed range can be adjusted with a screwdriver. -
Page 23: Shock Absorber's Preload Adjuster
OPERATION INSTRUMENTS » Rebound damping of shock absorber The shock absorber's damping action during rebound travel (rebound damping) can also be adjusted. This allows you adjust the damping behavior to match your driving style and the payload. The adjusting screw [1] is located on the bottom of the shock absorber. More information is provided in the chapter "Adjusting the fork and shock absorber.“... -
Page 24: Alarm System
» OPERATION INSTRUMENTS Grips The passenger can hold on to both grab handles [1]. Footrests The passenger footrests [2] fold up. Alarm system An alarm system can be retrofitted. Ask your authorized KTM shop for details. -
Page 25: General Tips And Warnings For Starting The Motorcycle
GENERAL TIPS AND WARNINGS FOR STARTING THE MOTORCYCLE Instructions for initial operation – Make sure the work for the „pre-delivery inspection“ was performed by your author- ized KTM workshop. The DELIVERY CER- TIFICATE and SERVICE MANUAL will be handed over when you pick up your vehicle. -
Page 26: Accessories And Payload
– Models with ABS: The ABS is designed to be used with the tires authorized by KTM and works best with these tires. The ABS function cannot be guaranteed if other tires are used. – Models with ABS: an incorrect tire pres-... -
Page 27: Check The Following Before Each Start
Arrange for the braking system to be checked by a KTM specialist, as com- plete failure of the braking system can be avoided. - Page 28 Make sure your luggage is correctly fastened before you drive off. Never drive faster than 130 kph (80 mph) if your motorcycle is loaded with cases or other baggage. They will impair the motorcycle's handling at higher speeds and can easily cause it to go out of control.
-
Page 29: Starting The Engine
If the engine is not switched off, engine damage will occur within a short period of time. Check the engine oil level or contact a ktm workshop. – Maximum period for continuous starting: 5 seconds. Wait at least 5 seconds before try- ing again. -
Page 30: Shifting/Riding
– If this is not the case, refill the tank – if sufficient fuel is in the tank, pro- ceed as described in the „Trouble- shooting“ section or contact a KTM dealer. NOTE: This motorcycle is equipped with a safety start- ing system. -
Page 31: Braking – Models Without Abs (Antilock Brake System)
Check the engine oil level or con- tact an authorized KTM workshop. – Never have the throttle wide open when changing down to a lower gear. The engine will overspeed, damaging the valves. -
Page 32: Switching Off The Abs
– If the resistance in the hand brake lever or foot brake pedal feels „spongy“ (too much play), this is an indication that something is wrong with the brake sys- tem. Don’t ride your motorcycle anymore without first having the brake system looked over by a KTM dealer. -
Page 33: Stopping And Parking
INFORMATION ABOUT THE SIDE STAND Use your foot to push the side stand forward as far as possible, and lean your motorcycle to the side. Make sure that your motorcycle is standing safely on solid ground. Just in case, you can also put in a gear. - Page 34 Make sure that the ground is solid and that your motorcycle is standing securely. – The center stand is designed to hold the weight of the motorcycle only. By sitting on the motorcycle, you will put additional weight on the center stand, possibly causing the cen- ter stand or frame to be damaged or the motorcycle to fall down.
-
Page 35: Fuel
Please use unleaded fuel only. The 990 Adventure has 2 tanks with 1 filler cap each. Both filler caps can be locked and are equipped with a tank vent system. To open, insert the ignition key, turn 45° in a clock- wise direction and fold up the filler cap. -
Page 37: Periodic Maintenance Schedule
Clean the oil jet for the clutch lubrication Check rubber boots for cracks or leaks Check fault memory with the KTM diagnosis tool Perform a status check of neutral, clutch, 2nd/3rd gear and side stand switch using the KTM diagnosis tool... - Page 38 Check/adjust smooth operation, free travel of handbrake/footbrake levers Check bolts of brake system for tight fit Check the ABS fault memory using the KTM diagnostics tool Check shock absorber and fork for leaks and proper operation Clean fork dust sleeves...
-
Page 39: Periodic Maintenance Schedule
If motorcycle is used for competition 7500 km service should be carried out after every race! Service intervalls should never be exceeded by more than 500 km. Maintenance work done by KTM autorized workshops is not a substitute of care and checks done by the rider! 990 ADVENTURE 2007... - Page 40 PERIODIC MAINTENANCE SCHEDULE 990 ADVENTURE 2007 VITAL CHECKS AND CARE PROCEDURES TO CONDUCTED BY THE OWNER OR THE MECHANIC Check oil level Check brake fluid level Check brake pads for wear Check lighting system for proper operation Check horn for proper operation...
-
Page 41: Maintenance Work On Chassis And Engine
– All screws and nuts must be tightened to the specified torque figures using a torque wrench. If screws or nuts are not adequately tight- ened, they can become loose and cause the motorcycle to go out of control while you drive. Tightening the screws and nuts too tightly can damage the thread and components. -
Page 42: Removing And Remounting The Seat
The tool set [4] and an extension piece [5] for some of the wrenches in the tool set are located in the pocket under the seat. The 990 Adventure S model (without ABS) has an additional storage compartment under the cover [6]. -
Page 43: Adjusting The Fork And Shock Absorber
There are a number of ways to adjust the fork and shock absorber to match the chassis to your driving style and the payload. We have provided a table with pragmatical values to help you tune up your motorcycle. These tune-up specifications are reference values only and should serve as a basis for your per- sonal chassis and suspension tuning. -
Page 44: Adjusting The Spring Preload On The Fork
» MAINTENANCE WORK ON CHASSIS AND ENGINE Adjusting the spring preload on the fork The fork spring preload can be adjusted by turning the adjusting screws [4] (wrench size 24 mm) ± 5 mm (0,2 in). Turning in a clockwise direction will increase the preload, turning in a counterclockwise direc- tion will decrease the preload. -
Page 45: Compression Damping Of Shock Absorber
– unscrew the respective number of clicks for the specific type of shock absorber in a coun- terclockwise direction. 990 Adventure ..20 clicks 990 Adventure S ..20 clicks »... -
Page 46: Rebound Damping Of Shock Absorber
– Turn the adjusting screw in a counterclockwise direction the number of turns specified for the respective type of shock absorber. 990 Adventure ..1.5 turns 990 Adventure S ..1.5 turns The damping unit of the shock absorber is filled with high-compression nitrogen. -
Page 47: Adjusting The Preload Of The Shock Absorber
Breathing the fork legs Breath the fork legs regularly (see Maintenance Schedule). To breath, place the motorcycle on the side stand and briefly remove the bleeder screws [2] to allow any overpressure to escape from the fork. Excessive pressure in the interior of the fork can cause leaks in the fork. If your fork is leak-... -
Page 48: Cleaning The Dust Sleeves Of The Telescopic Fork
Checking the chain tension Place the motorcycle on the side stand and switch the transmission to idle. Press the chain upwards under the lower chainguard screw [4]. The difference to the sagging chain should be 35 - 40 mm (1.37 …... -
Page 49: Correct Chain Tension
If you don’t happen to have a torque wrench at hand, make sure you have the tightening torque corrected by a KTM dealer as soon as possible. A loose axle may lead to an unstable driving behavior of your motorcycle. -
Page 50: Checking The Chain For Wear
– The chain does not have a chain joint for safety reasons. Always have the chain replaced in an authorized KTM workshop where the service technicans have the required riveting tool. – Never mount a normal chain joint. -
Page 51: General Informations About Ktm Disc Brakes
KTM motorcycle in road traffic. The brake pads design and friction factor and therefore the braking power can deviate significantly from original KTM brake pads. If you use dif- ferent brake pads than those provided with the original equipment, it cannot be war- ranted that they are authorized for use in road traffic. -
Page 52: Brake Fluid
DOT 4 brake fluid. Do not, in any event, use DOT 5 brake fluid. It is based on silicone oil and is dyed purple. KTM motorcycle gaskets and brake hoses are not designed for DOT 5 brake fluid. - Page 53 ABS cannot be warranted. – The ABS is designed to be used with the tires authorized by KTM and works best with these tires. The ABS function cannot be guaranteed if other tires are used.
-
Page 54: Adjusting Of Free Travel At The Hand Brake Lever
– If the brake fluid level drops below the minimum either the brake system has a leak or the brake pads are completely worn down. In this case, consult an authorized KTM dealer immediately. -
Page 55: Checking Rear Brake Fluid Level
– If the brake fluid level drops below the minimum either the brake system has a leak or the brake pads are completely worn down. In this case, consult an authorized KTM dealer immediately. -
Page 57: Dismounting And Mounting The Front Wheel
MAINTENANCE WORK ON CHASSIS AND ENGINE Dismounting and mounting the front wheel Jack the motorcycle up at the underride protection until the front wheel no longer touches the ground. Loosen the collar screw [1] and the clamp screws [2] at both fork leg axle passages. Unscrew the collar screw approx. - Page 58 Now you can tighten the clamp screws on both fork leg axle passages to 15 Nm. – If you do not have a torque wrench to mount the wheel, have the torques corrected by an authorized KTM workshop as soon as possible. A loose axle passage can cause the motorcycle's handling performance to become instable.
-
Page 59: Dismounting And Mounting The Rear Wheel
– If you don’t happen to have a torque wrench at hand, make sure you have the tighten- ing torque corrected by a KTM dealer as soon as possible. A loose wheel spindle may lead to an unstable driving behavior of your motorcycle. -
Page 60: Tires, Air Pressure
The ABS function can no longer be guaranteed. – Models with ABS: The ABS is designed to be used with the tires authorized by KTM and works best with these tires. The ABS function cannot be guaranteed if other tires are used. -
Page 61: Checking Spoke Tension
A clear tone must be the result. Dull tones indicate loose spokes. If necessary, have the spokes retightened and the wheel centered by a KTM dealer. – If you continue to drive with loose spokes, the spokes can tear and lead to an instable handling performance. -
Page 62: Battery
Never operate the motorcycle with a run-down battery or without the battery. This can dam- age the electronic components or safety equipment in either caseand the motorcycle will no longer be roadworthy. -
Page 63: Demounting And Mounting The Battery
Never disconnect the battery while the engine is running. This will destroy the rectifier- regulator. STORAGE: If the motorcycle is being immobilized for longer periods of time, remove and charge the battery. Storage temperature 0 - 35°C (32 - 95°F), avoid direct sunlight. Charge the battery every 3 months. -
Page 64: Charging The Battery
5.5 amperes To charge the battery while mounted, always use the KTM battery charger (Item no. 58429074000) to ensure that the electric system is not damaged by excess voltage. Always remove the battery if using other battery chargers! You can also use this charging device to test the off-load voltage and startability of the battery and generator. -
Page 65: Abs Fuses – Models With Abs (Antilock Brake System)
Two fuses for the ABS are located under the starter relay. Remove the caps and check the fuses [7] and [8]. Replace blown fuses with the same type of fuse. Visit an authorized KTM workshop if the new fuse blows again. -
Page 66: Fuses For Individual Current Consumers
[1]. Spare 10, 15, 25 and 40-ampere fuses [2] are also located next to the stor- age compartment. Replace a blown fuse only with an equivalent one. Visit an authorized KTM workshop if the new fuse blows again. -
Page 67: Replacing The Headlight Lamps
MAINTENANCE WORK ON CHASSIS AND ENGINE Replacing the headlight lamps Remove the 5 screws on the left and right and take off both side covers [1]. Use a screw- driver to detach the retaining tabs [2], tilt the windshield and headlight forward and pull the connector off the connector support. - Page 68 » MAINTENANCE WORK ON CHASSIS AND ENGINE PARKING LIGHT BULB [C] : Pull the bulb socket [7] out of the reflector and pull the bulb out of the bulb socket. USA design: The parking light [E] is located in the upper part of the headlight in the USA design. Bulb [F] (see Technical specifications –...
-
Page 69: Replacing The Brake And Tail Light Bulbs
Make a mark on a light wall behind a level surface at a height of 830 mm (32.7 in) (990 Adventure S) or 790 mm (31.1 in) (990 Adventure) respectively. Position your motorcycle loaded ready for the trip (baggage, driver, passenger) 10 meters away from the wall and switch on the low beam. -
Page 70: Replacing The Flasher Bulbs
Replacing the flasher bulbs Remove the screw on the back of the turn signal, carefully fold the lens [5] towards the motorcycle and remove. Slightly depress the bulb, turn it approx. 30° counterclockwise and pull it out of the socket. -
Page 71: Cooling System
If the fan is not working, and there appears to be sufficient cool- ing liquid, the only thing you can do is to drive on to your nearest authorized KTM work- shop at the least possible engine load. -
Page 72: Checking The Cooling Liquid Level In The Compensating Tank
If you need to add cooling liquid quite often, the cooling system may leak. If the compen- sating tank is empty, also check the cooling liquid level in the radiator. Have the cooling system checked by an authorized KTM workshop. »... -
Page 73: Checking The Cooling Liquid Level In The Radiator
If any cooling liquid is missing, the cooling system may leak. Have the cooling system checked by an authorized KTM workshop. If more than 1 liter (0.26 USgal) of cooling liquid needs to be added, the cooling system must be bled. -
Page 74: Bleeding The Cooling System
Remove the bleeder screw [4] on the left side of the radiator. To be able to completely bleed the cooling system, raise the motorcycle approx. 50 cm in the front. Add cooling liquid until it runs out of the discharge opening without bubbles and immedi- ately mount the screw to prevent more air from getting into the radiator. -
Page 75: Changing The Original Position Of The Clutch Lever
KTM uses biodegradable, hydraulic mineral oil to actuate the hydraulic clutch. Do not mix this oil with any other hydraulic oil. Always use original KTM hydraulic oil (available from your authorized KTM workshop) to make sure your clutch operates smoothly. -
Page 76: Checking The Engine Oil Level
Only use fully synthetic engine oils that meet the JASO MA quality requirements (see infor- mation on the can). KTM recommends Motorex Power Synt 4T in the 10W/50 viscosity (for temperatures over 0°C, 32°F) or 5W/40 (for temperatures under 0°C, 32°F). -
Page 77: Changing The Engine Oil And The Oil Filter Cleaning The Oil Screen
Since many parts must be demounted for an oil change, we recommend having the engine oil changed by an authorized KTM workshop. During the guaranty period, the oil change must be performed by an authorized KTM mechanic. Otherwise, the guarantee will become void. - Page 78 » MAINTENANCE WORK ON CHASSIS AND ENGINE Remove the 6 screws and the cover [4]. Remove the 5 screws, take off the left panel [5] and disconnect the turn signal cable. Close both fuel taps [6] on the connecting line.
- Page 79 » MAINTENANCE WORK ON CHASSIS AND ENGINE Remove the 3 screws [1], lift the tank approx. 15 mm and carefully tilt to the side. Disconnect the fuel lines, disconnect the connector for the fuel pump and the pickup cable (fuel level) and set down the tank.
- Page 80 » MAINTENANCE WORK ON CHASSIS AND ENGINE Carefully pull the oil screen [7] out of the oil tank. Thoroughly clean the drain plugs, the cover and both oil screens. Clean all rubber seal rings and check for damage. Replace if necessary. Mount the oil drain plug on the engine with a new seal ring and tighten to 20 Nm.
- Page 81 O-ring. Tighten the screws to 6 Nm. Only use original KTM oil filters. The engine can be damaged if other filters are used. Mount the oil drain plug on the oil tank with a new seal ring and tighten to 20 Nm.
- Page 82 » MAINTENANCE WORK ON CHASSIS AND ENGINE Add 2.5 liters (0.7 USgal) of fully synthetic engine oil meeting the JASO MA standard (e.g. Motorex Power Synt 4T) and mount the oil dipstick. Start the engine, allow to run warm for 4 minutes and switch off the engine.
-
Page 83: Activating The Ignition Curve For Low-Octane Fuel
» MAINTENANCE WORK ON CHASSIS AND ENGINE Activating the ignition curve for low-octane fuel If you are traveling to a country where fuel having at least 95 octane (RON) is not available, you can easily activate the corresponding ignition curve. A plug and socket connection [1] on a brown/black cable is located near the upper shock absorber holder . -
Page 84: Trouble Shooting
If you have your motorcycle serviced as set forth in this manual, no malfunctioning is to be expected. Nevertheless, if an error does arise, we recommend that you look for the error according to the following chart. Please note that you cannot perform all of the work yourself. If you are not sure, contact your KTM dealer. TROUBLE... - Page 85 Visit an authorized KTM workshop Switch to neutral gear Have the air filter/fuel filter replaced at an authorized KTM workshop Visit an authorized KTM workshop Activate the ignition curve for 95 octane, if fuel with at least...
- Page 86 Contact an authorized KTM workshop. Bleed the cooling system (see Maintenance work) Have the thermostat checked (opening temperature 75°C, 167°F) or replaced; contact an authorized KTM workshop Visit an authorized KTM workshop Stop, switch off the ignition, start again Replace the ABS fuses (under the right engine cover)
- Page 87 Recharge the battery according to the relevant instructions. Voltage regulator and generator should be checked by an authorized KTM workshop. Replace fuse HORN BRAKELIGHT SPEEDO. Check the pickup cable for damage, visit an authorized KTM workshop Blink code 06: FI blinks 6x short, pause ERROR DESCRIPTION...
- Page 88 » TROUBLE SHOOTING The blink code indicates which component is affected by an error. This allows the error to be identified if no diagnosis tool is available. BLINK CODE SIGNAL / COMPONENT Coolant temperature sensor Air temperature sensor Ambient air pressure sensor Tilt angle sensor Lambda probe for rear cylinder Lambda probe for front cylinder...
-
Page 89: Conservation For Winter Operation
(e.g. Motorex 900) and cleaned with a brush. – After the motorcycle has been rinsed with a soft water jet, it should be dried by air pressure and a cloth. Then take a short drive until the engine has reached the working temperature and also use the brakes. -
Page 90: Re-Initiation After Time Of Storage
– Take a short, careful test ride first. NOTE: Before you put your motorcycle away for the winter, you have to check all parts for their function and wear. Should any service jobs, repairs, or any refitting be necessary, you should have them carried out during the off-season (lower workload at mechanics’ shops). This... -
Page 91: Technical Specifications – Chassis
USA: high beam + low beam H4 12V 60/55 W (socket P43t) position light front + rear 12V 5W (socket W2.1x9.5d) indicator lamps LED stoplight 12V 21W (socket BA15s) * further tire releases are available on the Internet at www.ktm.com » 4 liters (1 USgal) reserve... -
Page 92: Basic Setting
TECHNICAL SPECIFICATIONS – CHASSIS CHASSIS 990 ADVENTURE / 990 ADVENTURE S Lighting flasher 12V 10W (socket BA15s) licens plate illumination 12V 5W (socket W2.1x9,5d) Battery maintenance-free battery 12V 11.2 Ah Steering head angle 63.4° Wheel base 1570 mm (61.8 in) Seat height, unloaded ADVENTURE: 860 mm (33.8 in), ADVENTURE S: 915 mm (36 in) -
Page 93: Tightening Torques - Chassis
TECHNICAL SPECIFICATIONS – CHASSIS TIGHTENING TORQUES – CHASSIS HH clamp bolts on top triple clamp HH clamp bolts for steering stem HH clamp bolts on bottom triple clamp AH bolt for handlebar mount Collar bolts for handlebar clamps HH clamp bolts on fork leg axle passages Collar screw on front wheel spindle Collar nut wheel spindle rear Collar nut for swing arm bolt... - Page 94 TECHNICAL SPECIFICATIONS – CHASSIS TIGHTENING TORQUES – CHASSIS Exhaust nuts on manifold HH bolts on exhaust suspension Spoke nipple HH nuts on rear sprocket bolts Hexagon nut on engine sprocket Engine carrier bolts HH bolts for side stand bracket - engine HH bolts side stand bracket - side stand console HH bolts side stand mounting HH bolt spring retainer side stand...
-
Page 95: Technical Specifications – Engine
TECHNICAL SPECIFICATIONS – ENGINE ENGINE 990 LC8 Design Liquid-cooled, 2-cylinder 4-stroke engine with 75° V arrangement with balancer shaft and electric starter Displacement 999 cc Bore / Stroke 101/62.4 mm Compression ratio 11.5:1 Fuel unleaded fuel with at least RON 95 (USA: Premium PON 91*) / RON 80 - 94 for other ignition curve) Valve timing 4 valves controlled over bucket tappet and 2 camshafts, camshaft drive with gears/chain Valve diameter... -
Page 96: Engine Oil
Only use fully synthetic engine oils that meet the JASO MA quality requirements (see infor- mation on the can). KTM recommends Motorex Power Synt 4T in the 10W/50 viscosity (for temperatures over 0°C, 32°F) or 5W/40 (for temperatures under 0°C, 32°F). -
Page 97: Head Word Index
» HEAD WORD INDEX ABS button – models with ABS (antilock brake system) ..14 ABS fuses – models with ABS (antilock brake system) ..64 ABS warning lamp – models with ABS (antilock brake system) . .14 Accessories and payload . - Page 98 Fuses for individual current consumers ....65 General informations about KTM disc brakes ... . .50 General tips and warnings for starting the motorcycle .
-
Page 99: Consumer Information For Usa Only
» CONSUMER INFORMATION FOR USA ONLY Sticker positions: 4 5 6... - Page 100 CONSUMER INFORMATION FOR USA ONLY [1] EAVP [4] Fuel level [7] Noise emission » [2] Type label USA [5] Before you go for the first ride [8] Technical information [2] Type label CAN [6] Vehicle emission [9] Exhaust system...
-
Page 101: Consumer Information For Usa Only
NOISE EMISSION WARRANTY KTM Sportmotorcycle AG warrants that this exhaust system, at the time of sale, meets all applicable U.S. EPA Federal noise standards. This warranty extends to the first per- son who buys this exhaust system for purposes other than resale, and to all subsequent buyers. - Page 102 10/2006 FOTO: MITTERBAUER KTM Group Partner KTM Sportmotorcycle AG A–5230 Mattighofen www.ktm.at...
Need help?
Do you have a question about the 990 ADVENTURE and is the answer not in the manual?
Questions and answers