BenQ W700 User Manual
Hide thumbs
Also See for W700:
- 3d instructions (6 pages) ,
- User manual (69 pages) ,
- Product service manual (137 pages)

Related Manuals for BenQ W700


Summary of Contents for BenQ W700
- Page 1 W700 / W710ST Digital Projector User Manual Welcome Downloaded From projector-manual.com BenQ Manuals...
-
Page 2: Table Of Contents
Adjusting the projected image .... 32 Magnifying and searching for details. 34 Playing 3D function......34 Selecting the aspect ratio...... 35 Optimizing the image......37 Hiding the image........41 Remote Receiver........41 My Screen..........41 Table of contents Downloaded From projector-manual.com BenQ Manuals... -
Page 3: Important Safety Instructions
To temporarily turn off the lamp, press BLANK on the projector or remote control. Important safety instructions Downloaded From projector-manual.com BenQ Manuals... - Page 4 When the projector is under operation, you may sense some heated air and odor from its ventilation grill. It is a normal phenomenon and not a product defect. Important safety instructions Downloaded From projector-manual.com BenQ Manuals...
- Page 5 Do not stand the projector on end vertically. Doing so may cause the projector to fall over, causing injury or 3000 m resulting in damage to the projector. (10000 feet) (0 feet) Important safety instructions Downloaded From projector-manual.com BenQ Manuals...
- Page 6 If you intend to mount your projector on the ceiling, we strongly recommend that you use a proper fitting BenQ projector ceiling mount kit and that you ensure it is securely and safely installed....
-
Page 7: Introduction
• The lamp brightness will decline over time and may vary within the lamp manufacturers specifications. This is normal and expected behavior. Introduction Downloaded From projector-manual.com BenQ Manuals... -
Page 8: Shipping Contents
Warranty card* Optional accessories Spare lamp kit Presentation Plus RS232 Cable Ceiling mount kit Soft Carry Case *The warranty card is only supplied in some specific regions. Please consult your dealer for detailed information. Introduction Downloaded From projector-manual.com BenQ Manuals... -
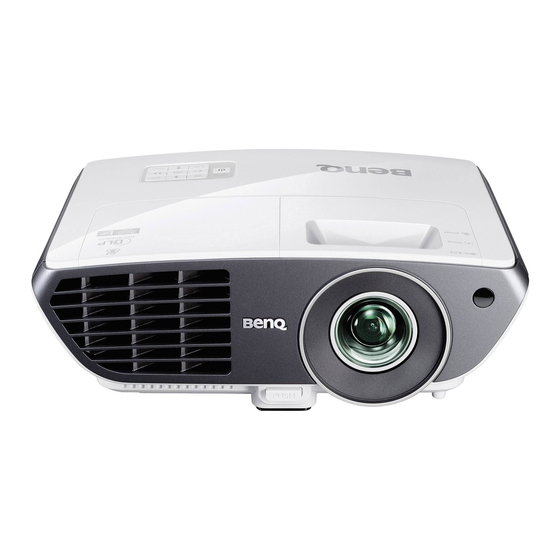
Page 9: Projector Exterior View
COMPUTER PC input jack RS-232 control port COMPONENT input jacks Rear adjuster foot Kensington anti-theft lock slot AUDIO input jack (R) AUDIO input jack (L) AUDIO input jack AUDIO output jack Quick-release foot AC power cord inlet Introduction Downloaded From projector-manual.com BenQ Manuals... -
Page 10: Controls And Functions
Manually corrects distorted images resulting TEMPerature indicator light from an angled projection. See "Correcting Lights up red if the projector's temperature keystone" on page 33 for details. becomes too high. See "Indicators" on page for details. Introduction Downloaded From projector-manual.com BenQ Manuals... -
Page 11: Remote Control
"Switching input signal" on "Selecting a Color Temperature" on page page 31 for details. for details. HDMI 1 INFO Displays the HDMI 1 source selection. See Starts the INFORMATION function. "Switching input signal" on page 31 details. Introduction Downloaded From projector-manual.com BenQ Manuals... - Page 12 Displays the test pattern. : Navigates and changes settings in the OSD. See "Using the menus" on page for details. : Manually corrects distorted images resulting from an angled projection. "Correcting keystone" on page 33 for details. Introduction Downloaded From projector-manual.com BenQ Manuals...
-
Page 13: Remote Control Effective Range
7 meters (~ 23 feet). Make sure that there are no obstacles between the remote control and the IR sensor on the projector that might obstruct the infra-red beam. Introduction Downloaded From projector-manual.com BenQ Manuals... -
Page 14: Replacing The Remote Control Battery
• If the battery is dead or if you will not be using the remote control for a long time, remove the battery to prevent damage to the remote control from possible battery leakage. Introduction Downloaded From projector-manual.com BenQ Manuals... -
Page 15: Positioning Your Projector
Rear Ceiling Select this location with the projector suspended upside- down from the ceiling behind the screen. Note that a special rear projection screen and the BenQ Projector Ceiling Mounting Kit are required for this installation location. Set Rear Ceiling in the SYSTEM SETUP: Basic >... -
Page 16: Obtaining A Preferred Projected Image Size
BenQ has provided a table of screen sizes to assist you in determining the ideal location for your projector. Refer to "W700/W710ST projection dimensions" on page 18. - Page 17 For example, if you are using a 120-inch screen, the W700 average projection distance is 4325 mm and with a vertical offset of 269 mm. the W710ST average projection distance is 2004 mm and with a vertical offset of 269 mm.
- Page 18 1494 4102 4325 4548 3810 3321 1868 5127 5406 5685 5080 4428 2491 6836 7208 7580 5588 4870 2740 7520 7929 8338 6350 5535 3113 8545 9010 9475 7620 6641 3736 10254 Positioning your projector Downloaded From projector-manual.com BenQ Manuals...
- Page 19 2347 3000 There is 5% tolerance among these numbers due to optical component variations. BenQ recommends that if you intend to permanently install the projector, you should physically test the projection size and distance using the actual projector before you permanently install it, so as to make allowance for this projector's optical characteristics.
-
Page 20: Connection
2. VGA cable or a function key with a 3. Audio cable monitor symbol on the notebook. Press FN and the labeled function key simultaneously. Refer to your notebook's documentation to find your notebook's key combination. Connection Downloaded From projector-manual.com BenQ Manuals... -
Page 21: Connecting Video Source Devices
Any stereo audio input (if provided), is mixed into a common mono audio output through the projector speakers. Connection Downloaded From projector-manual.com BenQ Manuals... -
Page 22: Connecting Hdmi Source Devices
Space" on page 31 for details. • If no signal is detected after establishing the connection, turn off the Quick Auto Search function in the SOURCE menu. See "Switching input signal" on page 31 for details. Connection Downloaded From projector-manual.com BenQ Manuals... -
Page 23: Connecting Component Video Source Devices
Component Video source device using HDMI Video connections, you need not connect to this device using a Component Video connection as this makes an unnecessary second connection of poorer picture quality. See "Connecting Video source devices" on page 21 for details. Connection Downloaded From projector-manual.com BenQ Manuals... - Page 24 S-Video source device using Component Video connections, you need not connect to this device using an S-Video connection as this makes an unnecessary second connection of poorer picture quality. See "Connecting Video source devices" on page 21 for details. Connection Downloaded From projector-manual.com BenQ Manuals...
-
Page 25: Connecting Composite Video Source Devices
You need only connect to this device using a composite Video connection if HDMI and Component Video and S-Video inputs are unavailable for use. See "Connecting Video source devices" on page 21 for details. Connection Downloaded From projector-manual.com BenQ Manuals... -
Page 26: Operation
"Timing chart" on page 65 for details. To maintain the lamp life, once you turn the projector on, wait at least 5 minutes before turning if off. Operation Downloaded From projector-manual.com BenQ Manuals... -
Page 27: Using The Menus
"AUDIO input jack (R)" on page 9 for details. A Kensington security cable lock is usually a combination of key(s) and a lock. Refer to the lock’s documentation for finding out how to use it. Operation Downloaded From projector-manual.com BenQ Manuals... -
Page 28: Utilizing The Password Function
Password: __ __ __ __ __ Keep this manual in a safe place. To leave the OSD menu, press MENU/EXIT. Operation Downloaded From projector-manual.com BenQ Manuals... -
Page 29: If You Forget The Password
BenQ Write down the number and turn off your Customer Center. projector. Seek help from the local BenQ service center to Recall code: decode the number. You may be required to 12345678 provide proof of purchase documentation to... -
Page 30: Disabling The Password Function
MENU/EXIT to cancel the change or try another password. Though the password function is disabled, you need to keep the old password in hand should you ever need to re-activate the password function by entering the old password. Operation Downloaded From projector-manual.com BenQ Manuals... -
Page 31: Switching Input Signal
Press MENU/EXIT and then press until the SOURCE menu is highlighted. Press to highlight Color Space Conversion and press to select the setting. This function is only available when the HDMI input socket is in use. Operation Downloaded From projector-manual.com BenQ Manuals... -
Page 32: Adjusting The Projected Image
3 seconds. • The screen will be blank while AUTO is functioning. • This function is only available when PC signal (analog RGB) is selected. Operation Downloaded From projector-manual.com BenQ Manuals... -
Page 33: Correcting Keystone
Off to disable Auto Press Press Keystone function. Press MENU/EXIT and then press DISPLAY until the menu is highlighted. Press to highlight Keystone and press MODE/ENTER. The Keystone correction page displays. Operation Downloaded From projector-manual.com BenQ Manuals... -
Page 34: Magnifying And Searching For Details
Video: standard NTSC/PAL DVD player to output 60Hz/50Hz movie. • 55% of the brightness will loss. To enjoy the 3D function, first enable the Play Movie in 3D setting found in your DVD devices under the 3D Disc Menu. Operation Downloaded From projector-manual.com BenQ Manuals... -
Page 35: Selecting The Aspect Ratio
Selecting the aspect ratio The 'aspect ratio' is the ratio of the image width to the image height. For W700/W710ST, the default aspect ratio is 16:9. Most analog TV and computers are in 4:3 ratio, and digital TV and DVDs are usually in 16:9 ratio. - Page 36 TV, as it displays them without aspect alteration. 16:10: Scales an image so that it is displayed in the center of the screen with a 16:10 aspect ratio. This setting stretches and resizes linearly. Operation Downloaded From projector-manual.com BenQ Manuals...
-
Page 37: Optimizing The Image
DVs through the PC input for best viewing in a blackened (little light) environment. User 1/User 2 mode: Recalls the settings customized based on the current available picture modes. See "Setting the User 1/User 2 mode" on page 38 for details. Operation Downloaded From projector-manual.com BenQ Manuals... -
Page 38: Adjusting Brightness
The higher the value, the greater the contrast. Use this to set the peak white level after you have previously adjusted the Brightness setting to suit your selected input and viewing environment. Operation Downloaded From projector-manual.com BenQ Manuals... -
Page 39: Adjusting Color
“color temperature”. A white color with a low color temperature appears to be reddish white. A white color with a high color temperature appears to have more blue in it. Operation Downloaded From projector-manual.com BenQ Manuals... - Page 40 Saturation is the amount of that color in a video picture. Lower settings produce less saturated colors; a setting of “0” removes that color from the image entirely. If the saturation is too high, that color will be overpowering and unrealistic. Operation Downloaded From projector-manual.com BenQ Manuals...
-
Page 41: Hiding The Image
SETUP: Basic > Remote Receiver menu. My Screen In addition to selecting the projector preset startup screen from among Black, Blue or BenQ screen, you can make your own startup screen that is an image projected from your computer or video source. - Page 42 In the unlikely event that the capturing action fails, change your target image. When Splash Screen Lock is activated, MyScreen cannot be enabled unless the correct password is entered every time when you attempt to capture a screen. Operation Downloaded From projector-manual.com BenQ Manuals...
-
Page 43: Freezing The Image
In cases like this, you should switch to High Altitude mode to solve these symptoms. However, this is not to state that this projector can operate under any and all harsh or extreme conditions. Operation Downloaded From projector-manual.com BenQ Manuals... -
Page 44: Adjusting The Sound
Off. The only way to change Power on/off ring tone is setting On or Off here. Setting the sound mute or changing the sound level will not affect the Power on/off ring tone. Operation Downloaded From projector-manual.com BenQ Manuals... -
Page 45: Personalizing The Projector Menu Display
Press POWER again to start the projector after the fans stop and the POWER indicator light turns orange. • Lamp life results will vary depending on environmental conditions, and usage. Operation Downloaded From projector-manual.com BenQ Manuals... -
Page 46: Menu Operation
Contrast Color Tint Sharpness 2. Brilliant Color On/Off PICTURE Color Warmer/Warm/Normal/Cool/ Temperature Cooler Primary color R/G/B/C/M/Y 3D Color Management Saturation Gain Save Settings Quick Auto Search On/Off 3. SOURCE Color Space Conversion Auto/RGB/YUV Operation Downloaded From projector-manual.com BenQ Manuals... -
Page 47: System Setup
Operation Quick Cooling On/Off Setting Disable/5 min/10 min/15 min/20 Blank Timer min/25 min/30 min Disable/30 min/1 hr/2 hr/3 hr/4 Sleep Timer hr/8 hr/12 hr Remote Receiver Front+Top/Top/Front Background Color Black/Blue/Purple Splash Screen BenQ/Black/Blue/MyScreen MyScreen Operation Downloaded From projector-manual.com BenQ Manuals... -
Page 48: Advanced Settings
Note that the menu items are available when the projector detects at least one valid signal. If there is no equipment connected to the projector or no signal detected, limited menu items are accessible. Operation Downloaded From projector-manual.com BenQ Manuals... -
Page 49: Description Of Each Menu
If input timings Vsync is higher than 95Hz, 3D Format grays out. 3D Format If input timings Vsync is lower than 95Hz, 3D Format supports Frame Sequential / Top-Bottom. 3D Sync Invert 3D sync. Invert Operation Downloaded From projector-manual.com BenQ Manuals... - Page 50 Save Settings Saves the settings made for User 1 or User 2 mode. Quick Auto "Switching input signal" on page 31 for details. Search Color Space "Changing Color Space" on page 31 for details. Conversion Operation Downloaded From projector-manual.com BenQ Manuals...
- Page 51 Selects background appearance when there is no signal. Background Color Allows you to select which logo screen will display during projector Splash start-up. Four options are available: BenQ logo, Black screen, Blue Screen screen, or MyScreen. Captures and stores the projected picture as MyScreen. MyScreen "My Screen"...
- Page 52 Returns all settings to the factory preset values. Reset All The following settings will still remain: Position, Phase, H. Size, Settings User 1, User 2, Projector Position, Language, High Altitude Mode, Security Settings, Baud Rate. Operation Downloaded From projector-manual.com BenQ Manuals...
- Page 53 Equivalent Lamp Hour Displays the number of hours the lamp has been used. Firmware Version Displays the firmware version of the projector. The INFORMATION menu shows you the current operating status of the projector. Operation Downloaded From projector-manual.com BenQ Manuals...
-
Page 54: Maintenance
Transporting the projector It is recommended that you ship the projector with its original packing or equivalent. When you carry the projector yourself, please use the original box or a suitable soft carry case. Maintenance Downloaded From projector-manual.com BenQ Manuals... -
Page 55: Lamp Information
. The time period can be set from 5 to 30 minutes in 5-minute increments. If the preset time lengths are not suitable for your presentation, select Disable. The projector will not automatically shut down in a certain time period. Maintenance Downloaded From projector-manual.com BenQ Manuals... -
Page 56: Timing Of Replacing The Lamp
55), you may continue to operate the projector until the next lamp warning appears. Lamp >XXXX Hours Order a new lamp at lamp.benq.com A new lamp should be fitted to avoid the Notice inconvenience when the projector runs out of lamp time. -
Page 57: Replacing The Lamp
• To assure optimal performance from the projector, it is recommended that you purchase a BenQ projector lamp for lamp replacement. Turn the power off and disconnect the projector from the wall socket. If the lamp is hot, avoid burns by waiting for approximately 45 minutes until the lamp has cooled. - Page 58 • Do not over tighten the screw. Replace the lamp compartment cover on the projector and tighten the captive screw. Restart the projector. Do not turn the power on with the lamp cover removed. Maintenance Downloaded From projector-manual.com BenQ Manuals...
- Page 59 Highlight Reset and press MODE/ ENTER. The lamp time will be reset to '0'. Do not reset if the lamp is not new or replaced as this could cause damage. Maintenance Downloaded From projector-manual.com BenQ Manuals...
- Page 60 Orange Green Green Green System events Green The projector has shutdown automatically. If you try to re- start the projector, it will shutdown again. Please contact your Green Green dealer for assistance. Green Orange Maintenance Downloaded From projector-manual.com BenQ Manuals...
-
Page 61: Troubleshooting
Stand within 7 meters (23 feet) of the projector. projector. The password is incorrect Cause Remedy Please see "Entering the password recall You do not remember the password. procedure" on page 29 for details. Troubleshooting Downloaded From projector-manual.com BenQ Manuals... -
Page 62: Specifications
9 pin x 1 Environmental Requirements Operating temperature 5°C–35°C at sea level Operating relative 10%–85% (without condensation) humidity • 0–1499 m at 5°C–28°C Operating altitude • 1500–3000 m at 5°C–23°C (with High Altitude Mode on) Specifications Downloaded From projector-manual.com BenQ Manuals... -
Page 63: Dimensions
330 mm (W) x 119.5 mm (H) x 247 mm (D) 330.0 119.5 58.5 60.0 *Ceiling Mount Screws: Ceiling Mount Installation M4 x L8 (Max. L=12, Min. L=8) 173.7 47.3 121.5 127.0 Unit: mm Specifications Downloaded From projector-manual.com BenQ Manuals... -
Page 64: Timing Chart
75.000 XGA_70 60.023 75.029 78.750 XGA_75 1024 x 768 68.667 84.997 94.500 XGA_85 VESA DMT14 97.551 119.989 115.5 120Hz* 45.000 60.000 74.250 1280 x 720_60* 1280 x 720 90.000 120.000 148.50 1280 x 720_120* Specifications Downloaded From projector-manual.com BenQ Manuals... - Page 65 1024 x 768@75Hz 60.240 75.020 80.000 MAC19 1152 x 870@75Hz 68.68 75.06 100.000 MAC21 1024 x 576@60Hz 35.82 46.996 1024 x 576-GTF 1024 x 600@60Hz 37.32 48.964 1024 x 600-GTF * Supported timing for 3D function. Specifications Downloaded From projector-manual.com BenQ Manuals...
- Page 66 Video mode Horizontal Vertical Color sub-carrier Frequency Frequency Frequency (kHz) (Hz) (MHz) NTSC* 15.73 3.58 PAL* 15.63 4.43 SECAM 15.63 4.25 or 4.41 PAL-M 15.73 3.58 PAL-N 15.63 3.58 PAL-60 15.73 4.43 NTSC4.43* 15.73 4.43 Specifications Downloaded From projector-manual.com BenQ Manuals...
- Page 67 WXGA_75 71.554 84.880 122.500 WXGA_85 63.981 60.020 108.000 SXGA_60* 1280 x 1024 79.976 75.025 135.000 SXGA_75 91.146 85.024 157.500 SXGA_85 60.000 60.000 1280 x 960_60* 1280 x 960 85.938 85.002 148.500 1280 x 960_85 Specifications Downloaded From projector-manual.com BenQ Manuals...
- Page 68 74.25 1080i_60 67.5 148.5 1080p 56.26 148.5 1080p 74.25 1080P@24Hz 28.12 74.25 1080P@25Hz 33.75 74.25 1080P@30Hz Displaying a 1080i_50 or 1080i_60 signal may result in slight image vibration. * Supported timing for 3D function. Specifications Downloaded From projector-manual.com BenQ Manuals...
-
Page 69: Warranty And Copyright Information
Proof of purchase date will be required with any warranty claim. In the event this product is found to be defective within the warranty period, BenQ's only obligation and your exclusive remedy shall be replacement of any defective parts (labor included). To obtain warranty service, immediately notify the dealer from which you purchased the product of any defects.
Need help?
Do you have a question about the W700 and is the answer not in the manual?
Questions and answers