Table of Contents
Advertisement
Quick Links
Advertisement
Table of Contents

Summary of Contents for Spot-on General A3 PRO
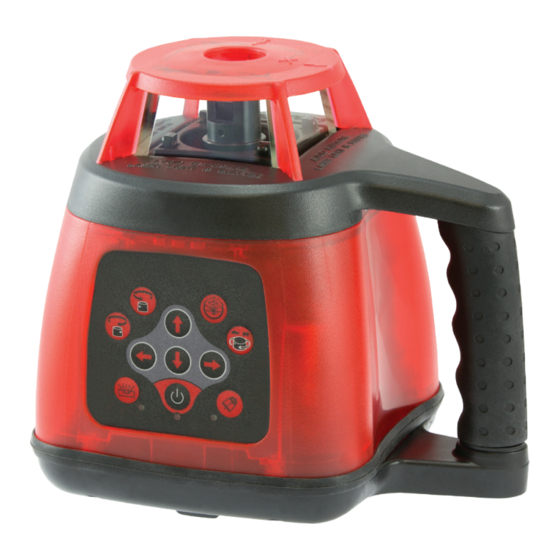
- Page 1 A3 PRO Red Rotary Laser SPECIAL EDITION INSTRUCTION MANUAL...
- Page 2 SAFETY Please read this instruction manual before operating this product. Please store this instruction manual in the carry case for future reference. CAUTION: Class 2 Laser Product Do not stare directly into the laser beam from apertures. Do not disassemble the instrument or attempt to perform any internal servicing as this will void your warranty.
-
Page 3: Item Checklist
Please ensure the following items are included with your laser. If anything is missing please contact your retailer. 90° 45° 10° INCHES 180° Remote control Detector and clamp Wall mount Laser target Laser glasses Carry case General A3 PRO Charger Rechargeable battery pack... -
Page 4: Product Overview
PRODUCT OVERVIEW Protective lighthouse Rotating laser port Control panel... -
Page 5: Control Panel
CONTROL PANEL Y-axis up / down Scanning mode Counter clockwise rotation 90° 45° 10° 180° Speed control Clockwise rotation X-axis up / down X-axis up / down Y-axis up / down Manual / automatic mode Tilt alarm Tilt alarm indicator Manual / automatic mode indicator Power indicator Power... - Page 6 DETECTOR CONTROL PANEL LCD display screen Sound on / off Laser sensor Coarse / fine mode Power Speaker...
-
Page 7: Remote Control Panel
REMOTE CONTROL PANEL Button indicator Speed control Scanning mode 90° 45° 10° 180° Manual / automatic mode Counter clockwise rotation Clockwise rotation Y-axis up / down X-axis up / down X-axis up / down Y-axis up / down... -
Page 8: Using Your Laser
USING YOUR LASER Power Supply ‣ The General A3 PRO is supplied with a rechargeable Ni-MH battery pack that is located in the base of the unit. ‣ It is recommended that the battery pack be completely charged before use. - Page 9 Horizontal Set Up ‣ Select a place as close as practical to the work site. Ensure the location is clear of traffic. ‣ Attach the laser to a tripod and place on a level surface. Ensure the unit is secured correctly and tightened in position. Vertical Set Up ‣...
- Page 10 Operation ‣ To turn the unit on press the power button. Self levelling will commence and the laser will begin to rotate. ‣ If the unit is outside the self levelling range the unit will not level causing the laser beam to flash continuously. Speed control ‣...
- Page 11 Tilt alarm ‣ Once the unit has been levelled off the tilt alarm can be enabled by pressing the tilt alarm button. The tilt alarm indicator light will flash for approximately 15 seconds. Once the light is constant the alarm is enabled. ‣...
- Page 12 Using Your Detector ‣ Switch the detector on by pressing the power button. The speaker will beep once indicating the unit is operating. ‣ The LCD screen will display the battery level, detection mode and speaker function. ‣ To change between coarse and fine mode press the coarse / fine mode button ‣...
- Page 13 Using Your Remote ‣ Ensure the unit is turned on and the laser is rotating. ‣ Press the speed control button to increase or decrease the speed of the lasers rotation. ‣ To focus the laser beam between two points press the scanning mode button.
-
Page 14: Checking Calibration
‣ Detect and note laser position on the wall or staff. ‣ Calculate the distance between the two readings. ‣ The difference should be within 6mm at 30m. ‣ If the unit is out of calibration it is advised to send it in to Spot-on. (see www.spoton.com.au for details) -
Page 15: Troubleshooting
TROUBLE SHOOTING Laser does not turn on ‣ Check the batteries. They may be in the wrong way or need replacing. ‣ Check the battery compartment for signs of damage. Ensure they are clean and not bent. ‣ Connect the main power adaptor. Laser turns on but does not rotate ‣... - Page 16 Detector does not detect the laser beam ‣ Check the batteries. ‣ Check that the laser is operating correctly. Detector speaker is not functioning ‣ Check sound is on. ‣ Check the laser is operating correctly and producing a beam.
-
Page 17: Care And Maintenance
CARE AND MAINTENANCE ‣ Reflective surfaces such as glass may reflect the beam, causing two beams to strike the detector at the same time. This may create inaccurate reference points. ‣ This is a precision instrument and should always be transported within the carry case provided. -
Page 18: Warranty
WARRANTY The General A3 PRO comes with a 3 year manufacturers warranty. Our goods come with guarantees that cannot be excluded under the Australian Consumer Law. You are entitled to a replacement or refund for a major failure and for compensation for any other reasonably foreseeable loss or damage. You are also entitled to have the goods repaired or replaced if the goods fail to be of acceptable quality and the failure does not amount to a major failure. -
Page 19: Specifications
SPECIFICATIONS Specifications General A3 PRO Product code 70046 Warranty 3 Years Accuracy ±2mm at 30m Range 300m Levelling range ±9% / ±5° Laser class 2 Red Battery life 20 hours Battery type 4x C (sealed pack) IP rating Weight (kg) 1.85... - Page 20 www.spoton.com.au...

Need help?
Do you have a question about the General A3 PRO and is the answer not in the manual?
Questions and answers