Ikelite SLR-DC Housing Quick Start
For 6812.75 nikon d750
Hide thumbs
Also See for SLR-DC Housing:
- Instruction manual (32 pages) ,
- Quick start manual (2 pages) ,
- Instruction manual (7 pages)
Advertisement
Quick Links
Download this manual
See also:
Instruction Manual
This Quickstart Guide will give you the basic information necessary to begin shooting underwater photo/video.
It is highly recommended that you also read your Ikelite housing manual and camera owner's manual.
1. Initial Camera Setup -
made before placing the camera in the housing.
-
Insert a fully charged battery and SDHC memory card(s).
-
Set the mode dial to "A" Aperture Priority. Set aperture to F8 for general
photography or F22 for macro photography (close-ups). Shutter speed is
locked at 1/60th second with a DS strobe attached and turned on. If a faster
shutter speed is desired, set Mode Dial to "M" manual. Maximum
recommended shutter speed is 1/250th second.
-
Set ISO Sensitivity to "200" and Metering to "Center-weighted."
-
Set Focus Mode Selector to "AF."
-
Set Focus Point to the center and rotate focus selector to "L."
-
In the
Photo Shooting Menu:
Set Image Quality to "JPEG Fine" and Image Size to "L" Large.
Set JPEG Compression to "Optimal Quality."
Set White Balance to "AUTO1." For best results set to "Preset manual" and
reset for each working depth.
Set Picture Control to "SD Standard."
Set Active D-Lighting, HDR and Vignette control to "OFF."
Set Auto Distortion Control and Long Exposure NR to "OFF."
-
In Custom Settings Menu:
Set AF-S priority selection to "Release" & AF point illumination to "ON."
Set Built-in AF-assist illuminator to "Off" and LCD illumination to "ON."
-
In the Setup Menu:
Set Time Zone and Date.
Set Save user settings to "U1."
Note: The camera's internal flash cannot be used while in the housing. This
housing is designed for use with an external strobe only. Use the Flash
Mode & Compensation Dial on the housing back to adjust flash duration.
Red-eye reduction should be off when connected to a strobe.
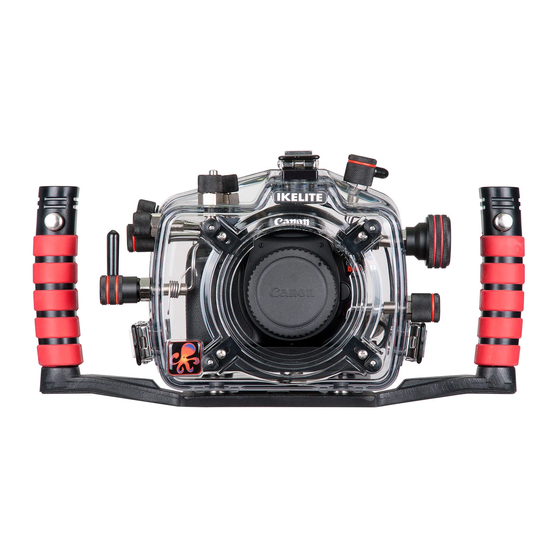
2. Attach Tray with Handles to Housing
-
Use hardware and instructions located in the clear Ikelite pouch.
3. Open the Housing and Remove the Housing Back
To open the housing, carefully open each Lid Snap. Lid Snaps have a Lock.
-
To open, push Lid Snap Lock forward and lift as shown (Diagram A). Keep
pressure on each Lid Snap so it does not fly open quickly.
4. Attach the Hotshoe and Camera Mounting Bolt
-
Slide the Hotshoe Connector forward onto the camera flash mount until it
stops (Diagram B). Hotshoe Connector should be attached before the
camera is secured with the mounting bolt.
-
Position the camera and lens on the camera tray, and then secure it with the
mounting bolt which threads into the camera's tripod socket (Diagram C).
Use a flathead screwdriver (recommended) or coin to tighten the mounting
bolt so the camera bottom is flush against the tray.
The Leveling Screw is factory preset and does not need to be adjusted.
5. Install Camera in Housing and Close Housing
-
Before installing the camera, make sure housing control levers are out of the
way. Pull out on the controls in the front section of the housing, or point them
forward away from the back. This will allow the camera to slide in easier.
Once the camera is installed and the lid snaps have been closed, return the
controls to their operating position.
-
CHECK each housing control's operation.
-
CHECK the main housing o-ring seal (should appear as a dark line around
the housing back).
-
CHECK Lid Snap Locking Tabs. Make sure they are flipped up (Diagram A).
S LR-DC Housing
Q u i c k s t a r t G u i d e
the following camera settings should be
6812.75 Nikon D750
Diagram A
Diagram B
Housing
Back
Diagram C
Housing
Front
Diagram D
Push Forward
Lid Snap Locking Tab
Lift
Hotshoe Connector
Housing Back
Camera
Leveling
Screw
Tray
IKELITE
Gear
Sleeve
Zoom
Clamp
IKELITE
External Strobe
Connector and
Waterproof Cap
FX
Mounting
Bolt
Port Lock
Zoom Control
When using Zoom
Control, mesh
Gear Sleeve teeth
with Black Housing
Drive Gear
Advertisement

Related Manuals for Ikelite SLR-DC Housing


Summary of Contents for Ikelite SLR-DC Housing
- Page 1 6812.75 Nikon D750 This Quickstart Guide will give you the basic information necessary to begin shooting underwater photo/video. It is highly recommended that you also read your Ikelite housing manual and camera owner’s manual. 1. Initial Camera Setup - the following camera settings should be made before placing the camera in the housing.
-
Page 2: Photo Tips
7. Using an Ikelite DS-series Strobe (Diagram F) Attach your Ikelite DS-series strobe and arm combination to the top of a housing handle. Depress the Handle Push Button and drop the open arm end into the handle. The Push Button will return to it’s starting position when the arm is properly locked-in.