Ikelite SLR-DC Housing Instruction Manual
Slr-dc housing for canon eos digital rebel t2i, canon eos 550d, canon kiss x4
Hide thumbs
Also See for SLR-DC Housing:
- Instruction manual (32 pages) ,
- Quick start (2 pages) ,
- Quick start manual (2 pages)
Table of Contents
Advertisement
Quick Links
Download this manual
See also:
Instruction Manual
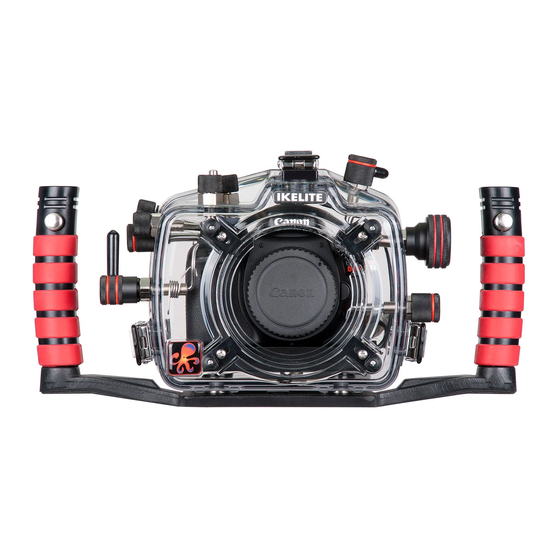
Ikelite SLR-DC Housing
i n s t r u c t i o n m a n u a l
#6871.55 for anon EOS Digital Rebel T2i,
anon EOS 550D, anon Kiss X4,
Port Lock
Congratulations on your purchase of an Ikelite Digital Camera
Housing. Ikelite has decades of experience in the underwater
photographic and lighting market. Our products are designed and
built in the USA by Ikelite for both the professional and amateur
photographer.
The clear housing permits instant visual inspection of the camera
and all sealing surfaces as well as complete monitoring of controls
and camera LCD screens.
This housing has been water pressure tested at the factory to 200'
(60m).
Lid
Snap
Mode Dial
Live View/
Movie Shooting
AE/FE Lock
Back O'ring
Camera Tray
Camera
Mounting
Bolt
Initial Camera Setup
- Insert a fully charged battery.
- Insert memory card (1 GB or greater capacity recommended).
- Set the mode dial to "M" manual.
- Set shutter speed to 1 /60th second or 1 /1 25th second for fast
moving subjects.
- Set aperture to F8 for general photography or F22 for macro
photography (close-ups).
- Set Quality to highest jpeg setting "L" or RAW.
- Set ISO to 1 00 and Meter to "center-weighted".
- Disable "LCD auto-off" in the camera menu settings.
- If using auto-focus in "Live-View", use "Quick-Mode".
NOTE: Auto-focus will not be as good in "Live-View" mode.
IKELITE
ISO
Main Dial
Power
Switch
Gear
Sleeve
Shutter
Release
Port
O'ring
SIDE VIEW
3
Shutter
Release
Lid
Snap
FRONT VIEW
Quick
Release
Button
Lens
Release
[A]
External Strobe Connector
and Waterproof Cap
[B] Menu Button
[C] Display Button
BACK VIEW
Initial Camera Setup (cont.)
- Disable "Auto Lighting Optimizer".
- Set auto-focus mode to "One Shot".
- Set "Hightlight Tone Priority" to "OFF".
- Disable "Red-eye reduction".
Optional
Port
- Set "Auto power off" to 4 minutes.
Disable LCD Auto Off Before Installing the Camera
If the LCD Auto Off is Enabled, the LCD will turn Off when
the camera is installed in the housing. To use the LCD when
the camera is in the housing, go to the camera menu and set
LCD Auto Off to the Disable Mode.
Opening the Housing
Lid Snaps have a Lock. To open, push Lid Snap Lock forward and
lift as shown. Keep
pressure on the Lid
Snap so it does not
fly open quickly.
Some lid snaps have
a lot of spring
tension once they go
over center, so have
a firm grip on the lid
snap. Lid Snaps may
be opened one at a
time.
Lid
Flash Button
Main-dial
Mode-dial
Snap
Power Switch
IKELITE
Port Lock
Gear Sleeve
Drive Gear
Port
Opening
Aluminum Tray
Viewfinder Port
Zoom
Control
D
B
C
E
G
A
I
[D] Live View/Movie Shooting
[E] "Av"Aperture, +/-
[F] AF Point Select, Magnify
[G] Quick Control Button
2
Push Forward
Lift
4
Quick-Release
Strobe Arm
Zoom
Mount
Control
Lens
Release
Rubber
Handle
Lid
Snap
Strobe
Mount
AEL/
AFL
F
H
Lid
Snap
J
K
[H] Cross Keys
[ I ] Playback Button
[J] Erase Button
[K] TTL Mode Buttons
Lid Snap Lock
Advertisement
Table of Contents

Related Manuals for Ikelite SLR-DC Housing


Summary of Contents for Ikelite SLR-DC Housing
-
Page 1: Opening The Housing
Our products are designed and Lens Snap Release built in the USA by Ikelite for both the professional and amateur photographer. The clear housing permits instant visual inspection of the camera and all sealing surfaces as well as complete monitoring of controls... -
Page 2: Installing The Camera
Installing the Camera Flash Connection for External Strobes When using an external strobe, connect the housing hotshoe Remove the back from the housing. The mounting tray for the camera is secured to the housing back. Position the camera and connector. Slide the connector into the hotshoe mount on the lens on the tray, and camera from the back of the camera as shown. - Page 3 Install the black Zoom Clamp on the Lens Zoom Ring and lower Manual Focusing Note: the lens into the housing opening. Make sure the Zoom Clamp Ikelite DSLR housings are designed for auto-focus DSLR grooved tabs align with the Gear Sleeve ribs. If necessary, Type 2 Installation: Figure 1 cameras and lenses.
-
Page 4: Installing The Port
A lens port must be secured to the housing before entering the audible "click" to indicate that the lock is engaged. water. Ikelite DSLR housings DO NOT come with a lens port. You must select the correct port for each lens you will be using Check around the perimeter of the port seal to see that the o’ring is properly sealed and not extruded (See Fig 2 - page 14). - Page 5 NOTE: The EV-Controller cannot be used as a slave. If hard-wired To Update Your Substrobe: to the housing, set the EV-Controller to Non pre-flash. Send to the Ikelite address on the back page of this manual or contact Ikelite for more information.
-
Page 6: Optional Accessories
Housing Accessory Mounting Points The top of the SLR-DC housing features a 1 /4-20 threaded mounting point for the attachment of a focus light, video light or other lightweight accessories. -
Page 7: Ikelite Limited Warranty
General Housing Maintenance General Tips Your Ikelite Housing should be given the same care and attention 1 . You should completely assemble and test your system in a as your other photographic equipment. In addition to normal swimming pool before using it in open water.
Need help?
Do you have a question about the SLR-DC Housing and is the answer not in the manual?
Questions and answers