
Subscribe to Our Youtube Channel
Related Manuals for Chromalox HD3D


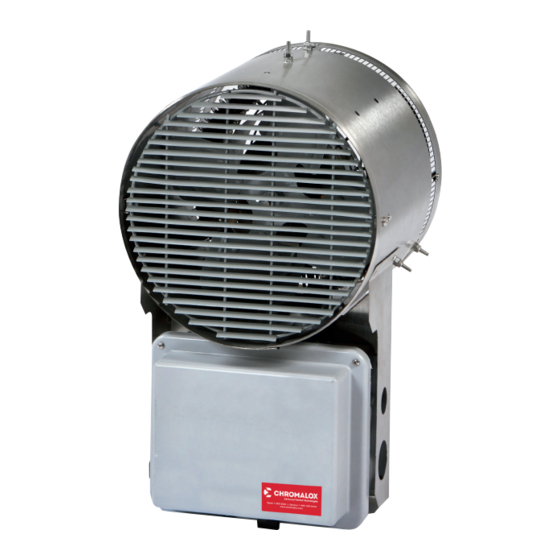
Summary of Contents for Chromalox HD3D
- Page 1 Installation, Operation and Maintenance Instructions HD3D Forced-Air Heater Corrosion Resistant/Hose Down PF200-8 161-305521-001 January 2015...
-
Page 2: Table Of Contents
Table of Contents Section Page 1. Warnings ..........................3 2. Optional Equipment ......................4 3. Package Contents ........................ 4 4. Mounting Instructions ......................5 5. Standard “L” Bracket Installation ..................6 6. Wiring ........................... 7 7. Operation..........................9 8. Maintenance ........................10... -
Page 3: Warnings
Chromalox does not guarantee its products against National Electrical Code, NFPA 70. corrosion. To ensure proper operation and service life, contact your local Chromalox sales office for applica- tion assistance. General Information Dimensions... -
Page 4: Optional Equipment
• Universal Swivel Bracket - Field installed (See Item Quantity Description PF926 for installation instructions) HD3D Unit Heater • Drip Shield - Field installed (See PF927 for installa- Standard Mountng Bracket tion instructions) Aside from mounting brackets, unit heaters with factory installed •... -
Page 5: Mounting Instructions
Mounting Instructions Ceiling Heater Location Instructions: Arrange units so their discharge air streams: 9" (23 cm) Ceiling A. Are subjected to minimum interference from col- Min. umns, machinery and partitions. B. Wipe exposed walls without blowing directly at 9" (23 cm) them. -
Page 6: Standard "L" Bracket Installation
Standard “L” Bracket Installation 1. While securing bottom set of lock nuts, completely • Figure 4 shows typical installation dimensions remove top set. meeting minimum requirements. Standard Non-Swivel Brackets 120˚ 120˚ A Typ Figure 3 Dimensions 2. Install “L” bracket so that the slot is oriented toward A Radius the back (inlet) of the heater and secure using top Inches (cm) -
Page 7: Wiring
Wiring Instructions Note: All electrical wiring must be done according to 1. Check all factory wiring for loose connections. It is National Electrical and local codes by a qualified per- possible for connections to become loose during son. shipping. 2. Connect heater according to the voltage and fre- quency specified on the nameplate. -
Page 8: Wiring Diagrams
PRIMARY 1PH ELEMENT WIRING FOR VOLTAGE TERMINAL SEE HEATER BLOCK 120V 1 PHASE HD3D-200 & HD3D 300 120V 1Ø HD3D-200 and HD3D 280-277V 1Ø 1PH ELEMENT WIRING 3PH ELEMENT WIRING BUILT IN OR REMOTE THERMOSTAT REMOVE JUMPER WHEN 2T 6T... -
Page 9: Operation
Pri. XFMR Lead Clrs. 120V Sec. Lead Clrs. 24V Sec. Lead Clrs. BLK/RED HD3D-500TSP thru HD3DTSP-4000 Operation With proper installation this heater will provide efficient 5. Disconnect: To disconnect the heater, turn lever in and dependable service. Please read the following the clockwise direction until you hear a click. -
Page 10: Maintenance
Maintenance 1. Turn off heater and allow to cool before performing these maintenance procedures. Turn off power to service heater. Do not at- 2. Fan motors in these heaters are provided with tempt to service or clean heater while unit is sealed ball bearings, factory lubricated, requiring no operating as there is hazard of electric shock, further lubrication under normal service conditions. - Page 11 Figure 12 Elements Heater 120 Volt 208 Volt 240 Volt 277 Volt 480 Volt 575 Volt 118-305471-001 118-305471-002 118-305471-004 118-305471-005 Not Available Not Available 118-305471-006 118-305471-007 118-305471-009 118-305471-010 Not Available Not Available 118-305471-011 118-305471-013 118-305471-014 118-305471-019 Not Available 118-305471-020 118-305471-022 118-305471-023 118-305471-028 118-305471-024 118-305471-101 118-305471-103 118-305471-104...
- Page 12 4. Disconnect switch includes handle, face plate, gasket and mounting hardware. 5. 690V Heaters - contact factory for replacement parts. Limited Warranty: Please refer to the Chromalox limited warranty applicable to this product at http://www.chromalox.com/customer-service/policies/termsofsale.aspx. Chromalox, Inc. 1347 Heil Quaker Boulevard...
Need help?
Do you have a question about the HD3D and is the answer not in the manual?
Questions and answers