Table of Contents
Advertisement
Advertisement
Table of Contents

Related Manuals for Medeli DD401


Summary of Contents for Medeli DD401
- Page 1 VOLUME aw_DD401_Manual_G02_130717 2013 10:54:04...
- Page 2 INFORMATION FOR YOUR SAFETY! PRECAUTIONS THE FCC REGULATION WARNING (for USA) This equipment has been tested and found to comply with PLEASE READ CAREFULLY BEFORE PROCEEDING the limits for a Class B digital device, pursuant to Part 15 of the FCC Rules. Please keep this manual in a safe place for future reference.
-
Page 3: Table Of Contents
Contents Panel & Display Description Selecting the Click Voice...........11 Front Panel..............4 Setting the Time Signature........12 Rear Panel..............4 Setting the Interval............12 QUICK START Playing Back Pattern About Patterns............13 Setup Selecting a Pattern............13 Connecting Pads and Pedals........5 Playing Back a Pattern..........13 Adjusting the Pattern Volume........13 Connections Connecting an Audio Equipment.........6 Practicing in Coach Mode... -
Page 4: Panel & Display Description
Panel Description Front Panel 1. POWER Button Use this button to turn the drum module on and off. 2. VOLUME Knob Adjusts the volume of headphone and line output. VOLUME 3. CLICK Button Turn the metronome on or off. 4. START/STOP Button Start or stop playing patterns. -
Page 5: Setup
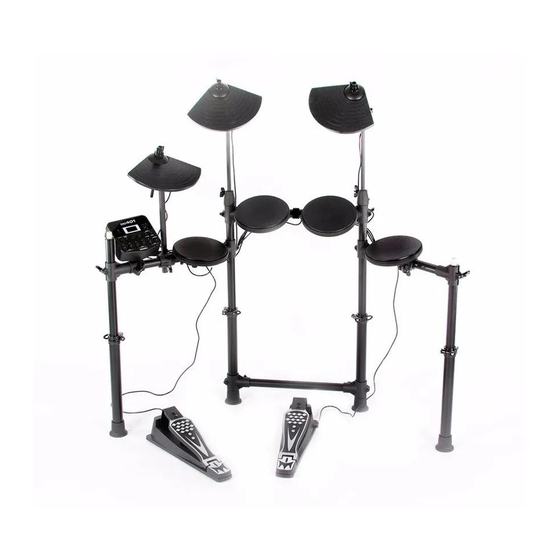
Setup Caution! To prevent electric shock and damage to the device, make sure the power is switched OFF on the drum and all related devices before making any connection. Connecting Pads and Pedals Standard: KICK, SNARE, TOM1-3, CRASH, RIDE, HI-HAT and HI-HAT PEDAL. Using the provided cables to connect with kick pedal, snare, tom1~tom3, ride, crash, hi-hat and hi-hat pedal. -
Page 6: Connections
Connections Connecting an Audio Equipment When using an amplifier, connect the Output L/MONO and R jacks on the rear panel to the input jack of the amplifier. Note: Turn off the power of all devices before you make connections. For mono playback, use the L/MONO jack. For stereo playback, connect both L/MONO and R jacks. -
Page 7: Performing
Performing Operation Feature Enter the Volume Page Double click the corresponding buttons, enter the Volume pages. For example: Double click the [PATTERN] button to enter pattern volume page. Double click the numeric button [1] ~ [5] to enter kit volume page. Double click the [CLICK] button to enter click volume page. -
Page 8: Playing Along With Patterns
Performing Playing along with Patterns There are 30 patterns in this drum module. Press the [PATTERN] button to enter pattern menu. The [PATTER]’s LED will be lighten. Press the [+] or [-] button to adjust the pattern number. Press the [START/STOP] button to start/stop pattern playing. For details on patterns playing, refer to ADVANCED USE. -
Page 9: Coach/Beat Check
Performing Coach/Beat Check Beat Check type is designed for training your accurate beat with metronome. Press the [PATTERN] and [TEMPO] buttons simultaneously, you can enter the coach mode. The LED of [PATTERN] and [TEMPO] buttons will be lighted. In coach mode, press the [1] button. Select the Beat Check training type. -
Page 10: Playing With Drum Kit
Playing with Drum Kit About the Drum Kits It is very easy to select a drum kit to play. What’s more, you can also adjust the volume of each kit. There are 10 kits in this digital drum. Selecting a Drum Kit Press the numeric button [1] ~ [5] with [VARIATION] button to select a drum kit. -
Page 11: Setting The Metronome
Setting the Metronome About Metronome Operation Menu Display The digital drum is equipped with a built-in metronome, which can be [CLICK]+[1] Click Voice CL1~CL5 used as a rhythm guide for practice, or in conjunction with the pattern [CLICK]+[2] Time Signature 1-2,2-2,3-4,4-4,6-8 playback. -
Page 12: Setting The Time Signature
Setting the Metronome Setting the Time Signature Press the [CLICK] and [2] buttons simultaneously, the time signature page will be selected. Press the [+] or [-] button to change the current time signature. There are 5 types you can choose: 1-2, 2-2, 3-4, 4-4 and 6-8, the default value is 4-4. -
Page 13: Playing Back Pattern
Playing Back Pattern About Patterns There are 30 preset patterns in this digital drum, please refer to the Pattern List for details. In Pattern mode, you can select the pattern number and adjust the volume of the pattern. Selecting a Pattern Press the [PATTERN] button to enter pattern mode. -
Page 14: Practicing In Coach Mode
Practicing in Coach Mode About Coach Mode The Coach mode is a unique set of exercises. Specifically designed for those learners who want to improve their tempo, accuracy and stamina, as well as developing a better drum skill. According to you present skills, you can select an appropriate coach type to practice. -
Page 15: Beat Check
Practicing in Coach Mode After the Beat SLOW (After the Beat) If the time point of your hitting is later than the standard beat, the LED of [1] or [2] button will flashing for a moment in red. You need to speed 1. -
Page 16: Gradual Up/Down
Practicing in Coach Mode Gradual up/down In gradual up/down type, you can see how fast you can go and still maintain accurate timing. Practicing with metronome in all sorts of time signature and intervals. As you play along with a metronome, the drum will automatically increase the tempo if your timing is good and decrease it if not. -
Page 17: Change Up
Practicing in Coach Mode Change UP In change up type, you can choose one rhythm group to practice with. Rhythm Display Description Maintain good timing as you play along with up to three different Group practice rhythms that change every two measures. And the display will 2-4-8-3-16 flash for times when the rhythm is ready to change. -
Page 18: Follow Me
Practicing in Coach Mode For example: Practice in P-1 Select the Change Up. Press the [PATTERN] and [TEMPO] buttons simultaneously to enter Coach mode. Press the [3] button to select change up type. Press the [START/STOP] button to enter preparation. Press the [1] button to select “P-1”... -
Page 19: Drum Mute
Practicing in Coach Mode Drum Mute In drum mute type, there are 30 patterns to practice from easy to hard. In this mode, the numeric buttons [1] ~ [5] and the [VARIATION] button stand for one part of drum. These buttons can be used to open or mute drum’s play.(As described in the table) One part of drum is muted when its corresponding LED light up. -
Page 20: Making The Setting For Midi
Making the Settings for MIDI About MIDI MIDI (Musical Instrument Digital Interface) is a standard that allows performance data and other information to be exchanged among electronic musical instruments and computers. With a MIDI cable connecting MIDI connectors equipped device, you can play multiple instruments with a single electronic musical instrument, have multiple instruments perform in ensemble, program the settings to change kits automatically to match the performance as the song progress, and more. -
Page 21: Troubleshooting
Troubleshooting Problem Possible Cause and Solution No Sound Rotate the [VOLUME] knob to be sure that the volume isn’t down. No Sound from Pads To be sure that the pad is connected correctly. To be sure not set the volume of the pad to 0 No Click Sound To be sure not set the volume of the click to 0. -
Page 22: Kit List
Kit List PRESET KIT Acoustic Funk JazzBrush Rock FX Mix Marimba Indian Percussion aw_DD401_Manual_G02_130717 2013 10:54:09... -
Page 23: Gm Kit List
GM Kit List Note No. Standard (bank 00) Funk (bank 08) Rock (bank 16) Electric (bank 24) Brush (bank 40) 27-D#1 High Q <- <- <- <- 28 E1 Slap <- <- <- <- 29-F1 Scratch Push <- <- <- <- 30-F#1 Scratch Pull... -
Page 24: Gm Backing Instrument List
GM Backing Instrument List aw_DD401_Manual_G02_130717 2013 10:54:10... -
Page 25: Pattern List
Pattern List Name Type Name Type Fusion1 Loop Fusion3 Loop Dance Funk Loop Pop Shuffle Loop Modern Pop Loop Mambo Loop Hip Hop Loop Pop Bossa Loop Dance Loop 3/4 Jazz Loop Classic Rock Loop Rock Loop 6/8 Ballad Loop Pop Funk Loop Country Pop... -
Page 26: Loop List
Loop List Number Name Loop 1 Loop 2 Loop 3 Loop 4 Loop 5 Loop 6 Loop 7 Loop 8 Loop 9 Loop 10 Loop 11 Loop 12 aw_DD401_Manual_G02_130717 2013 10:54:10... -
Page 27: Midi Implementation Chart
MIDI Implementation Chart aw_DD401_Manual_G02_130717 2013 10:54:10... - Page 28 DD401_G02 aw_DD401_Manual_G02_130717 2013 10:54:10...
Need help?
Do you have a question about the DD401 and is the answer not in the manual?
Questions and answers