Table of Contents
Advertisement
MB-3 USER INSTRUCTION MANUAL
User Manual
Preface
This publication, including all photographs, illustrations and software, is
protected under international copyright laws, with all rights reserved. Neither
this manual, nor any of the material contained herein, may be reproduced
without the express written consent of the manufacturer, April 2011.
Trademarks
Other product names mentioned herein are used for identification purpose
only and may be trademarks and/or registered trademarks of their respective
companies.
Limitation of Liability
While reasonable efforts have been made to ensure the accuracy of this
manual, the manufacturer and distributor assume no liability resulting from
errors or omissions in this manual, or from the use of the information
contained herein.
1
Advertisement
Table of Contents

Related Manuals for ViseeO MB-3


Summary of Contents for ViseeO MB-3
- Page 1 MB-3 USER INSTRUCTION MANUAL User Manual Preface This publication, including all photographs, illustrations and software, is protected under international copyright laws, with all rights reserved. Neither this manual, nor any of the material contained herein, may be reproduced without the express written consent of the manufacturer, April 2011.
- Page 2 Moreover, it supports play digital music stored in your mobile phone via Bluetooth A2DP profile and with an iPhone/iPod cable to play iPhone/iPod music. Although ViseeO MB-3 is very easy to install and operate it is still recommended that you read all chapters in this manual before starting to use the adaptor.
- Page 3 (For detailed instruction please see Section 3.2 Pairing for the First Time) 1. Press the middle key [MENU] on MB-3. 2. MB-3 should display [BLUETOOTH] if not press the right key [ ] to select it. 3. Press the middle key [SETUP] to setup Bluetooth.
- Page 4 Section 5.3 Enable iPhone/iPod Music Play Function) 1. Connect the wired remote control. 2. Plug the ViseeO Music Cable for iPod/iPhone into the mini USB port at the bottom of MB-3. 3. Connect your iPod/iPhone with the ViseeO Music Cable.
-
Page 5: Table Of Contents
1. Understanding Your MB-3................6 1.1 Package Contents ......................6 1.2 MB-3 Main Unit & Descriptions..................7 1.3 MB-3 OLED Display & Main Screen Icon Descriptions............7 1.4 MB-3 Keypads and Functions ..................8 1.5 Wired Remote Control for MB-3 ..................8 1.6 Software Dip Switch and NTG 4 Vehicles (W204, W212, W207, etc.)...... -
Page 6: Understanding Your Mb-3
MB-3 USER INSTRUCTION MANUAL 1. Understanding Your MB-3 1.1 Package Contents 1. MB-3 main unit. 2. Wired remote control. 3. ViseeO Music Cable for iPod/iPhone. 4. USB to mini USB cable. 5. ViseeO Software Upgrade Cable. -
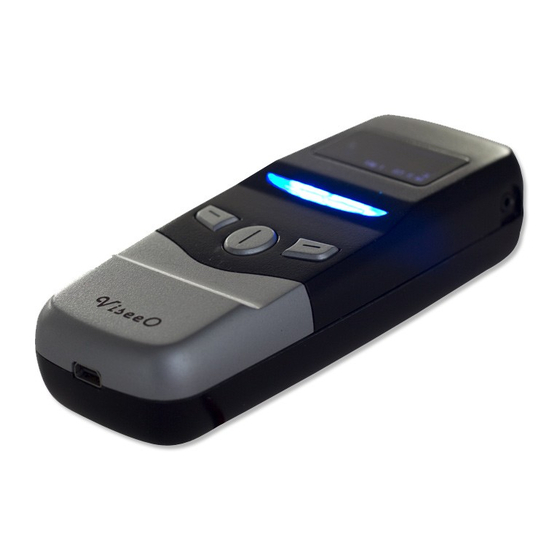
Page 7: Main Unit & Descriptions
MB-3 USER INSTRUCTION MANUAL 1.2 MB-3 Main Unit & Descriptions 1.3 MB-3 OLED Display & Main Screen Icon Descriptions... -
Page 8: Keypads And Functions
Main menu, Confirm, Save, Setup, OK Right key Audio mode, Menu browsing, Yes, Volume + A2DP FM 3 88.1 PHONEBOOK FM> MENU SETUP 1.5 Wired Remote Control for MB-3 The wired remote control is designed for controlling the A2DP and iPod/iPhone music functions. -
Page 9: Software Dip Switch And Ntg 4 Vehicles (W204, W212, W207, Etc.)
2. Switch both software switches 1&2 to the off position (see the illustration below) Software switch position for W204, W212, W207 and other NTG 4 vehicles Now you are ready to insert MB-3 into the UHI connector of a NTG 4 vehicle. -
Page 10: Installation
2. Installation 2.1 Installing the Main Unit ViseeO MB-3 is designed to work with a pre-installed UHI/MHI Comand system in your vehicle. Therefore, you will need to locate the UHI/MHI connector which is normally found in the tray under the front armrest. -
Page 11: Installing The Accessories
MB-3 USER INSTRUCTION MANUAL 2.2 Installing the Accessories 1. Installing the wired remote control. 2. Installing ViseeO Music Cable for iPod/iPhone 3. Installing the USB to Mini USB charging cable. -
Page 12: Basic Operation
MB-3 USER INSTRUCTION MANUAL 3. Basic Operation 3.1 Hot Keys and Menu Functions Hotkey functions in main screen mode: Audio mode hot key - Press right key in the main screen to select an audio input mode (iPod/AUX/A2DP). A2DP IPOD FM 3 88.1... - Page 13 MB-3 USER INSTRUCTION MANUAL FM channel setup hot key - Press & hold left key for 3 seconds or more in the main screen to enter the current FM channel’s setup page. FM CH1 A2DP 99.1 FM 1 99.1 MHz ┼...
-
Page 14: Pairing For The First Time
MB-3 USER INSTRUCTION MANUAL 3.2 Pairing for the First Time Once you have installed your MB-3 in the vehicle, you need to pair it with your mobile phone. To pair your mobile phone with MB-3 for the first time: A2DP 1. -
Page 15: Making The First Call
Due to the variation in phone’s Bluetooth setting and phone’s operating software not all phones can be paired or connected with MB-3 smoothly. We endeavour to make sure all major Bluetooth mobile phones are compatible with MB-3. However, with the new phones or less popular phones there is still a possibility that MB-3 may not pair, connect properly or smoothly. -
Page 16: Phonebook Function
1. From phone to MB-3. 2. From MB-3 to Comand APS console. As soon as your phone is connected with MB-3 it will upload contacts in your phone memory to the MB-3’s memory. When this is completed MB-3 will then transfer the contacts to the Comand system. -
Page 17: Manually Upload Phonebook
Depending on the Comand system, for each paired phone you will be able to transfer up to 1000 or 650 entries to the Comand APS console from MB-3. Therefore, if you have 4 paired phones you can upload up to a total of 4000 phonebooks. If your phone has more than 1000 entries Command APS will randomly pick up 1000 entries to be displayed on your screen. -
Page 18: Phonebook Organization For Ntg 4 Vehicles
Comand system will now begin the phonebook transfer. Once completed the entries will emerge in the phonebook on the Comand screen. This works the same for uploading the phonebook under the OPP mode. If you transfer the phonebook entries to MB-3 under the OPP mode you will also be... -
Page 19: Phonebook Setting
NTG 4 does not allow user to delete the entire phonebook in one go whereas phonebook transferred from MB-3 using the Import command on the NTG 4 regardless it is automatic sync or manual upload user will be able to delete the entire phonebook in one go. -
Page 20: Music Functions & Setting
Music on all devices is broadcasted to your car radio via MB-3's built-in FM transmitter in near CD quality. MB-3 comes with three pre-set FM channels and it is recommended that you setup the desired frequencies for each FM channel (see Section 5.1 FM Setting for further information) before you... - Page 21 FM frequency on your MB-3 (for instance, if your MB-3 is on FM CH1 88.1 MHz then, tune your car radio also to FM 88.1 MHz). Then, enable music function on MB-3 (see Section 5.2, 5.3 and 5.4 for further information) and you will hear the broadcasted music coming out from your car radio.
-
Page 22: Enable A2Dp Function
Music function is only compatible with A2DP equipped phone. For some phones you may need to activate the music from your phone first before MB-3’s media player buttons can take over the control. To find out whether your phone supports A2DP please consult your phone specification sheet or manufacturer for further information. -
Page 23: Enable Iphone/Ipod Music Play Function
MB-3 USER INSTRUCTION MANUAL 5.3 Enable iPhone/iPod Music Play Function ViseeO MB-3 can support your iPod/iPhone to provide music playback, basic control and charging. Before you use this function please set up the right FM channel as described in Section 5.1 FM Setting. -
Page 24: Enable Aux-In Music Function
5.4 Enable AUX-IN Music Function ViseeO MB-3 can support music played on any of the sound devices with 3.5mm earphone jack. Before you use this function please set up the right FM channel as described in Section 5.1 FM Setting. -
Page 25: Advanced Bluetooth Setting
6.1 Pairing with More Than One Phone To pair more devices with ViseeO MB-3, please repeat the Bluetooth pairing procedures as described in Section 3.2 Pairing for the First Time. If MB-3 is already in connection with another phone you will be requested to disconnect from the current device first before you can enter the pairing mode. -
Page 26: Reconnect A Paired Device
FM> MENU To reconnect a paired device 1. Press the middle key [MENU] to enter the menu. 2. MB-3 should display [BLUETOOTH] as the first menu BLUETOOTH item if not press the right key [ ] to select it. SETUP 3. -
Page 27: Other Advanced Settings
5. Press the middle key [SAVE] to confirm. Note: MIC VOLUME Microphone quality may vary between car models. ViseeO suggests SETUP that you set up the microphone level by calling your friend and family to confirm the sound quality at different microphone level and find the best one that suits your vehicle. -
Page 28: Factory Default Setting (Master Reset)
If you are unable to get automatic reconnection or are experiencing some problem with the connection or simply would like to erase all paired settings and the phonebook entries, ViseeO MB-3 allows you to reset it back to the original factory settings. - Page 29 Every season new mobile phones or new mobile operating system (e.g. iOS, Android, Symbian, WP7, etc.) are released by the phone manufacturers. Sometimes the new phones or operating software may not be compatible with MB-3's current software therefore, ViseeO offers CPU software (MB-3’s operating software) and Bluetooth firmware update to keep your MB-3 up-to-date.
-
Page 30: Miscellaneous
8.2 Product Information Model No.: MB-3 Product Description: ViseeO Bluetooth Upgrade Adaptor Main Unit: Dimension: 125mm x 50mm x 27mm (Approx.) Weight: 83.5 g (Approx.)
Need help?
Do you have a question about the MB-3 and is the answer not in the manual?
Questions and answers