THOMSON ST2030 SIP User Manual
Voip business phone
Hide thumbs
Also See for ST2030 SIP:
- Administrator's manual (110 pages) ,
- Administrator's manual (316 pages) ,
- Administrator's manual (20 pages)

Related Manuals for THOMSON ST2030 SIP


Summary of Contents for THOMSON ST2030 SIP
- Page 1 Thomson Telecom S.A.S with a capital of 130 037 460 RCS 390 546 059 Copyright © THOMSON 2005 All rights reserved 09/2005 - 1 www.speedtouchpartner.com...
- Page 2 89/336/EEC on the approximation of the laws of the Member States relating to electromagnetic compatibility. Thomson Telecom declares that this ST2030 MGCP IP Phone is in compliance with the essential requirements and other relevant provisions of Directive 1999/5/EC. You can download the declaration of conformity on www.speedtouchpartner.com.
-
Page 3: Table Of Contents
PRODUCT OVERVIEW AND CONNECTIONS............... 4 ..........................4 ONNECTIONS PC................. 4 ONNECTING TO THE ETWORK AND THE ....................... 5 OWERING UP THE HONE ........................5 ONNECTED A HEADSET ........................6 HYSICAL EATURES ............................. 6 SER PANEL ..........................7 ISPLAY KEYS ............................. 7 UDIO KEYS .......................... -
Page 4: Product Overview And Connections
I. Product overview and connections Connections Extension Module ST 2030(back) (optional) AC Adapter Headset (optional) Handset Network Computer Connecting to the Network and the PC The ST2030 MGCP IP Phone has 2 RJ-45 ports that each support 10/100 Mbps full duplex Ethernet connection to external devices- Network port and access port (one for PC and one for LAN). -
Page 5: Powering Up The Phone
Access port (10/100PC) Use the Ethernet cable to connect a network device, such as a computer to the PC port on the back of your phone. Powering up the Phone The ST2030 could be powered by either a main power unit, or PoE. Its power consumption is under 6W. -
Page 6: Physical Features
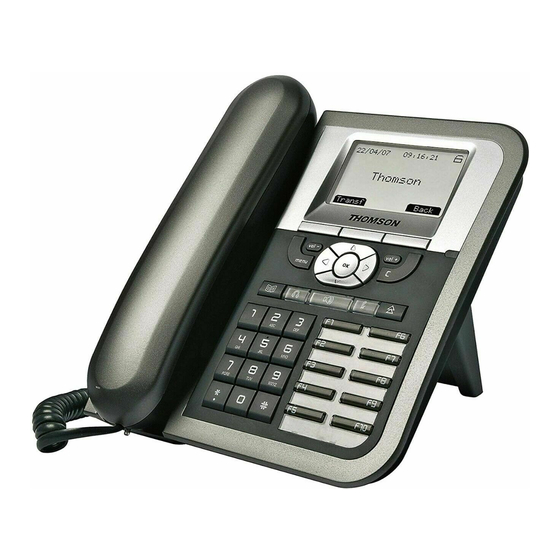
Physical Features User panel Volume Softkey Handset Indicator Clear Key Function Keys* Menu Key Navigator keys Dial Pad Memory Keys * Keys from left to right: phone book/ headset/ speaker/ mute and redial. -
Page 7: Display Keys
Display keys key: Confirms settings Navigator keys Enable browsing setting options, display the latest 30 call numbers in standby mode and move among soft keys options in editing mode. Fout! Objecten Clear kunnen niet key: worden Clear characters in editing mode or exit to standby display (long click) or gemaakt door return back to the previous page. -
Page 8: Audio Keys
Audio keys Volume keys: Adjust the volume of the handset, headset, speaker phone, ringer phone. Speaker key: Activates/disables hands free or group-listing function and switch on/off the microphone Headset key: Activates headset mode during a call Mute key: Activates/deactivates mute function. Dialing keys Dialing pad Press the dial pad buttons to dial a number. -
Page 9: Definitions Of Led
Definitions of LED LED Indicator Condition Color Status Default Speaker During FW boot Loudspeaker is activated during a call Default During FW boot Headset Headset or Headset group-listing mode is activated during call Default Mute During FW boot Mute is active Default During FW boot Used for speed dial keys in standby mode... -
Page 10: Call Services
II. Call Services Talking Mode & Operations 5 kinds of communication mode Handset mode Hands free mode Headset mode Handset group listening Headset group listening Operation of off hook There are four ways supported for Off Hook operation Picking up the handset: Handset mode Press Speaker key: Hands free mode Press Headset key: Headset mode Press F1 when phone is ringing... -
Page 11: Character Input- Edit Mode
Character Input- Edit Mode The editor is automatically activated whenever you are modifying content of configurable parameters. Apart from entering characters, you can use this editor to navigate through text or delete characters. Even though the maximal text length is not limited by the number of characters on the display because the text can be shifted to the left and right, there are limits for the certain scenarios. -
Page 12: Configuration Through Lcd
III. Configuration through LCD Assign an IP address to the phone Setting the address Using Fix IP address menu Press key. with softkeys. Choose Admin The phone will prompt Input Password: Make sure you have selected the right entry mode with the A>a>1 softkey. - Page 13 The ST2030 displays Reboot? softkey Press Wait for ST2030 to reboot The new IP address is set Check that the IP address is set properly Using DHCP menu Press key. with softkeys. Choose Admin The phone will prompt Input Password: Make sure you have selected the right entry mode with the A>a>1 softkey.
-
Page 14: Check That The Ip Address Is Set Properly
Check that the IP address is set properly menu Press softkeys Choose User with Navigator keys Use the to scroll down the menu to Information softkey Press Select The IP address is displayed Once you know the IP address of the ST2030, you can start to configure the phone using its friendly web interface. -
Page 15: Configure Phone Using Web Interface
IV. Configure phone using web interface Find the phone IP address menu Press softkeys Choose User with Navigator keys Use the to scroll down the menu to Information softkey Press Select The IP address is displayed Access to Admin Homepage (web interface) Open a web browser (Firefox, Internet Explorer, Safari…) Enter the ST2030 IP address in the address bar with /admin.html appended at the end of it. -
Page 16: Setup The Sip Configuration
Enter the administrator password (default value is 784518) You will access the Homepage of the ST2030 Setup the SIP configuration Once connected to the ST2030 Admin Homepage, go to the Utility page (Click on SETUP on the top menu of the Homepage. You will access the Setup Page... - Page 17 Click on Basic Setup in the left menu You will access the Setup – Basic Setup page...
- Page 18 Click on the Edit button of the profile you want to edit. You will access the Profile Setup page.
- Page 19 Fill in the SIP Servers properties and the User Accounts Click on Apply...
-
Page 20: Upgrade Firmware
Your changes have been taken into account Upgrade firmware Once connected to the ST2030 Admin Homepage, go to the Setup page (Click on UTILITY on the top menu of the Homepage. You will access the Utilities Page... - Page 21 Click on Firmware Update You will access the Utilities – Firmware Update page...
- Page 22 Browse to find the firmware file you want to upload...
- Page 23 The ST2030 will upload the firmware...
- Page 24 When the firmware file will be uploaded, the ST2030 will ask you to confirm the restart.
- Page 25 Click on Restart. The ST2030 will reboot and the firmware will be updated...
Need help?
Do you have a question about the ST2030 SIP and is the answer not in the manual?
Questions and answers