Table of Contents
Advertisement
Advertisement
Table of Contents

Related Manuals for Sunshine Kids Radian Premier


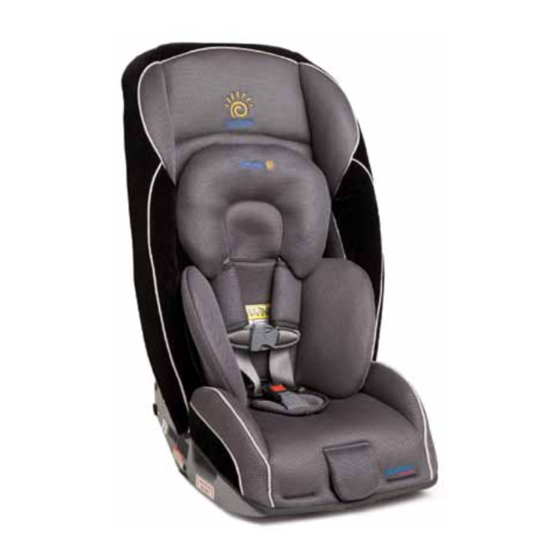
Summary of Contents for Sunshine Kids Radian Premier
- Page 1 Instruction Manual CANADIAN-ENGLISH VERSION...
-
Page 2: Table Of Contents
Table of Contents Page Warnings Seating Position Information Child Restraint Safety Information Seat Belt Information Carrying Restraint Unfolding and Folding Car Seat Installing and Removing Detachable Base Rear-facing Lower Connector System (UAS) Installation (2.3 to 20.5 kg) Rear-facing Lap-Shoulder Belt Installation (2.3 to 20.5 kg) Rear-facing Lap Belt Installation (2.3 to 20.5 kg) Foward-facing Lower Connector System (UAS) - Page 3 Radian Features Child information tag Fabric side panel Lower Connector System Harness clip (UAS) belt Buckle pad Lower Connector System Harness adjuster lever (UAS) strap guides Buckle slot Forward-facing belt path Buckle Release lever Harness pad Harness adjuster strap Detachable base Metal harness yoke Backpack strap anchor Shoulder harness strap...
-
Page 4: Warnings
WARNING DEATH OR SERIOUS INJURY CAN OCCUR • Follow all instructions labeled on this child restraint and in the written instruction manual on the lanyard located on back of restraint. For infants under 4.5 kg (10 lbs), consult pediatrician for recommended seat back angle before installation. •... -
Page 5: Seating Position Information
• Based on accident statistics, Sunshine Kids recommends the vehicle’s rear seat as the safest location for all children under age 13. -
Page 6: Child Restraint Safety Information
Sunshine Kids Product Registration 275 Frobisher Dr., Suite 3 Waterloo, ON N2V 2G4 Or you can call Sunshine Kids: 519-725-1700. WARNING: DO NOT place a child restraint in the front seat of a vehicle with a passenger air bag unless the air bag is turned off. - Page 7 • This restraint is not a toy. Do not allow children to play with it. • Using any non-Sunshine Kids product with this restraint, or any product not specifically approved by Sunshine Kids for use with this restraint, is not allowed.
-
Page 8: Seat Belt Information
Seat Belt Information The information below applies only to installations using vehicle seat belts. IMPORTANT: • This restraint can be installed securely in most vehicles using the seat belt. However, some seat belts have an anchoring position for the lap belt that may not allow a secure restraint installation. -
Page 9: Carrying Restraint
• Do not carry restraint by harness adjuster strap (see diagram, page 3). This can damage the mechanism and the webbing. • Only the shoulder strap made by Sunshine Kids is approved for use with this restraint. There are four ways to carry restraint: 1. -
Page 10: Unfolding And Folding Restraint
Unfolding and Folding Restraint WARNING: • Do NOT use restraint if release levers or locking bolts bind or do not move freely. When release levers are lifted, release levers and locking bolts should spring back immediately. • Do NOT oil or lubricate any part of restraint. •... - Page 11 3. Pull harness adjusting strap until harness begins to tighten. (Fig. 3) If strap does not slide freely, fold restraint, remove harness adjusting strap from fold joint and repeat step 3. 4. Fasten both fabric side panels to center panel. (Fig. 4) 5.
- Page 12 Folding Restraint (continued) 3. Place restraint on its back, push either release lever down- ward to release locking bolts. (Fig. 3) 4. Pull harness straps firmly toward top center restraint. Keep buckle extended toward top of restraint while folding seat bottom into back. (Fig. 4) IMPORTANT: If restraint does not easily fold completely, do NOT force it closed.
-
Page 13: Removing Base
Detachable Base WARNING: • Detachable base must be used when restraint is rear-facing. • Do NOT use detachable base when restraint is forward facing. Installing base (Rear-facing only) 1. Confirm restraint is locked in its unfolded position (see page 10). 2. - Page 14 Rear-Facing UAS Installation for children 5 to 45 lbs (2.3 to 20.5 kg) WARNING: • You must use restraint rear-facing if child weighs less than 22 lbs (10 kg). • Detachable base must be used with rear-facing restraint. • Do NOT use SafeStop™ with rear-facing child. Fig.
-
Page 15: Uas) Belt
5. Route the UAS belt through rear-facing belt path. Confirm the UAS connector belt lays flat and is not twisted. Attach each connector to the USA anchor- age closest to each side of the restraint. (Figs. 2 & 3) The lower connector will ‘click’ to confirm attachment to anchor. -
Page 16: (2.3 To 20.5 Kg)
Rear-Facing Lap-Shoulder Belt Installation for children 5 to 45 lbs (2.3 to 20.5 kg) WARNING: • You must use restraint rear-facing if child is less than 1 year and weighs less than 22 lbs (10 kg). • Detachable base must be used with rear-facing restraint. •... - Page 17 4. Push restraint down firmly into vehicle seat back while pulling shoulder portion of seat belt to remove slack and tighten lap portion of seat belt. (Fig. 4) Vehicle cushions should compress where there is contact with restraint. WARNING: • Make sure vehicle seat belt is properly locked. •...
-
Page 18: Rear-Facing Lap Belt Installation (2.3 To 20.5 Kg)
Rear-Facing Lap Belt Installation for children 5 to 45 lbs (2.3 to 20.5 kg) WARNING: • You must use restraint rear-facing if child weighs less than 22 lbs (10 kg). • Detachable base must be used with rear-facing restraint. • Do NOT use SafeStop™ with rear-facing child. Fig. - Page 19 4. Push restraint down firmly into vehicle seat back while adjusting seat belt length. Tighten and lock seat belt according to vehicle owner’s manual. (Fig. 3) Vehicle Cushions should compress where there is contact with restraint. CHECK LIST: Confirm restraint is properly positioned. Confirm seat belt is tight and buckle is properly fastened.
-
Page 20: Forward-Facing Belt Path
Forward-Facing UAS Installation for children 22 to 65 lbs (10 to 30 kg) WARNING: • Remove detachable base when restraint is forward-facing. • Do NOT place infant in forward-facing restraint until 22 lbs (10 kg). • ALWAYS use SafeStop with forward-facing child below 40 lbs (18.5 kg). - Page 21 Installation Tip: Unfasten fabric side panels and reach behind restraint cover for easy access to belt path. (Fig. 3) 5. Confirm UAS belt lays flat and is not twisted. Attach each connector to the UAS anchor closest to each side of the restraint.
-
Page 22: Installation (10 To 30 Kg)
Forward-Facing Lap-Shoulder Belt Installation for children 22 to 65 lbs WARNING: • Remove detachable base when restraint is forward-facing. • Do NOT place infant in forward facing restraint until 22 lbs (10 kg). • Always use SafeStop™ with forward-facing under 40 lbs (18.5 kg). -
Page 23: (10 To 30 Kg)
(10 to 30 kg) 3. Kneel on restraint to force it into vehicle seat while pulling shoulder portion of seat belt to remove slack and tighten lap portion of seat belt. (Fig. 5) Vehicle cushions should compress where there is contact with restraint. -
Page 24: Forward-Facing Lap Belt Installation (10 To 30 Kg )
Forward-Facing Lap Belt Installation for children 22 to 65 lbs (10 to 30 kg) WARNING: • Do NOT place infant in forward facing restraint until 22 lbs (10 kg). • Always use SafeStop™ with forward-facing under 40 lbs. (see page 26). •... -
Page 25: Checking Restraint Stability
3. Kneel on restraint to force it into vehicle seat while pulling shoulder portion of seat belt to remove slack and tighten lap portion of seat belt. (Fig. 5) Vehicle cushions should compress where there is contact with restraint. CHECK LIST: Confirm restraint is properly positioned. -
Page 26: Aircraft Installation
Aircraft Installation Rear-facing aircraft installation (Fig. 1): • Adjust seatbelt buckle to its shortest length to insure buckle is accessible for release. • Ask flight attendant for ‘seatbelt extender’ , and then use this extender to adjust seatbelt length. • Follow remaining installation instructions on page 18. -
Page 27: Forward-Facing Recline Adjustment
Forward-Facing Recline Adjustment WARNING: • Do not lower adjustable bottom when using detachable base with rear-facing installation. • Only use adjustable bottom to position forward-facing restraint at a more reclined angle. Fig. 1 shows operation of adjustable base. Adjustable bottom must be operated before installation of restraint. -
Page 28: Top Tether
Top Tether • Sunshine Kids recommends using a tether for rear-facing installations to improve stability and performance of the restraint. • If vehicle does not have tether anchorage points, consult vehicle owner’s manual or contact vehicle manufacturer with questions. Do NOT modify vehicle without approval from vehicle manufacturer or authorized vehicle dealer. -
Page 29: Tether Connecting Strap
Note: Rear facing installation may also require the use of tether connecting strap (see page 29). 3. Install restraint as shown in appropriate installation sections (see pages 14 to 24 for restraint installation instructions). 4. After installing restraint, pull top tether adjuster strap to remove all slack. -
Page 30: Support Cushions
Support Cushions WARNING: Do not use body support for children over 30 lbs. Infant Support: This restraint features a full infant head and body support. (Fig. 1) Toddler Body Support: Remove head support to use body support cushion for toddlers. (Fig. 2) Head Support Cushion: Support cushion can be attached higher on the seat to provide head support and comfort. -
Page 31: Restraint Harness Buckle
Using Harness Clip IMPORTANT: Position harness clip at proper height for child: level with child’s armpits. (Fig. 1) Always utilize harness pads and attach them as shown. (Fig. 1A) To Fasten: Push both halves together until a ‘click’ confirms proper engage- ment. -
Page 32: Properly Securing Child
Properly Securing Child WARNING: Serious injury or death can result if child is not properly secured in restraint. Confirm harness is snug* before each use and after making any restraint adjustments. 1. Confirm proper restraint installation. 2. To loosen harness: lift harness adjuster and pull shoulder straps forward. -
Page 33: Proper Harness Height And Child Height
IMPORTANT: Give a firm, upward tug on both harness straps behind the child’s shoulders and close to the harness slots in the restraint, to confirm there is no harness slack behind the restraint. 8. Confirm harness is not twisted and lays flat against child. 9. -
Page 34: Adjusting Harness Height
Proper Harness Height & Child Height (continued) Weight Ranges: Rear Facing 5 to 45 lbs (2.3 kg to 20.5 kg) Forward Facing up to 65 lbs (30 kg) Maximum Height: Child is too tall for restraint if tops of the ears are above the back of the restraint OR if child is more than 53”... -
Page 35: Harness Buckle Removal And Installation
Harness Buckle Location Confirm location of harness buckle is correct, to insure proper harness fit: 1. Properly secure child in restraint (see page 32). 2. Check for correct position of harness buckle: Harness buckle can be directly above its buckle slot. (Fig. A) Harness buckle can be forward of its buckle slot. - Page 36 Harness Buckle Removal and Installation (continued) Removing harness buckle: 1. Make sure restraint is securely locked in its unfolded position. (See page 10, unfolding restraint.) 2. Unbuckle harness. 3. Push harness buckle strap down 2 inches into rear-facing belt path tunnel. 4.
- Page 37 Locking a Vehicle Lap-Shoulder Belt with a Locking Clip Proper use of a locking clip maintains a tight, secure installation by preventing the seat belt from becoming loose over time. WARNING: • Failure to properly lock the seat belt will result in an unsafe installation that will greatly increase the potential for injury or death to the child in an accident.
-
Page 38: Restraint Cover
Restraint Cover WARNING: Never remove harness buckle tongues or chest clip from harness shoulder straps. This is dangerous and is NOT necessary when removing and replacing restraint cover. Removing restraint cover: 1. Unthread harness shoulder staps from back of restraint (see page 34, adjusting harness height). -
Page 39: Cleaning And Maintenance
Cleaning and Maintenance Cleaning / Maintenance of release mechanism and locking bolts: Periodically inspect release levers and locking bolts for cleanli- ness and proper functioning: When release levers are lifted, release levers and locking bolts should spring back immediately and completely. WARNING: •... -
Page 40: Washing The Cover
Cleaning and Maintenance (continued) Cleaning the plastic shell: • Clean with damp cloth only: wet cloth with warm water and mild soap and wring thoroughly so it is NOT dripping water. • Towel dry. • Do use solvents or abrasive cleaners. Washing the cover: •... -
Page 41: Replacing Harness Straps
Cleaning harness buckle: If child eats or drinks in restraint, periodically clean harness buckle to insure proper functioning. 1. Remove center buckle from restraint. (see page 35) 2. Rinse thoroughly in mildly hot water or soak overnight to loosen dried liquid or hardened food debris. (Fig. 1) 3. -
Page 42: Warranty Information
Proof of purchase is required. The exclusive remedy for this warranty is that Sunshine Kids will, at its option, replace, repair or provide replacement components for this product or may refund the original purchase price of this product. - Page 43 This warranty grants you specific legal rights. Neither Sunshine Kids, nor any retailer selling this product, authorizes any other person or party to create for it any other warranty, obligation, or liability in connection with this...
- Page 44 RadianPremier convertible car seat Model: 18500 Sunshine Kids Mfg. by: 3104 142nd Ave E, Suite 105 Sumner, WA 98390 CUSTOMER SERVICE Tel: 866-954-9786 Email: ca-sales@skjp.com www.skjp.com © 2010 Sunshine Kids Juvenile Products, LLC. All rights reserved. RadianPremier CA Eng 110110...
Need help?
Do you have a question about the Radian Premier and is the answer not in the manual?
Questions and answers