Table of Contents
Advertisement
Advertisement
Table of Contents

Related Manuals for blackburn ATOM SL3.0


Summary of Contents for blackburn ATOM SL3.0
- Page 1 3.0 / 4.0 / 5.0 / 6.0...
- Page 2 IntroductIon Congratulations on the purchase of your new Blackburn Atom Series cyclometer. Blackburn cyclometers are manufactured using only the highest quality materials and production standards. This manual is an integral part of your Blackburn cyclometer. Please read it carefully and use it while performing the initial programming and operating of the unit.
- Page 3 coMPonEntS english...
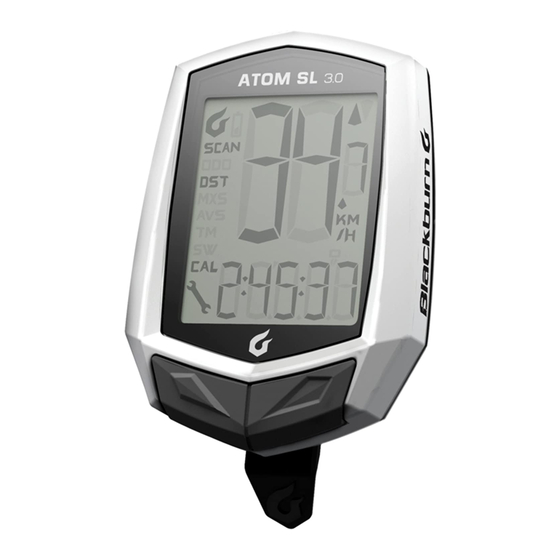
- Page 4 coMPonEntS ATOM SerieS FunCTiOnS 1. Cyclometer unit 2. Front speed sensor 3. rear speed sensor 4. Cadence sensor 5. Spoke Magnet 6. Crank Magnet 7. Wired Mounting Bracket 8. Wireless Mounting Bracket 9. rubber Mount 10. Velcro 11. Zip-Ties ATOM SL 3.0 / 4.0 / 5.0 / 6.0...
- Page 5 BAttEry Blackburn Atom computers are powered by a Cr2016 / Cr2032 3v Lithium Battery. under normal conditions, this battery should last approximately one year. INSTALLING/REPLACING THE COMPUTER BATTERY using a small Philips screwdriver, turn screws counter clockwise until the door comes free.
- Page 6 Atom SL 1–3 mm Sensor The Blackburn Atom SL uses a single wired sensor attached to the front fork. INSTALLING WIRED SPEED SENSOR AND BRACKET Sensor 1. Loosely attach the wheel sensor to either fork blade using the zip-ties. Do not fully tighten.
- Page 7 InStALLAtIon Atom 3.0 / 5.0 1–3 mm The Blackburn Atom 3.0 / 5.0 uses a single wireless sensor attached to the front fork. Sensor INSTALLING WIRELESS SPEED SENSOR AND BRACKET Sensor 1. Loosely attach the wheel sensor to either fork blade using the zip-ties. Do not fully tighten.
- Page 8 InStALLAtIon Atom 6.0 / Atom 4.0 follow steps 1– 5 1–3 mm The Blackburn Atom 6.0 uses speed and cadence sensors attached to the chain stay. Sensor INSTALLING WIRELESS SPEED SENSORS AND BRACKET 1. Loosely attach the two sensors to the left chain stay using the zip-ties. Do not fully tighten.
- Page 9 ButtonS Blackburn Atom cyclometers have 2 operating buttons located on the base of the unit. MODE (RESET) english...
- Page 10 oPErAtInG ModES Atom SL / 3.0 / 4.0 Operation MODE MODE TiMe OF DAY ODOMeTer TriP DiSTAnCe MODE MODE MODE SCAn riDe TiMe AVerAGe SPeeD MAX SPeeD ATOM SL 3.0 / 4.0 / 5.0 / 6.0...
- Page 11 oPErAtInG ModES Atom SL / 3.0 / 4.0 SETTING WHEEL SIZE 1. Press & Hold MODe and SeT. (note: this will clear all odometer information and reset time of day.) 2. Adjust blinking digit by Pressing MODe. 3. Set & advance by Pressing SeT. 4.
- Page 12 oPErAtInG ModES Atom 5.0 / 6.0 Operation MODE MODE SCAn BiKe ALTiMeTer MODE MODE MODE CADenCe (for Atom 6.0 only) ATOM SL 3.0 / 4.0 / 5.0 / 6.0...
- Page 13 oPErAtInG ModES SCAN MODE: SCAn mode automatically scrolls through the data in a continuous loop as below. Clock Trip distance Trip time Temperature Altimeter Slope Gain eTA1 eTA2 Cadence BIKE MODE: Press Set Button in BiKe mode to select the data show as below sequence. Clock Trip distance Odometer...
- Page 14 ProGrAMMInG Atom 5.0 / 6.0 SETTING WHEEL SIZE 1. Press & hold MODe and SeT. (note: this will reset the cyclometer and clear all setting data) 2. Adjust blinking digit by Pressing MODe. 3. Set & advance by Pressing SeT. 4.
- Page 15 ProGrAMMInG Atom 5.0 / 6.0 BIKE 1 & BIKE 2 switching 1. Press & hold MODe for 2 seconds to select either BiKe 1 or BiKe 2. This cyclometer can store 2 bikes data for wheel sizes, average speed, trip time and distance. english...
-
Page 16: Wheel Size
WHEEL SIZE MEASURING WHEEL SIZE WHEEL CIR. To assure accurate Speed and Distance measurements, you must enter the correct wheel circumference (in millimeters). The adjacent chart (1) lists most popular wheel sizes and their circumferences. if you can not find your wheel size on the chart, use the following method for manually measuring your wheel size: MANUALLY MEASURING WHEEL SIZE (2) 1. - Page 17 ProGrAMMInG SETTING TIME OF DAY 1. Select the Clock in Bike mode, Press & Hold the SeT button. Atom SL / 3.0 / 4.0 2. Adjust 12- or 24-hour format by pressing the MODe button. Set by pressing Set button. 3.
- Page 18 rESEttInG tHE cycLoMEtEr To Set and reset current data — Atom SL / 3.0 / 4.0 1. To reset all current ride data, in Distance mode (DST), press & Hold reSeT for 2 SeCOnDS. 2. ride Time, Trip Distance, Average speed will be reset to zero (0). 3.
- Page 19 SLEEP ModE 1. To conserve battery life, the unit will go into SLeeP mode when there is no signal received for 5 minutes. 2. Press either MODe or SeT to instantly resume normal operation with no loss of ride data. 3.
- Page 20 EStIMAtE tIME to ArrIVAL (EtA) Estimate time to arrival function 1. Press SeT button to select Destination 1 or 2. 2. Then press and hold SeT button for 2 second, it sets the destination distance. 3. After the distance is set, it shows the estimated time of arrival in hr and mins. it will shows 99:59 initially, and after you ride a few seconds, the remaining time will change by the calculated riding speed.
- Page 21 WIrELESS trAnSMISSIon Id codE nuMBEr The wireless transmission system has five (no. 0 – 4) digit codes. To avoid interference between two or more people riding together use different codes. To check your existing code number press the button indicated below and the iD code number will be shown as illustrated on the screen below.
- Page 22 WIrELESS trAnSMISSIon Id codE nuMBEr if the code is the same as your accompanying rider please change the iD code number by pressing the transmitter reSeT button and continue riding. During this time you may see no data received, just keep riding for approximately 1 minute and the computer will register a new iD code automatically and work properly.
Need help?
Do you have a question about the ATOM SL3.0 and is the answer not in the manual?
Questions and answers