Table of Contents
Advertisement
Advertisement
Table of Contents

Subscribe to Our Youtube Channel
Related Manuals for Zanussi ZWH 7160 P


Summary of Contents for Zanussi ZWH 7160 P
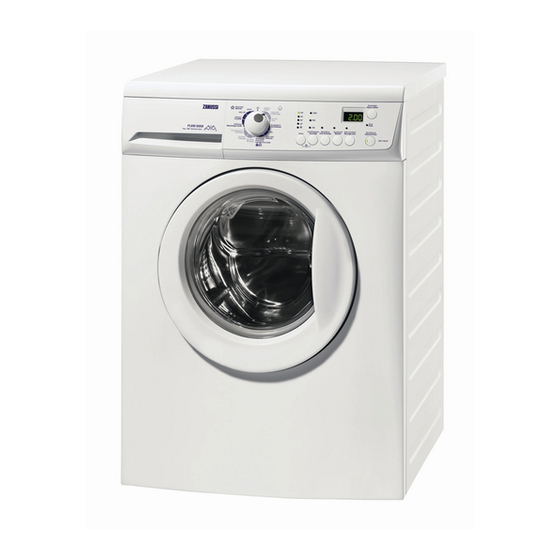
- Page 1 User manual Washing Machine ZWH 7160 P...
-
Page 2: Table Of Contents
• If the appliance has a child safety device, we recommend you ac- tivate it. General Safety • Before maintenance, deactivate the appliance and disconnect the mains plug from the mains socket. • Do not change the specification of this appliance. www.zanussi.com... -
Page 3: Safety Instructions
• Make sure not to cause damage to the mains from the laundry. plug and to the mains cable. Contact the • Do not put a container to collect possible Service or an electrician to change a dam- water leakage under the appliance. Contact aged mains cable. www.zanussi.com... -
Page 4: Frost Precaution
By ensuring this product where you purchased the product. is disposed of correctly, you will help prevent potential negative consequences for the www.zanussi.com... -
Page 5: Product Description
Product description Detergent dispenser drawer Water drain hose Worktop Drain hose support Control panel Hose holders Door opening handle Water inlet hose Rating plate (on the inner edge) Mains cable Front adjustable feet Back feet www.zanussi.com... -
Page 6: Technical Data
Warning! Remove and keep all transit devices so that they can be re- Warning! fitted if the appliance ever has to be transpor- • Read carefully the "Safety information" ted again. chapter before installing the appliance. Necessary tools 10 mm 30 mm www.zanussi.com... - Page 7 • Remove the polystyrene base from the bot- tom. • Return appliance to it's upright posi- tion. • Unscrew the three bolts and remove the hose holders. • Slide out the relevant plastic spacers. www.zanussi.com...
- Page 8 Accurate levelling prevents vibration, noise and displacement of the appliance during op- eration. • Plug the smaller upper hole and the two Repeat the levelling action, if the appliance is large ones with the corresponding plastic not level and stable. plug caps. www.zanussi.com...
- Page 9 The end of the drain hose can be positioned side diameter of the in four ways: drain hose. The drain • Hooked over the edge of a sink using hose must not be the plastic hose guide. kinked. www.zanussi.com...
- Page 10 It is essential that these appliances are not con- nected to the surface water drainage system as this water is discharged directly into a river or stream and may cause pollution. If you require any further advice please contact your local water authority. www.zanussi.com...
-
Page 11: First Use
5 buttons simul- vice, which sounds in the following cases: taneously for about 6 • at the end of the cycle; seconds, the acous- • if there is a fault. tic signal is deactiva- ted (except if there is a fault). www.zanussi.com... -
Page 12: Daily Use
• Treat curtains with special care. treat any residual marks on white fabrics with • Wash the socks and the gloves inside the bleach and then rinse thoroughly. bag or a net. 1) do not use acetone on artificial silk. www.zanussi.com... - Page 13 (fabric softener, quantities to avoid waste and protect the envi- starch). ronment. Although biodegradable, detergents contain substances which, in large quantities, can up- set the delicate balance of nature. www.zanussi.com...
- Page 14 • Rotate the flap up- • Do not use liquid detergent if the washing wards. Ensure to fit programme doesn't start immediately. the flap completely In all above listed cases, use the flap in "UP" position . • Carefully put the drawer back. www.zanussi.com...
- Page 15 When an option button is selected, the corresponding pilot light is on. Otherwise it is off. For compatibility among washing programmes and options, see the "Washing Pro- grammes". If an incorrect option is selected, the integrated red pilot light of the button 9 flashes 3 times and the display shows the message Err. www.zanussi.com...
- Page 16 By selecting this function the water of the last rinse is not emptied out to prevent the fabrics from creasing. Before open- ing the door it will be necessary to empty out the water. To empty out the water, please read the paragraph «At the end of the programme». www.zanussi.com...
- Page 17 Press simultaneously the buttons 4 and 6 for some seconds: • the pilot light of button 6 illuminates; • the extra rinse option is activated and it stays permanently To remove it press the same buttons again until the pilot light of button 6 goes off. www.zanussi.com...
- Page 18 9 start flashing. • End of programme When the programme has finished a zero ( ) is displayed, the door pilot light 10 and the pilot light of button 9 go out and the door can be opened. www.zanussi.com...
- Page 19 PAUSE by pressing button 9 and wait a few minutes before opening the door. After you have closed the door, press the same button again. The Delay Start cannot be selected with the draining programme. www.zanussi.com...
- Page 20 If you do not intend to carry Follow the below instructions to empty out the out another wash, close the water tap. Leave water: the door open to prevent the formation of mil- • Turn the programme selector dial to dew and unpleasant smells. www.zanussi.com...
-
Page 21: Washing Programmes
Main wash - Rinses - Maximum spin speed 900 rpm SUPER QUICK Max. load 3,5 kg - Reduced load 2 kg EXTRA RINSE Synthetic or mixed fabrics: underwear, coloured garments, DELAY START non-shrink shirts, blouses . Normally soiled items. www.zanussi.com... - Page 22 If a spin speed at 700 rpm is selected, by pressing the rele- vant button, the appliance performs a short spin. Special programmes www.zanussi.com...
-
Page 23: Consumption Values
The data of this table are approximate. Different causes can change the data: the quantity and type of laundry, the water and ambient temperature. Programmes Load Energy con- Water con- Approximate Remaining (kg) sumption sumption (litre) programme moisture (kWh) duration (mi- nutes) Cottons 60 °C www.zanussi.com... -
Page 24: Care And Cleaning
• Select the hottest cotton wash programme. ment should be re- moved. • Use a normal measure of detergent, must be a powder with biological properties. Cleaning the dispenser drawer The washing powder and additive dispenser drawer should be cleaned regularly. www.zanussi.com... - Page 25 • turn programme selector dial to position • open the filter cov- • unplug the appliance; er and insert the fil- • open the door; ter again; • turn the drum and align the filter cov- er (FILTER) with the arrow on the door seal; www.zanussi.com...
-
Page 26: What To Do If
Before contacting your local Service Centre, scribed in the charts, without calling out an en- please carry out the checks listed below. gineer. During appliance operation it is possible that the red pilot light of the button 9 flashes, the www.zanussi.com... - Page 27 The door has not been closed or is not closed properly. • Close firmly the door. Door open The appliance does not start or stops during Before contacting your local Service Centre, operation without any visible alarm. please carry out the checks listed below. www.zanussi.com...
- Page 28 The appliance is not levelled correctly. The appliance vibrates • Adjust the feet. noisily: The laundry is not evenly distributed in the drum. • Redistribute the laundry. Maybe there is very little laundry in the drum. • Load more laundry. www.zanussi.com...
- Page 29 If the malfunction shows again, contact your Service Centre. The necessary data for the Model description (MOD.) ....... Product number (PNC) ........Serial number (S.N.) ........Mod..Prod. No..Ser. No..www.zanussi.com...
- Page 30 www.zanussi.com...
- Page 31 www.zanussi.com...
- Page 32 www.zanussi.com/shop...
Need help?
Do you have a question about the ZWH 7160 P and is the answer not in the manual?
Questions and answers
How can I select a short 40 degree wash
To select a short 40-degree wash on a Zanussi ZWH 7160 P, choose the SYNTHETICS program set to 40°C, and activate the SUPER QUICK option. This program is suitable for synthetic or mixed fabrics and allows for a reduced washing time.
This answer is automatically generated