Table of Contents
Advertisement
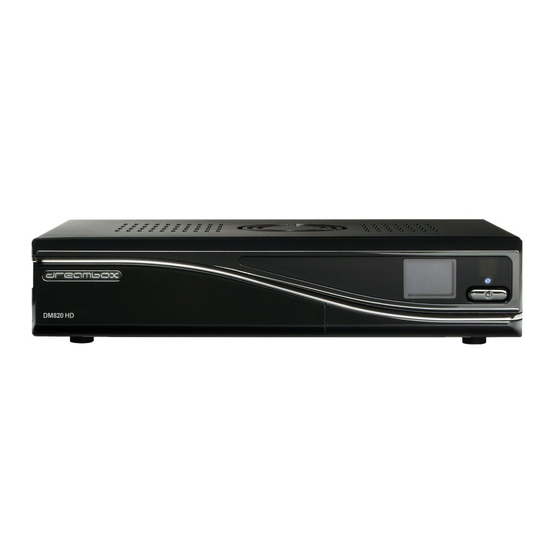
dreambox
DM820 HD
User Manual
Digital satellite receiver for free and encrypted Digital
Video Broadcasting (DVB) with optional digital record-
ing capability.
HDTV
DVB-S2 Tuner
Gigabit Ethernet
internal SATA harddisk connector
eSATA-interface
OLED-Display
2x Smartcard-Reader Dreamcrypt™
2x USB 2.0
HDMI 1.4a
Dreambox OS
Dreambox API
Advertisement
Table of Contents

Summary of Contents for Dreambox DM820 HD
-
Page 1: User Manual
DM820 HD User Manual Digital satellite receiver for free and encrypted Digital 2x Smartcard-Reader Dreamcrypt™ Video Broadcasting (DVB) with optional digital record- ing capability. 2x USB 2.0 HDTV HDMI 1.4a DVB-S2 Tuner Dreambox OS Gigabit Ethernet Dreambox API internal SATA harddisk connector... - Page 2 Please note that the range of functions expands continiously by new software updates. If you updated the software of your dreambox or found some failure in the manual, please check if a new version is available in the download section of our website www.leontechltd.com.
-
Page 3: Table Of Contents
3 Basic operation 3.1 Turning your Dreambox on and off ....... . . 16 3.2 Service selection... - Page 4 4.7 Parental control ..........31 5 Hard disk operation 5.1 Installation-Guide .
- Page 5 9 Updating the software 9.1 Backing up your settings ........65 9.2 Restoring your settings .
-
Page 6: Before Initial Operation Of The Receiver
Shut down • In case your Dreambox is in use for a longer period of time disconnect the power plug from the power outlet. • During thunder storm the unit should also be physically disconnected from the power outlet. - Page 7 Additional safety instructions • (Dis-)Connecting to a LNB: Turn the Dreambox off before you connect or disconnect a cable coming from or going to a LNB. • Connection to the cable wall box or terrestrial antenna: Before connecting or disconnecting your antenna cable to the Dreambox please turn it off.
-
Page 8: Packaging Contents
Disposal instructions The packaging of the Dreambox only consists of reusable materials. Please recycle if possible. This symbol on the product or on its packaging indicates that this product must not be disposed of with your other household waste. Instead, it is your responsibility to dispose of your waste equipment by handing it over to a designated collection point for the recycling of waste electrical and electronic equipment. -
Page 9: Views
Smartcard reader slots. Dreamcrypt™ is a registered trademark of Dream-Multimedia. OLED-Display The OLED-Display shows all major information. IR-Sensor The remote control sensor receives the infrared signals of the Dream Remote Control. Standby-Button The Standby-Button switches your Dreambox on and off. Status-LED The Status-LED indicates the Standby-Status of your Dreambox. -
Page 10: Rear View
LNB input Connect the coaxial cable from your LNB here. Micro SD-Card Reader Put your Micro SD-card e.g. from your digital camera in here. ® HDMI -Out output You can connect a TV to the HDMI out of your Dreambox if your TV has the right input. ® HDMI -In input You can connect your HDMI device with the right output. -
Page 11: Remote Control
1.4 Remote control Battery charge indicator Standby-Button HELP-Button DREAM-Mode-Button TV-Mode-Button HELP Numeric Keypad pqrs wxyz Arrow-Left-Button Arrow-Right-Button Options-Buttons INFO MENU INFO-Button MENU-Button Navigation-Buttons OK-Button AUDIO AUDIO-Button PVR-Button EXIT-Button EXIT Volume +/- Buttons Bouquet +/- Buttons Mute-Button Rewind-Button Fast Forward-Button PLAY/PAUSE-Button STOP-Button RADIO TEXT... - Page 12 Battery charge indicator indicates the status of the battery voltage. Standby-Button The Standby-Button switches your Dreambox on and off. (see Chapter Turning your Dreambox on and off on page 16) DREAM-Mode-Button The DREAM-Mode-Button switches your remote control into Dreambox con- trol mode.
- Page 13 All functions of the Dreambox can be controlled via OSD-Menu (On-Screen-Display). This makes the handling of the Dreambox very easy for you. All options are indicated by four colored dots or beams (red, green, yellow, blue) in the OSD-Menu and can be started with the Option-Buttons on the Remote Control.
-
Page 14: Start-Up
Before using the Dreambox, please read the safety instructions under Chapter Safety instructions on page 1. In the following is described how to connect the dreambox to a Satellite-dish, an a/v receiver, a tv-device and a network. 2.1.1 Satellite Dish (DVB-S/S2) Connect the (LNB) with a suitable coax cable to the LNB-Input of your Dreambox. -
Page 15: A/V Receiver
2.1.2 A/V Receiver Connection via optical fiber cable If your a/v receiver (amplifier) has a suitable optcial S/PDIF Input, connect the connection jack S/PDIF at the Dreambox with an optical fiber cable (toslink) with the optcial S/PDIF Input of your amplifier. - Page 16 Connection via HDMI cable Use an hdmi-cable to connect the hdmi-out of your dreambox to an hdmi-input of the a/v receiver. After that take a second hdmi-cable for connecting the hdmi-out of your a/v receiver to the hdmi-input of the...
-
Page 17: Television
Connect the dreambox with the hdmi-cable to the TV-input of your television. At least use the hdmi-interface for getting the best picture quality (through digital transmission). You can use the supplied HDMI cable for connecting the dreambox with the hdmi-input of your television. -
Page 18: Network
2.1.4 Network Connection via network cable... -
Page 19: Turning The Device On
2.3 Start wizard If you switch on your Dreambox for the first time, you will see the setup wizard. The setup wizard will guide you through the first time installation. Follow the instructions on the screen and use the Navigation- ) and the OK-Button. - Page 20 Parental control makes it possible to lock selected channels. Detailed information can be found under Parental control on page 31. Chapter Network The network wizard will assist you with the network setup of your Dreambox. Detailed information can be found under Chapter Network on page 48.
-
Page 21: Basic Operation
3. Alternatively you can push down the Standby-Button on your Dreambox for 5 seconds. If no OSD Menu is visible on the screen this will also put your dreambox into Standby-Mode. (If the OSD Menu is still open press the EXIT-Button). -
Page 22: Service Selection
3.2 Service selection Pressing the Navigation-Buttons ( ) on your Dreambox remote control will take you to the previous or next service. Pressing the 0 on the Numeric-Keypad will enable you to skip back and forth between the two most recently watched services. -
Page 23: Changing The Audio Track
3.5 Changing the audio track Pressing the AUDIO-Button in TV or Radio Mode. Use the Navigation-Buttons ( ) to move to desired au- dio track. Press the OK-Button to select. The contents of this menu will vary from service to service. AC3-Downmix: Press the red Options-Button to toggle “AC3-Downmix”... -
Page 24: Subtitles
3.8 Subtitles Follow this steps: 1. In TV- or Radio Mode press the AUDIO-Button. 2. By pressing the yellow Options-Button a list with the available subtitles will show up. 3. With the Navigation-Buttons ( ) select a desired subtitle and press the OK-Button to activate. The screenshot on the left shows you an example of how a subtitle looks. -
Page 25: Infobar
3.9 Infobar The Infobar appears when switching a channel and shows all necessary information about the selected service. By pressing the OK-Button you can open the Infobar if needed! Active tuner Signal level Error rate Channel name Current time Progress bar Current show Next show Remaining time... -
Page 26: Electronic Program Guide - Epg
“Multi-EPG” (see Chapter 3.10 auf Seite 23). The Dreambox automatically searches for similar broadcasts in the background. If one or more similar broadcasts are found the label “Similar” will appear in the red window. Pressing the red Options-Button opens a listing of similar broadcasts. - Page 27 Single-EPG In this view you are supplied with detailed information about the currently selected channel’s programming. Follow this steps: 1. Press the INFO-Button. 2. Press the yellow Options-Button for getting the “Single-EPG” view. You can also access this view by pressing: 1.
- Page 28 Multi-EPG Follow this steps: 1. Press the Info-Button. 2. Press the blue Options-Button for switching to “Multi-EPG” view. Use the blue and yellow Options-Buttons to switch between the now, next and more views. Pressing the green Options-Button will give you the possibility to automatically copy the start and end time of the selected show into a recording timer.
- Page 29 Time/Date Input Press the Menu-Button in the Multi-EPG view. A window will appear where you can enter a time and date. After you have entered the desired time and date press the OK-Button to activate your selection. Graphical Multi-EPG You have another option to view the EPG of different services and successive shows. The Graphical Multi- EPG displays the EPG overview for the upcoming hours (can be set to 1-5 hours with the Buttons 1-5 on the Numeric-Keypad) for the chosen bouquet.
-
Page 30: Teletext (Videotext)
Time/Date Input Press the Menu-Button in the Multi-EPG view. A window will appear where you can enter a time and date. After you have entered the desired time and date press the OK-Button to activate your selection. 3.11 Teletext (Videotext) 1. - Page 31 Teletext Konfigurationsmenü: If the Teletext page 100 is shown you can press the MENU- Button to enter the Teletext configuration menu. You have the following options: Scale filter and Scale filter zoom You can choose between following scale options: • bilinear •...
-
Page 32: Sleep Timer
3.12 Sleep timer Using the sleep timer you can put your Dreambox into standby or turn it off after a predetermined amount of time. Follow this steps: 1. Press the Menu-Button to open the main OSD menu. 2. With the Navigation-Buttons ( ) choose the option “Standby / Restart”... -
Page 33: Edit The Channellist
Chapter 4 Edit the channellist What is a bouquet? A bouquet can be thought of something like a folder. Every channel equals a page in this folder and the pages are sorted into categories. This way you can create a bouquet called “Kids”, for example, under which you “file” all children’s stations. Another example would be to create a bouquet called “Sports”... -
Page 34: Add A Service To Favorites
4.2 Add a service to favorites If you want to add a service to your Favorites-view you can choose from services in the All-, Satellites- and Provider-views. You can switch views by pressing the red, green, yellow and blue Options- Buttons. -
Page 35: Remove A Service From Favorites
4.4 Remove a service from favorites 1. Press the Navigation-Buttons ( ) to open the channellist. 2. With the Navigation-Buttons ( ) choose the channel you want to delete. 3. By pressing the MENU-Button the “Channellist menu” will open up. 4. -
Page 36: Parental Control
6. Press the OK-Button, to add the marker to your favorites list. If you have added two markers use the Arrow-Left and Arrow-Right-Buttons to jump between those two markers. 4.7 Parental control Parental control makes it possible to lock selected channels. Follow this steps: 1. - Page 37 2. With the Numeric-Keypad enter a 4-digit Pincode. You have to enter the new pincode twice to ensure you didn’t make any typing errors. If you already created a pincode earlier you will be prompted to enter the old pincode and afterwards the new one. You will see a notice that the pincode has been changed.
-
Page 38: Hard Disk Operation
Hint: When using an external eSATA HDD it must have an own power supply!!! 5.1 Installation-Guide This capter describes how to install a 2,5"’ SATA Hard disk in your Dreambox DM820 HD. Please always adherence to ESD (Electrostatic Discharge) regulations when handling electronic devices. - Page 39 Opening the device 1. Unscrew the screw(s) on the left and right side of your Dreambox. Remove screw(s) on the left and right side 2. Remove the screw(s) on the rear panel, marked on the picture. 3. Pull the the cover backwards first (1.) and lift it afterwards (2.).
- Page 40 1. Place the hard disk into the hard disk cage, ensure that the connection port is pointing towards the back of the dreambox. Place the hard disk carefully into the plug of the hard disk cage. Placing hdd to hard disk cage (Fig. 1)
- Page 41 Opening the device on page 34) backwards. 4. Reattach all necessary cables to your Dreambox making sure that you connect the power cord as last. Before you can use your hard disk for recordings it has to be initialized by the box as described in Initialization on page 37.
-
Page 42: Management
5.2 Management 1. Press the Menu-Button to open the main OSD menu. 2. With the Navigation-Buttons ( ) choose the option “Setup” and press the OK-Button. 3. With the Navigation-Buttons ( ) choose the option “System” and press the OK-Button. 4. -
Page 43: Stop Recording
1. Add recording (indefinitely) 2. Add recording (stop after current event) 3. Add recording (enter recording duration) 4. Add recording (enter recording endtime) 5. Don’t record Use the up/down-Buttons to navigate to your desired selection and press the OK-Button to select. A ongoing recording is indicated by a flashing symbol in the Infobar (see Chapter Infobar on page 20). - Page 44 For all four options you can set a date for the first execution of the timer You can decide what should happen after the recording finishes by selecting the “After event” option. You can choose between auto to keep your Dreambox in the same state as before the recording do nothing to keep your Dreambox turned on after the recording...
- Page 45 Choose service which you want to record fill text Timer Editor 1. Press the Menu-Button to open the main OSD menu. 2. With the Navigation-Buttons ( ) choose the option “Timer” and press the OK-Button. Timerlist Pressing the red Options-Button will delete a timer. The green Options-Button adds a timer, the yellow Options-Button toggles active on and off...
-
Page 46: Timeshift
If you pressed the blue Options-Button you will be asked if you really want to delete the finished timer. Use the Navigation-Buttons ( ) to select. Press the OK-Button to activate. Your Dreambox will be turned on 5 minutes before the recording if a recording is supposed to start while the Dreambox is in Standby mode. 5.3.4 Timeshift Press the PLAY/PAUSE-Button to pause the screen (video and audio will pause). -
Page 47: Setting A Marker (Bookmarks)
Rewind-Button = Rewind PLAY/PAUSE-Button = Pause and Play STOPP-Button = Stop Fast Forward-Button = Fast Forward Keep in mind that you have to be in the PVR-Mode to use these options. You can check this by pressing the OK-Button. The Infobar will reveal and should show the depicted control symbols. If they are not shown you simply have to press the PVR-Button. -
Page 48: Delete A Recording
Infobar Movieplayer with Markers Skip to a marker You can directly skip to a previously set marker during playback. Press the Arrow-Left-Button to skip to the previous marker and press the Arrow-Right-Button to skip to the next marker. To delete a marker skip to it as described above and press the 0 on the Numeric-Keypad. 5.6 Delete a recording 1. - Page 49 List styles You have the choice between different list styles: List style default with ex- List style default tended description List style single line List style compact with de- List style compact scription...
-
Page 50: Setup
We will not explain the expert mode in detail in this manual. 6.2.1 Simple Mode Shutdown when no button has been pressed for Set dreambox into standby mode when no button has been pressed for a configured time. You can choose between 1-5 hours or disable this feature. -
Page 51: Intermediate Mode
Infobar timeout Set the desired time after which you want the Infobar to disappear. You can choose between one and ten seconds or “no timeout”. Show event-progress in channel selection Show progress bar for each event in channel list. 6.2.2 Intermediate mode: These settings supplement the settings in simple mode. -
Page 52: A/V Settings
) choose the option “A/V Settings” and press the OK-Button. Video output This option selects to which output the video signal will be sent to. HDMI If you have connected your TV to the HDMI output of your Dreambox set the “Output type” option to “HDMI”. Modus... -
Page 53: Oled-Display
controlled by HDMI If the connected HDMI device supports the format AC3+, the AC3+ signal will be forwarded without altering it, otherwise the AC3+ stream will be converted to a AC3 stream. OSD visibility With the Navigation-Buttons ( ) you can change the transparency of the gui. Scaler sharpness With the Navigation-Buttons ( ) you can change the sharpness of the screen. - Page 54 Nameserver Enter the DNS-Server’s IP address here. DNS is used to translate a Domain name to an IP address. Normally, if the Type is set to LAN, there is no need for a DNS entry. If the Dreambox is connected to the Internet over a router, enter the router’s IP address here.
-
Page 55: Skin
) choose the option “Factory Reset” and press the OK-Button. You will be asked if you really want to reset all your settings to the factory defaults. If you select “yes” all your settings and bouquets will be lost. Afterwards your Dreambox will be restarted automatically. -
Page 56: Service Searching
Service searching In this chapter you will learn how to setup the tuner configuration for the reception with a satellite-dish (DVB-S/S2), via cable television (DVB-C) or via digital terrestrial television (DVB-T) in your dreambox and how to perform a service scan. -
Page 57: Two Satellites Via Toneburst A/B
Connect the two coax cables from the two LNBs to a so-called Toneburst switch and connect the coax cable from the Toneburst switch to your Dreambox. Two satellites via Toneburst Follow this steps: 1. -
Page 58: Two Satellites Via Diseqc A/B
9. With the Navigation-Buttons ( ) choose the desired Satellite. 10. With the Navigation-Buttons ( ) choose the option “Port B”. 11. With the Navigation-Buttons ( ) choose the desired Satellite. 12. Press the OK-Button to save this settings. Make sure you know which satellite is connected to which input on the Toneburst switch. If you do not find any services in the transponder scan later, exchange the two satellites in this list and try again. -
Page 59: Four Satellites Via Diseqc A/B/C/D
9. With the Navigation-Buttons ( ) choose the desired Satellite. 10. With the Navigation-Buttons ( ) choose the option “Port B”. 11. With the Navigation-Buttons ( ) choose the desired Satellite. 12. Press the OK-Button to save this settings. Make sure you know which satellite is connected to which input on the Toneburst switch. If you do not find any services in the transponder scan later, exchange the two satellites in this list and try again. -
Page 60: Stab Positioner Using Usals
find the coordinates of your residence. http://www.heavens-above.com The rest is done automatically by your Dreambox with build-in USALS. USALS is a model for calculating the position of all satellites in orbit with a margin of error less than 0.1 degrees. USALS was developed by the Stab company. -
Page 61: Stab Positioner Without Usals
7.1.6 Stab Positioner without USALS Use this type of configuration if you want to receive many satellites without a Stab positioner from a Single Universal LNB. The coax cable is directly connected from your Dreambox to the LNB. Stab Positioner without USALS Follow this steps: 1. -
Page 62: Dvb-C Tuner Configuration
4. With the Navigation-Buttons ( ) choose the option “Tuner configuration” and press the OK- Button. 5. With the Navigation-Buttons ( ) choose the option “DVB-S2 Tuner” and press the OK-Button. 6. With the Navigation-Buttons ( ) choose the option “Configuration”. 7. -
Page 63: Dvb-T Tuner-Configuration
3. With the Navigation-Buttons ( ) choose the option “Service searching” and press the OK- Button. 4. With the Navigation-Buttons ( ) choose the option “Tuner configuration” and press the OK- Button. 5. With the Navigation-Buttons ( ) choose the “DVB-C Tuner” and press the OK-Button. Frequency bands This type of searching scans the frequencies used by most cable providers. -
Page 64: Automatic Scan
2. With the Navigation-Buttons ( ) choose the option “Setup” and press the OK-Button. 3. With the Navigation-Buttons ( ) choose the option “Service searching” and press the OK- Button. 4. With the Navigation-Buttons ( ) choose the option “Tuner configuration” and press the OK- Button. - Page 65 Use the Navigation-Buttons ( ) to set the “Clear before scan” option to “Yes” if you want to delete all services before the scan starts. Otherwise leave the setting to “No” which results in only new services being added to the channel list. In order to find the new services, follow this steps: 1.
- Page 66 You can see the progress of the scan here. The scan is done once you see this menu. It shows how many channels were found during the scan. Press the OK-Button to store the found channels or the EXIT-Button to cancel.
-
Page 67: Manual Scan
7.5 Manual scan Follow this steps: 1. Press the Menu-Button to open the main OSD menu. 2. With the Navigation-Buttons ( ) choose the option “Setup” and press the OK-Button. 3. With the Navigation-Buttons ( ) choose the option “Service searching” and press the OK- Button. -
Page 68: Systeminformation
Chapter 8 Systeminformation 8.1 Service This window shows detailed technical information about the current service. channel information Follow this steps: 1. Press the MENU-Button in order to open the main menu. 2. Navigate to the option “Information” and press the OK-Button. The “Information”... -
Page 69: About (Hard- And Software)
8.2 About (Hard- and Software) This window shows all relevant information about the Hard- and Software of your Dreambox. Hardware- and Software-Information Follow this steps: 1. Press the MENU-Button in order to open the main menu. 2. Navigate to the option “Information” and press the OK-Button. -
Page 70: Updating The Software
Chapter 9 Updating the software 9.1 Backing up your settings Before installing newer software on your Dreambox you should backup your settings, otherwise they will be lost. 1. Press the Menu-Button to open the main OSD menu. 2. With the Navigation-Buttons ( ) choose the option “Setup”... -
Page 71: Updating A New Software
The following steps assume you have a DHCP server. Usually dhcp-server is activated by default in delivery condition of your router. First of all, power down the Dreambox to standby and then switch it off by the power switch on the back. Idle mode is not enough! Follow these steps: 1. - Page 72 2. Click on "‘Online recovery"’ on the given site in your Browser. 3. Click on "‘GO"’ to start the recovery process. Your dreambox will try to download and install the latest software now. If there is no internet connection available at this moment, it will try to install the software from a previous recovery session.
-
Page 73: Troubleshooting
Batteries are inserted incorrectly Remove batteries and check polar- Batteries are empty Insert new batteries Wrong remote control mode Press Dream-Mode or TV-Mode (Dream-Mode, TV-Mode) button Software is not reacting Reboot Dreambox Dreambox does not react Dreambox is locked up Reboot Dreambox... -
Page 74: Tv-Mode Setup
Chapter 11 TV-Mode setup With the Dreambox remote control you have the possibility to control the dreambox and your tv device with only one remote control. In order that your tv device reacts to the signals of the remote control, you have to program it before. - Page 75 3. Press the desired button on the dreambox rcu, (except the DREAM- and the TV-Mode-Button) which you want to program. 4. Place the dreambox rcu and the tv-device rcu towards each other at a distance of ˜ 3-5 cm. Remote control...
- Page 76 TV-Mode By pressing the TV-Mode-Button the remote control unit switches to the tv-mode and the last stored rcu-code is used. Now you can use the dreambox rcu instead of the tv-device rcu in order to control your tv-device. Duration of lighting of the Dreambox-Symbol You can adjust (in seconds) the duration of how long the dreambox-symbol at the bottom is lit-up after you once pressed a button on the rcu.
-
Page 77: Technical Data
Chapter 12 Technical Data • Dreambox OS • Dreambox API • 7000 DMIPS Dual Core Prozessor • MPEG2 / H.264 Hardware decoding (DVB compliant) • 2x Smartcard-Reader (Dreamcrypt™) • 2x HDMI 1.4a (1x Input, 1x Output) • 10/100/1000 MBit/s compatible Gigabit Ethernet Port •... - Page 78 Additional info: DBS-Tuner with DVB-S2: Frequency Range 950 ..2150 MHz Demodulation DVB-S (QPSK); DVB-S2 ((8PSK,QPSK) Symbol rate DVB-S: 2 ... 45 Mbaud/s, SCPC/ MCPC DVB-S2: 10 – 31 Mbaud/s (8PSK) , 10 –30 Mbaud/s (QPSK) DVB/C-Tuner (plugable): Input/Loop through Connector IEC 169-24, Female Frequency Range 50 - 870 MHz Signal Level Input -20 - 25dBm Demodulation QAM...
- Page 79 Mini USB service connector: Function: Update of Firmware Ethernet: 10/100/1000 MBit/s compatible Gigabit Ethernet-Port Function: Update of Firmware SATA-Interface: for internal 2,5" HDD and one eSATA eSATA-Interface USB: 2 x USB 2.0 Host LNB power and polarisation per tuner: LNB Current 500mA max.; short-circuit-protected LNB Voltage vertical <...
-
Page 80: Features
• Easy expansion of the base function with the use of Plugins • Remote controllable via Web-Interface and streaming of the TV-/Radio stations to any PC connected to the Dreambox through network • mp3 playback • Skinable OSD in many languages... -
Page 81: Contact & Support Information
Chapter 14 Contact & Support Information Headquarter & Distribution: Leontech Limited 10/F, North Point Goodview Centre 4 Kam Hong Street North Point Hong Kong Technical Support Dealer’s Hotline: (Dealers only) Tel.: +49 (0)180 - 3 44 11 30 992 Fax: +49 (0)180 - 3 44 11 30 993 You can reach the technical support hotline for dealer’s from: Mo - Fr.
Need help?
Do you have a question about the DM820 HD and is the answer not in the manual?
Questions and answers