
Related Manuals for LG LRTN22330 Series


Summary of Contents for LG LRTN22330 Series
- Page 1 REFRIGERATOR SERVICE MANUAL CAUTION BEFORE SERVICING THE UNIT, READ THE SAFETY PRECAUTIONS IN THIS MANUAL. models LRTN22330 LRTN22320 LRTN19330 LRTN19320...
-
Page 2: Table Of Contents
CONTENTS SAFETY PRECAUTIONS ............................... 2 SPECIFICATIONS................................... 3 PARTS IDENTIFICATION ............................... 4 DISASSEMBLY..................................5-6 DOOR....................................5 DOOR SWITCH..................................5 FAN AND FAN MOTOR................................ 6 DEFROST CONTROL ASSEMBLY............................6 LAMP....................................6 CONTROL BOX-REFRIGERATOR ............................6 ADJUSTMENT..................................7-8 COMPRESSOR..................................7 PTC-STARTER..................................7 OLP (OVERLOAD PROTECTOR) ............................8 TO REMOVE THE COVER PTC ............................8 CIRCUIT DIAGRAM ................................ -
Page 3: Specifications
1. SPECIFICATIONS 1-1 DISCONNECT POWER CORD BEFORE 1-7 REPLACEMENT PARTS SERVICING Relay ............. 6748C-0004D IMPORTANT – RECONNECT ALL Overload ............6750C-0004S GROUNDING DEVICES Defrost Thermostat ........6615JB2005B Defrost Heater ......19cu. ft : 5300JK1003D All parts of this appliance capable of conducting electrical ....... -
Page 4: Parts Identification
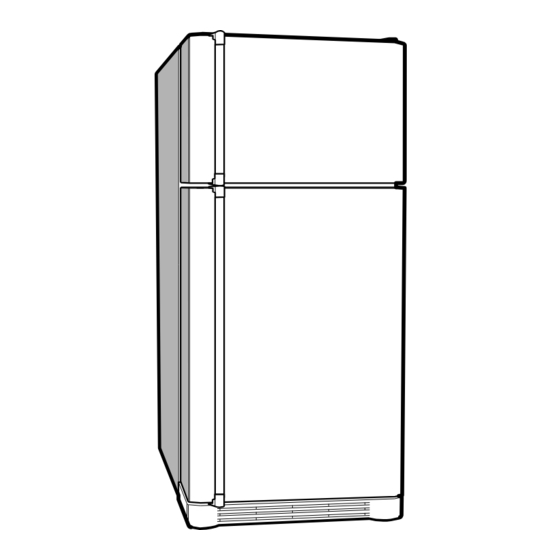
2. PARTS IDENTIFICATION Pizza Nook* Leveling Screw (inside) CustomCube Ice maker * Refrigerator Door Bin CustomFit Egg Box* FlexiFloor * Design-A-Door Digital Sensor Control Icebeam Door Cooling * Refrigerator Light * Door Cooling Chef Fresh * / Snack Pan Dairy Bin Shelves Freezer Door Bin * Can Dispenser*... -
Page 5: Disassembly
3. DISASSEMBLY 3-1 DOOR 3-2 DOOR SWITCH Freezer Door 1. To remove the door switch, pry it out with a slotted-type 1. Remove the hinge cover by pulling it upwards. driver, as shown in (Figure 4). 2. Loosen hexagonal bolts attaching the upper hinge to the 2. -
Page 6: Fan And Fan Motor
3-3 FAN AND FAN MOTOR 3-5 LAMP 1. Remove the freezer shelf. (If your refrigerator has an icemaker, remove the icemaker first) 2. Remove the grille by pulling it out and by loosening a screw. 3. Remove the Fan Motor assembly by loosening 4 screws and disassemble the shroud. -
Page 7: Adjustment
4. ADJUSTMENT 4-1 COMPRESSOR 4-2-3 PTC-Applied Circuit Diagram Starting Method for the Motor 4-1-1 Role The compressor intakes low temperature and low pressure gas from the evaporator of the refrigerator and compresses OVERLOAD PROTECTOR this gas to high-temperature and high-pressure gas. It then delivers the gas to the condenser. -
Page 8: Olp (Overload Protector)
4-3 OLP (OVERLOAD PROTECTOR) 4-4 TO REMOVE THE COVER PTC 4-3-1 Definition of OLP (1) OLP (OVERLOAD PROTECTOR) is attached to the Compressor and protects the Motor by opening the circuit to the Motor if the temperature rises and activating the bimetal spring in the OLP. (2) When high current flows to the Compressor motor, the Bimetal works by heating the heater inside the OLP, and the OLP protects the Motor by cutting off the... -
Page 9: Circuit Diagram
5. CIRCUIT DIAGRAM BEST MODEL - 9 -... - Page 10 BETTER MODEL - 10 -...
-
Page 11: Troubleshooting
6. TROUBLESHOOTING 6-1 COMPRESSOR AND ELECTRIC COMPONENTS (Reated Voltage Remove PTC-Starter Power Source. ±10%)? from Compressor and measure voltage between Terminal C of Compressor and Terminals 5 or 6 of PTC. OLP disconnected? No Voltage. Replace OLP. Check connection condition. Reconnect. -
Page 12: Ptc And Olp
6-2 PTC AND OLP Normal operation of Check another Separate PTC-Starter Observation value is Compressor is electric component. from Compressor and 115V/60Hz : 6.8Ω±30% measure resistance impossible or poor. between No. 5 and 6 of PTC-Starter with a Replace PTC- The resistance value Tester.(Figure 13) Starter... -
Page 13: Other Electrical Components
6-3 OTHER ELECTRIC COMPONENTS M Not cooling at all Check for open short or Compressor Cause incorrect resistance readings doesn't run. in the following components a. Starting devices Short, open or broken. Poor contact b. OLP or shorted. Coil open or shorted. c. -
Page 14: Service Diagnosis Chart
6-4 SERVICE DIAGNOSIS CHART COMPLAINT POINTS TO BE CHECKED REMEDY No Cooling. • Is the power cord unplugged from the outlet? • Plug into the outlet. • Check if the power Switch is set to OFF. • Set the switch to ON. •... -
Page 15: Refrigeration Cycle
6-5 REFRIGERATING CYCLE M Troubleshooting Chart TEMPERATURE STATE OF STATE OF THE CAUSE REMARKS OF THE THE UNIT EVAPORATOR COMPRESSOR PARTIAL Freezer Low flowing sound of A little higher • Refrigerant level is low due LEAKAGE compartment and Refrigerant is heard and than ambient •... - Page 16 M General Control of Refrigerating Cycle ITEMS UNIT STANDARDS PURPOSES REMARKS Pipe and Min. Pipe: within 1 hour. To protect The opening time should be reduced piping system Comp: within 10 minutes. moisture to a half of the standards during rain opening time Drier: within 20 minutes.
-
Page 17: Operation Principle & Repair Method Of Icemaker
7. OPERATION PRINCIPLE AND REPAIR METHOD OF ICE MAKER 7-1 OPERATION PRINCIPLE 7-1-1 Operation Principle of Icemaker Power On Start Position • Adjusts EJECTOR to Start Position with power on. Ice Making • Waits until water becomes cold after starting Mode ice-making operation. - Page 18 7-2 CONTROL METHOD ACCORDING TO FUNCTIONS 7-2-1 Start Position 1. After POWER OFF or Power Cut, check EJECTOR's position with MICOM initialization to restart. 2. Control Method to check if it's in place: (1) EJECTOR is in place, - The ejector must be in the park position before a new cycle can be initiated. (2) EJECTOR isn't in place: A.
- Page 19 7-2-4 Fill / Park Position 1. Once a normal harvest mode has been completed, the water solenoid will be activated. 2. The amount of water is adjusted by pressing the water supply control Switch. This changes the time allowed for fill as illustrated in the chart.
- Page 20 7-2-5 Function TEST 1. This is a compulsory operation for TEST, SVC, cleaning, etc. It is operated by pressing the water supply control KEY for 3 seconds. 2. It operates in the Icemaking mode, but not in the Ice-Removing mode or water supply process. (If there is an ERROR, it can only be checked in the TEST mode.) 3.
-
Page 21: Description Of Function & Circuit Of Micom
8. DESCRIPTION OF FUNCTION & CIRCUIT OF MICOM 8-1 FUNCTION 8-1-1 Function 1. When the appliance is plugged in, it is set to "37 °F" for the Refrigerator and "0 °F" for the Freezer (set to "4" for Refrigerator and "4" for Freezer). You can adjust the Refrigerator and the Freezer control temperature by pressing the COLDER button or the COLD button. - Page 22 8-1-5 Alarm for Open Door 1. This feature sounds a buzzer when the freezer or refrigerator door is not closed within 1 minute after it is opened. 2. One minute after the door is opened, the buzzer sounds three times each for 0.5 seconds. These tones repeat every 30 seconds.
- Page 23 8-1-9 Defect Diagnosis Function 1. Defect diagnosis functions are easy SVC when defects occur which can affect product performance. 2. When a defect occurs, the buttons will not operate; but the tones. such as "ding". will sound. 3. When the defect CODE removes the sign, it returns to normal operation (RESET). 4.
- Page 24 8-1-10 TEST Mode 1. The Test mode allows checking the PCB and the function of the product as well as finding out the Defective part in case of an error. 2. The test button is on the main PCB of the refrigerator (Test S/W). The test mode will be cleared in 2 hours regardless of the type of test mode.
- Page 25 8-2 PCB FUNCTION 8-2-1 Power Circuit 1. Power is supplied to the control board at pins 1 and 3 of connector #1. - 25 -...
- Page 26 8-2-2 Load / Buzzer Drive & Open Door Detection Circuit 1. Load Drive Condition Check To measure outputs of the control board, check voltages between the pins for the following components: Circuit Pin Number Pin Number Output Voltage Compressor Con2 pin7 Con1 pin1 115 VAC Condenser fan...
- Page 27 2. Open Door Circuit (Door Monitor Circuit) Freezer or Refrigerator Measurement between pins 4 and 3 at Con 5 Both Closed 0 volts One door open 5 volts - 27 -...
- Page 28 8-2-3 Temperature Sensor Circuit Voltage supplied to each sensor wil range between 0.5 volts -22°F(-30°C) and 4.5 volts 122°F(50°C) depending upon the temperature in the compartments. A measurement of 0 volts indicates a short in the sensor circuit. A measurement of 5 volts indicates an open in the sensor circuit.
- Page 29 8-2-4 Motor Damper Circuti A reversible DC motor is used to open and close the damper. To open the damper, push test button once. To close the damper, push test button twice. 8-2-5 Damper Heater * The damper heater is attached to the baffle and always will be on if the unit is powered on. The damper heater uses 12VDC.
- Page 30 8-2-6 Key Button Input & Display Light On Circuit LED CHECK MODE: When the COLDER(ADJUST) button in the refrigerator temperature control and the COLDER(ADJUST) button in the freezer temperature control are pushed and held for 1 second or longer, every LED on the display turns on at the same time.
- Page 31 8-3 RESISTANCE SPECIFICATION OF SENSOR TEMPERATURE RESISTANCE OF FREEZER RESISTANCE OF REFRIGERATOR SENSOR & DEFROST SENSOR - 20 ˚C (-4 °F) 22.3 KΩ 77 KΩ - 15 ˚C (5 °F) 16.9 KΩ 60 KΩ - 10 ˚C (14 °F) 13.0 KΩ 47.3 KΩ...
- Page 32 - 32 -...
- Page 33 8-5 MAIN PWB ASSEMBLY AND PARTS LIST 8-5-1 Main PWB Assembly connector 1 connector 2 connector 5 connector 4 connector 6 connector 3 - 33 -...
-
Page 34: Exploded View & Replacement Parts List
9. EXPLODED VIEW & REPLACEMENT PARTS LIST CASE PARTS CAUTION: Use the part number to order part, not the position number. 103B 401A 301A 281A 281B 103A 501F 282E 175A 610A 418A 410G 612A 411A 282B 406B 120A 501A 304A 145A 113A 282H... - Page 35 FREEZER PARTS CAUTION: Use the part number to order part, not the position number. 116A 330B 408A 332A 409A 158E 405C 405A 284A 404A 284C 329A 149A 149B 315B 143B 136A 315B 143A - 35 -...
-
Page 36: Refrigerator Parts
REFRIGERATOR PARTS CAUTION: Use the part number to order part, not the position number. 147C 146A 147B 140A 147A 140D 147D 140B 140E 149E 141D 149C 142D 142B 141E 142E 128A 170A 128D 141B 141A 278G 128B 128C 278C 141C 141B 167B 141A... -
Page 37: Door Parts
DOOR PARTS CAUTION: Use the part number to order part, not the position number. 205D 200A 203A 205C 205A 281D 281D 201A 201A 281E 281E 205B 205C 244B 205A 607A 212A 212A 205B 210B 210A 607A 244C 230A 241A 233A 231A 281D 281D... - Page 38 ICE MAKER PARTS CAUTION: Use the part number to order part, not the position number. 622A 616E 623A 616D 602A 619A 600A 131A - 38 -...
- Page 39 ICE MAKER PARTS (LOC#600A) NON SERVICEABLE PARTS 628C 510A 276A 405D 629C 125D 629B 629A 406D 275D 501G 628B 273A 120H 613B 629D 628A 501B 280E 629E 275C 613A 628E 404X 404Y 404Z - 39 -...
- Page 40 MARZO, 2003 Printed in México P/No. 3828JL8008A...
Need help?
Do you have a question about the LRTN22330 Series and is the answer not in the manual?
Questions and answers