Waring PRO ES1500 Vero Barista User Manual
Professional espresso maker
Hide thumbs
Also See for PRO ES1500 Vero Barista:
- Quick start manual (2 pages) ,
- Instruction manual (9 pages)
Advertisement
Advertisement
Table of Contents

Related Manuals for Waring PRO ES1500 Vero Barista


Summary of Contents for Waring PRO ES1500 Vero Barista
- Page 1 PROFESSIONAL ESPRESSO MAKER ES1500 Vero Barista ® For your safety and continued enjoyment of this product, always read the instruction book carefully before using.
-
Page 2: Important Safeguards
IMPORTANT SAFEGUARDS When using any electrical appliance, basic safety precautions should always be taken, including the following: READ ALL INSTRUCTIONS. 2. Unplug from outlet when not in use, before putting on or taking off parts and before any cleaning or maintenance operations. -
Page 3: Save These Instructions
12. Children must be supervised at all times to ensure they do not play with the appliance. Do not allow children access to the plastic packaging bags. 13. DO NOT IMMERSE THE APPLIANCE IN WATER OR OTHER LIQUIDS. 14. Before filling the tank with water, ALWAYS disconnect the appliance from the electrical outlet. -
Page 4: Table Of Contents
CONTENTS Important Safeguards ..............2 Parts & Assembly ................ 5 Before First Use ................7 Ground Espresso Instructions ............. 8 Pod Holder Instructions .............. 9 How to Texturize Milk ..............10 Dispensing Hot Water ............... 12 Beverage Suggestions .............. 12 Cleaning &... -
Page 5: Parts & Assembly
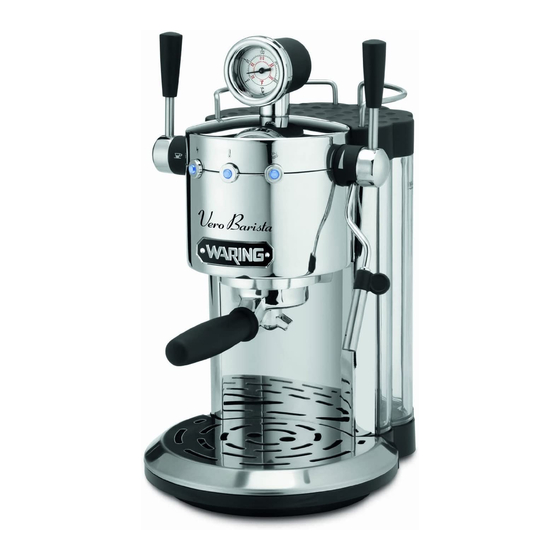
PARTS & ASSEMBLY A. Main housing B. Water tank C. Water tube D. On/Off switch E. Control lever F. Power indicator light G. Boiler temperature control light H. Steam function indicator light I. Boiler temperature thermometer (˚C & ˚F) J. Ground espresso holder (with crema enhancer) J1. - Page 6 F. Power Indicator Light (Left) This light indicates that the ON/OFF switch has been turned to the ON position. This light will remain illuminated until the switch is turned to the OFF position. G. Boiler Temperature Control Light (Middle) This light will illuminate when the machine is at the right temperature for preparing your beverage.
-
Page 7: Before First Use
BEFORE FIRST USE 1. Check that the household voltage is the same as that indicated on the technical plate. 2. Place the espresso maker on a flat and stable surface where it will not be knocked over. 3. Wash the water tank and fill it with cool tap water up to the line marked MAX. -
Page 8: Ground Espresso Instructions
HOW TO MAKE ESPRESSO Please visit us at waringpro.com for an online video demonstration. Be sure that the machine is fully preheated and the Boiler Temperature Control Light (G) is on before preparing beverages. Using Ground Espresso 1. Attach either the single or double espresso spout (K) onto the ground espresso holder (J). -
Page 9: Pod Holder Instructions
4. Depending on the espresso spout used, place one or two cups underneath the espresso spout and pull the control lever (E) forward/towards the espresso cup symbol. Allow espresso to dispense to the desired level (a standard shot of espresso is approximately 1 ounce in size). To stop dispensing, raise the control lever back to the vertical standby position, as indicated by the dot. -
Page 10: How To Texturize Milk
To stop dispensing, raise the control lever back to the vertical standby position, as indicated by the dot. Just a few seconds are needed for the espresso to flow down into the cup(s). If the dispensing time is longer, this may mean that the espresso pod is inserted incorrectly. - Page 11 3. Pour cold milk into a stainless steel frothing pitcher. Keep in mind that the volume of milk will increase during the texturizing. 4. Initially, a little bit of hot water will come out of the steam/ water wand, so you may wish to purge the steam wand of any water.
-
Page 12: Dispensing Hot Water
NOTE: Do not touch hot water coming from the spout. The boiler temperature control light (G) will turn off a few seconds later to indicate the boiler thermostat has intervened. The machine will be ready for making espresso as soon as the light (G) turns on again. Little puffs of steam may come out while dispensing hot water. -
Page 13: Cleaning & Maintenance
CLEANING & MAINTENANCE Parts are not dishwasher safe; hand-wash only. Cleaning the ground espresso holder (J) Turn the filter counterclockwise and lift to remove it. Underneath is the two-part crema enhancer silicone disk and plastic base. Wash the silicone disk under running water, bending it slightly on the side in order to free-up any residue. - Page 14 Cleaning the internal boiler It is recommended to thoroughly clean the boiler about every three months, using a dishwasher detergent tab (without added rinse aid or other chemical additives) as follows: 1. Put a dishwasher detergent tab into the pod holder (without espresso) when the machine is hot (after heating for at least five minutes).
- Page 15 1. Be sure the machine is unplugged and in the OFF position. 2. Remove the water tank and fill it to capacity with a mixture of ¹/ ³ white vinegar and ²/ ³ water. Place the water tank back into place. 3.
-
Page 16: Troubleshooting
TROUBLESHOOTING If there are severe problems with operation, immediately turn off the machine and unplug it from the electrical outlet. Problem: Cause: Solution: The espresso Air has probably Make sure the water tank is entered the circuit and properly inserted and that maker does not deactivated the pump. - Page 17 Problem: Cause: Solution: Espresso is Faulty pod Wait a minute or so and slowly remove the overflowing from holder from the housing. the edges of the CAUTION: Any remaining coupling seat. pressure could cause hot (continued) espresso/water to splash. Replace the pod. The espresso is The holes of the Turn on the machine...
- Page 18 Problem: Cause: Solution: The espresso is Broken pod. Remove the pod filter holder, clean the coupling not supplied or seat with a sponge, and put flows too slowly. a new pod inside. (continued) The espresso is The blend has been A more finely ground blend too watery and ground too coarsely.
- Page 19 NOTES...
- Page 20 Trademarks or service marks of third parties used herein are the trademarks or service marks of their respective owners. ©2014 Waring Consumer Products 150 Milford Road East Windsor, NJ 08520 www.waringpro.com Printed in China ES1500 IB 13WR000858 IB-11226B...
Need help?
Do you have a question about the PRO ES1500 Vero Barista and is the answer not in the manual?
Questions and answers