Table of Contents
Advertisement
Available languages
Available languages
Quick Links
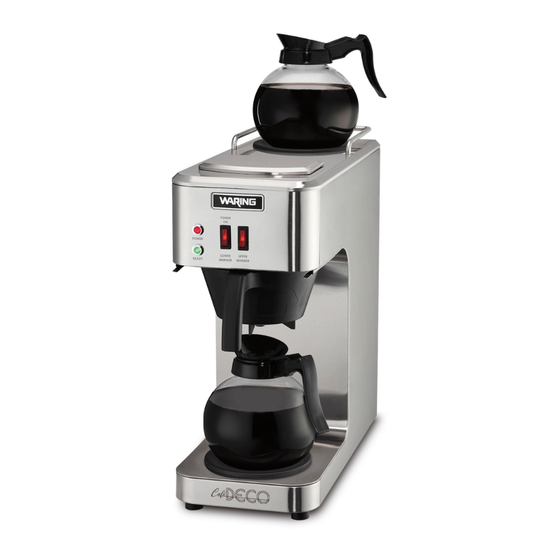
POUR-OVER COFFEE BREWER
CAFETERA COMERCIAL DE LLENADO MANUAL
CAFETIÈRE COMMERCIALE
À REMPLISSAGE MANUEL
WCM50 Series
For your safety and continued enjoyment of this product,
always read the instruction book carefully before using.
Para su seguridad y para disfrutar plenamente de este producto,
siempre lea cuidadosamente las instrucciones antes de usarlo.
Afin que cet appareil vous procure en toute sécurité beaucoup
de satisfaction, lire attentivement le mode d'emploi avant de l'utiliser.
Advertisement
Chapters
Table of Contents

Related Manuals for Waring WCM50 Series


Summary of Contents for Waring WCM50 Series
- Page 1 POUR-OVER COFFEE BREWER CAFETERA COMERCIAL DE LLENADO MANUAL CAFETIÈRE COMMERCIALE À REMPLISSAGE MANUEL WCM50 Series For your safety and continued enjoyment of this product, always read the instruction book carefully before using. Para su seguridad y para disfrutar plenamente de este producto, siempre lea cuidadosamente las instrucciones antes de usarlo.
-
Page 2: Table Of Contents
8. Do not operate any appliance with a damaged cord or plug or after the appliance malfunctions or has been dropped or damaged in any manner. Return appliance to the nearest Waring Repair Center for examination, repair, and electrical or mechanical adjustment. - Page 3 9. The use of accessory attachments not recommended by Waring may cause injuries. 10. This appliance is not intended for outdoor use. 11. Do not let cord hang over edge of table or counter or touch hot surfaces. 12. Do not place on or near a hot gas or electric burner, or in a heated oven.
-
Page 4: Introduction
INTRODUCTION Thank you for purchasing this Waring™ Commercial Pour-Over Coffee Brewer. Features & Benefits • 64-ounce portable coffeemaker – no plumbing required! • High-end industrial design for professional environments • Solid stainless steel construction, durable and easy to clean • Guardrails around upper warmer for safe placement of second decanter •... -
Page 5: Short Cord Instructions
SHORT CORD INSTRUCTIONS A short power-supply cord is provided to reduce the risk resulting from becoming entangled in or tripping over a longer cord. If a longer, detachable power-supply cord or extension cord is used, (1) the marked electrical rating of the extension cord should be at least as great as the electrical rating of the appliance, and (2) the longer cord should be arranged so that it will not drape over the countertop or tabletop where it can be pulled on by children or... -
Page 6: Parts
PARTS 1. Upper warmer with guardrail 6. Lower warmer 2. Ready and Power lights 7. Rubber anti-slip feet 3. Rocker switches for upper 8. Power cord (not shown) and lower warmers 9. Pour-over opening 4. Brew Basket 5. Stainless steel housing... -
Page 7: Controls
CONTROLS Power Light – indicates the unit is powered on Ready Light – illuminates when brewing is complete Power ON/Lower Warmer Switch – starts brewing and heats lower warmer Upper Warmer Switch – heats upper warmer UNPACKING & INSTALLATION CAUTION: This is a heavy piece of equipment. It is recommended that moving or lifting the unit be done by two people to avoid injury. -
Page 8: Installation
1. INSTALLATION CAUTION: The brewer must be disconnected from the power source throughout the initial setup, except when specified in the instructions. 1. Insert an empty brew basket into the rails. 2. Place an empty decanter under the brew basket. 3. -
Page 9: Cleaning & Maintenance
1. The use of a damp cloth rinsed in any mild, nonabrasive liquid detergent is recommended for cleaning all surfaces on Waring equipment. a. DO NOT use any cleaning fluids that can be harmful to you, others around you, or to the environment. -
Page 10: Troubleshooting
If the problem remains after exhausting the troubleshooting steps, contact the Waring Technical Service Department. If unit will not brew, check the following before calling for service: 1. Is the unit plugged in? 2. -
Page 11: Warranty
Under this warranty, Waring will repair or replace any part that, upon our examination, is defective in materials or workmanship, provided the product is delivered prepaid to the Waring Service Center at 314 Ella T. -
Page 12: Medidas De Seguridad Importantes
ÍNDICE Medidas de seguridad importantes ..........12 Introducción ..................14 Instrucciones de puesta a tierra ............14 Uso de alargadores ................15 Piezas ....................16 Controles ..................17 Desembalaje e instalación..............17 Conexión a la red eléctrica ..............17 Instalación ..................18 Preparación .................. - Page 13 9. El uso de accesorios no recomendados por Waring para uso con este modelo puede causar heridas. 10. Esta unidad no está diseñada para uso en exteriores.
-
Page 14: Introducción
PARA USO COMERCIAL SOLAMENTE INTRODUCCIÓN Gracias por comprar la cafetera comercial de llenado manual Waring™ Commercial. Características • Cafetera “portátil” de 64 onzas (1.9 L). ¡No requiere conexión a la red de agua! • Diseño industrial de alta calidad para entornos profesionales •... -
Page 15: Uso De Alargadores
PRECAUCIÓN: Antes de enchufar el adaptador, cerciórese de que la toma de corriente está puesta a tierra. Si no está seguro/a, comuníquese con un electricista. Nunca use un adaptador sin estar seguro/a de que la toma de corriente esté puesta a tierra. NOTA: Está... -
Page 16: Piezas
PIEZAS 1. Placa calentadora superior 5. Carcasa de acero inoxidable con barras de protección 6. Placa calentadora inferior 2. Luces de listo y encendido 7. Pies de goma antideslizantes 3. Controles de las placas 8. Cable (no ilustrado) calentadoras superior e inferior 9. -
Page 17: Controles
CONTROLES Luz de encendido – indica que la unidad está encendida Luz de listo – se enciende cuando el café está listo Interruptor POWER ON/LOWER WARMER – inicia el ciclo de preparación y enciende la placa calentadora inferior Interruptor UPPER WARMER –... -
Page 18: Instalación
2. INSTALACIÓN PRECAUCIÓN: La cafetera debe estar desconectada de la fuente de alimentación durante la configuración inicial, a menos que las instrucciones especifiquen el contrario. 1. Deslice el portafiltro vacío en los rieles. 2. Coloque una jarra vacía debajo del portafiltro. 3. -
Page 19: Limpieza Y Mantenimiento
9. Al final del ciclo de preparación, la luz de listo verde “READY” se encenderá para indicar que el café está listo. 10. Simplemente tire los posos de café y el filtro. 11. APAGUE LAS PLACAS CALENTADORAS CUANDO LA CAFETERA NO ESTÉ EN USO. NOTA: Para detener el ciclo de preparación en cualquier momento, ponga el interruptor izquierdo en la posición “LOWER WARMER”. -
Page 20: Resolución De Problemas
Si el problema persiste después de agotar los pasos a continuación, póngase en contacto con el Departamento de Servicio Técnico de Waring. Si la unidad no funciona, compruebe lo siguiente antes de llamar al servicio técnico: 1. -
Page 21: Garantía
GARANTÍA LIMITADA DE UN AÑO (VÁLIDA EN LOS EE. UU. Y EN CANADÁ SOLAMENTE) Waring garantiza toda nueva cafetera comercial Waring Commercial ™ contra todo defecto de materiales o fabricación durante un año a partir de la fecha de compra, siempre que haya sido usada con alimentos, líquidos no abrasivos (a excepción de detergentes) y... - Page 22 Bajo esta garantía, Waring reparará o reemplazará toda pieza que, tras estar inspeccionada por nuestro servicio posventa demuestre defectos de fabricación o fallas de materiales, siempre que el producto se entregue con franqueo pagado a: Waring Service Center, 314 Ella T. Grasso Ave., Torrington, CT 06790, o a cualquier centro de servicio aprobado.
-
Page 23: Importantes Consignes De Sécurité
TABLE DES MATIÈRES Importantes consignes de sécurité ...........23 Introduction ..................24 Instructions de mise à la terre ............25 Utilisation de rallonges ..............26 Pièces ....................27 Contrôles ...................28 Déballage et installation ..............28 Raccordement électrique ..............28 Installation ..................29 Préparation ..................29 Nettoyage et entretien ...............30 Résolution de problèmes ..............31 Garantie .....................32 IMPORTANTES CONSIGNES DE... - Page 24 ; le renvoyer à un service après- vente autorisé afin qu’il soit inspecté, réparé ou réglé au besoin. 9. L’utilisation d’accessoires non recommandés par Waring peut entraîner des risques pour l'utilisateur. 10. Cet appareil n'est pas destiné à être utilisé à l'extérieur.
-
Page 25: Introduction
POUR USAGE COMMERCIAL UNIQUEMENT INTRODUCTION Merci d’avoir acheté la cafetière commerciale à remplissage manuel Waring™ Commercial. Caractéristiques • Cafetière “portable” de 64 onces (1,9 L) ; aucun branchement d'eau requis ! • Conception industrielle de haute qualité pour les environnements professionnels •... -
Page 26: Utilisation De Rallonges
REMARQUE : L’utilisation d’un adaptateur comme celui mentionné ci-dessus est interdite au Canada. UTILISATION DE RALLONGES Pour des raisons de sécurité, cet appareil est équipé d’un cordon d’alimentation court. Si vous devez utiliser une rallonge électrique ou un cordon amovible plus long, veillez à ce que les spécifications électriques de la rallonge ou du cordon soient au moins égales à... -
Page 27: Pièces
PIÈCES 1. Plaque chauffante supérieure 5. Boîtier en acier inoxydable avec barres de protection 6. Plaque chauffante inférieure 2. Voyants d’alimentation et de 7. Pieds antidérapants en “prêt” caoutchouc 3. Commandes des plaques 8. Cordon d'alimentation (non chauffantes supérieure et illustré) inférieure 9. -
Page 28: Contrôles
CONTRÔLES Voyant d’alimentation – indique que l’appareil est sous tension Voyant de “prêt” – s’allume lorsque le café est prêt Interrupteur POWER ON/LOWER WARMER – démarre le cycle de préparation et allume la plaque chauffante inférieure Interrupteur UPPER WARMER – allume la plaque chauffante supérieure DÉBALLAGE ET INSTALLATION MISE EN GARDE : Cet appareil est lourd ;... -
Page 29: Installation
3. INSTALLATION MISE EN GARDE : La cafetière doit être débranchée de la prise de courant lors de la mise en service initiale, sauf indication contraire dans les instructions. 1. Insérer un panier-filtre vide dans les rails. 2. Placer une carafe vide sous le panier-filtre. 3. -
Page 30: Nettoyage Et Entretien
9. À la fin du cycle de préparation, le voyant vert “READY” s'allumera pour indiquer que le café est prêt. 10. Jeter simplement le marc de café et le filtre. 11. ÉTEINDRE LES PLAQUES CHAUFFANTES LORSQUE VOUS N’UTILISEZ PAS L’APPAREIL. REMARQUE : Pour arrêter le cycle de préparation à... -
Page 31: Résolution De Problèmes
Vous trouverez ci-dessous une liste des causes probables et des solutions possibles aux problèmes les plus courants. Si le problème persiste après avoir suivi les étapes ci-dessous, contacter le Service technique de Waring. En cas de problème, vérifier les points suivants avant d'appeler le service après-vente : 1. -
Page 32: Garantie
GARANTIE LIMITÉE D'UN AN (VALABLE AUX É.-U. ET AU CANADA UNIQUEMENT) Waring garantit tout nouvelle cafetière commerciale Waring™ Commercial contre tout vice de matière ou de fabrication pendant une période d'un an suivant sa date d’achat, à condition qu’il ait... - Page 33 à condition que l'appareil n'ait pas été soumis à des charges excédant sa capacité maximale. Au titre de cette garantie, la division Waring Commercial réparera ou remplacera toute pièce nous paraissant afficher un vice de matière ou de fabrication. Pour un service au titre de cette garantie, envoyez l'appareil, port payé, à...
- Page 36 ©2020 Waring Commercial 314 Ella T. Grasso Avenue Torrington, CT 06790 www.waringcommercialproducts.com Printed in China Impreso en China Imprimé en Chine WCM50 Series IB 20WC065284 IB-16622...
Need help?
Do you have a question about the WCM50 Series and is the answer not in the manual?
Questions and answers