Advertisement
DIAGONAL CONTACT CONVEYOR TOASTER
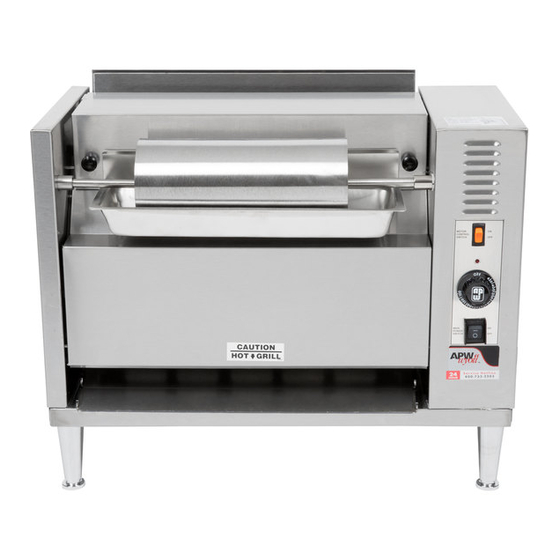
HORIZONTAL RADIANT CONVEYOR TOASTER
UNIT MUST BE KEPT CLEAR OF COMBUSTIBLES AT ALL TIMES
WARNING: Improper installation, adjustment, alteration, service or maintenance can
!
cause property damage, injury or death. Read the Installation, Operating and
Maintenance Instructions thoroughly before installing or servicing this equipment.
This equipment has been engineered to provide you with year-round dependable service when used
according to the instructions in this manual and standard commercial kitchen practices.
Phone:
+1 (214) 421-7366
Fax:
+1 (214) 565-0976
Toll Free: +1 (800) 527-2100
Website: www.apwwyott.com
E-mail:
info@apwwyott.com
INSTALLATION
OPERATING
INSTRUCTIONS
Model:
AT / BT Series
Model:
INTENDED FOR OTHER THAN HOUSEHOLD USE
RETAIN THIS MANUAL FOR FUTURE REFERENCE
R
AND
M Series
1
!
P/N 57212 9/06
APW WYOTT
729 Third Avenue
Dallas, TX 75226
Advertisement
Table of Contents
Troubleshooting

Related Manuals for APW Wyott AT/BT Series


Summary of Contents for APW Wyott AT/BT Series
- Page 1 Phone: +1 (214) 421-7366 Fax: +1 (214) 565-0976 Toll Free: +1 (800) 527-2100 Website: www.apwwyott.com E-mail: info@apwwyott.com INSTALLATION OPERATING INSTRUCTIONS M Series Model: AT / BT Series Model: P/N 57212 9/06 APW WYOTT 729 Third Avenue Dallas, TX 75226...
-
Page 2: Table Of Contents
Check rating label. Are you operating unit on proper voltage? If the supply cord is damaged it should be replaced by an identical supply cord. If the above checks out and you still have problems, call an APW Wyott authorized service agency. TABLE OF CONTENTS... -
Page 3: Specifications
M-83, M-83-D & M-91 & M-95 PLEASE READ PAGE 2 - “GENERAL INFORMATION”, BEFORE YOU CONTINUE. Electrical Information - All Models Each unit is equipped with a 4 foot (122cm), 3 wire grounded power supply cord which terminates with a 3 prong plug. - Page 4 ASSEMBLY (REFER TO ILLUSTRATIONS ABOVE) Lay the toaster on its side and install the four Adjustable Legs (Item 1) in threaded holes in base. Tighten legs with crescent wrench. The unit may be leveled by unscrewing the lower insert of each leg. Precise leveling is not required for proper operation of the toaster. Set the toaster upright.
- Page 5 Remove Top Front Panel (Item 4A) by gripping rear edge and lifting up. The Bottom Front Panel (Item 4B) can then be removed by holding the top edge with one hand and the bottom edge with the other hand, then lifting panel up. Cut and remove the nylon tie securing the conveyor.
-
Page 6: Location
Place the toaster on a flat surface and in such a way that the unit's vents are not blocked. Air must circulate under and through the vents provided on the base, right side (M-83, M83D, & M-95), left side (M-91) and rear of the unit. Locate the unit near a wall receptacle of the proper configuration. -
Page 7: Field Adjustments & Cleaning
C. PRODUCTION To Grill Buns - the following is the basic procedure to operate the bun toaster. Fig. 1. Heat toaster oil to melting point and fill the butter roller tray 2/3 full. Fig. 2. Turn "Main" power switch to "on." Turn motor switch "on";... - Page 8 M-91: Push Butter Roller shaft to the right to disengage the notched end of the shaft from the drive motor and remove. To facilitate cleaning, the shaft assembly may be separated from the Butter Roller cylinder. Hold cylinder securely with one hand and slide the shaft with the other hand.
-
Page 9: Troubleshooting Guide
CONTACT TOASTER TROUBLESHOOTING GUIDE PROBLEM CAUSE Buns won’t toast... a. Wrong temperature setting. b. Wrong oil is used. c. Improper application of oil. d. Excessive cupping of bread surface. Buns toast unevenly..a. Only part of bun surface is toasted - other part is pale in color and dry. - Page 10 AT-10, AT-30, AT-10BT, AT-5, AT-200 PLEASE READ PAGE 2 - "GENERAL INFORMATION," BEFORE YOU CONTINUE. Electrical Information - Models AT-10 & AT-30: Each unit is equipped with a 4 foot (122 cm), 3 wire grounded power cord which terminates with a standard 3 prong plug.
- Page 11 Electrical information - AT-200 Each toaster is equipped with a 4 foot (122 cm), 3 wire grounded power supply cord which terminates with a 3 prong plug (6-50P). MODEL NUMBER Overall Dimensions with Superfeeder Stock Number/Electrical Productivity (Fresh Product) Bun Halves per hour Bread/toast sliced per hour Croissants per hour English muffins per hour...
-
Page 12: Installation
C. INSTALLATION Place the toaster on a flat surface and in such a way that the unit's vents are not blocked. Air must circulate under and through vent provided on the base, left side and at the rear of the unit. - Page 13 PREPARATlON/WARM-UP: Main Power: Turn toaster on by pressing the Main Power switch up. Turn the toaster off by pressing the Main Power switch down. Temperature: Set the Top Heat knob and the Bottom Heat knob to the 6 setting (mid range) for warm-up.
-
Page 14: Series
PLEASE READ PAGE 2 - "GENERAL INFORMATION," BEFORE YOU CONTINUE. Electrical Information - Models BT-15 . Each unit is equipped with a 4 foot (122 cm), 3 wire grounded power cord which terminates with a standard 3 prong plug. The 208/240V units have a 6-30P plug. MODEL NUMBER Overall Dimensions Electrical... -
Page 15: Installation
ASSEMBLY Lay the toast on its side and install four adjustable legs into threaded holes in base. Tighten legs with crescent wrench. The unit may be leveled by unscrewing the lower insert of each leg. Precise leveling is not required for proper operation of the toaster. Set the toaster upright. - Page 16 Temperature: TOP HEAT - The MIN. setting will help produce the lightest top-toast. The MAX. Setting will help produce the lightest toast. BOTTOM HEAT - The MIN. setting will help produce the lightest bottom- toast. The MAX. setting will help produce the darkest bottom-toast. Off turns the heating elements off.
- Page 17 IMPORTANT FOR FUTURE REFERENCE Please complete this information and retain this manual for the life of the equipment. For Warranty Service and/or Parts, this information is required. Model Number Serial Number Date Purchased Notes:...
- Page 18 Notes:...
- Page 19 APW Wyott's option or its Authorized Service Agency, it will be serviced on site or replaced. From day two through the conclusion of this warranty period, portable units must be taken to or sent prepaid to the APW Wyott Authorized Service Agency for in-warranty repairs.
- Page 20 Phone: +1 (214) 421-7366 Fax: +1 (214) 565-0976 Toll Free: +1 (800) 527-2100 Website: www.apwwyott.com E-mail: info@apwwyott.com 24 Hour Toll Free Service Hot Line 1 (800) 733-2203 APW WYOTT 729 Third Avenue Dallas, TX 75226...
Need help?
Do you have a question about the AT/BT Series and is the answer not in the manual?
Questions and answers