
Related Manuals for Kodak EASYSHARE DX3900


Summary of Contents for Kodak EASYSHARE DX3900
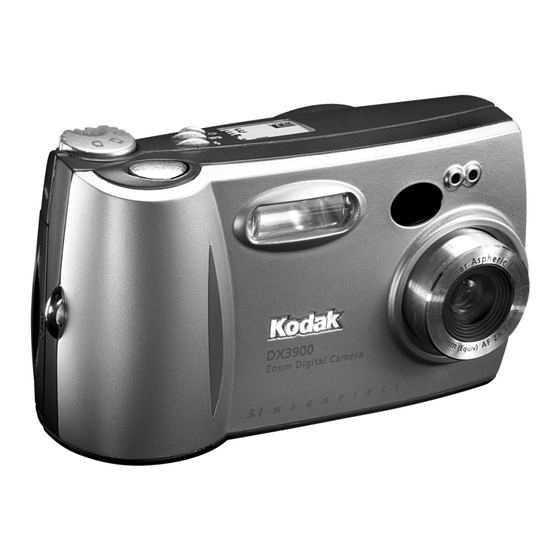
- Page 1 KODAK EASYSHARE DX3900 Zoom Digital Camera User’s Guide Visit Kodak on the World Wide Web at www.kodak.com...
- Page 2 Eastman Kodak Company 343 State Street Rochester, New York 14650 © Eastman Kodak Company, 2001 Kodak, EasyShare, and Ektanar are trademarks of Eastman Kodak Company. P/N 6B5582...
-
Page 3: Bottom View
Front View 1 Shutter button 2 Flash unit 3 Viewfinder lens 4 Lens (built-in cover not shown) Bottom View 1 Connector door (open) 2 Camera Dock connector 3 USB / Video out connectors Product Overview 3 9 0 D i g i t a e r a 5 Light sensor... -
Page 4: Mode Dial
Top/Back View 1 Viewfinder 2 Status display 3 Buttons: Flash Close-up/Distant Self Timer 4 Mode dial 5 Picture Card access light Mode Dial Product Overview 6 Wrist strap post 7 Picture Card door 8 Menu button 9 Select button 10 Four-way arrow button / Zoom button (W and T) 11 LCD screen 12 Viewfinder light... -
Page 5: Status Display
Status Display The Status Display is located on the top of the camera. The icons displayed indicate the camera features and settings that are currently active. 1 ISO setting 2 Long-time exposure 3 Color mode 4 White balance 5 Red-eye flash 6 Flash setting 7 Close-up/Distant Product Overview... -
Page 7: Table Of Contents
1 Getting Started ...1 What Can I Do With My KODAK EASYSHARE DX3900 Zoom Digital Camera?...1 What Can I Do With My Digital Pictures? ...1 Camera Package Contents ...2 Attaching the Wrist Strap ...2 Loading the Batteries ... 3 Inserting a Picture Card ... 4 Turning the Camera On and Off ... - Page 8 3 Customizing Picture-taking Settings ...21 Setting Exposure Compensation ... 21 Setting White Balance ... 22 Setting a Color Mode ...23 Setting the Picture Quality... 24 Setting Exposure Metering ... 25 Setting Picture Sharpness ...26 Setting the ISO Speed... 27 Setting the Shutter Speed ...28 Placing the Date on Pictures ...29 4 Reviewing Your Pictures ...
- Page 9 Transferring Your Pictures...50 Working With Your Pictures...51 Transferring Your Pictures Manually... 52 Printing Your Pictures ... 53 8 Using the KODAK EASYSHARE Camera Dock ... 55 Camera Dock Package Contents ... 55 Installing the Dock Insert...56 Connecting the Camera Dock...56 Installing the Battery Pack in the Camera...57...
- Page 10 Troubleshooting—EASYSHARE Camera Dock... 68 EASYSHARE Camera Dock Status... 69 10 Getting Help ...71 Software Help ...71 World Wide Web ...71 Kodak Fax Support...71 Telephone Customer Support... 72 11 Appendix ...75 Camera Specifications... 75 Camera Dock Specifications ...77 Original Factory Settings—Camera...77 Power Save—Camera Performance ...
-
Page 11: Getting Started
—in Setup mode, customize your camera settings. Set Up What Can I Do With My Digital Pictures? Install the software that is included on the KODAK Picture Software CD*, then: Transfer—automatically transfer your pictures to your computer. Share—e-mail your pictures to friends and family. -
Page 12: Camera Package Contents
Camera Package Contents Your camera is packaged with the following items: * The Dock insert is used to custom-fit your camera to the KODAK EASYSHARE Camera Dock. ** Your camera may have been packaged with a KODAK EASYSHARE Camera Dock. In that case, you received the KODAK Ni-MH Rechargeable Battery Pack. -
Page 13: Loading The Batteries
Loading the Batteries A KODAK Lithium Battery, KCRV3 or 2, AA lithium batteries are included with your camera.* Insert a KCRV3 lithium battery IMPORTANT BATTERY INFORMATION page 79 for the types of batteries you can use in your camera. For acceptable battery life and to make sure your camera operates dependably, do not use alkaline batteries. -
Page 14: Inserting A Picture Card
Card access light is blinking. Doing so may damage your pictures, Picture Card, or camera. Eject button Use only certified cards that carry the CompactFlash logo . Additional KODAK Picture Cards can be purchased separately on our Web site http://www.kodak.com/go/accessories. Chapter 1 page 82 for Picture Card storage capacities. -
Page 15: Turning The Camera On And Off
Turning the Camera On and Off Built-in Lens Cover Your camera has a built-in sliding lens cover that protects the lens from dust and scratches. The lens cover opens automatically whenever you turn on the camera, and closes when you turn off the camera. Chapter 1 To turn on the camera, slide the power switch to the On ( | ) position. -
Page 16: Checking The Batteries
Checking the Batteries Check the battery power level in the Status Display before you begin taking pictures. Don’t miss an important picture because the camera batteries are low or exhausted. For guidelines on battery usage, see Automatic Powerdown Saves Batteries The automatic powerdown feature helps extend battery life by turning off the camera when it has been inactive (no buttons pushed and no pictures taken) for the given time period. -
Page 17: Setting The Clock
Setting the Clock The camera has a built-in clock that maintains the date and time in a 24-hour format. If the battery is removed from the camera for an extended period of time, or is exhausted, you may need to reset the clock. NOTE: It is important to set the correct date and time if you want to imprint the date on your pictures Chapter 1... -
Page 18: Mode Dial-Settings And Menus
Mode Dial—Settings and Menus Use the Mode dial to access three ways to use your camera: Mode dial Capture Menus Menu Exposure Compensation (page White Balance (page Color Mode (page Quality (page Exposure Metering (page Chapter 1 —take pictures and change Capture picture-taking options Review... -
Page 19: Review Menus
Review Menus Menu Magnify (page Delete (page Protect (page Chapter 1 To access the Review mode menus: Turn the Mode dial to Review Press the Menu button. Use the arrow buttons to scroll through the menus and submenus. Press the Select button. Menu Slide Show (page... -
Page 20: Setup Menus
Setup Menus Menu Power Save (page Digital Zoom (page Camera Sounds (page Date/Time Set (page Video Out (page Chapter 1 To access the Setup mode menus: Turn the Mode dial to Setup The Setup menu screen is displayed on the LCD. Use the arrow buttons to scroll through the menus and submenus. -
Page 21: Navigating Through The Menus
Navigating Through the Menus The method of moving through the menus and selecting options is the same in all three camera modes. Menu name SELECT MENU Menu button Additional selections Submenu display SELECT MENU Select button Chapter 1 To display the menus on the LCD screen: In Capture press the Menu button. -
Page 23: Taking Pictures
Taking Pictures Before you take pictures, make sure there is a Picture Card in the camera, the Mode dial is turned to Capture Taking a Picture Shutter button Viewfinder Viewfinder light Picture Card access light , and the camera is on. Center the subject in the viewfinder or use Preview (page... -
Page 24: Viewing And Deleting The Last Picture
Viewing and Deleting the Last Picture When you take a picture, Automatic QuickView displays the picture on the LCD screen for several seconds. While the picture is displayed, you can decide to keep it or delete it. This feature is ideal for verifying picture information. SELECT MENU Press to delete... -
Page 25: Previewing Your Picture
Previewing Your Picture If you want to see what a picture looks like before it is taken, you can preview a live image on the LCD screen. With Preview activated, use the LCD instead of the viewfinder to frame your picture. NOTE: Preview is required when you are using digital zooming aperture shutter speed... -
Page 26: Shooting A Burst Series Of Pictures
Shooting a Burst Series of Pictures The Burst feature allows you to take up to 8 pictures in quick succession. When you shoot with the Burst feature, the Flash and the Self Timer features are disabled. Burst is available in the Picture Quality menu NOTE: Burst is ideal for taking pictures of sporting events or for recording moving objects. -
Page 27: Shooting Distant And Close-Up Pictures
Shooting Distant and Close-Up Pictures To choose the setting: Set the Mode dial to Capture Press the Close-Up/Distant icon appears in the Status Display on top of the camera. Press the Shutter button half-way to lock the auto-focus and exposure. Press the Shutter button all the way down to take the picture. -
Page 28: Using Zoom
Using Zoom Your camera offers optical and digital zoom features. Use optical zoom to get up to two times closer (2X) to your subject. Then, to get even closer, use digital zoom for an additional 3X. In optical zoom, the camera lens extends or retracts as you push the zoom buttons. -
Page 29: Using The Flash
Using the Flash When you take pictures at night, indoors, or outdoors in heavy shadows, your pictures may need flash. The camera flash is effective at the following distances, depending on your zoom position. Zoom position (at ISO 140) Effective flash—distance from subject Wide Angle Telephoto Auto Flash (no icon)—flash fires when the lighting... -
Page 30: Putting Yourself In The Picture
Putting Yourself in the Picture The Self Timer creates a 10-second delay between the time you press the Shutter button and the time the picture is taken. This setting is ideal when you want to include yourself in the picture. Place the camera on a flat, steady surface or use a tripod. -
Page 31: Customizing Picture-Taking Settings
Customizing Picture-taking Settings Use Capture on the Mode dial to customize your picture-taking settings. Setting Exposure Compensation Use the Exposure Compensation feature to control how much light is allowed into the camera. You can adjust the exposure by plus or minus 2 stops in 1/2- stop increments. -
Page 32: Setting White Balance
Setting White Balance Whites can look white in daylight, but different under other lighting conditions. Use the White Balance setting to correct for these types of color shifts that result from shooting pictures under different light sources. Turn the Mode dial to Capture Highlight the White Balance menu Press Select to accept the change and return to the Menu screen. -
Page 33: Setting A Color Mode
Setting a Color Mode Use the Color Mode setting for controlling color tones and moods. Select color, black and white, or sepia. The camera Preview displays the color setting selected. Turn the Mode dial to Capture Highlight the Color Mode menu Press Select to accept the change and return to the Menu screen. -
Page 34: Setting The Picture Quality
Setting the Picture Quality Use the Quality setting to select a picture resolution. Turn the Mode dial to Capture Highlight the Quality menu Higher resolutions produce more detailed images and larger file sizes— great for photo-quality prints but take up more space on the Picture Card and may take longer to transmit by e-mail. -
Page 35: Setting Exposure Metering
Setting Exposure Metering To ensure proper exposure, your camera features three metering systems for measuring the amount of light entering the camera lens: Multi-Pattern, Center- Weighted, and Center Spot metering. Turn the Mode dial to Capture Highlight the Exposure Metering menu Press Select to accept the change and return to the Menu screen. -
Page 36: Setting Picture Sharpness
Setting Picture Sharpness Use the Sharpness setting to highlight or blend the edges of the subject in pictures. Turn the Mode dial to Capture Highlight the Sharpness menu Press Select to accept the change and return to the Menu screen. Press Menu to exit the Menu screen. -
Page 37: Setting The Iso Speed
Setting the ISO Speed The ISO setting controls the camera’s sensitivity to light. Use a lower ISO setting in brightly lit scenes, use a higher ISO setting for low-light scenes. Turn the Mode dial to Capture Highlight the ISO Speed menu Press Select to accept the change and return to the Menu screen. -
Page 38: Setting The Shutter Speed
Setting the Shutter Speed Use the Auto setting and let the camera automatically set the shutter speed. Or choose a shutter speed from 0.7 to 16 seconds, for longer exposures when taking pictures in low-light conditions, without flash. Turn the Mode dial to Capture Highlight the Shutter Speed menu Press Select to accept the change and return to the Menu screen. -
Page 39: Placing The Date On Pictures
Placing the Date on Pictures Use the Date & Time Stamp setting to imprint the date, or the date and time, on the lower-right corner of the picture. NOTE: This setting is ideal for recording when a picture was taken; for example, for a birthday or an insurance claim. -
Page 41: Reviewing Your Pictures
Reviewing Your Pictures Use the Review setting pictures that are stored on the Picture Card in your camera. You can view each picture stored on the Picture Card in your camera in full LCD screen size, or you can use the Filmstrip feature to view and select from up to three thumbnail-size pictures at one time. -
Page 42: Viewing Pictures With The Filmstrip
Viewing Pictures With the Filmstrip SELECT MENU Filmstrip Memory Needle locator Chapter 4 Turn the Mode dial to Review press Menu to display the Filmstrip. Press the through the Filmstrip. To continuously scroll, press and hold an arrow button. For fast scrolling through the memory bar, press Select while holding an arrow button. -
Page 43: Magnifying Pictures
Magnifying Pictures Use the Magnify feature to zoom in on specific parts of a picture. With this feature, you can magnify at two or four times the normal magnification level. NOTE: This feature is ideal for checking detail and verifying sharp focus on your pictures. -
Page 44: Deleting Pictures
Deleting Pictures Use the Delete feature to quickly delete one or all pictures from the Picture Card. NOTE: Delete pictures to free up space on the Picture Card. Turn the Mode dial to Review Press an arrow button to display the picture you want to delete. Highlight the Delete menu Press Select. -
Page 45: Protecting Pictures
Protecting Pictures Use the Protect feature to prevent special pictures from being accidentally deleted from the Picture Card. Turn the Mode dial to Review Press an arrow button to display the picture you want to protect. Highlight the Protect menu Chapter 4 and press Menu. -
Page 46: Running A Slide Show
Running a Slide Show Use the slide show feature to automatically display your pictures on the camera LCD screen at a selectable interval rate. You can also run a slide show on any video device that is equipped with a video input, such as a television, computer monitor, or digital projector. -
Page 47: Selecting Pictures For Automatic Printing
Selecting Pictures for Automatic Printing Use the Print Order feature to select specific pictures and print quantities to be printed automatically to a KODAK Personal Picture Maker or other direct- print-enabled printer. NOTE: This feature saves time when printing. When you put the Picture Card into a print order enabled printer, only the images you marked are printed. -
Page 48: Viewing Picture Information
Viewing Picture Information The Picture Information feature displays specific data for each picture on the Picture Card in your camera. For example, the information includes the picture number, the date and time the picture was taken, and the settings that were used for the picture. -
Page 49: Personalizing Your Camera
Personalizing Your Camera Use Setup on the Mode dial to customize the camera settings according to your personal preferences. Selecting a Power Save Setting The Power Save feature is designed to balance battery consumption with camera performance. See perfomance. Turn the Mode dial to Setup Highlight the Power Save menu Press Select. -
Page 50: Setting Digital Zoom Behavior
Setting Digital Zoom Behavior Digital zoom provides three times (3X) magnification beyond the optical zoom. You can specify how the digital zoom feature behaves when you push Telephoto (T) on the 4-way arrow button beyond the limit of optical zoom. page 18 for how to use digital zoom. -
Page 51: Adjusting The Camera Sounds
Adjusting the Camera Sounds The camera provides sounds (beeps) to let you know when certain functions are being performed. You can set the camera to make sounds for most functions, for selected functions, or to make no sounds at all. NOTE: Set the Camera Sounds to OFF when taking pictures at events that require a quiet environment, for example, a wedding or a play. -
Page 52: Setting Video Out
Setting Video Out The Video Out feature allows you to match the camera video-out signal to the standard applicable in your area. Turn the Mode dial to Setup Highlight the Video Out menu Press Select. This setting remains until you change it. Selecting a Language The Language feature allows you to display the menus and screen messages in different languages. -
Page 53: Formatting A Picture Card
Formatting a Picture Card You may need to format a Picture Card if the card becomes corrupted. When this happens, an error message appears on the LCD screen. See error messages. Turn the Mode dial to Setup Highlight the Format Card menu Press Select. -
Page 54: Resetting User Settings
Resetting User Settings The Reset User Settings feature allows you to return most Capture menu settings to the original factory defaults each time the camera is turned off. See page 77 for a list of the original factory defaults. Turn the Mode dial to Setup Highlight the Reset User Settings menu Viewing Camera Information Use the About feature to find your camera name and model and the firmware... -
Page 55: Installing The Software
Installing the Software Make sure that you install the software from the KODAK Picture Software CD before you transfer pictures from your camera to the computer. MACINTOSH OS X users, see the note on Install the Software Before you begin, close all software applications running on your computer. - Page 56 Do not install KODAK Connection Software or Picture Transfer Software—MACINTOSH OS X ships with an image capture application that provides the functionality of both the KODAK Connection Software and KODAK Picture Transfer Software. These two applications are unnecessary and will not function if installed on MACINTOSH OS X.
-
Page 57: Software Included With Your Camera
Software Included With Your Camera The KODAK Picture Software CD contains the following applications that let you access, transfer, and have fun with your digital pictures. Your CD may contain additional software not described here. For detailed information on using the applications, refer to the online help supplied with each application. -
Page 58: Computer System Requirements
Built-in USB port or CompactFlash card reader Color monitor with a minimum resolution of 800 x 600 pixels; thousands or millions of colors recommended Visit our Web site at http://www.kodak.com with new operating systems as they become available. Chapter 6 for information on compatibility... -
Page 59: Using Pictures On Your Computer
Before You Transfer Your Pictures Before you transfer your pictures from the camera to the computer, make sure you have installed the software from the KODAK Picture Software CD (page 45). MACINTOSH OS X users, see note on... -
Page 60: Transferring Your Pictures
Connecting With the KODAK EASYSHARE Camera Dock NOTE: You can also use a KODAK USB Picture Card Reader to transfer your pictures. See your KODAK retail dealer or visit our Web site at www.kodak.com/go/accessories. Transferring Your Pictures KODAK Picture Transfer Software automatically opens on your computer when you have connected as shown in the previous section, Computer. -
Page 61: Transferring On A Macintosh Computer
With KODAK Picture Software you can: Add special effects to your pictures, fix red-eye, crop, and rotate. Print to your personal printer. E-mail pictures to family and friends. Refer to the KODAK Picture Software online help for details on using the software. Chapter 7... -
Page 62: Transferring Your Pictures Manually
Transferring Your Pictures Manually KODAK Camera Connection Software lets you directly access the pictures in your camera and allows you to: display and browse thumbnails of your pictures, copy all or selected pictures to your computer, open a picture directly in third-party applications, delete pictures from a storage location, format the Picture Card, and view information on a selected picture. -
Page 63: Printing Your Pictures
Print to your home printer with KODAK Premium Picture Paper. From a Picture Card Use the Print Order feature Card directly to a KODAK Personal Picture Maker or other direct-print- enabled printer. Take your Picture Card to your local photo retailer for printing. -
Page 65: Using The Kodak Easyshare Camera Dock
Camera Dock. If a KODAK EASYSHARE Camera Dock was not included with your camera, you can purchase one as an accessory. See your KODAK retail dealer or visit our Web site at http://www.kodak.com/go/accessories. Camera Dock Package Contents The Camera Dock is packaged with the following items. -
Page 66: Installing The Dock Insert
Installing the Dock Insert KODAK DX-series cameras are packaged with a Dock insert, which is used to custom-fit the camera to the Camera Dock. Connecting the Camera Dock Connect the Camera Dock to your computer and to an external power source. -
Page 67: Installing The Battery Pack In The Camera
Installing the Battery Pack in the Camera IMPORTANT: The batteries in the Battery Pack are not charged when you receive it. See instructions. Docking the Camera When you are ready to transfer your pictures from the camera to the computer, or charge the Battery Pack, place the camera in the Camera Dock. -
Page 68: Charging The Battery Pack
Camera Dock with the power on, charging resumes when the camera enters automatic power down mode (see NOTE: The Camera Dock only charges the KODAK Ni-MH Rechargeable Battery Pack. If you place the camera in the Camera Dock with any other type of batteries, rechargeable or not, no charging takes place. -
Page 69: Transferring Pictures
You can also transfer your pictures manually while the green light is blinking. See page Then, KODAK Picture Software opens so you can work with your pictures on your computer. For further details, see Your Computer. -
Page 71: Troubleshooting Problems
Troubleshooting Problems There may be times when you have questions about using your KODAK EASYSHARE DX3900 Zoom Digital Camera or KODAK EASYSHARE Camera Dock. This chapter helps you find the answers quickly. Additional technical information is available in the ReadMe file located on the KODAK Picture Software CD. - Page 72 Software is not installed. Install the software There are too many applications running on your computer. Chapter 9 Solution Go to the online help for KODAK Camera Connection Software Getting Started: Connect the Camera to Your Computer. Or, go to and click Service and Support.
- Page 73 Camera Problem Cause Shutter button does Camera is not turned on. Turn on the camera not work. The camera is processing a picture, the viewfinder light is blinking. The Picture Card is full. Transfer pictures to your Part of the picture Something was blocking is missing.
- Page 74 Camera Problem Cause Camera does not Battery is not properly turn on. installed. Battery is not charged. Camera freezes up Camera detects an error when a Picture when the Picture Card Card is inserted or was inserted or removed. removed. Picture is too light.
- Page 75 Camera Problem Cause Picture is not clear. The lens is dirty. Subject too close when taking picture. Subject or the camera moved while the picture was taken. The subject is too far away for the flash to be effective. Slide show does Video Out setting is not run on external incorrect.
-
Page 76: Camera Status And Messages
Camera Status and Messages Camera Viewfinder Light Light Status Viewfinder light blinks red. Viewfinder light glows steady red. Viewfinder light blinks yellow. Viewfinder light blinks green. Camera Picture Card Access Light Light Status Picture Card access light blinks green. Chapter 9 Cause Solution Error state. - Page 77 Date/Time entry screen appears automatically Chapter 9 Cause The Picture Card is corrupted, or formatted for another digital camera. The camera cannot read the picture format. A camera error has occurred. There is no more space on the Picture Card.
-
Page 78: Troubleshooting-Easyshare Camera Dock
Troubleshooting—EASYSHARE Camera Dock Camera Dock Problem Pictures are not transferred to the computer Chapter 9 Cause Solution AC adapter or USB Check the connections cable is not securely connected. Software is not Install the software installed. There are too Close all software applications many applications and try again. -
Page 79: Easyshare Camera Dock Status
EASYSHARE Camera Dock Status Camera Dock indicator light Light Status Light glows steady green Light glows steady Light blinks green Light blinks red Chapter 9 Cause Solution Camera is The camera and Camera Dock are docked. operating normally. Camera Dock is charging Battery Pack. -
Page 81: Getting Help
Getting Help If you need help with your KODAK EASYSHARE DX3900 Zoom Digital Camera or KODAK EASYSHARE Camera Dock, it is available from a number of resources: Troubleshooting Problems, page 61 Software application online help Product information by fax Software Help Help with any software application packaged with your camera can be obtained from the online help provided with the application. -
Page 82: Telephone Customer Support
Telephone Customer Support If you have questions concerning the operation of KODAK software or the camera, you may speak directly to a customer support representative. Before You Call Before you call to speak to a customer support representative, please have the... - Page 83 Outside the U.S. and Canada—calls are charged at National Rate. Australia Austria/Osterreich Belgium/Belgique China Denmark/Danmark Ireland/Eire Finland/Suomi France Germany/Deutschland Greece Italy/Italia Japan Korea Netherlands/Nederland New Zealand Norway/Norge Portugal Spain/Espana Sweden/Sverige Switzerland/Schweiz/Suisse International Toll Line International Toll Fax Number +44 131 4586962 Chapter 10 1800 147 701 0179 567 357...
-
Page 85: Appendix
Appendix This appendix serves as a resource for technical information about your KODAK EASYSHARE DX3900 Zoom Digital Camera, KODAK EASYSHARE Camera Dock, Picture Cards, batteries, and available accessories. Camera Specifications Camera Specifications Pixel Resolution 3.1 MP (by Quality 2.2 MP setting) 1.6 MP... - Page 86 Chapter 11 2 Lithium, AA KODAK Lithium Battery, KCRV3 2 Ni-MH, AA rechargeable Alkaline batteries not recommended KODAK Ni-MH Rechargeable Battery Pack, recharge in Camera Dock only. Dock provides power to the camera. Optical quality glass Wide: f/2.8 Telephoto: f/4.0...
-
Page 87: Camera Dock Specifications
Color Mode Date/Time Digital Zoom Exposure Compensation Exposure Metering Chapter 11 Cable included with KODAK DX-series cameras 5.9 in. /4.4 in. /1.5 in. (150 mm/112.5 mm/38.5 mm) 5.5 oz. (155 g) 5.9 in. /4.4 in. /1.7 in. (150 mm/112.5 mm/42.5 mm) 6.2 oz. -
Page 88: Power Save-Camera Performance
Feature Flash ISO Speed Quality Sharpness Shutter Speed Slide Show Interval Video Out White Balance Power Save—Camera Performance You can choose from three Power Save settings (On, Standard, Off) to balance battery consumption with camera performance (see describes the effect of the Power Save settings on camera functions. Camera Function Preview Frame Rate LCD Brightness... -
Page 89: Using Your Batteries
– 2, 1.5 volt AA lithium batteries – 1, KODAK Lithium Battery, KCRV3 * – 1, KODAK Ni-MH Rechargeable Battery Pack, rechargeable in the KODAK EASYSHARE Camera Dock * – 2, 1.2 volt AA Nickel Metal Hydride (Ni-MH) batteries, rechargeable * * These batteries can be purchased by visiting our Web site at http://www.kodak.com/go/accessories. -
Page 90: Tips, Safety, Maintenance
Clean the outside of the camera by wiping with a clean, dry cloth. Never use harsh or abrasive cleaners or organic solvents on the camera or any of its parts. Service agreements are available in some countries. Please contact a dealer of Kodak products for more information. Chapter 11... -
Page 91: Camera Accessories
Increase your picture storage. Or extend your battery life. For a full range of KODAK accessories, see your Kodak retailer or visit our Web site at http://www.kodak.com/go/accessories. Enables quick picture transfer, charges the included Battery Pack, and provides power to the camera Rechargeable with the KODAK EASYSHARE Camera Dock only, the Battery Pack ensures you’ll always... -
Page 92: Picture Storage Capacities
Use only certified cards that carry the CompactFlash logo. Locating Pictures on a Picture Card Pictures stored on a KODAK Picture Card use a standard agreed upon by many camera manufacturers. This allows you to use the Picture Card in different cameras. -
Page 93: Picture Card File Naming Conventions
If you use the Picture Card in a camera other than the DX3900, and that camera manufacturer adheres to this file structure standard, the \DCIM folder contains a folder named by that camera. -
Page 94: Regulatory Information
Chapter 11 Regulatory Information FCC Compliance and Advisory This device complies with Part 15 of the FCC Rules. Operation is subject to the following two conditions: 1) this device may not cause harmful interference, and 2) this device must accept any interference received, including interference that may cause undesired operation. -
Page 95: Canadian Doc Statement
Chapter 11 Canadian DOC Statement DOC Class B Compliance—This digital apparatus does not exceed the Class B limits for radio noise emissions from digital apparatus set out in the radio interference regulations of the Canadian Department of Communications. Observation des normes-Class B—Le présent appareil numérique n’émet pas de bruits radioélectriques dépassant les limites applicables aux appareils numériques de la Classe B prescrites dans les règlements sur le brouillage redioélectrique édictés par le Ministère des Communications du Canada. - Page 97 access light, Picture Card accessories adjusting camera sounds color mode exposure compensation exposure metering ISO speed picture quality resolution, compression sharpness white balance attaching, wrist strap auto shutoff automatic flash powerdown printing, print orders backlit scenes batteries charging Battery Pack checking power level extending battery life guidelines...
- Page 98 provided with Camera Dock video camera accessories cleaning connecting problems information, viewing maintenance original defaults, resetting original factory defaults package contents problems safety specifications turning on and off Camera Connection Software about online help transferring pictures Camera Dock charging Battery Pack installing insert loading camera package contents...
- Page 99 cover, lens customer support numbers customizing settings camera setup for picture taking review date placing on pictures setting DCIM folder, Picture Card defaults original settings resetting deleting from Picture Card last picture protecting pictures from digital pictures, using digital zoom setting display problems displaying...
- Page 100 Battery Pack Picture Card software ISO speed, adjusting KODAK software Camera Connection getting help installing Picture Index Picture Transfer language, selecting error messages previewing pictures viewing pictures on...
- Page 101 manual settings memory card inserting and removing storage capacities menus camera setup capture navigating overview review reviewing pictures setup taking pictures metering, setting exposure MISC folder, Picture Card mode dial capture overview review settings and menus setup modes capture review setup monitor requirements...
- Page 102 storage capacities Picture Software about editing pictures Picture Transfer Software about online help transferring pictures pictures black & white color customizing settings deleting editing file naming information, viewing locating on computer locating on Picture Card magnifying printing protecting quality, adjusting reviewing selecting for printing sepia...
- Page 103 Kodak web site telephone numbers setting Index clock date and time on pictures digital zoom exposure metering flash...
- Page 104 MAC OS X KODAK Camera Connection KODAK Picture KODAK Picture Transfer upgrading specifications camera Camera Dock MACINTOSH system WINDOWS-based system status display battery symbol overview...
- Page 105 Picture Card Index web site, Kodak white balance wide angle zoom WINDOWS installing software system requirements wrist strap, attaching zoom digital digital, setting optical...
Need help?
Do you have a question about the EASYSHARE DX3900 and is the answer not in the manual?
Questions and answers