Table of Contents
Advertisement
Advertisement
Table of Contents

Related Manuals for Ozito CMX-080


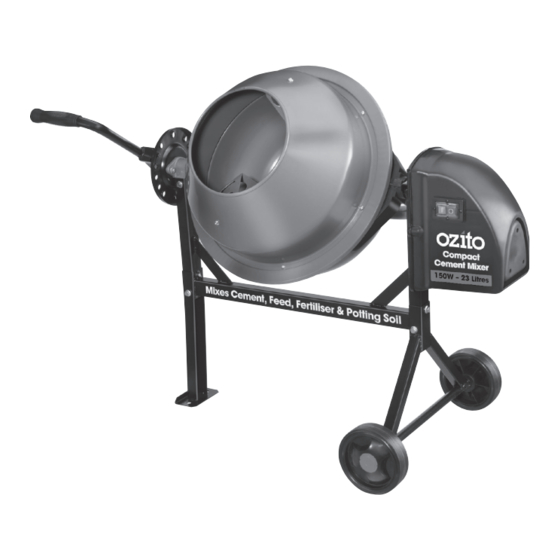
Summary of Contents for Ozito CMX-080
-
Page 2: Specifications
SPECIFICATIONS – MODEL NO. CMX-080 Motor: 150W (S6 30%) Induction Motor Input: 230-240V ~ 50Hz Motor Speed: 1420/min Drum Speed: 31/min Gross Drum Volume: 46 Litres (1.6 cu ft) Unmixed Dry Volume: 32 Litres (1.1 cu ft) Mixed Wet Volume: 23 Litres (0.8 cu ft) -
Page 3: Table Of Contents
TABLE OF CONTENTS SPECIFICATIONS………………………………………..….. Page 1 INTRODUCTION……………………………………….…… Page 3 SAFETY INSTRUCTIONS…………………………….…….. Page 3 ELECTRICAL SAFETY………………………………………. Page 3 GENERAL SAFETY INSTRUCTIONS…….………………… Page 4 ADDITIONAL SAFETY INSTRUCTIONS FOR CEMENT MIXERS…. Page 6 ASSEMBLY…………………………………..………………. Page 7 OPERATION…………………………………..…………….. Page 10 MAINTENANCE……………………………….……………. Page 13 SPARE PARTS……………………………………………….. Page 14 DESCRIPTION OF SYMBOLS………………………………... -
Page 4: Introduction
The electric motor has been designed for 230V and 240V only. Always check that the power supply corresponds to the voltage on the rating plate. Note: The supply of 230V and 240V on Ozito tools are interchangeable for Australia and New Zealand. -
Page 5: General Safety Instructions
GENERAL SAFETY INSTRUCTIONS Warning! Read all instructions. Failure to follow all instructions listed below may result in electric shock, fire and/or serious injury. The term “Power Tool” in all of the warnings listed below refers to your mains operated (corded) power tool or battery operated (cordless) power tool. - Page 6 GENERAL SAFETY INSTRUCTIONS (cont.) Dress properly. Do not wear loose clothing or jewellery. Keep your hair, clothing and gloves away from moving parts. Loose clothes, jewellery or long hair can be caught in moving parts. g) If devices are provided for the connection of dust extraction and collection facilities, ensure these are connected and properly used.
-
Page 7: Additional Safety Instructions For Cement Mixers
ADDITIONAL SAFETY INSTRUCTIONS FOR CEMENT MIXERS Warning! For your own safety, do not try to use your cement mixer or plug it in until it is completely assembled and installed according to the instructions and until you have read and understood the following: •... -
Page 8: Assembly
ASSEMBLY Caution: It is recommended that two people assemble the Cement Mixer. Tools required (not supplied): Spanner (12mm), Phillips Head Screwdriver. 1. Remove the cement mixer and all components from the carton. Frame Assembly 2. Refer to Fig.1 and select parts bag A (13). 3. - Page 9 ASSEMBLY (cont.) 11. Secure the lower drum (11) to the frame assembly (5) by lining up the holes in the side supports of the frame assembly (5) with those in the bearing bracket (10), insert one of the M8x50 hex bolts from one side, then one of the lock nuts from the opposite side.
- Page 10 ASSEMBLY (cont.) Locking Plate Assembly Fig.6 18. Refer to Fig.6 and select parts bag F (13). 19. Slide the locking plate (14) over the large diameter shaft at the support leg (18) end of the frame assembly (5) with the rim facing inwards.
-
Page 11: Operation
ASSEMBLY (cont.) Motor Assembly Fig.8 23. Refer to Fig.8 and select parts bag H (13). 24. To attach the motor and motor housing (8), line up the keyways, slide the motor and motor housing (8) over the pinion shaft. Screw the two M8 lock nuts to the threaded stub on the motor and motor housing (8). - Page 12 OPERATION (cont.) Turning the Cement Mixer On and Off • To turn the cement mixer on, press the green button. • To turn the cement mixer off, press the red button. Loading the drum IMPORTANT: Completely unwind an extension cord (not supplied). Connect it to the cement mixer first before connecting to a power supply.
- Page 13 OPERATION (cont.) 6. Gradually add more water giving it a chance to mix in and keep an eye on the consistency. A good mix should be smooth and plastic, not wet and runny or dry and crumbly. The mix on the inside should come approximately 3/4 of the way up to the top and then fall back into the mix, if the mix is not taken up the side, the mixture is too wet.
-
Page 14: Maintenance
7. Regularly check that all bolts, screws and nuts are securely fixed as these could work loose during normal operation. Note: Ozito Industries will not be responsible for any damage or injuries caused by the repair of the tool by an unauthorised person or by mishandling of the tool. -
Page 15: Spare Parts
SPARE PARTS Limited spare parts are available subject to availability. Please contact your local Bunnings Special Orders Desk to order the required spare parts. Most common spare parts listed below Spare Part Part No. Leather Washer (pack of 4) SPCMX080-02 Rubber Gasket SPCMX080-09 Wheel... -
Page 16: Caring For The Environment
Reuse of recycled material decreases pollution in the environment. Please recycle packaging where facilities exist. Check with your local council authority for recycling advice. OZITO INDUSTRIES PTY LTD AUSTRALIA (Head Office) 1-23 Letcon Drive, Bangholme Victoria, Australia, 3175 Telephone: 1800 069 486 Facsimile: +61 3 9238 5588 Website: www.ozito.com.au... -
Page 17: Warranty
PURCHASED FROM: ________________________________________________ DATE PURCHASED: ________________________________________________ 1 YEAR REPLACEMENT WARRANTY Your Ozito tool is guaranteed for a period of 12 months from the original date of purchase and is intended for DIY (Do it yourself) use only. WARNING The following actions will result in the warranty being void.
Need help?
Do you have a question about the CMX-080 and is the answer not in the manual?
Questions and answers